


Snowflake Snowsight is a powerful web-based user interface that enables Snowflake users to build and run queries, create interactive dashboards to display data, and collaborate with others on their data projects—all within Snowflake. It eliminates the need to worry about the lengthy setup process of the SnowSQL(CLI Client) tool. All with just the help of the browser of your choice, it gives you all the capabilities like worksheets to build/run queries, built-in data dashboards, simplified access controls, and faster analytics in a more secure and controlled environment.
In this article, we will cover what Snowsight is, its key capabilities, step-by-step instructions for using the various Snowsight pages for queries, dashboards, administration—and more, along with the benefits and limitations of this platform.
What Is Snowsight From Snowflake?
Snowflake Snowsight is a web-based interface that lets you query, visualize, and share data in Snowflake. Snowsight simplifies data tasks for users of all data roles, by providing an intuitive graphical interface, built-in data visualization capabilities, simplified data access and security controls—and collaboration features. Snowsight is accessible via any modern browser and can help you perform advanced data analysis and reporting more efficiently and effectively, without requiring extensive coding skills or complex/lengthy setup processes.
Here are some of the key features of Snowflake Snowsight:
- Intuitive visual interface to build and run queries
- Interactive Dashboards
- Rapid slicing and dicing of data without extensive setup and coding
- Usage Monitoring
- Resource Monitoring
- Simplified management of user roles and permissions
- Easy team collaboration
How Do I Enable Snowsight in Snowflake?
Snowsight is enabled by default for all Snowflake accounts and users. Any user with a role in the Snowflake account can easily access Snowsight through the internet or private connectivity, depending on your Snowflake account configuration. To access Snowsight through the internet, you need to have a web browser compatible with Snowsight. Simply go to https://<your_account>.snowflakecomputing.com/ to directly access your Snowsight login page.
But, to access Snowsight through private connectivity, you'll need to set it up via a proxy or firewall. This may require adding the fully qualified URL and port values to your proxy servers or firewall configuration. To find the complete URL and port details for Snowsight, examine the SNOWSIGHT_DEPLOYMENT entry within the return value provided by the SYSTEM$ALLOWLIST function.
Browser Requirements for Snowflake Snowsight
To use Snowsight without any issues, you need to have a browser that is compatible with Snowsight’s features and functionalities. Snowsight supports the latest four major versions of the following browsers:
- Google Chrome (Latest): Chrome is the recommended browser for Snowsight, as it has been tested extensively and offers the best performance and compatibility.
- Microsoft Edge (Latest): Edge is another browser that's similar to Chrome because it's built with the Chromium engine inside, meaning you'll get the same functionality as Chrome, and it works exceptionally well for Snowsight.
- Apple Safari (Latest): Safari is another browser that works well with Snowsight, especially for macOS users.
- Mozilla Firefox (Latest): Firefox is another popular web browser that works well with Snowsight.
Earlier browser versions may face limitations with certain visualizations and dashboard features. For the best experience with Snowsight, you should always use the latest version of your preferred browser, and update it regularly. You should also check the browser settings and preferences, and make sure that they are compatible with Snowflake Snowsight’s requirements. For example, you should enable JavaScript, cookies, and pop-ups for Snowsight, and disable any extensions that may interfere with Snowsight’s functionality.
What Are the Capabilities of Snowflake Snowsight?
Snowflake Snowsight offers end-to-end capabilities spanning querying data, visual exploration, collaborating with teams, monitoring consumption, and so much more—all through an intuitive interface. Snowsight has many capabilities that can help you perform data tasks more efficiently and effectively, such as:
1) Visual Query Building
Snowsight allows you to build and run queries using SQL directly inside the Snowflake Snowsight interface. You can use the query editor also known as Snowflake worksheet to write SQL queries it has loads of awesome features like query autocomplete, syntax highlighting, error-checking and so much more. You can also use the worksheet to build and run queries.
2) Interactive Dashboards
Snowsight enables you to create interactive dashboards to display data using various charts and graphs. Within the dashboard editor, you can add, edit, and arrange tiles that showcase data from your worksheets. Also, you have the flexibility to select from different types of charts and graphs, including bar, line, pie, scatter, map, and table formats. Moreover, you can customize the appearance and behavior of your charts and graphs. You can also enhance your dashboards by adding filters, parameters, and variables, making them more dynamic and interactive.
3) Faster Exploration Without Complex Setup and Coding Skills
Snowsight assists in faster and easier data exploration and analysis, without the need for extensive coding skills or complex setup and integration processes. It allows you to access and query data from any source supported by Snowflake. Snowsight also facilitates data profiling, automatically analyzing your data to offer statistics, distributions, and identification of outliers. Also, it enables data manipulation tasks like sorting, filtering, grouping, and pivoting.
4) Quick Business Analytics Reporting
Snowsight enables the creation of quick and straightforward business analytics reports using data from your worksheets and dashboards. It allows you to generate insights, identify trends, and recognize patterns in your data through various analytical functions. Also, Snowsight enables the creation of calculated columns derived from existing columns using formulas or expressions. You can also set up alerts in Snowsight, notifying you when your data meets specific conditions or changes over time.
5) Simplified Data Access and Security Controls
Snowsight simplifies data access and security controls by providing a unified and user-friendly interface for managing data objects and permissions. It allows you to create and manage users and other account-level objects, including roles, organizations, and private links. Snowsight also facilitates the creation and utilization of virtual warehouses, modification of databases, and all associated database objects. Moreover, it enables data sharing with other Snowflake accounts and the exploration and public sharing of data via the Snowflake Marketplace. On top of that, Snowsight also allows users to grant and revoke privileges on data objects, controlling access and modifications to your data.
6) Query Usage Monitoring
Snowsight enables you to monitor your query usage and performance by providing various tools and views for tracking and analyzing your queries. With the help of Snowsight, you can access query execution details such as status, duration, warehouse, result size, and bytes scanned. Also, it allows you to review query history, displaying all executed queries within your account by you or other users. Snowsight also provides access to copy history, showcasing data loading and unloading operations performed within your account by you or other users. On top of that, you can utilize Snowsight to observe task history, displaying all scheduled tasks created and executed within your account by you or other users.
7) Team Collaboration
Snowsight enables collaboration/communication among users by offering various features and options for collective work on data projects. You can utilize Snowsight to comment on worksheets and dashboards, engaging in discussions with other users about your data. Also, Snowsight allows you to annotate worksheets and dashboards, enabling the addition of notes or explanations to your data. This functionality facilitates smooth communication between teams.
With the help of these and many other features, Snowsight helps to simplify how users work with Snowflake across diverse analytics roles. Next, we will explore the key sections and pages within Snowsight.
But before we dive into the key section of Snowsight, let's quickly navigate to the main interface elements of Snowflake Snowsight.
Main Interface Elements—Snowsight
Snowsight has a simple and user-friendly interface. Now, let's dive into those sections where we will show you how to navigate and use the main interface section, such as:
- Snowsight Navigation Menu (1): The left nav in Snowsight contains sections that represent different areas of Snowsight, such as Worksheets, Dashboards, Streamlit, Data, Apps, Activity, Admin, and Help & Support.
- User Menu (2): The top left circular icon in Snowsight shows your name and role. You can use it to change your profile, preferences, roles, or documentation, or log out of Snowsight.
- Account Selector (3) : The bottom left option in Snowsight shows your account name and region. You can use it to sign in to or sign out of different Snowflake accounts.
- Content Pane (4) : The main section in Snowsight shows the content of the area you choose from the left nav. The content pane changes with the area you select. For example, Worksheets shows your worksheets and options to create or open them. Dashboards shows your dashboards. Data shows your databases and objects and options to modify them.

Now that you have the context of the basic Snowsight interface elements, let’s explore the key sections provided by Snowsight.
Step-by-step guide to use Snowflake Snowsight—Key Section Breakdown
Here is the key section breakdown of Snowflake Snowsight:
Section 1—Getting Started With Snowflake Worksheets in Snowsight
Snowsight enables you to use worksheets to build and run queries. Worksheets are essentially sheets connected to Snowflake, capable of querying data from any source supported by Snowflake. In this section, we'll guide you through using Snowflake worksheets in Snowsight, covering various tasks such as viewing, creating, opening, resuming, resizing, writing, executing, and sharing worksheets.
Now, to get started with Snowflake worksheets in Snowsight, you need to access the Worksheets area of Snowsight. To do so, you need to click on the Worksheets icon on the left Snowflake Snowsight navigation menu. This will open the Worksheets on content pane, where you can see the list of worksheets that you have access to, and the options to create, open, or search for worksheets.
1) Viewing Snowflake Worksheets
To view the worksheets you have access to, utilize the Worksheets area in Snowsight. This section displays the list of worksheets available to you, based on your role and privileges. In the Recent tab, you'll find the title, type, last modified date, and creator of each worksheet. Also, it shows the total number of your worksheets and those shared by other users.
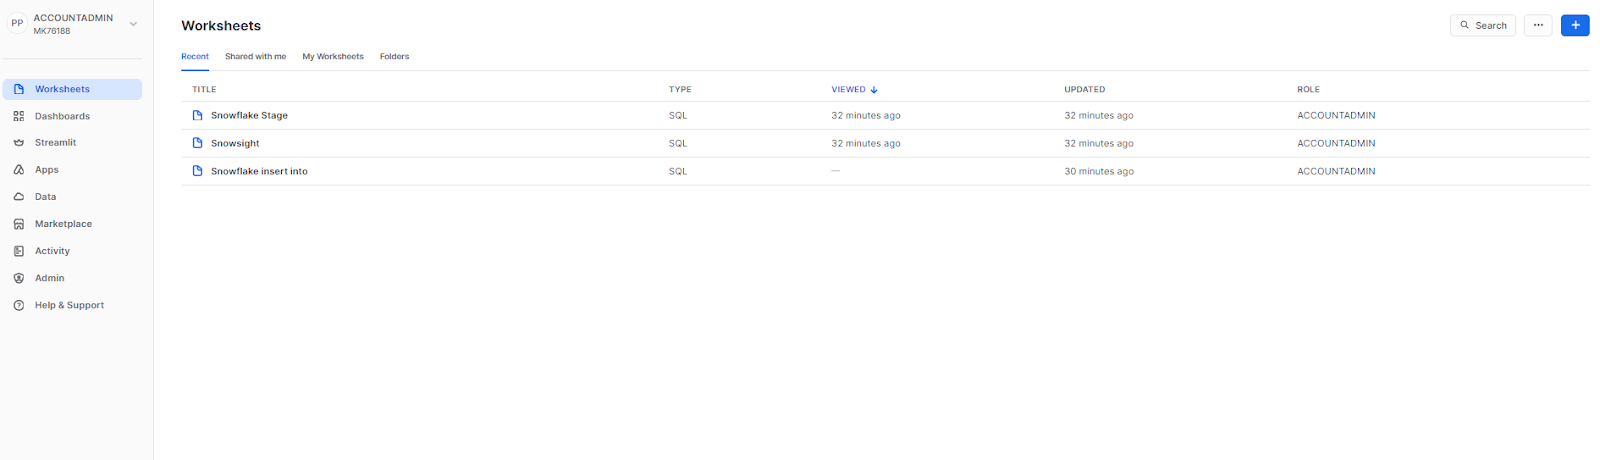
Use the search box to find a worksheet by name or description.

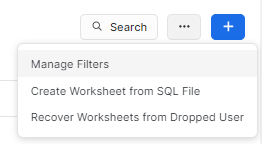
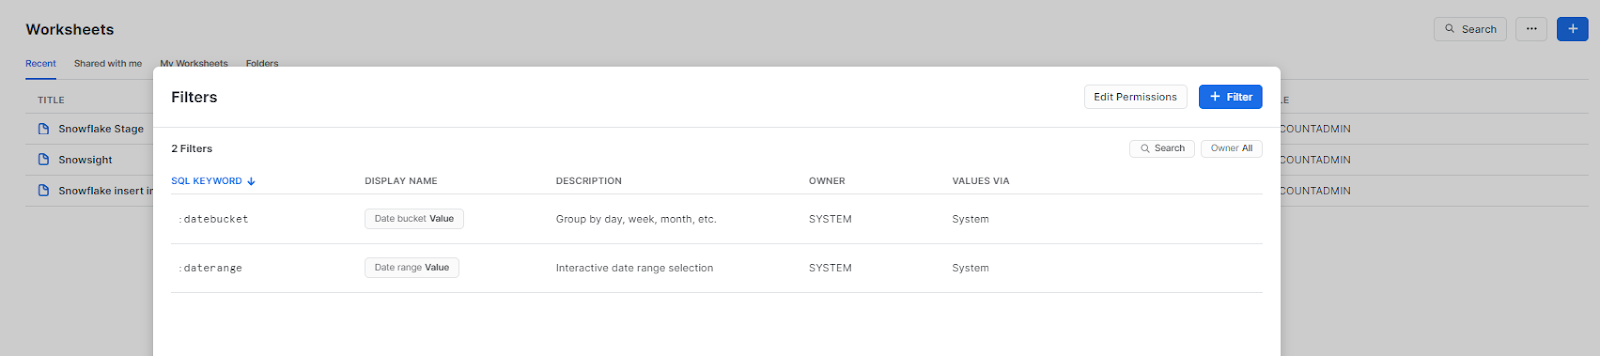
You can also manage the worksheet filter by owner, description, or shared status–and more!
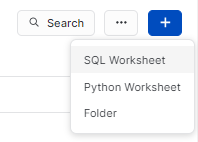
2) Creating Worksheets
To create a new worksheet, click on the “+” button for an SQL or Python worksheet located at the top right corner of the Worksheets area. This action will open a new tab with a blank worksheet, allowing you to begin writing your query. Also, you can name and add a description to your worksheet by clicking on the text at the top left corner of the worksheet tab. You can have multiple worksheets open simultaneously and switch between them using the tabs at the top of the content pane. To close a worksheet, simply click on the X icon on the tab.
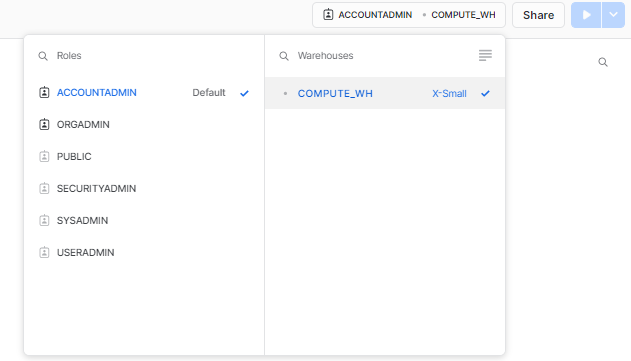
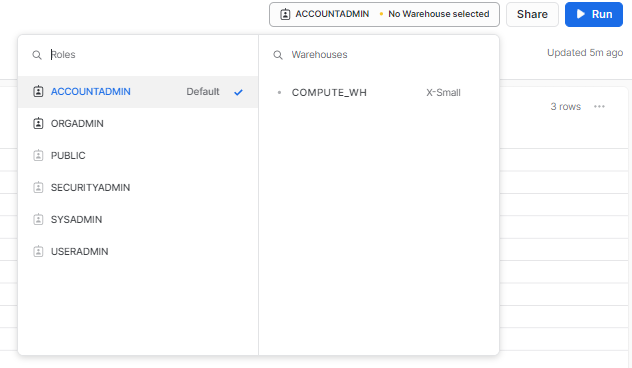
You can also choose the warehouse that you want to use for your query, by clicking on the Warehouse drop-down menu on the top right corner of the worksheet tab.
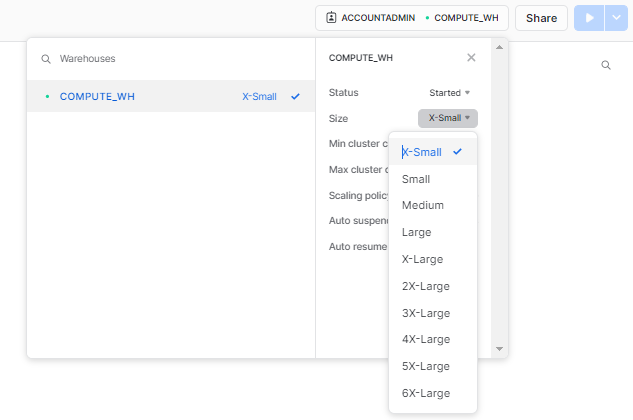
You can also resume or suspend an existing warehouse by clicking on the currently active Warehouse. To resize a warehouse, click on the “Size” option located below the “Status” option. This action will open a drop-down menu where you can select the warehouse size, ranging from X-Small to 6X-Large
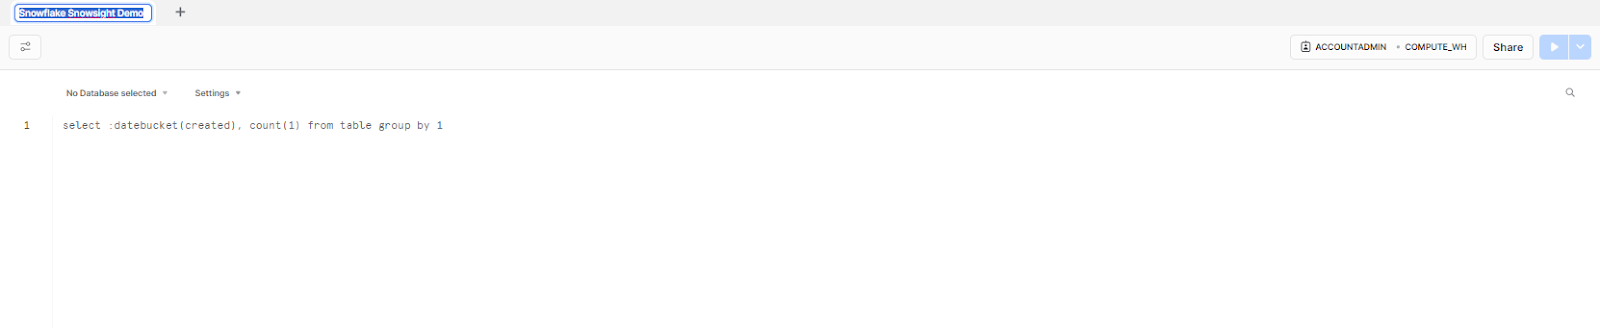
3) Writing and Running Queries in Worksheets
To write queries in worksheets, simply begin writing in your worksheet's query editor section. This editor enables you to craft SQL queries with autocomplete, syntax highlighting, and error-checking features. You can also toggle the highlight statement under the settings option to emphasize the code.

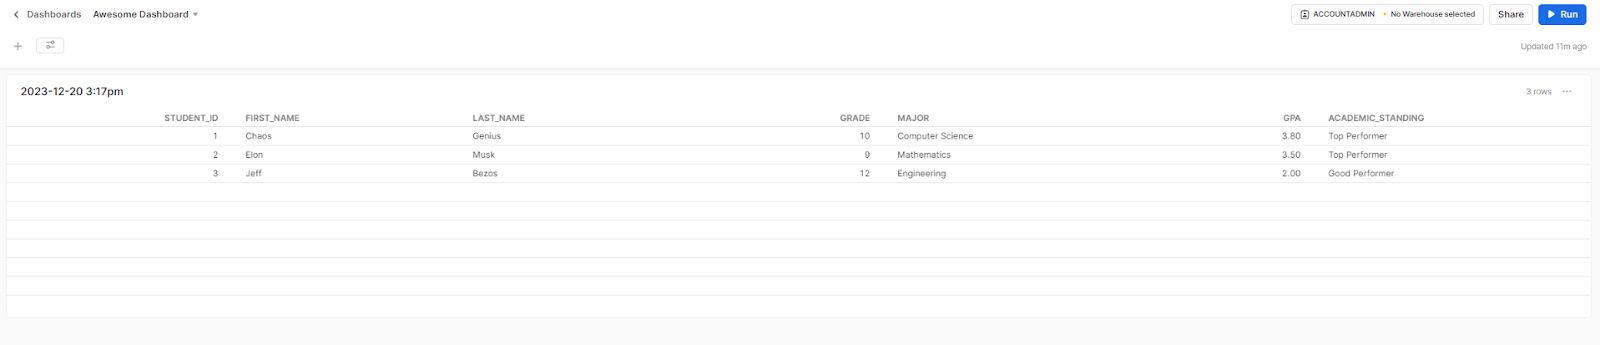
To execute or run queries in worksheets, use the Run or Play icon located at the top of the query editor or the worksheet editor. Simply click it, and it will execute your query, displaying the results at the bottom of the worksheet tab. Also, you can run a query by selecting the desired query and then pressing Ctrl+Enter or Cmd+Enter on your keyboard.
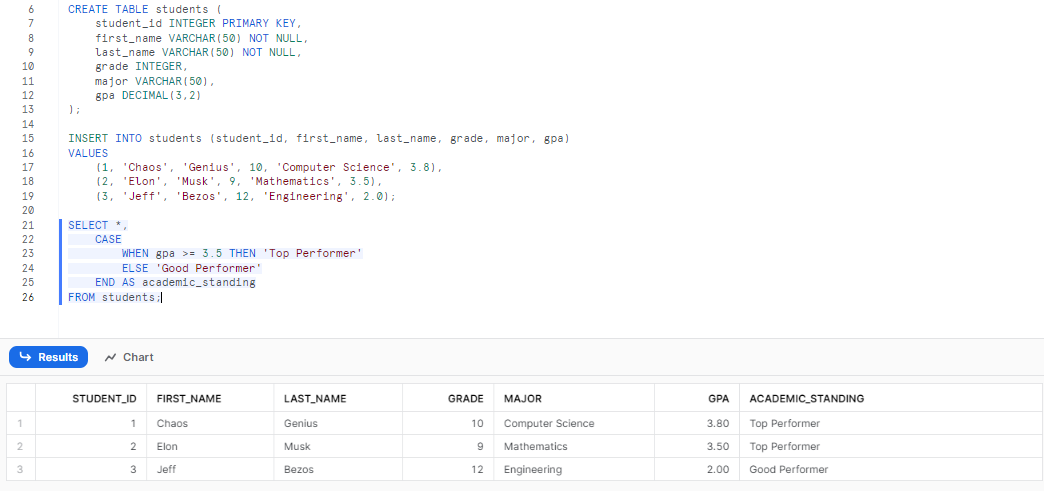
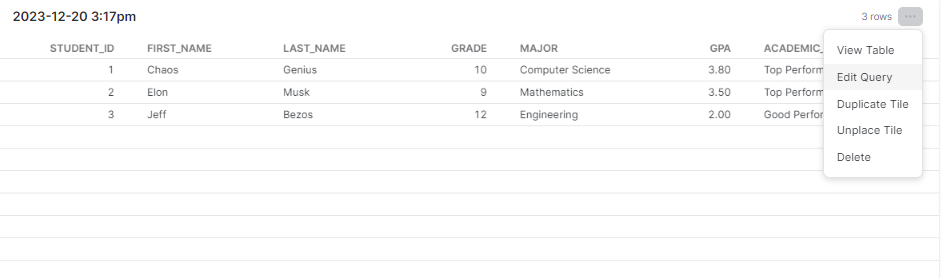
Here is one sample query that we will execute:
CREATE DATABASE demo_db;
CREATE SCHEMA demo_schema;

CREATE TABLE students (
    student_id INTEGER PRIMARY KEY,
    first_name VARCHAR(50) NOT NULL,
    last_name VARCHAR(50) NOT NULL,
    grade INTEGER,
    major VARCHAR(50),
    gpa DECIMAL(3,2)
);

INSERT INTO students (student_id, first_name, last_name, grade, major, gpa)
VALUES
    (1, 'Chaos', 'Genius', 10, 'Computer Science', 3.8),
    (2, 'Elon', 'Musk', 9, 'Mathematics', 3.5),
    (3, 'Jeff', 'Bezos', 12, 'Engineering', 2.0);

SELECT *,
    CASE
        WHEN gpa >= 3.5 THEN 'Top Performer'
        ELSE 'Good Performer'
    END AS academic_standing
FROM students;
Snowflake Snowsight demo query example
4) Viewing Query Execution Details and Query History
To view the query execution details, access the Query Execution Details located at the bottom of the worksheet tab. The Query Execution Details section provides information such as the status, duration, rows, Query ID, bytes scanned, warehouse details—and many other details about your query.
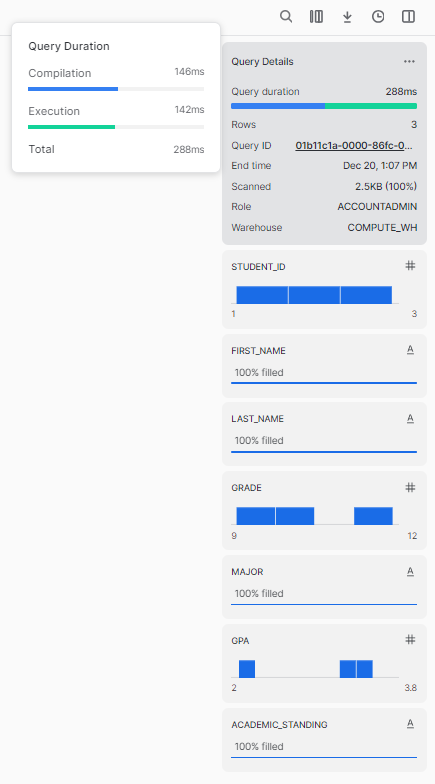
5) Worksheet Data Visualization (Charts)
To visualize your worksheet query data using charts, use the Chart icon situated at the bottom of the worksheet tab, next to Result. This section displays your query details in a graph format. You can alter the chart type to formats such as line, bar, scatter, heat grid, and scorecard. Also, you can customize the appearance of the charts, including orientation and axis settings.

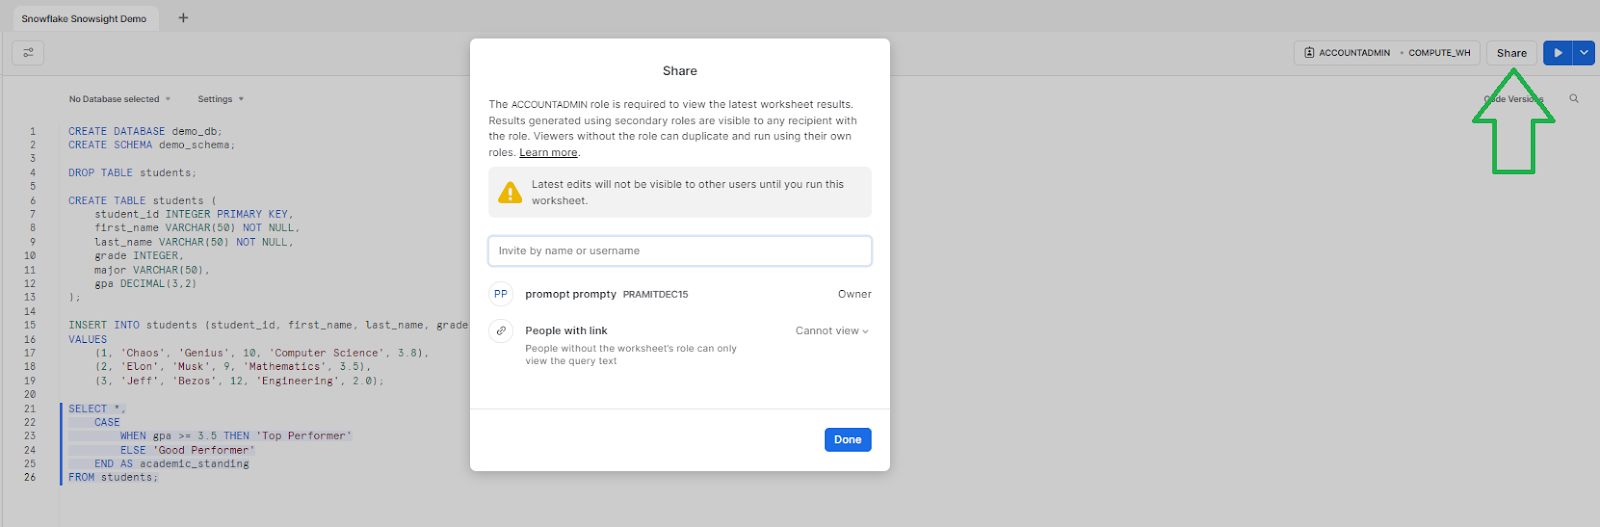
6) Sharing Worksheets
To share your worksheets with other users, use the Share icon located in the top right corner of the worksheet tab. The share section enables you to invite users and displays a list of users with whom you've shared your worksheet, along with their access levels and permissions. Also, you can view the count of users you've shared your worksheet with and the number of users who've shared their worksheets with you.
These and many more features facilitate faster iteration over queries and data in Snowsight worksheets. Combine this with dashboarding to unlock the true potential of Snowsight. So, let's jump right into the Dashboard section.
Section 2—Getting Started With Snowflake Dashboards in Snowsight
Snowsight allows you to use dashboards to display data using various charts and graphs formats. Dashboards are collections of tiles that show data from your worksheets/queries. You can customize and interact with your dashboards, and share them with other users. In this second section, we will show you how to use Snowflake dashboards in Snowsight and perform various tasks, such as viewing, creating, opening, managing, editing—and sharing dashboards.
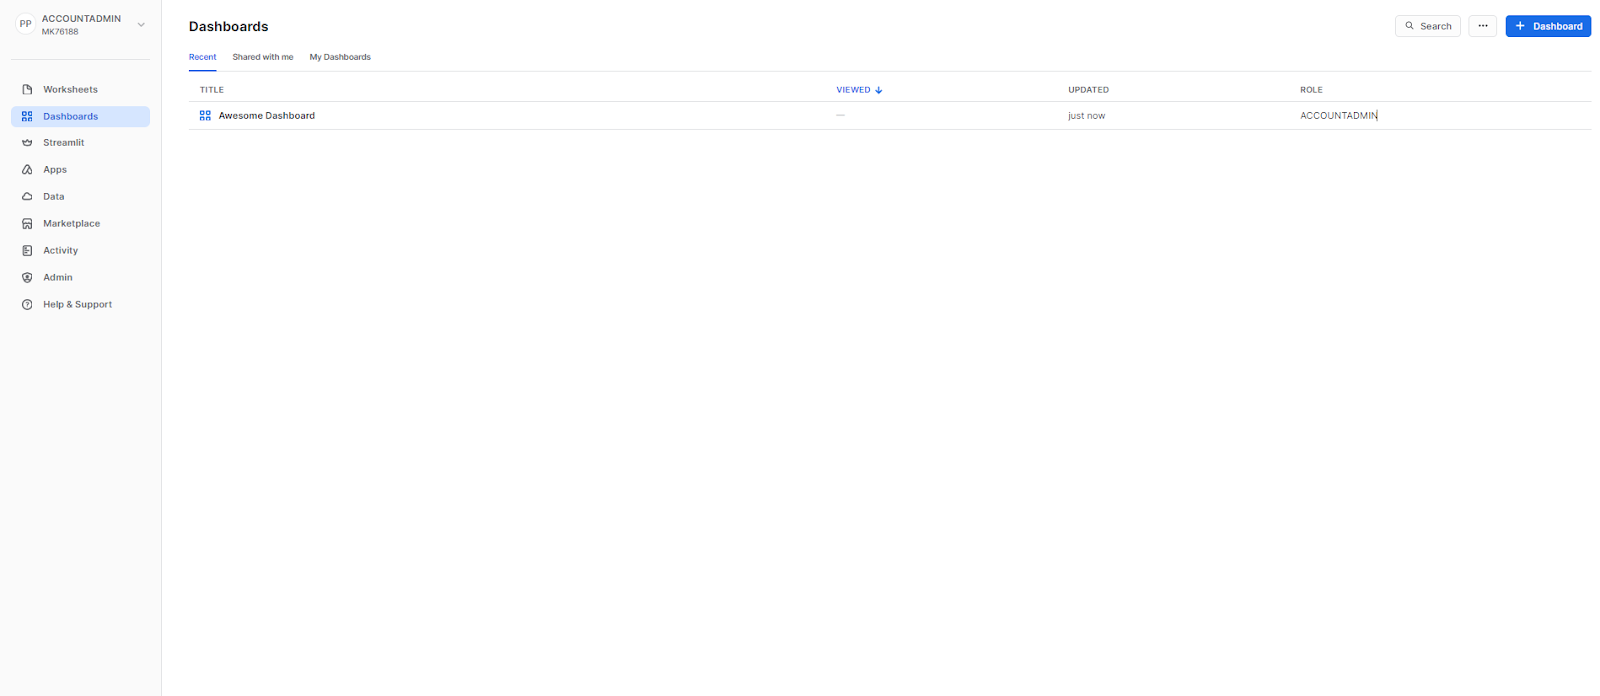
To get started with Snowflake dashboards in Snowsight, you need to access the Dashboards area of Snowsight. To do so, all you need is to click on the Dashboards icon on the left Snowflake Snowsight navigation menu option. This will open the Dashboards area, where you can see the list of dashboards that you have access to, and the options to create, open, or search for it.
1) Viewing Snowflake Dashboards
To view the dashboards accessible to you, navigate to the Dashboards area in Snowsight. Here, you'll find a list of available dashboards tailored to your role and privileges. Each dashboard displays details like name, description, owner, last viewed date and role. You can also track the count of dashboards you own and those shared with you by other users. Also, you can make use of a search box to find specific dashboards by name or description.
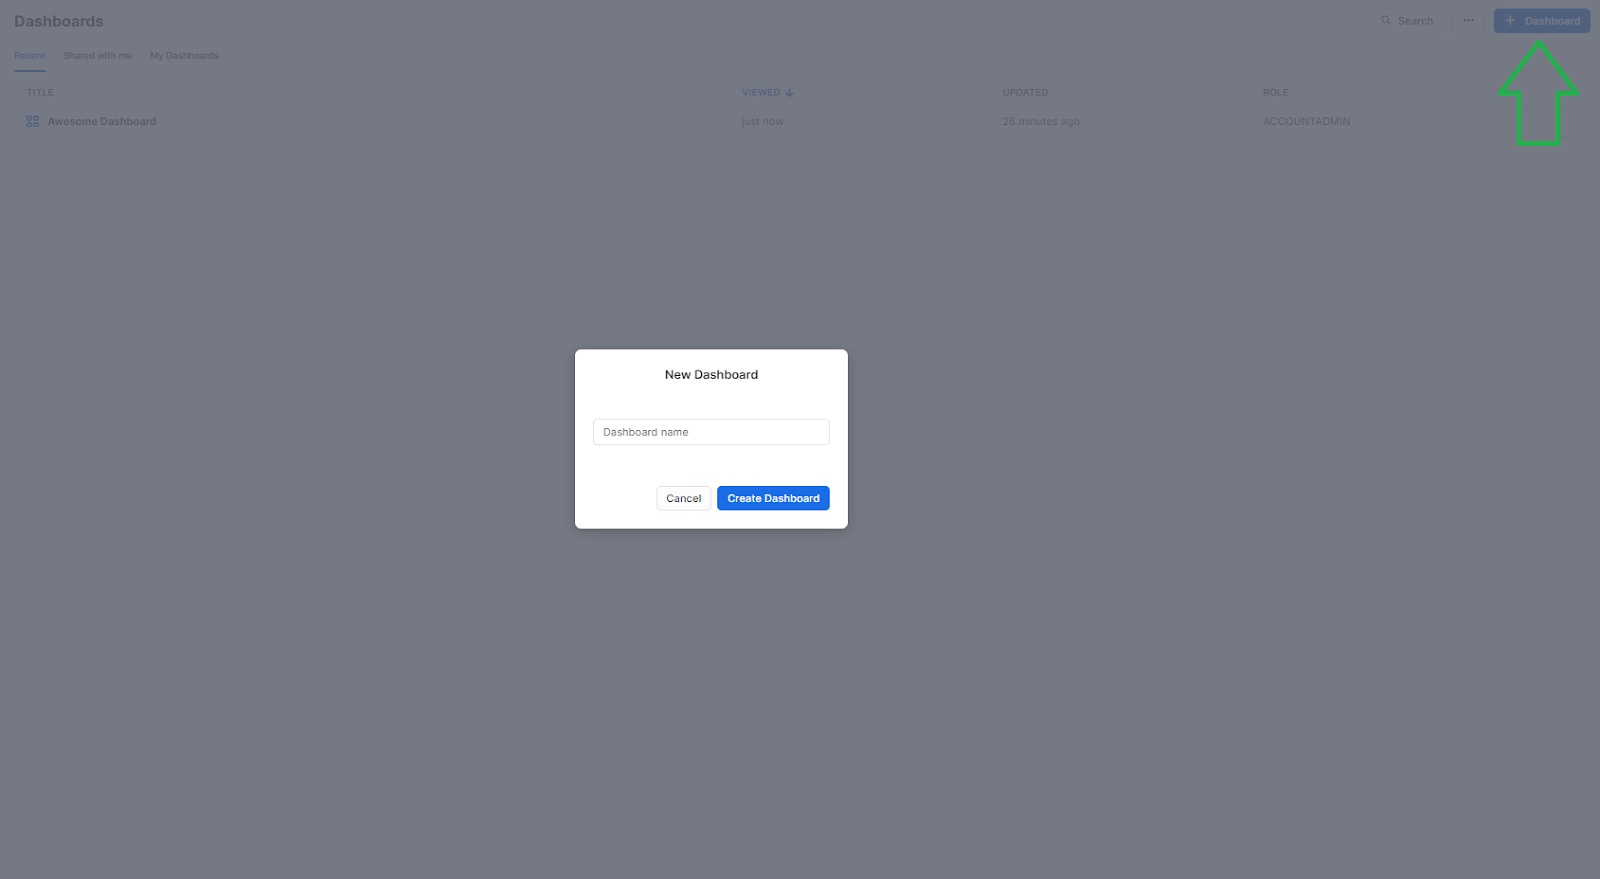
2) Creating Dashboard
To create a new dashboard, click on the Create Dashboard button located in the top right corner of the Dashboards area. This will open a new tab with a blank dashboard. Here, you can provide a name for the dashboard and begin adding tiles. Also, you can rename the dashboard and add a description by clicking on the Dashboard name text situated at the top left corner of the tab.
2) Creating Dashboard From Worksheet
You can utilize an existing worksheet to create a dashboard. When using a worksheet for dashboard creation, the original worksheet remains in the Worksheets area without removal. The worksheet's query is stored within the dashboard and can be edited in that context. To create a dashboard using an existing worksheet, open the desired worksheet, then click the Create Dashboard button. This action opens a new tab displaying a dashboard with tiles based on the selected worksheet/query. Also, you can create a dashboard by directly executing the query.

The dashboard interface consists of different elements that allow you to view and interact with your dashboard. The dashboard interface includes the following elements:
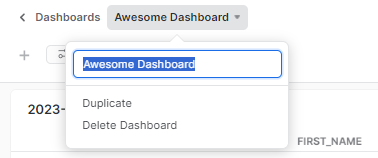
Dashboard menu: Dashboard menu, located in the upper-left corner of the page, lets you:
- Rename or delete your dashboard
- Move your dashboard to a different folder
- Duplicate your dashboard
- Show and hide filters: The settings icon, located in the upper-right corner of the page, lets you show or hide the filters pane, where you can add, edit, or remove filters for your dashboard. Filters allow you to dynamically change the data that is displayed on your dashboard, based on certain criteria or values.
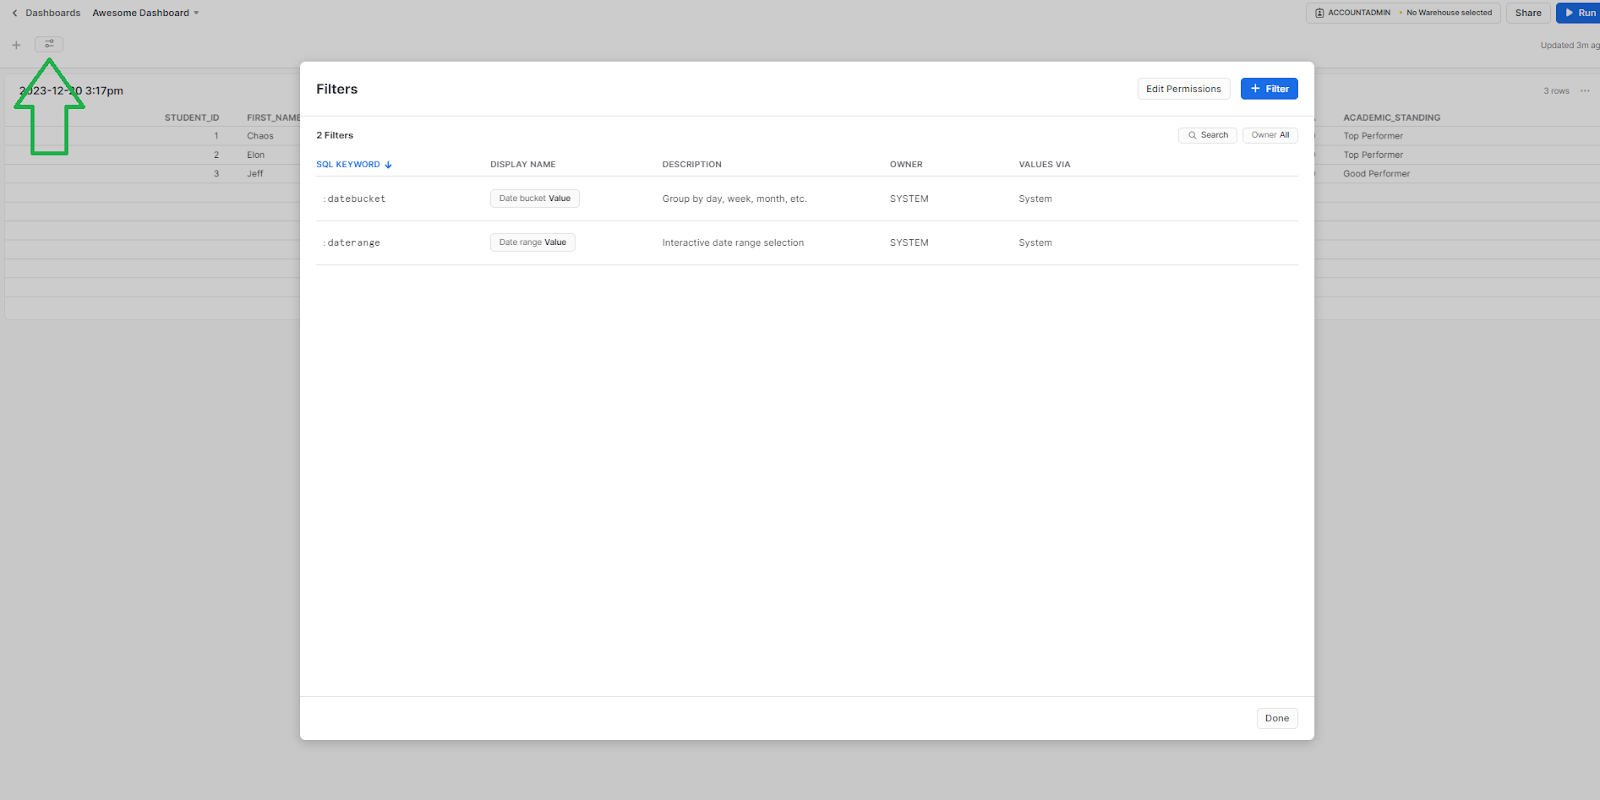
- Warehouse selector: The warehouse selector, located in the upper-right corner of the page, lets you choose the warehouse for your dashboard.
- Run dashboard queries: The run dashboard queries icon, located in the upper-right corner of the page, lets you run the queries for your dashboard.

- Tile: Tile is a section that displays data from a worksheet query in chart, table, or graph format.. You can add, edit, rearrange, or delete tiles on your dashboard. You can also interact with your tiles, such as changing the chart type, options, and settings, applying filters, parameters, and variables, and adding comments, annotations, and alerts. To add a new tile to your dashboard, you need to click on the “+” Tile button on the top left corner of the dashboard tab. This will open a dialog box where you can choose the worksheet that you want to use for your tile.
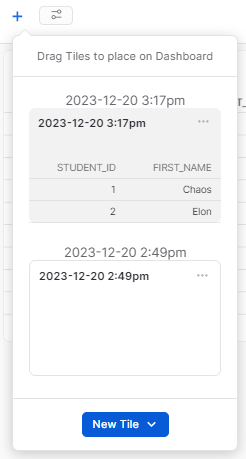
To rearrange the order of your tiles on your dashboard, you need to drag and drop the tiles to the desired position. You can also resize the tiles by dragging the edges or corners of the tiles.
3) Editing Charts and Queries in Dashboard
To edit the charts and queries for your tiles, click on the tile, then click on the three-dot menu option that you want to edit. This action will open a menu where you can edit the query and update the tile.
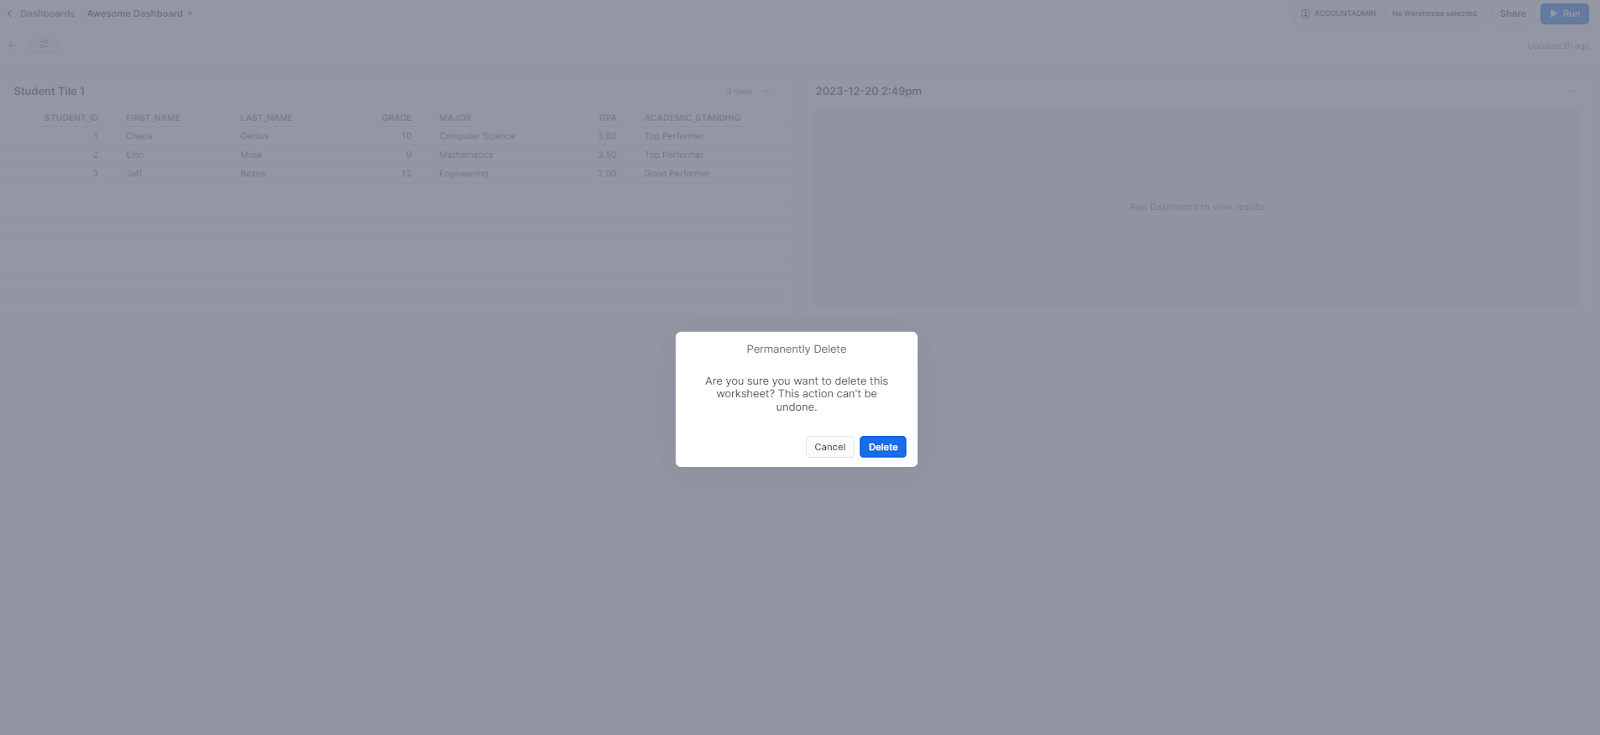
4) Deleting Tile From Dashboard
To delete the tile, click on the tile, then select the three-dot menu option for deletion. This will open a menu where you can find the delete option. Click on it to delete the tile.
5) Sharing Dashboard
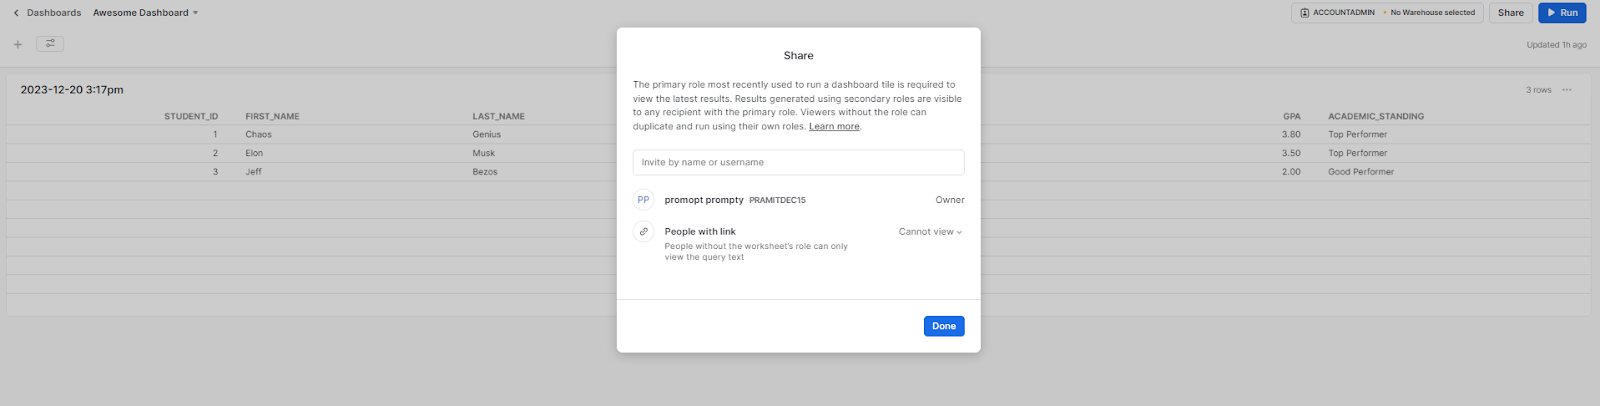
To share your dashboards with other users, utilize the Share icon located in the top right corner of the dashboard page. This feature allows you to share your dashboard with other users and manage their access levels and permissions. Additionally, you can view the list of users with whom you've shared your dashboard, along with their access levels and permissions.
With these dashboarding capabilities, Snowsight enables the creation of rich, interactive reporting experiences using Snowflake data without the need for any kind of third-party tools/applications.
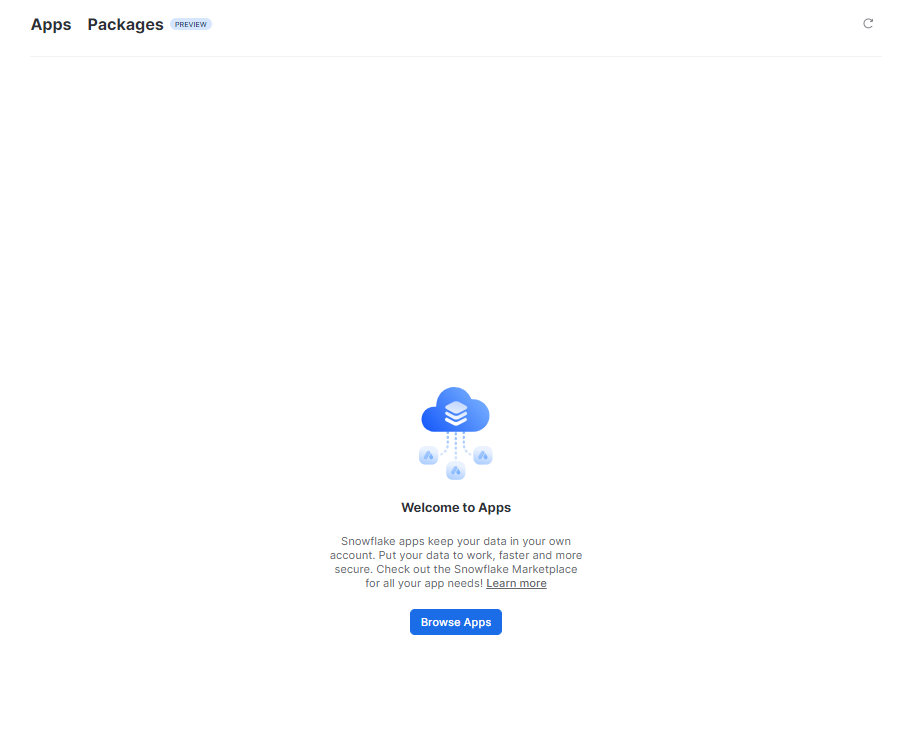
Section 3—Getting Started With Apps in Snowsight
To begin using Snowflake apps in Snowsight, access the “Apps” area within Snowsight. To do this, click on “Apps” in the left navigation menu of Snowsight. This action will open the Apps area in the content pane, where you can view the list of accessible apps and options to browse, create app packages, or search for specific apps.
1) Viewing and Browsing Apps
To view and browse the Apps, you can use the Apps section of Snowsight. The Apps section shows the list of apps that are available to you.
You can also use the search box to find an app by name or description.
2) Creating App Package Using Snowsight
An application package is a container that encapsulates the data content, application logic, metadata, and setup script required by an application. An application package also contains information about versions and patch levels defined for the application.
Now comes the cool part—we can build apps with just some configuration in Snowsight vs. complex programming. Click the “Packages” tab and then select “+ App Package” to get started.
Simply provide a name, comments and distribution option for your app.
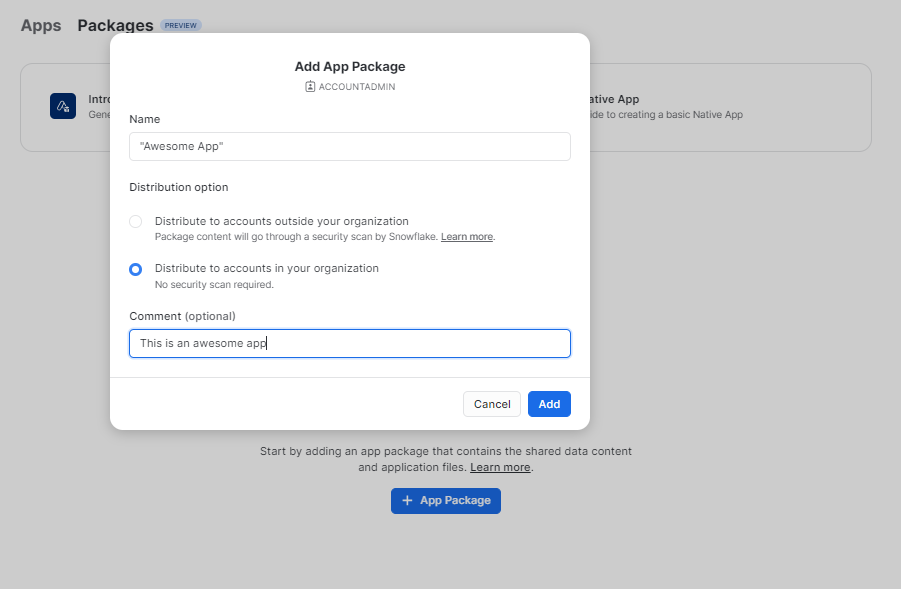
Then upload supporting files like the data content, visualization code and optionally even a configuration script to automate setup. That’s it! Snowsight packages it all into an easily discoverable
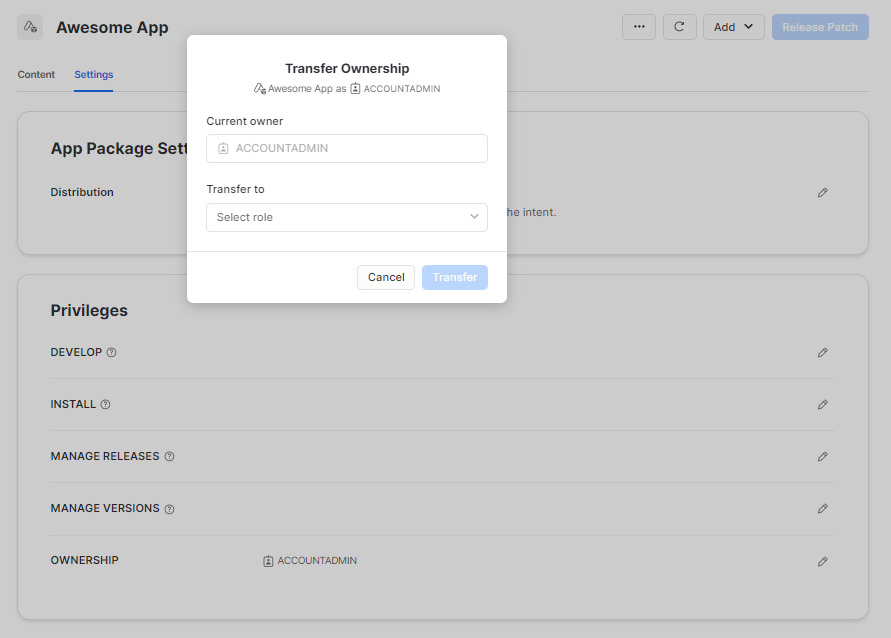
3) Granting Privileges on App and Transferring Ownership
Once an app is ready, we need to securely enable access for intended consumers. In the Settings section for any app, Snowsight allows granting privileges like Install, Manage or even full Ownership through simple Ownership selection. We can toggle these access levels anytime.
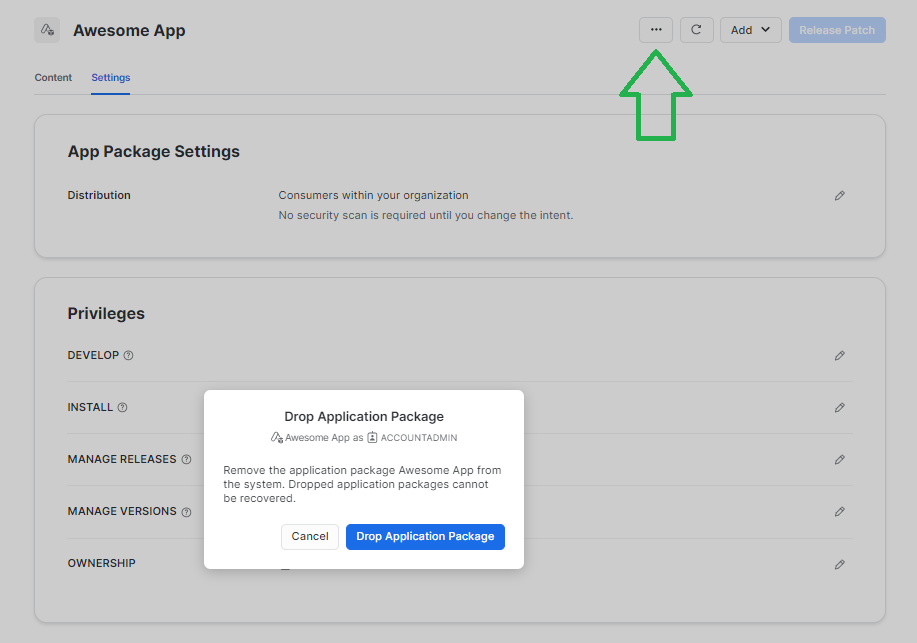
4) Removing App Package
No application lasts forever, however. As business priorities evolve, maintaining unused apps adds unnecessary maintenance overhead. Snowsight enables us to safely remove owned apps without performing any hectic task. To do so, simply click on the three-dot icon located at the top of the section. You'll then get the option to delete the app package; click on it, and you've successfully removed the app package.
Check out this documentation for step-by-step guide on creating App packages in Snowsight
Section 4—Getting Started With Data in Snowsight
Data pages section in Snowsight allows you to view and explore your databases and objects in Snowflake. You can access data pages from the left Snowsight navigation menu by clicking on the Data option. You can also use the search bar at the top to find a specific database, schema, table, view, pipe, function, or procedure.
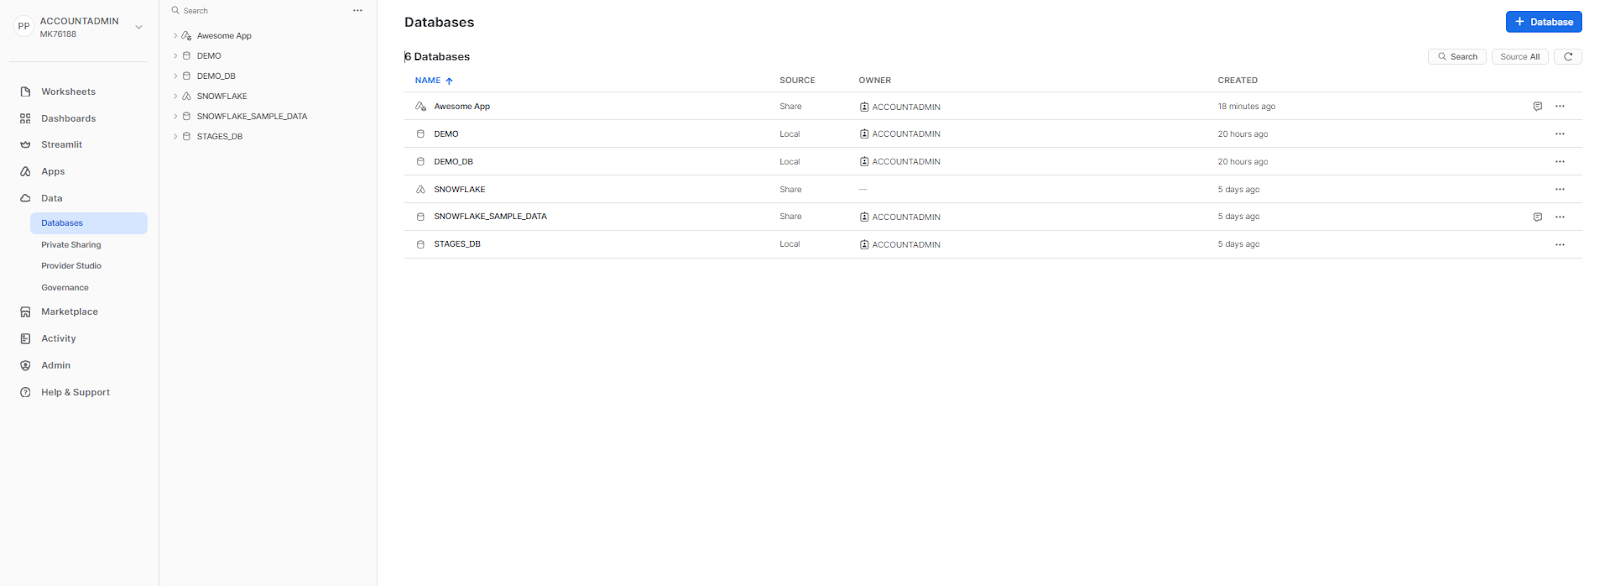
1) Viewing Databases and Objects
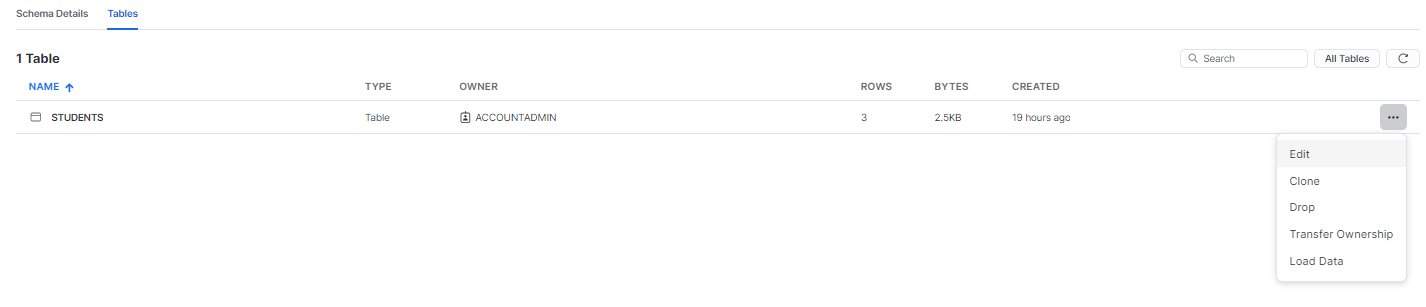
When you open the data page, you will see a list of databases that you have access to. You can expand each database to see its schemas.
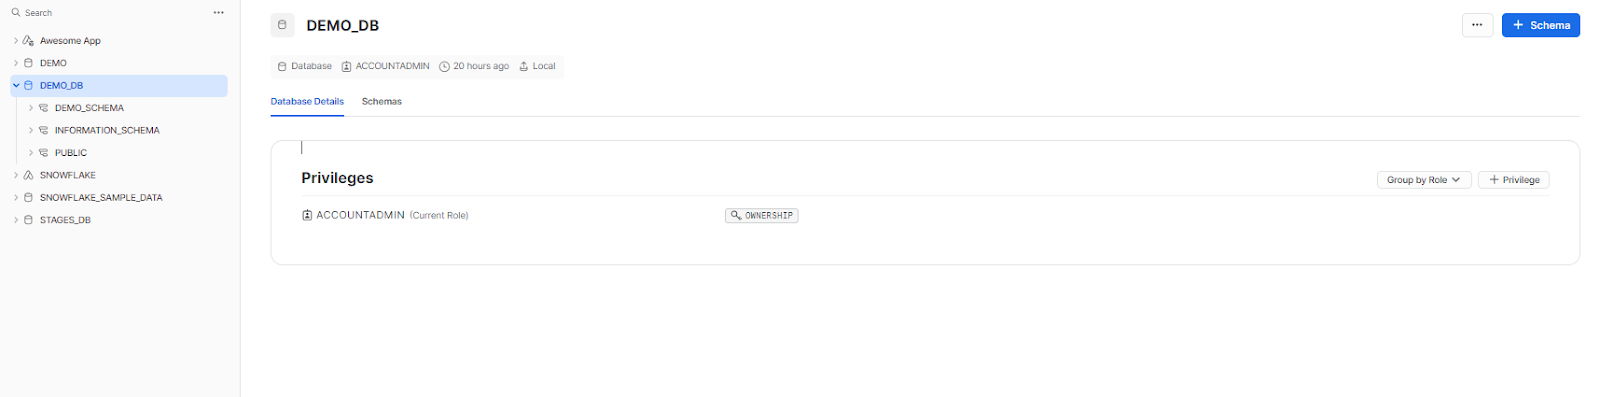
To view the details of a schema, click on its name, and you will see all the underlying objects inside that schema.

Depending on the type of object you select, you will see different details on the tab.
You can also perform actions on the object, such as renaming, cloning, dropping, truncating, loading data, or refreshing. You can also grant or revoke privileges on the object to other users or roles. To perform these actions, you can click on the meatball option located at the end of each object.
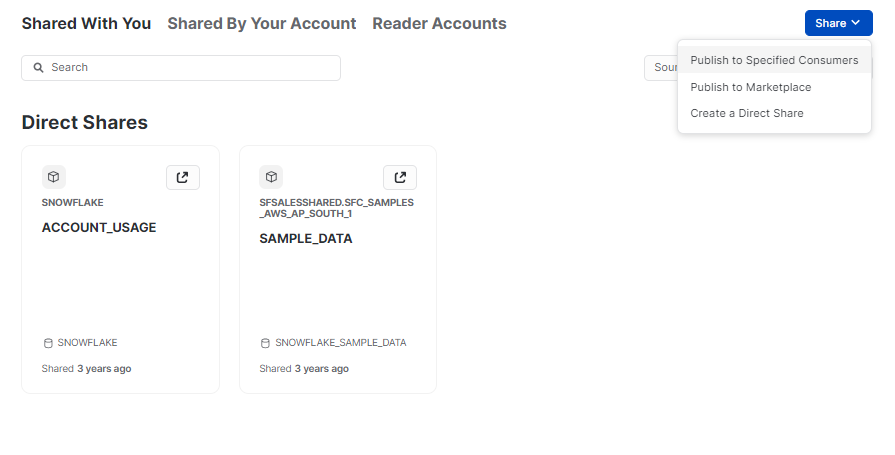
2) Private Sharing
One cool benefit of Snowsight is its capability to securely and easily share data with other accounts or users. You can utilize the private sharing feature to publish to specified consumers, the marketplace, or create a direct share, granting access to other accounts or users. On top of that, you can even specify the privileges you wish to grant.
To create a share, you can use the Share button on the top right corner of the Private Sharing page.
3) Provider Studio
Provider Studio in Snowsight allows you to view and manage the data that you share with other accounts or users, and the data that is shared with you. You can access Provider Studio from the Snowsight navigation menu by clicking on the Provider Studio section.
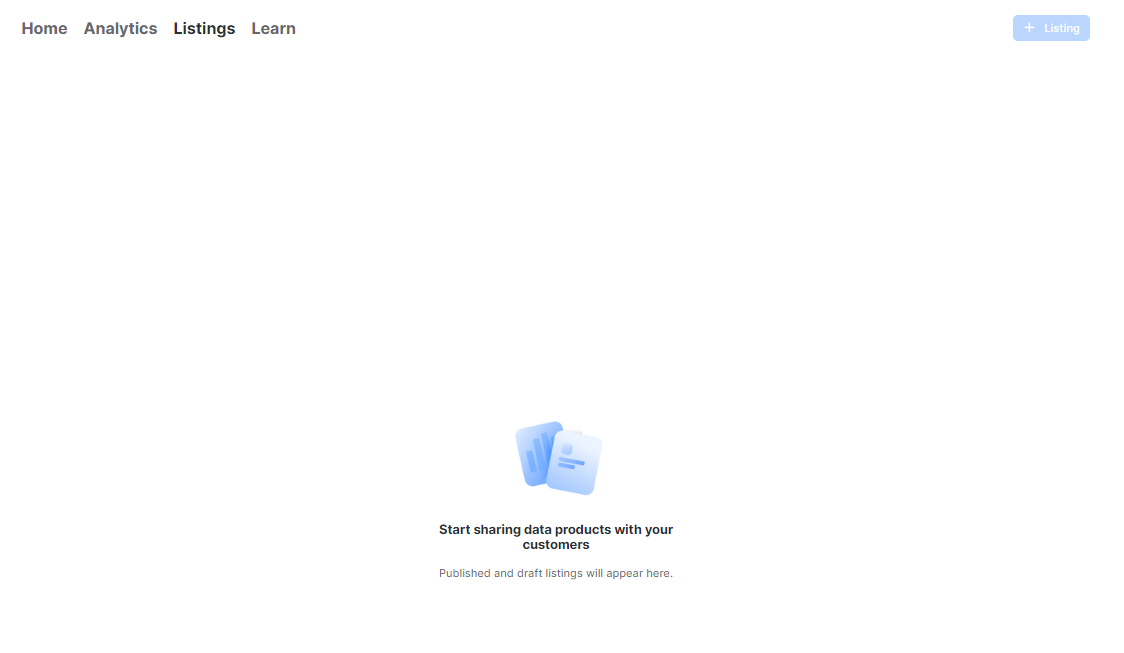
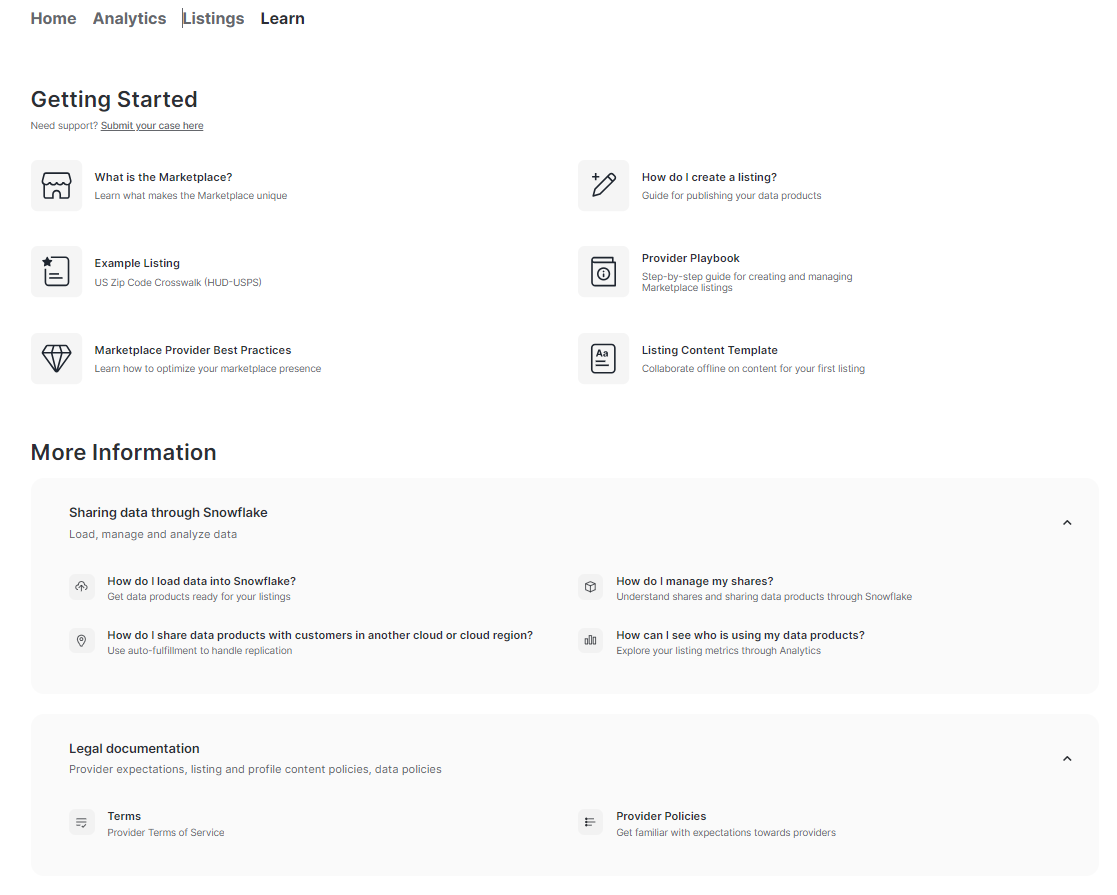
When you open Provider Studio, you will see four tabs: Home, Analytics, Listings, and Learn.
- Home tab displays all the details of where and how the data product you created is shared.
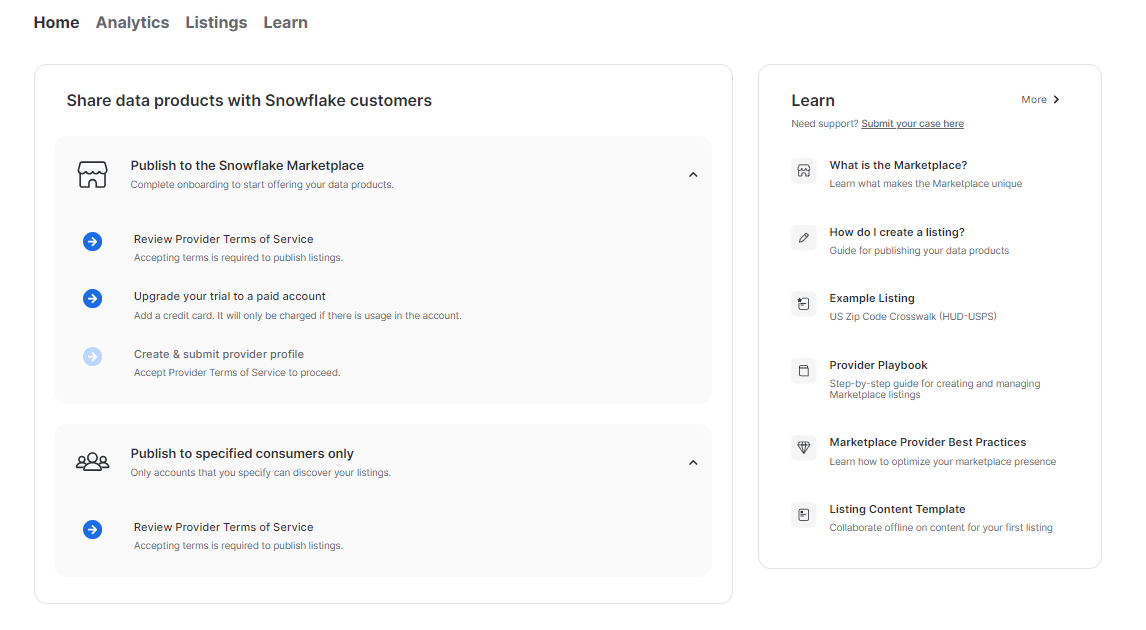
- Analytics tab provides detailed metrics about the status of your data apps.
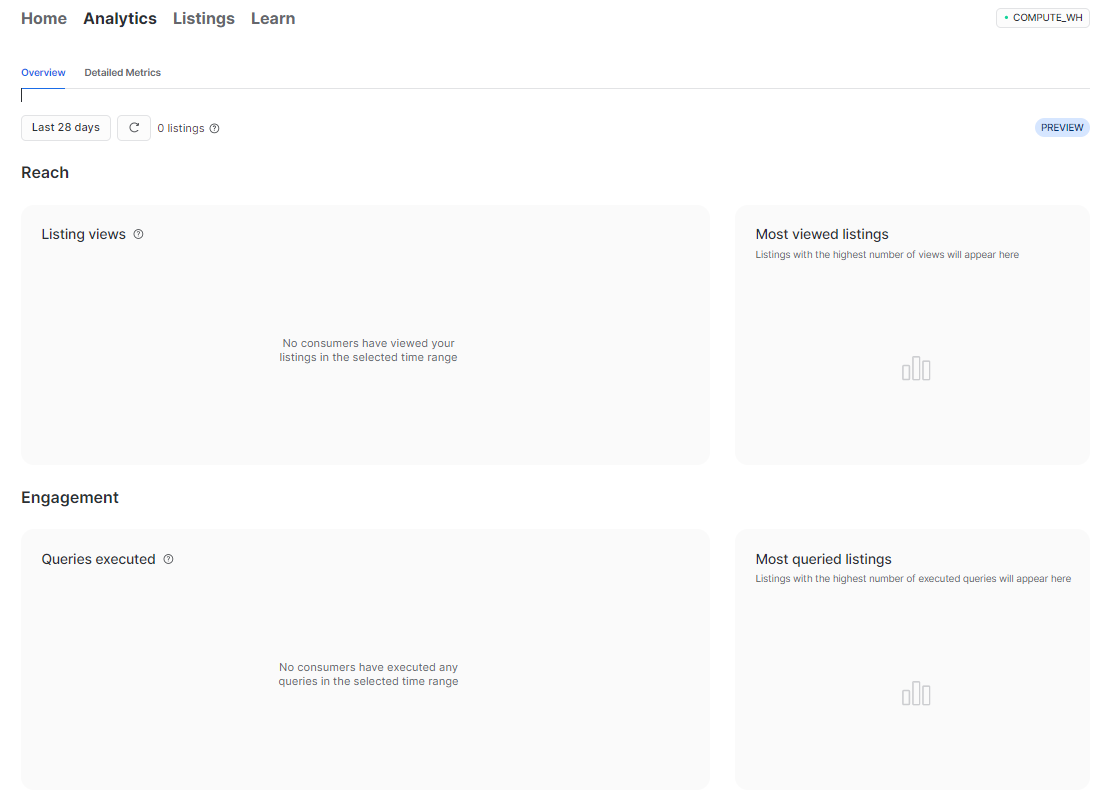
- Listings tab showcases published and draft listings.
- Learn tab is where you can find resources to get started with sharing data in Snowflake, including documentation and guides.
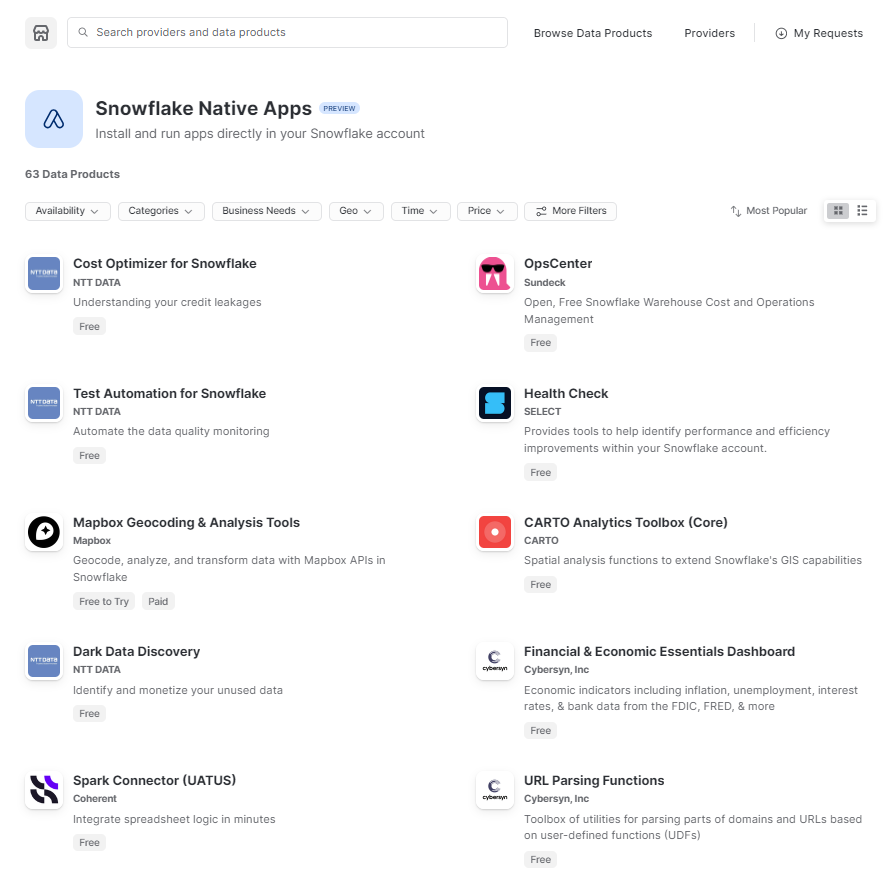
Section 5—Getting Started With Marketplace in Snowsight
Snowflake Marketplace in Snowsight enables you to discover and purchase live, ready-to-use data and applications. You can access the Snowflake Marketplace by following the same steps mentioned earlier: click on the left Snowsight navigation menu, then select the “Marketplace” section.
Snowflake Marketplace connects you to over 500+ providers, offering more than 2000+ live, ready-to-use data, services, and Snowflake Native Apps. You can browse the marketplace listings by category, provider, or keyword, and filter them by price, rating, or popularity. You can also see the details of each listing, such as description, features, pricing, terms of service, and reviews.
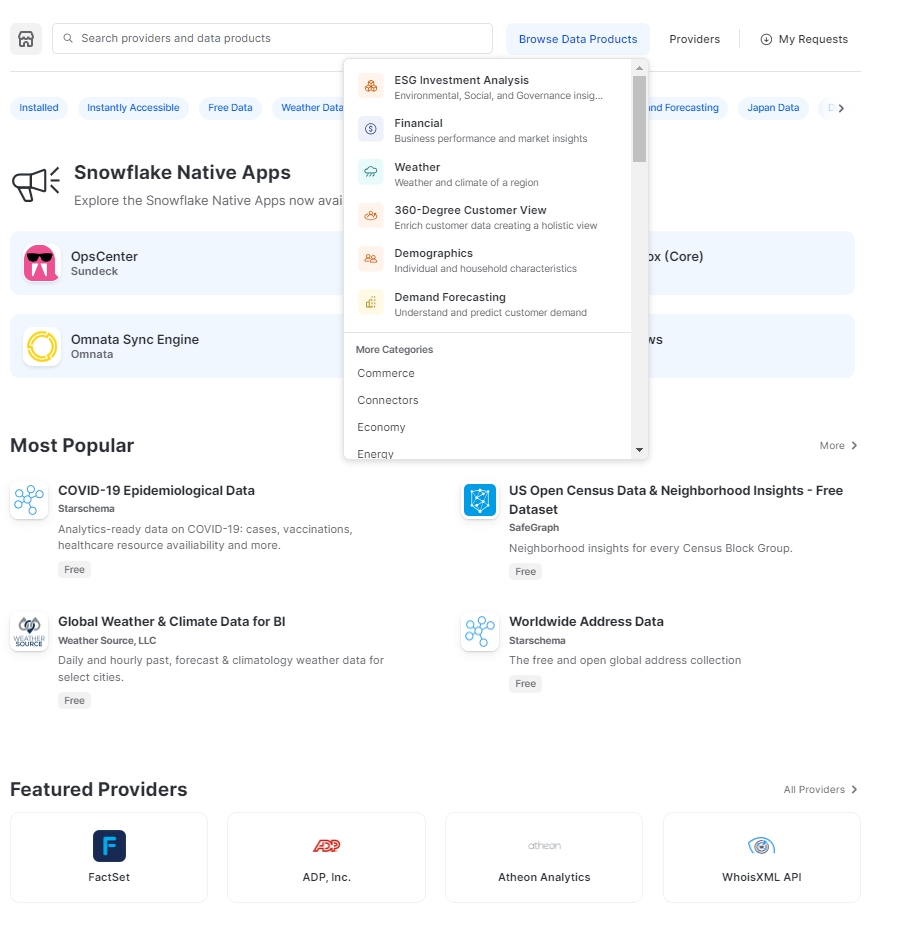
Snowflake Marketplace offers a wide variety of data and applications from some of the world’s leading companies. From public health and financial market data to SaaS application data/apps, the Snowflake Marketplace caters to nearly every business need.
1) Viewing and Accessing Shared Datasets
One main benefits of Snowflake Marketplace is that it enables you to access shared datasets from other accounts or users in a secure and easy way. You can use the shared datasets feature to create a share that contains one or more datasets that you want to include in your workspace. You can also specify the permissions that you want to grant to other accounts or users who have access to your share.
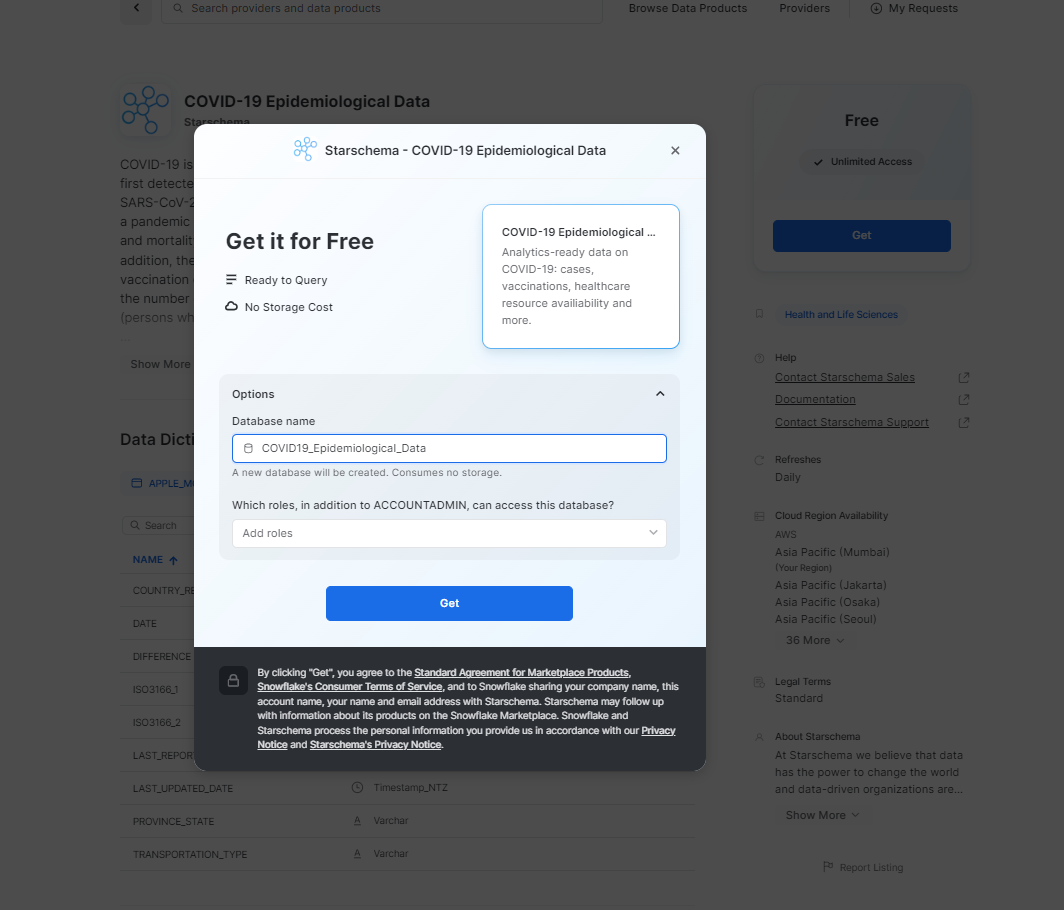
To access shared datasets, search and click on the dataset you prefer.
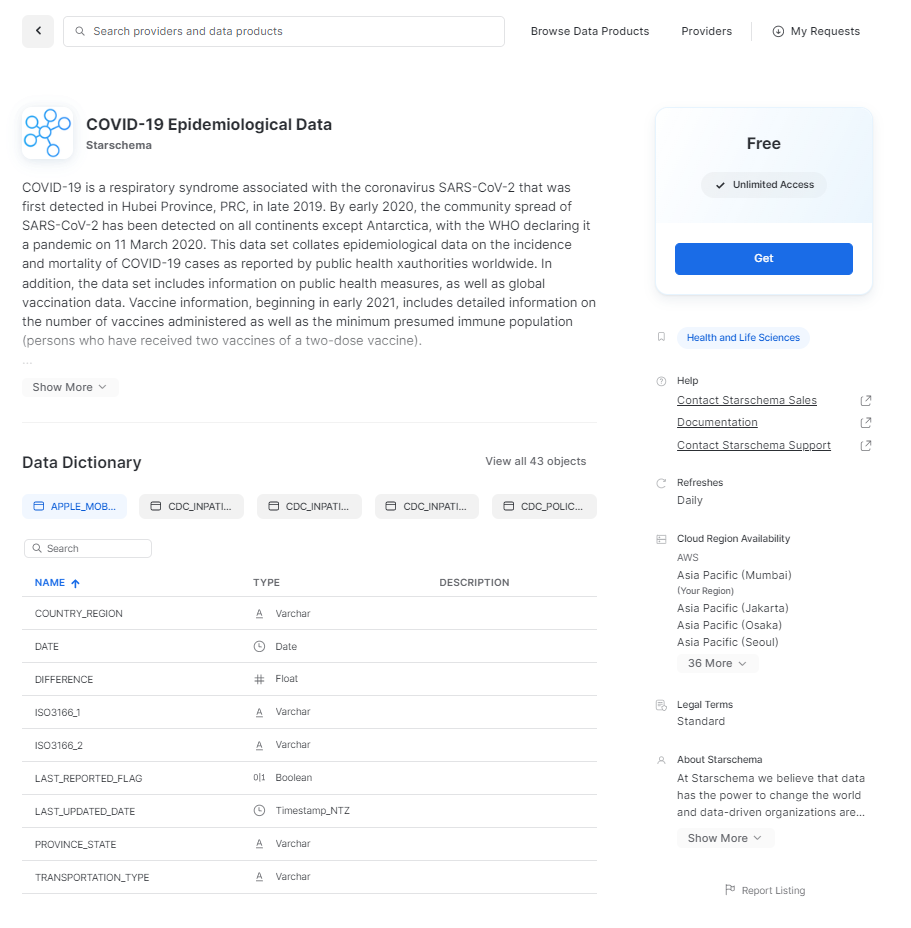
Click on “Get”, and a popup will appear where you need to specify the database name and role. Once you've done that, proceed by clicking on the “Get” option, and you'll successfully import the dataset.
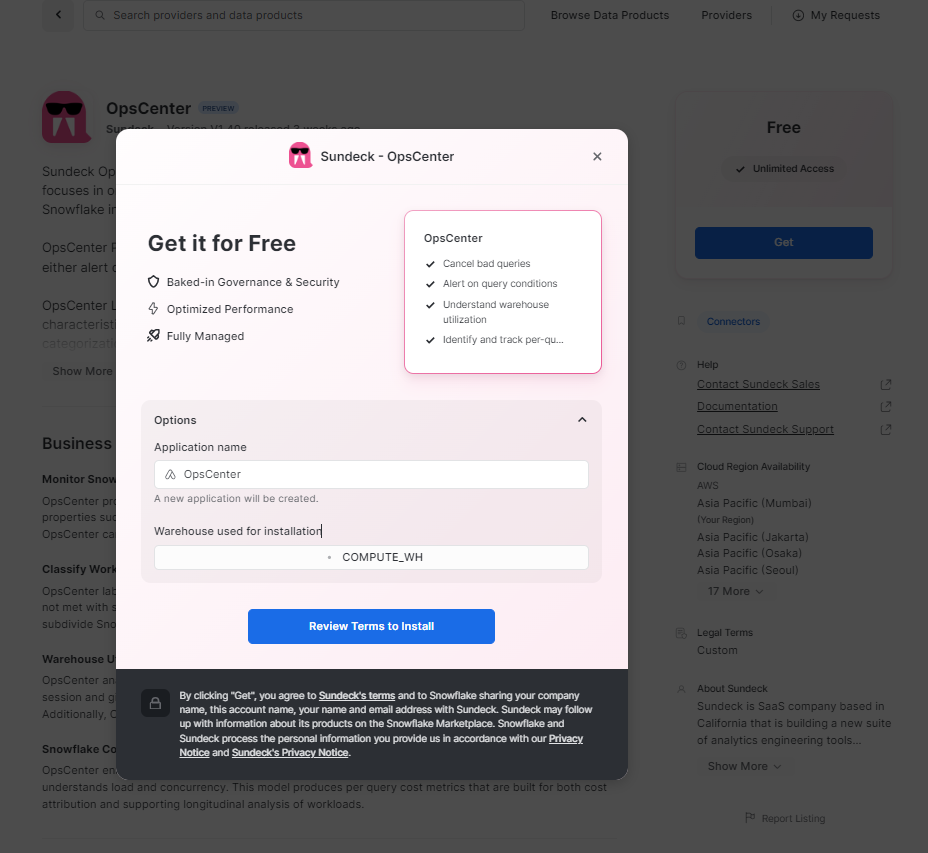
2) Viewing and Installing Apps
Apps are pre-built applications that operate within Snowflake, offering specialized functionality or services for your data and analytics requirements. Installing an app follows the same process as accessing a dataset. Instead, specify the application name and the warehouse used for installation, and you're all set.
Section 6—Getting Started With Activity in Snowsight
Activity Pages section in Snowsight allows you to monitor and view various activities associated with your data and queries in Snowflake. Accessing activity pages follows the same process as in the previous section: navigate from the left Snowsight navigation menu by clicking on the “Activity” section.
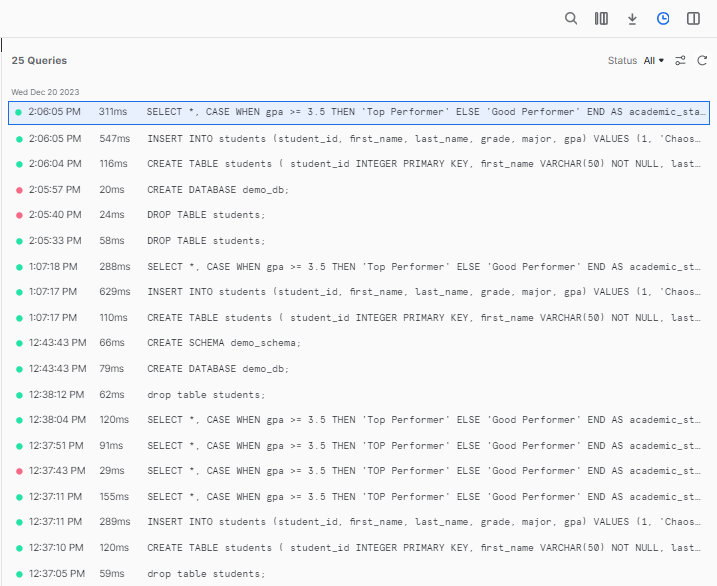
1) Monitoring Query History
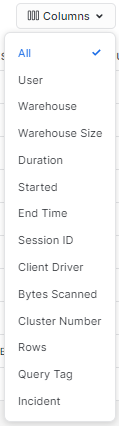
Query history enables you to view and delve into the details of queries executed in your Snowflake account within the last 14 days. You can filter the query history by various criteria such as status, user, warehouse, duration, session ID, client driver, bytes scanned, cluster number, rows, or query tag—and so much more. Also, you can sort the query history based on any of these columns.
To view the details of a query, simply click on its name. This action will open a new tab displaying information such as query details and the query profile specific to that particular query.

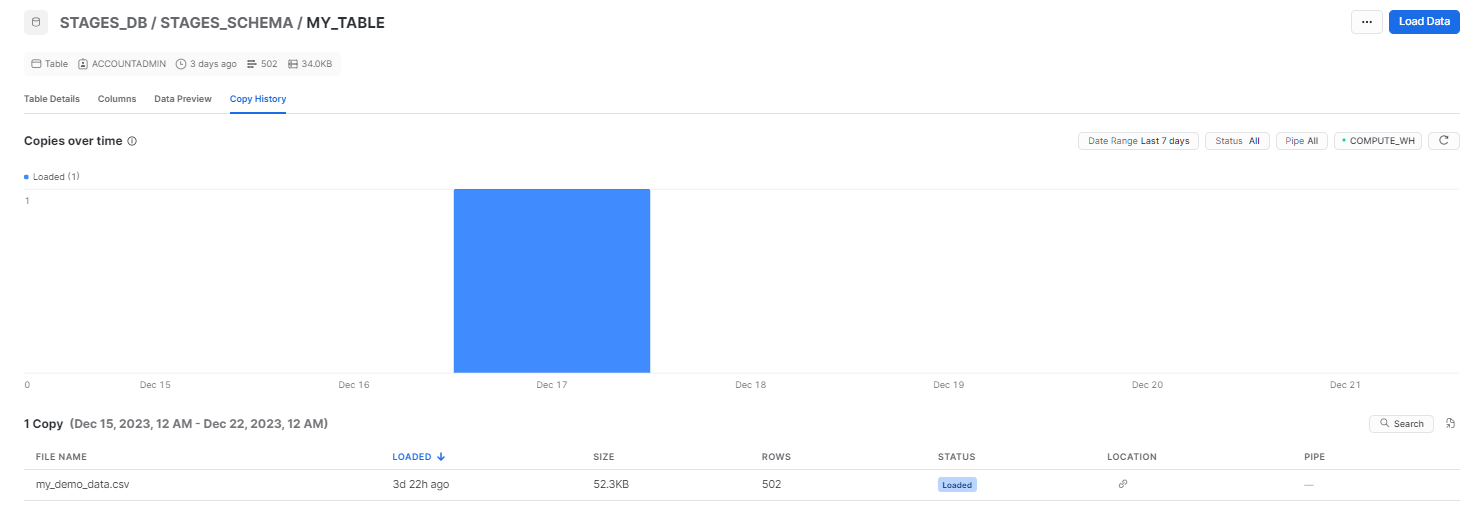
2) Copy History
Copy history allows you to monitor and view details about instances of bulk and continuous data loading, including operations using COPY INTO (bulk loading) and pipes (continuous loading). You can filter the copy history by stages like In Progress, Loaded, Failed, Partially Loaded, and Skipped Loading Process.
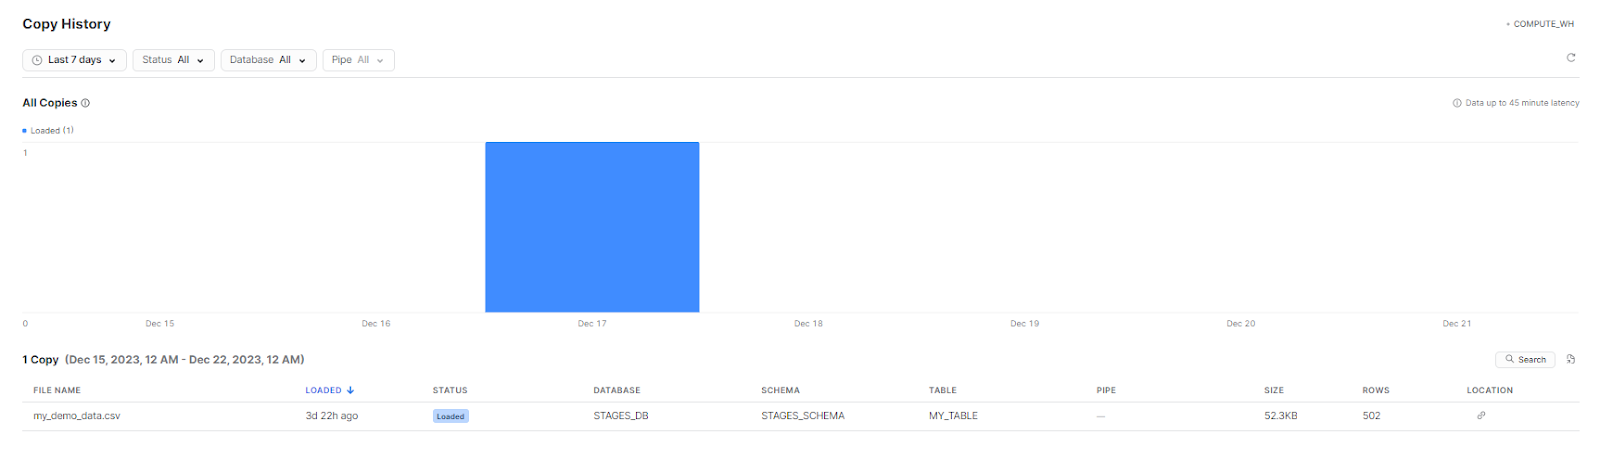
To view the details of a copy instance on the copy history page, click on the loaded file name. This action will open a new tab displaying information such as filename, loaded time, status, database, schema, table, pipe name, size, rows, and stage location.
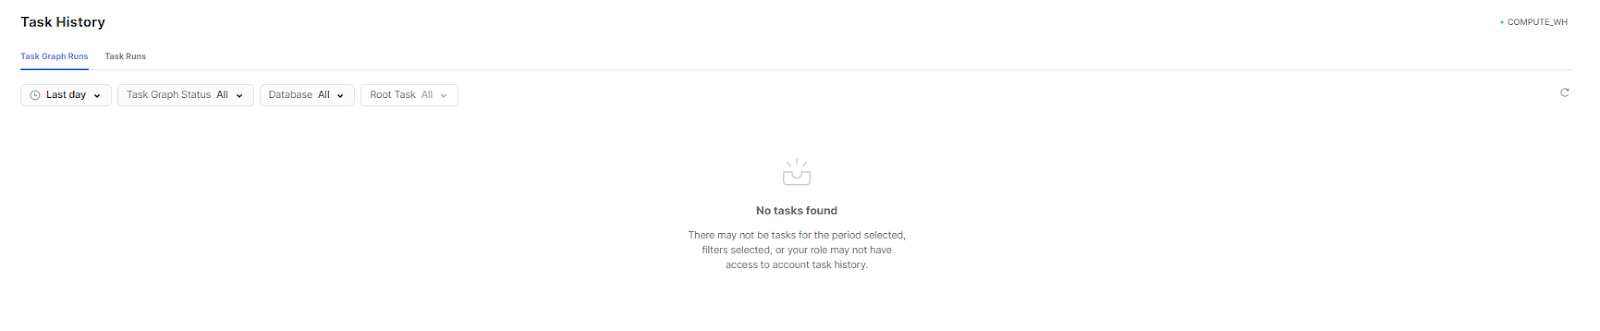
3) Task History
Task history allows you to monitor and access details about Snowflake tasks. These tasks enable the automation of Snowflake SQL statements, stored procedures, and UDFs on a scheduled basis. They are useful for automating repetitive data management and ELT processes within Snowflake. Tasks in Snowflake provide a framework for scheduling multi-step data transformations, incremental data loading, maintaining data pipelines, and ensuring downstream data availability for analytics and applications.
To view the details of a task on the task history page, click on its name. This action will open a new tab displaying information such as task ID, task description, task status, and more!
4) Dynamic Tables
Snowflake Dynamic Tables are a special type of table in Snowflake that are used to simplify data transformation pipelines. They are created by specifying a SQL query that defines the results of the table. The results of the query are then materialized into a dynamic table, which can then be used like any other table in Snowflake.
Check out this article to learn everything you need to know about Snowflake Dynamic tables
To view the details of dynamic tables on the dynamic tables page, click on its name. This action will open a new tab displaying information such as Status, TimewithinTargetlag, Targetlag, Current lag, Maximum lag, Database and Schema.

Section 7—Getting Started With Admin in Snowsight
Snowflake Admin Page allows you to administer your Snowflake account and perform various tasks such as viewing and monitoring your usage, managing your user access and security, and reviewing your billing and terms. You can access Snowflake Admin Page from the left navigation menu by clicking on the Admin section.
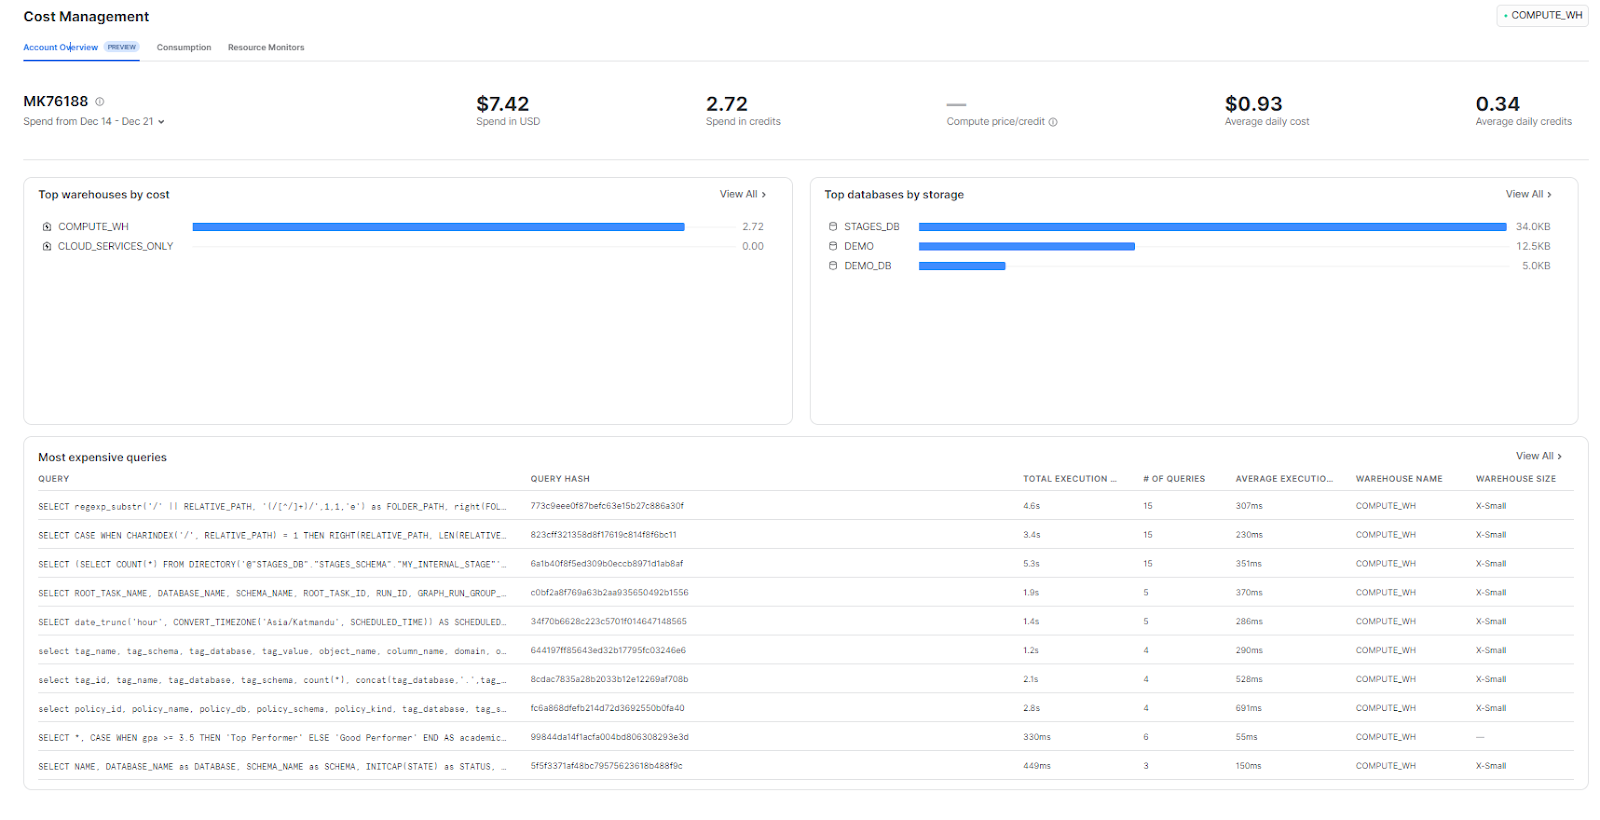
1) Viewing and Monitoring Usage, Warehouse Consumption and Resource Monitor
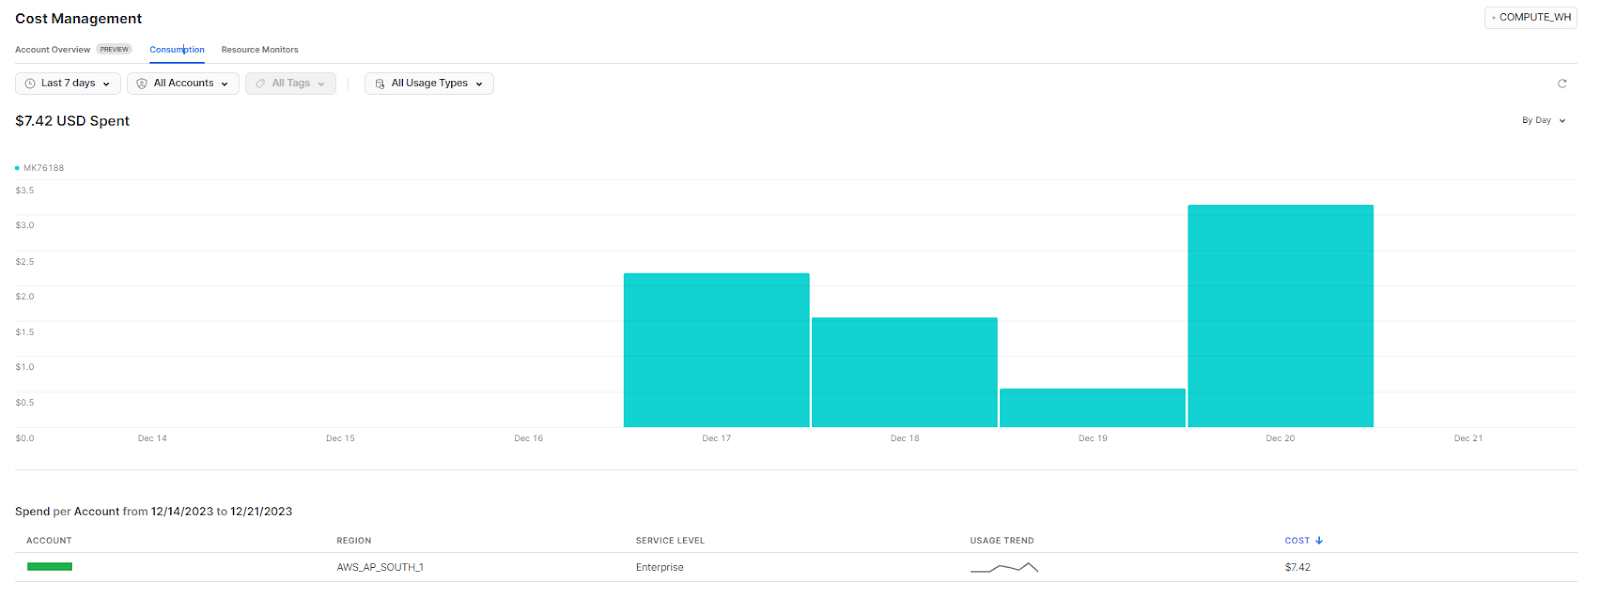
Account Overview tab provides detailed information about your Snowflake consumption across all relevant services, including compute, storage, and data transfer. You can filter the usage data by date range, account, and type of usage. Additionally, you have the option to aggregate the usage data by custom date.
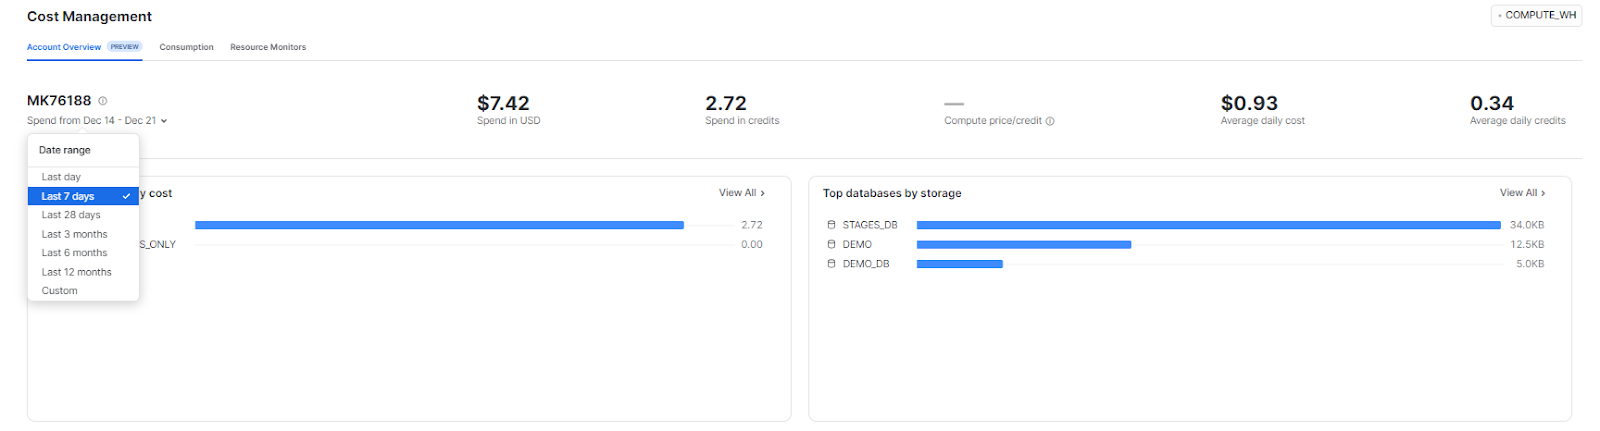
Consumption tab displays the amount of credit and money spent by the specific account, offering a detailed breakdown of consumption.
In the Resource Monitors tab, you can view, create, and manage your resource monitors.
To create one, click on +Resource Monitors.

This action will open a “New Resource Monitor” window where you can set the Resource Monitor’s name, frequency (credit quota), credit usage threshold, and actions to be taken when the threshold is exceeded.
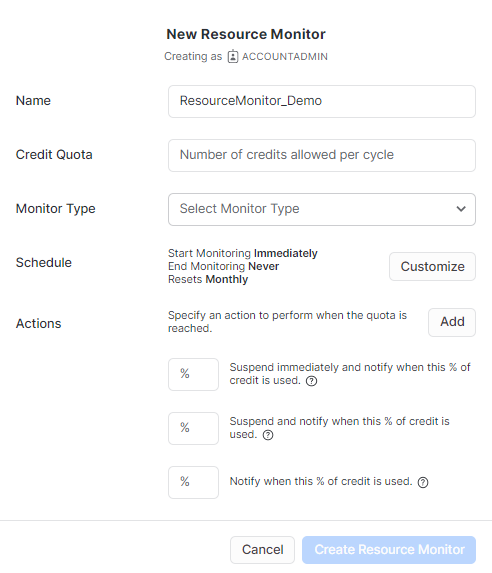
Configure the Credit Quota property within the “New Resource Monitor” popup window. This defines the credits allowed to be consumed within a specified time interval, triggering the Resource Monitor's actions.
Next, configure the “Monitor Type property. Snowflake Resource Monitors can monitor credit usage at the Account and Warehouse levels. If you select the Account level, the Resource Monitor will oversee credit usage for the entire account (i.e., all warehouses in the account). Choosing Warehouse level requires individual selection of warehouses to monitor.
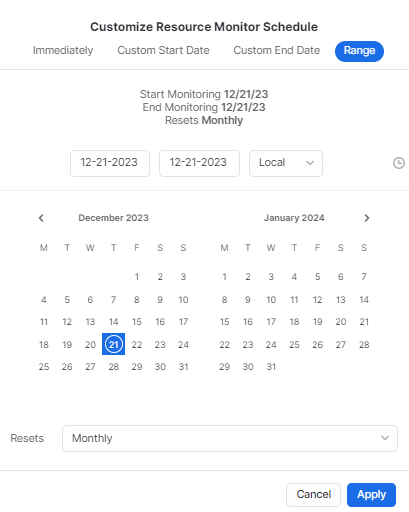
Proceed to configure the “Schedule” property. By default, the Resource Monitor starts monitoring immediately and resets credit usage to zero at the beginning of each calendar month. Customize the schedule according to your preferences.
Now, with the basic properties configured, define the “Actions” property for actions when the credit usage threshold is exceeded. The “Actions” property offers three default actions as shown in the screenshot below.
Once you've configured everything, click the "Create Resource Monitor" button to create it.
Check out this article to learn everything you need to know about Snowflake Resource Monitors.
2) Managing user access, Security and Billing
Users & Roles page allows you to view and manage your users and roles. Users are objects representing individuals or applications with access to log into Snowflake and perform various operations. Roles define privileges and access rights for users.
You can view details such as the name, email, login name, default role, default warehouse, and default namespace for each user, as well as the roles granted to them. Additionally, details including the name, description, and type of each role, along with the users and roles granted to it, are accessible.
Also, you can perform various actions on your users and roles, such as creating, editing, and revoking them.

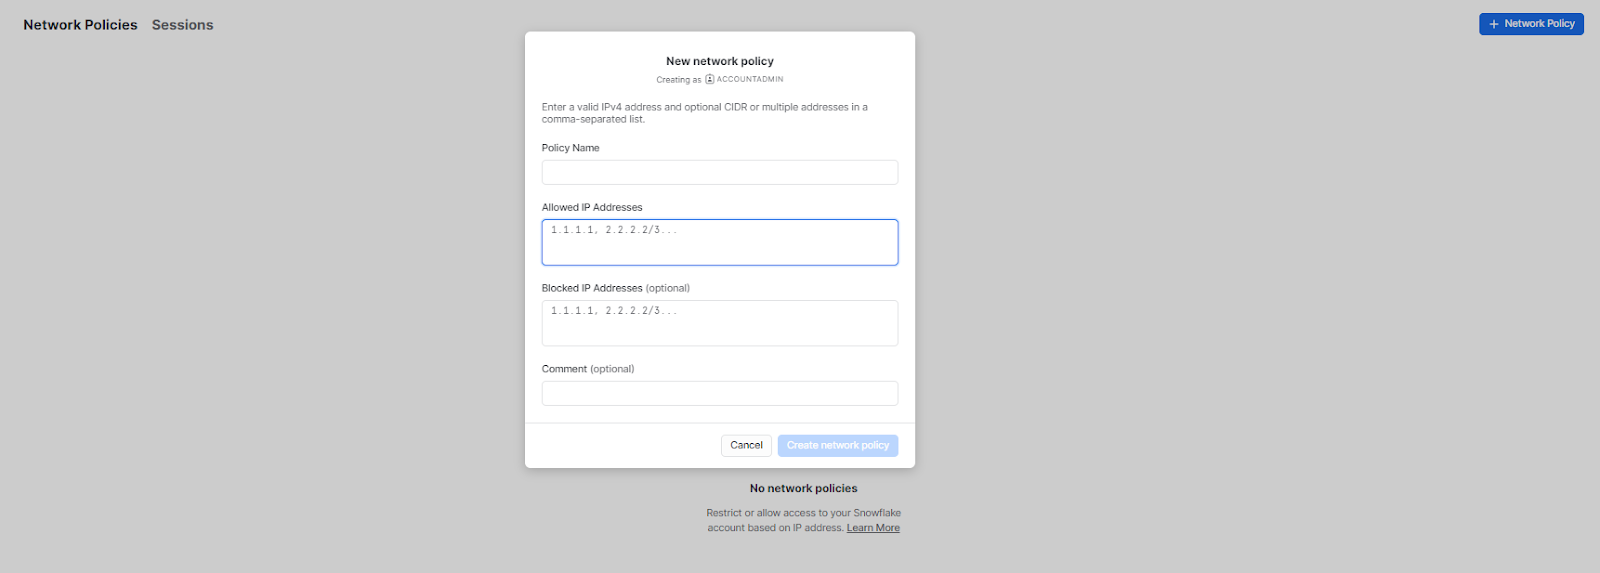
Security page enables you to create, view, and manage your network policies and session activity, controlling and monitoring access to your Snowflake account.
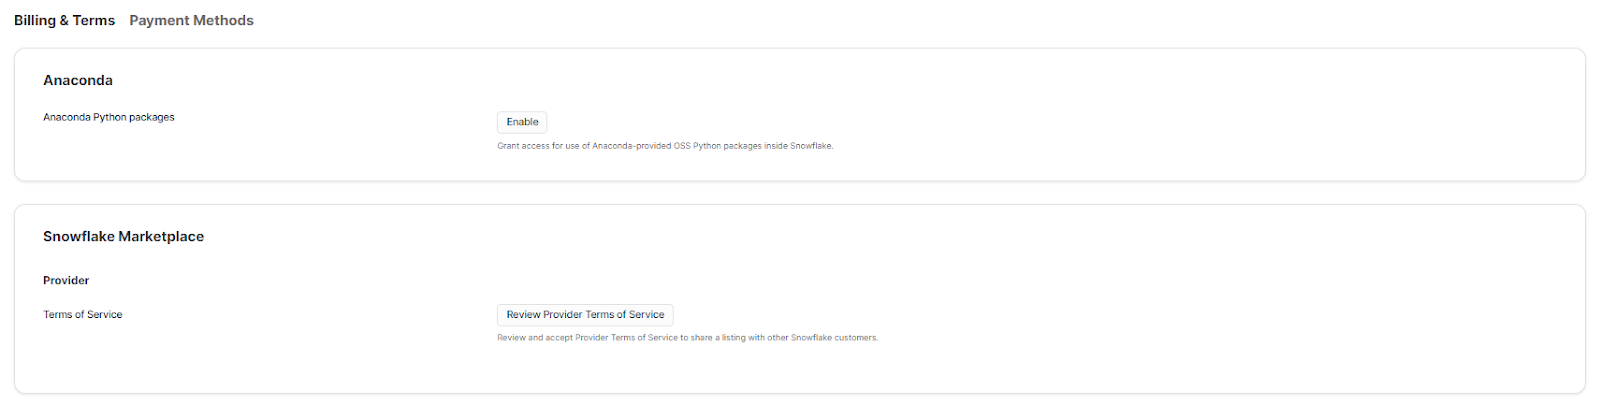
On the Billing & Terms page, you can view and manage your billing/payout methods used for paying or receiving credits. Additionally, you can review provider and consumer terms of service governing your use of Snowflake and the data shared or consumed.

Now that we have an overview of Snowsight’s key features and capabilities, let’s dive into some of the benefits and common use cases of using Snowsight.
What Are the Benefits of Snowsight?
Snowsight offers many benefits for data exploration, analysis, reporting, and collaboration. Here are some of the main benefits of Snowsight:
1) Simplifies User Work Across Data Roles by Providing a Unified View
Snowsight is your one-stop shop for easily accessing and managing everything in Snowflake. Explore all your data objects like databases, tables, and views on the intuitive data pages. Manage warehouses, users, roles and other admin tasks on the admin pages. Easily switch between accounts and roles with the account selector. Access the Snowflake Marketplace and Provider Studio to discover and publish apps. With this single, unified interface you can interact with all aspects of Snowflake to boost your productivity.
2) Rapid Prototyping and Rapid Analysis
Snowsight makes rapid data analysis a breeze. Without complicated setups—simply open your browser. Create worksheets to prototype SQL queries on live data fast. Visualize results through interactive dashboards. Insights from any data source are instantly assessable to fuel your analysis. No hardware or configurations needed—just log in and explore. Snowsight removes the chaos so you can focus on deriving value.
3) Business Analytics Reporting
Snowsight enables you to generate and share business analytics reports utilizing interactive dashboards and charts. You have the flexibility to create dashboards either from scratch or by utilizing existing worksheets. Within these dashboards, you can add tiles featuring various types of charts and tables. Also, there are different chart options available to visualize your data in diverse ways.
3) Democratizing Data Access
Snowsight makes data access effortless and secure for everyone. Create shares to grant query access to other accounts and users with just a few clicks using private sharing. The Provider Studio oversees what data you consume and share with others. Discover live third-party apps and datasets for purchase on the Snowflake Marketplace. With these intuitive features for data sharing, consumption and publishing, Snowsight allows you to seamlessly democratize data access across your organization.
4) Enables User to Perform Their Tasks Faster and More Efficiently
Snowsight helps you to perform your tasks faster and more efficiently by providing handy features like autocomplete, data profiling, visualizations, dashboards, collaboration tools, and deep integration with the Snowflake ecosystem. Autocomplete speeds up writing SQL. Automatic profiling gives insight into data. Visualizations present query results clearly. Dashboards create interactive reports. Collaboration enables sharing work with others. Together these capabilities help you perform tasks faster and more efficiently.
Limitations and Challenges of Snowflake Snowsight
Snowsight offers many benefits, but it also has some limitations and challenges that you should be aware of. Here are some of the common limitations and challenges with Snowsight:
- Snowsight provides limited customization options compared to other third-party tools. Out-of-the-box visualizations may not meet all needs.
- There are query result size limits since everything gets loaded into the browser. Complex queries on large datasets may hit these limitations.
- It currently lacks governance capabilities around data access, masking, security, etc.
- Snowsight is not optimized for mobile access and viewing dashboards on smaller screens.
- The data upload options are currently limited compared to other cloud data platforms.
- It has limited platform support - currently only web browser access is available. No mobile app or offline access.
- The community and ecosystem around Snowsight is smaller than other leading tools which offer more support resources.
- Role and permission management can get quite complex for large enterprises with diverse data access needs.
- Integrating well with on-prem data sources and non-Snowflake tools requires additional effort.
Conclusion
Snowsight stands out as a uniquely intuitive yet powerful solution. Its visual and user-friendly interface opens up sophisticated data exploration capabilities to everyone. It completely eliminates the need for a complex setup process. Whether you are building or running a simple query, creating a dashboard, or building a scalable reporting solution, Snowsight provides all the flexibility you need to make it happen all within your browser window.
In this article, we covered:
- What is Snowsight from Snowflake?
- Browser Requirements for Snowflake Snowsight
- What are the capabilities of Snowsight?
- Step-by-step guide to navigate and use the interface elements
- Step-by-step guide to use Snowflake Snowsight—Key Section Breakdown
- What are the benefits of Snowsight?
- Limitations of using Snowflake Snowsight
FAQs
What is Snowsight?
Snowsight is a web-based interface for querying, visualizing, and sharing Snowflake data.
How do I access Snowsight?
Access Snowsight through any modern browser at your_account.snowflakecomputing.com.
What are the key capabilities of Snowsight?
Key capabilities of Snowsight are building SQL queries, creating interactive dashboards, simplifying security, enabling collaboration and integrating with the Snowflake ecosystem.
Does Snowsight require extreme coding skills?
No, Snowsight features an intuitive visual interface allowing users of all skill levels to analyze and share data.
Can I share queries and dashboards with others in Snowsight?
Yes, Snowsight simplifies sharing worksheets, dashboards, and underlying data sources with other users or accounts.
Does Snowsight integrate with other Snowflake products?
Yes, Snowsight integrates natively with services like Snowflake Marketplace, Snowpark, Data Exchange and other core platform capabilities.
How do I enable Snowsight in Snowflake?
Snowsight is enabled by default for all Snowflake accounts and users. Any user with a role in the Snowflake account can easily access Snowsight through the internet or private connectivity, depending on your Snowflake account configuration.
What SQL capabilities does Snowsight provide?
You can build/run SQL queries faster leveraging auto-complete, syntax highlighting, error checking and other coding assistance features.
Can I manage warehouses in Snowsight?
Yes, you can easily pause, resume or resize virtual warehouses using Snowsight.
What are Snowsight dashboards?
Dashboards allow customizable displays of visual analytics derived from worksheet queries in a single view.
Can I develop applications within Snowsight?
Yes, you can create and publish Snowflake application packages in Snowsight.
Does Snowsight enable data sharing?
Yes. Share live data seamlessly with other accounts or users leveraging Snowsight’s data sharing capabilities.
What browsers support Snowsight access?
Snowsight works on the latest versions of Chrome, Safari, Edge and Firefox.
Is Snowsight available via mobile apps?
Currently, Snowsight is only accessible through browser-based web applications. Mobile optimization is still in progress.
Is the Snowsight interface customizable?
Yes. Snowsight features preset visualizations and dashboards with limited custom styling or personalization options.
What is the Provider Studio in Snowsight?
Provider Studio allows you to view and manage data that you share with others or that is shared with you in Snowsight. You can monitor consumption and access analytics on your shared data products.
Can I schedule and automate tasks in Snowsight?
Yes, you can leverage Snowsight's integration with Snowflake Tasks to create, monitor and manage scheduled automation of SQL statements, procedures and UDFs.
Does Snowsight integrate with Snowpark?
Currently direct integration with Snowpark for programming in Python, Scala and Java is limited, but queries and results executed in Snowpark are accessible.
Can I manage resource monitors in Snowsight?
Yes, the Admin section enables creating, configuring and managing resource monitors to limit cloud infrastructure consumption and costs.
How do I monitor real-time query activity?
Activity pages provide visibility into current and historical queries, data loads, tasks and table statuses to monitor operations.


