


SnowSQL is the command-line interface (CLI) client designed for connecting to the Snowflake platform. It allows users to execute SQL queries and carry out a wide range of DDL and DML operations. SnowSQL offers a robust interface, enabling direct control of Snowflake right from a terminal or command prompt.
In this article, we will explain what SnowSQL is, how to install it, connect to Snowflake, run queries, configure variables, and use its many features to understand it even better and utilize the capabilities of Snowflake through it.
What is SnowSQL?
SnowSQL, also known as the Snowflake CLI (command line interface), enables connecting to Snowflake from the command line to execute SQL statements and scripts, load and unload data, manage databases & warehouses, and perform a whole lot of other administrative tasks.
SnowSQL isn't just another SQL command-line client; it's packed with features that make it stand out. Here are some key features about SnowSQL:
- Available on Linux, Windows, and MacOS
- One-step installation process
- Provides an interactive shell for executing SQL commands
- Supports batch mode execution
- Includes output formatting options for result sets
- Comes with command history, auto-completion and syntax highlighting
- Allows configuration profiles to save connection details
- Supports variables for parameterizing SQL statements
- Integrated help (!help) commands for on-the-fly commands assistance
Tldr: SnowSQL allows for efficient access and control of Snowflake directly through a terminal, eliminating the need to use its UI (Snowsight).
Save up to 30% on your Snowflake spend in a few minutes!


Usage of SnowSQL
SnowSQL, as Snowflake's command-line client, offers a TONS of functionalities. Here are some of its primary usages:
1.Execute SQL statements and scripts
- Run queries directly in the CLI
- Execute scripts in batch mode
- Issue DDL commands like CREATE, ALTER, DROP
- Insert, update, delete data (DML)
- Call stored procedures and user-defined functions (UDFs)
2. Load and unload data
- Use COPY INTO to load data from files
- PUT command to upload data from local
- GET command to download result sets
- COPY INTO location to stage external files
3. Query monitoring and tuning
- See execution plans using EXPLAIN
- Monitor resource usage with query history
- Tune queries based on execution metrics
4. User and security management
- Switch roles to control privileges
- Grant and revoke user privileges
- Manage user accounts and passwords
5. Database administration
- Create, clone, undrop databases
- Execute DDL on schemas, tables
- Switch contexts with USE DB and USE SCHEMA
6. Warehouse management
- Create and resize virtual warehouses
- Suspend, resume, or drop warehouses
- Switch warehouses to control usage
7. Session management
- Establish connections and authenticate
- Use MFA, OAuth, and other auth methods
- Create multiple named connection profiles
- Disconnect or quit sessions
8. Command line productivity
- Command history and auto-complete
- Pipe results between commands
- Format output using options
- Export results to files
And a whole lot more!!
Section 1: How to download and install Snowsql
SnowSQL installers are available for download directly from Snowflake’s website. The installers bundle all required software dependencies and configures PATH making SnowSQL accessible system-wide.
Platforms Compatible with SnowSQL Installation
SnowSQL offers native installers for these platforms and versions:
- Linux - CentOS, Red Hat Enterprise Linux (RHEL) 7, 8, Ubuntu 16.04, 18.04, 20.04 or later
- MacOS - 10.14 or higher
- Windows - Windows 8, Windows Server 2012 or higher
To find the latest supported versions, check Snowflake's documentation.
1) Download SnowSQL on Your System
Go to Snowflake's website and navigate to the SnowSQL download page. Select the installer package for your platform.
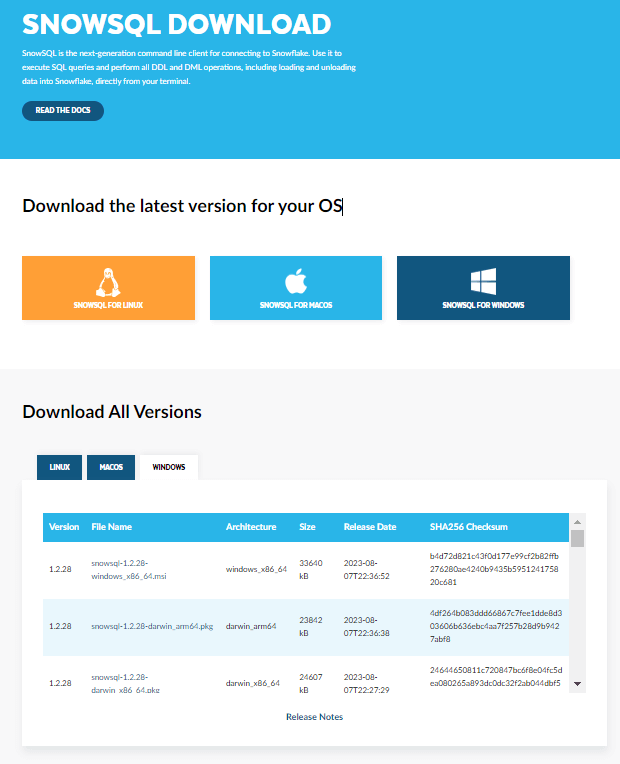
The packages use these conventions:
- Linux: snowsql-<version>-linux_x86_64.bash
- MacOS: snowsql-<version>-darwin_x86_64.pkg
- Windows: snowsql-<version>-windows_x86_64.msi
Note: <version> represents the SnowSQL version number.
For the purpose of this article, we will walk through installing SnowSQL on Windows machine, but the process is very similar across operating systems.
2) Step-by-Step Guide to Installing SnowSQL
SnowSQL can be easily installed on Windows, MacOS, and Linux systems by downloading the appropriate installer package from Snowflake's website.
This section will provide a step-by-step walkthrough of installing SnowSQL on a Windows machine using the MSI installer.
Here is the step by step process to install SnoSQL:
Step 1: Download the SnowSQL installer package for Windows (snowsql-<version>-windows_x86_64.msi) from the Snowflake website.
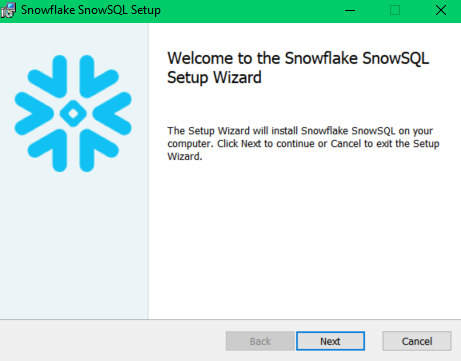
Step 2: Double click the downloaded MSI file to launch the SnowSQL setup wizard.
Step 3: On the Welcome screen, click "Next" to proceed with the installation.
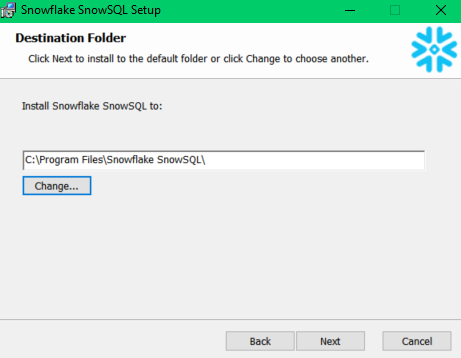
Step 4: Again, Select “Next” to perform a default install. Now, you need to specify the destination folder. The default is C:\Program Files\Snowflake SnowSQL.
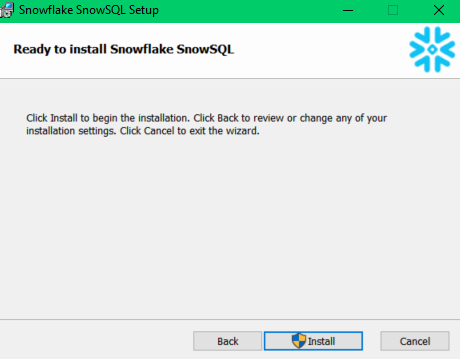
Step 5: Review the summary on the Ready to Install screen and click "Install" to begin the installation.
Step 6: Wait for the installation progress to reach 100%. Then click "Finish" when prompted.
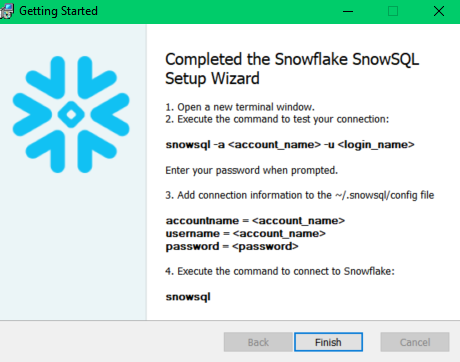
Step 7: Open a new command prompt or terminal window and run the following command to verify. You should see the installed SnowSQL version number printed.
snowsql -v 
Check out this in-depth documentation guide if you want to install SnowSQL on Linux and macOS.
Note: When installing SnowSQL, it's highly recommended to use the official installer. This approach ensures that all necessary dependencies are seamlessly managed. Moreover, the installer takes care of configuring the PATH environment variable, which makes SnowSQL accessible globally across all command prompts or terminal sessions.
Section 2: How to connect to Snowflake using SnowSQL
After installing SnowSQL, you can establish connections to Snowflake by providing the necessary credentials and parameters. Proper configuration of SnowSQL is essential for ensuring a secure and efficient connection.
There are several approaches:
1) Passing Credentials Directly
snowsql -a <account> -u <user> -p <password>To retrieve your Snowflake account details, simply run the following command. This will provide your account identifier. Once you have it, enter the identifier into the 'account' field, followed by your username and password. After entering these details, press 'Enter', and you should connect directly to Snowflake.
SHOW ORGANIZATION ACCOUNTS;
Now, fill in the credentials just like this
snowsql -a <account> -u PRAMITOCT4
Bam!! You are successfully connected to Snowflake. This connects interactively prompting for any missing credentials.
Along with the above-mentioned parameters, you can also pass the following ones
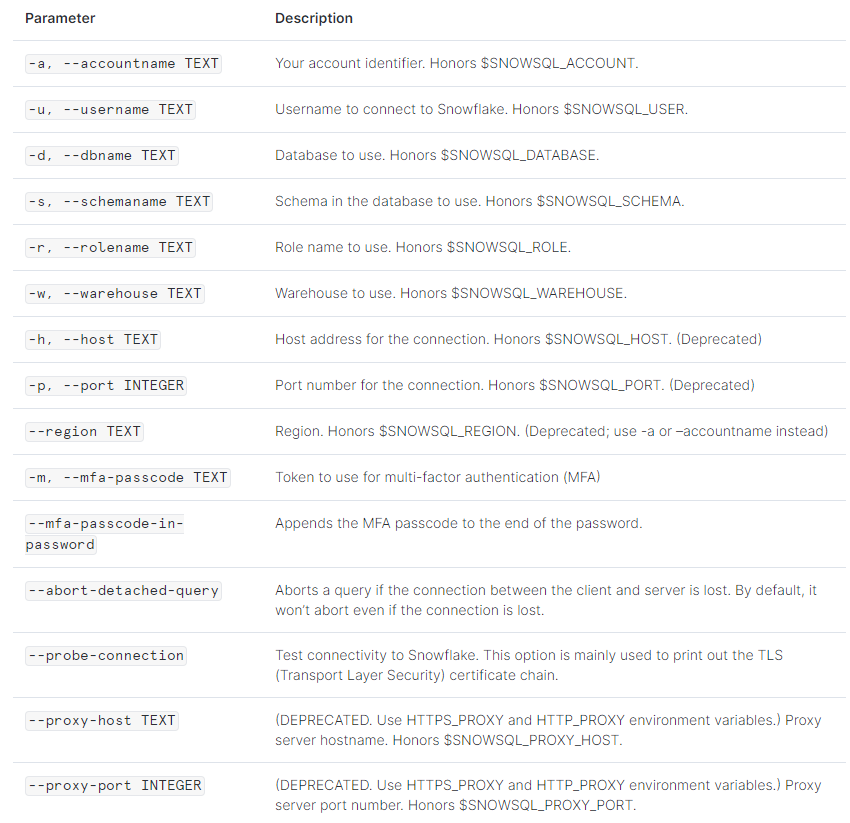
Check out this Snowflake documentation for a more comprehensive list of parameters and detailed explanations.
2) Specifying a Config Profile
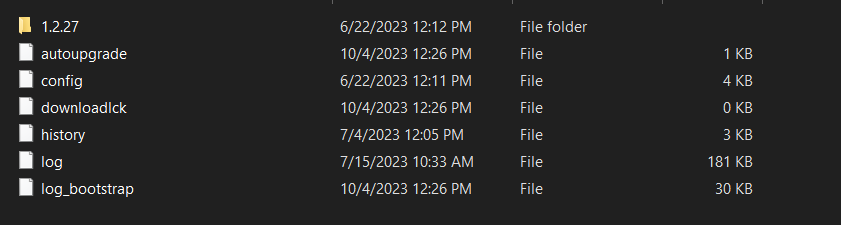
Another method to connect to Snowflake using SnowSQL involves creating a [connection.example] profile within the Snowflake configuration file. To set this up, navigate to the directory where SnowSQL was installed, typically located at %USERPROFILE%\.snowsql\. Once there, open the configuration file using your preferred code editor.
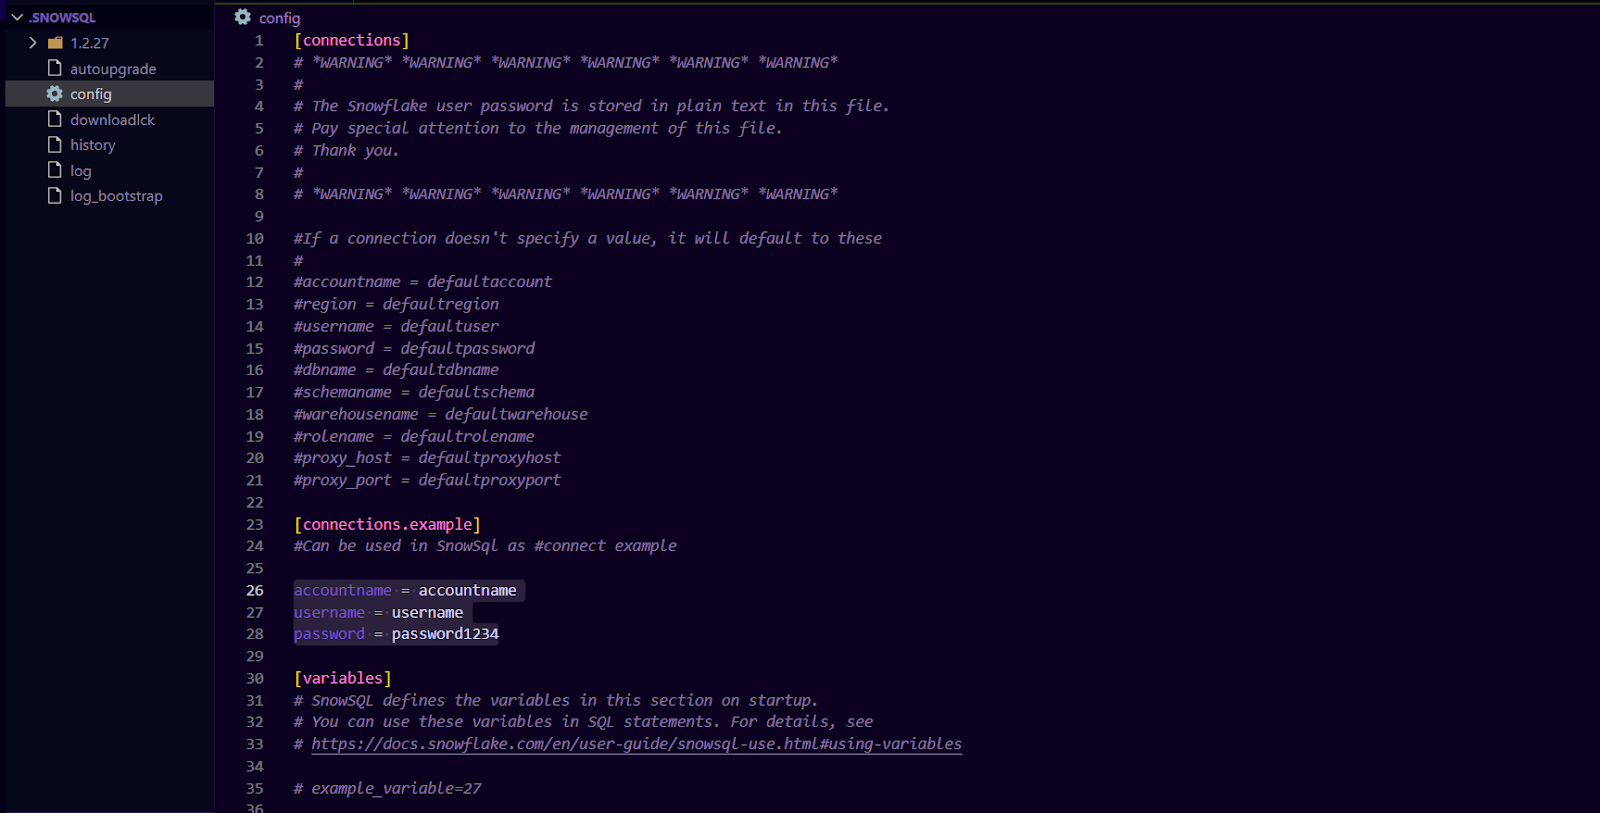
Update the configuration with your specific details: for “accountname”, enter the full account identifier, for “username”, input your user ID), and provide the corresponding password.
[connections.example]
#Can be used in SnowSql as #connect example

accountname = accountname
username = username
password = password1234
To connect to Snowflake, execute the following command in your command prompt or PowerShell, specifying the connection name.
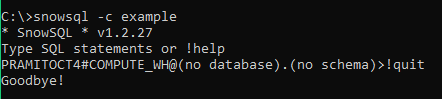
snowsql -c exampleThis uses the credentials in the profile.
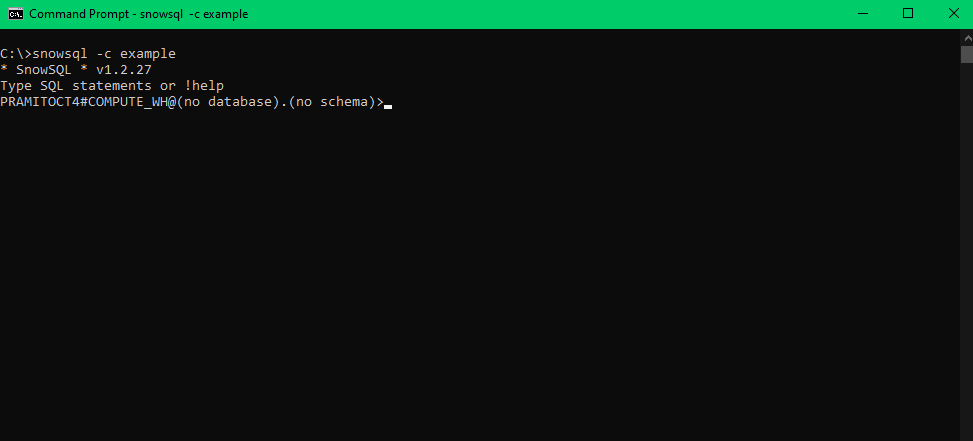
Bam!! You have successfully connected to Snowflake.
You can define multiple named connection profiles:
[connections.dev]
  accountname = <account>
  username = <user>
  password = <password>

[connections.prod]
  accountname = <account>
  username = <user>
  password = <password>
Connect to a specific profile:
snowsql -c devSnowSQL supports many additional connection parameters including OAuth, MFA, SSO, and private key authentication. Refer to the documentation for details.
Section 3: How to run SQL Queries using SnowSQL
Running SQL queries in SnowSQL is straightforward. At its core, SnowSQL provides the added advantage of being tailored for Snowflake's unique architecture. Let's delve deeper into this process with a hands-on example using the snowflake_sample_data database.
1) Selecting the Database and Schema in SnowSQL
Before running any queries, it's essential to specify the database and schema you want to work with. Snowflake provides a sample database named snowflake_sample_data, which is an excellent resource for practice and exploration.
To select this database in SnowSQL, use the USE DATABASE command:
USE DATABASE snowflake_sample_data;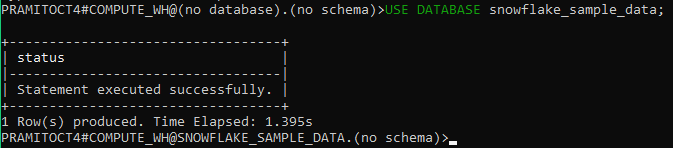
Once the database is selected, you'll need to choose a schema. For this example, let's work with the TPCH_SF1 schema, which contains sample data from the TPC-H benchmark:
USE SCHEMA TPCH_SF1;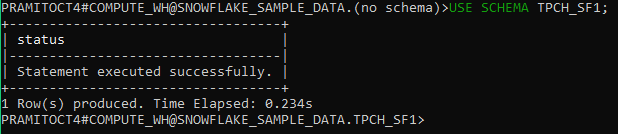
2) Exploring the Tables inside SnowSQL
Before diving into complex queries, it's a good idea to familiarize yourself with the available tables and their structures. The SHOW TABLES command provides a list of all tables within the selected schema:
SHOW TABLES;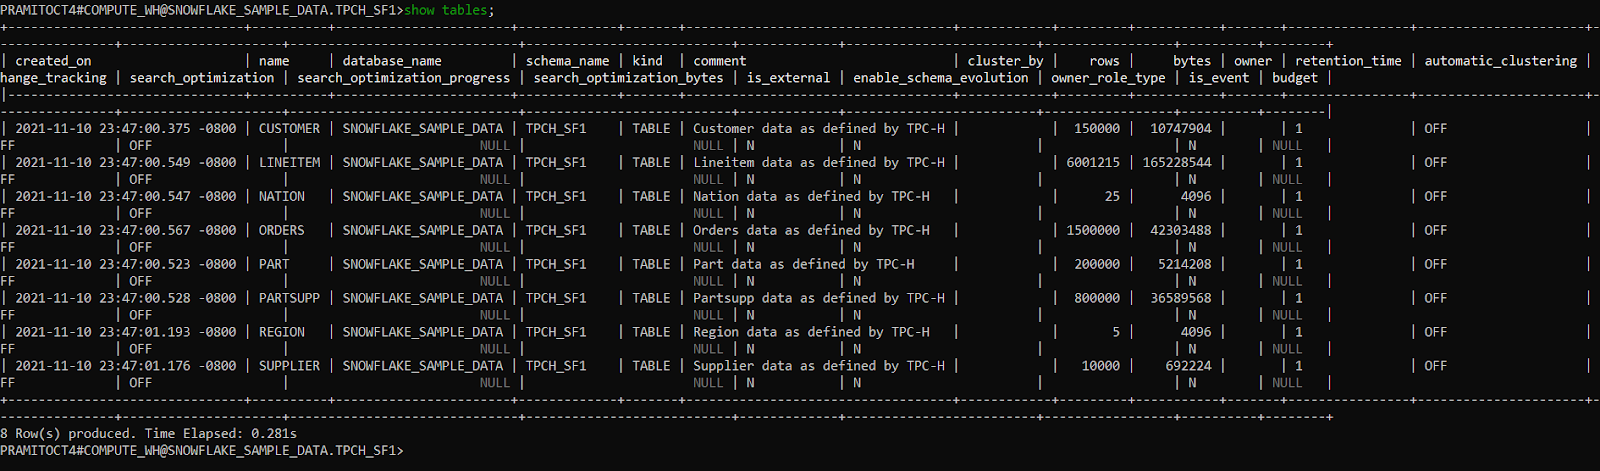
Among the tables, you might find ORDERS, CUSTOMER, LINEITEM, and more. For our example, we'll focus on the ORDERS and LINEITEM tables.
3) Basic Data Retrieval in SnowSQL
To get a sense of the data within the ORDERS table, you can fetch the first few records using the SELECT statement combined with the LIMIT clause:
SELECT * FROM ORDERS LIMIT 5;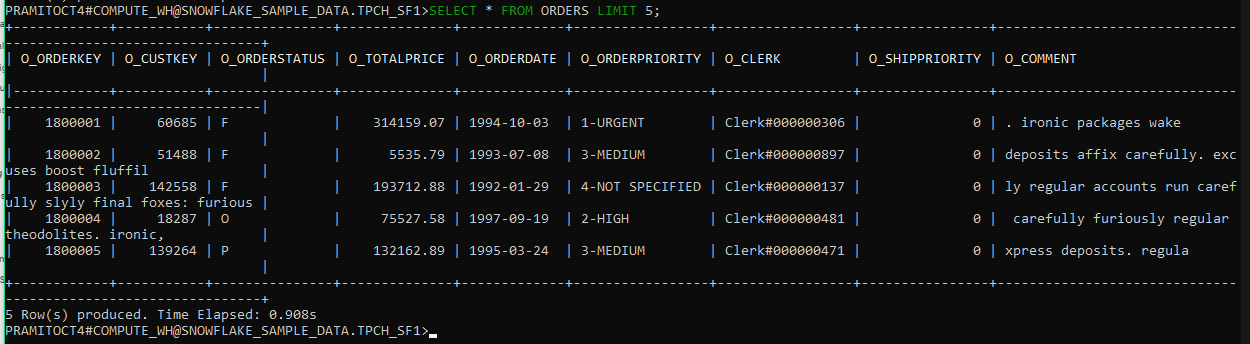
This command will simply retrieves the first five rows from the ORDERS table, giving you a snapshot of its columns and the type of data it contains.
4) Performing Calculations In SnowSQL
Now, let's perform a more complex query involving calculations. Suppose we want to determine the total revenue generated for each order in the dataset.
We can join the ORDERS and LINEITEM tables, then sum the product of L_QUANTITY and L_EXTENDEDPRICE for each O_ORDERKEY to get the total revenue per order:
SELECT
    O.O_ORDERKEY,
    SUM(L.L_QUANTITY * L.L_EXTENDEDPRICE) AS TOTAL_REVENUE
FROM
    TPCH_SF1.ORDERS O
JOIN
    TPCH_SF1.LINEITEM L ON O.O_ORDERKEY = L.L_ORDERKEY
GROUP BY
    O.O_ORDERKEY
ORDER BY
    TOTAL_REVENUE DESC
LIMIT 10;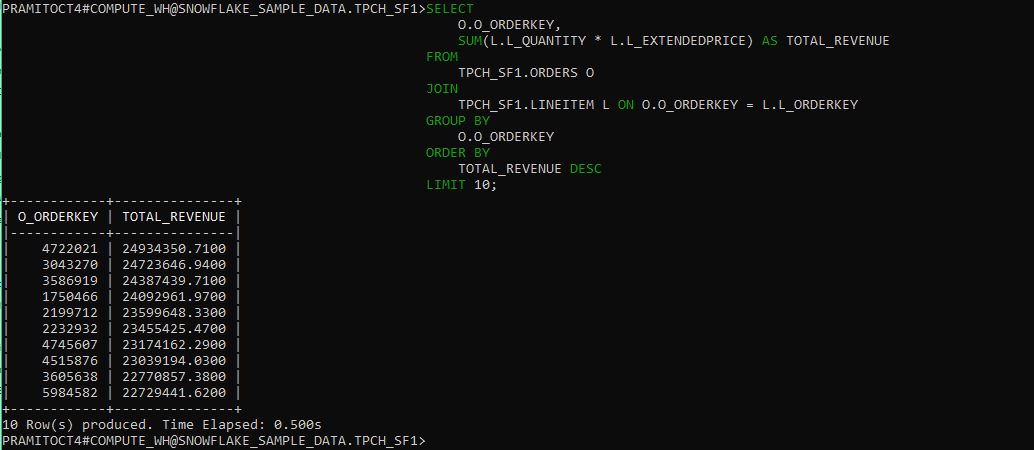
As you can see, the query joins the ORDERS and LINEITEM tables from TPCH_SF1, calculates the total revenue for each order using the L_QUANTITY and L_EXTENDEDPRICE columns, and labels it as TOTAL_REVENUE. It then displays the top 10 orders, sorted by revenue in descending order, right inside SnowSQL.
5) Live Demo—Seeing Changes in Real-Time on Snowflake UI (Snowsight)
To truly appreciate the power and efficiency of SnowSQL, let's walk through a live demo.
Setting up Both Snowsql and Snowsight
Make sure you're logged into both SnowSQL and the Snowflake web UI (Snowsight).
Executing a Query in SnowSQL
In SnowSQL, let's create a new table:
CREATE TABLE demo_table (id INT, name STRING);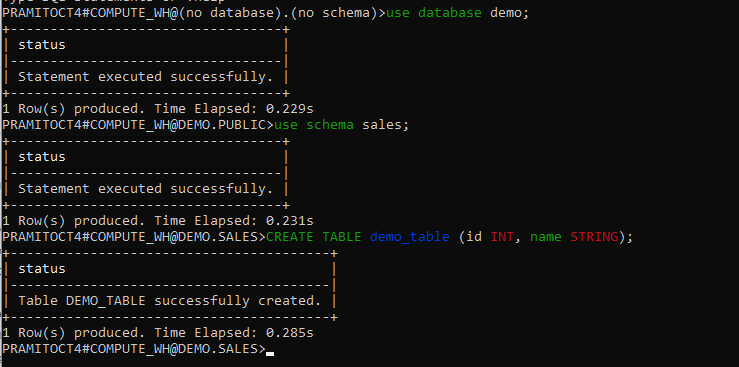
Viewing Changes in Snowflake UI (Snowsight)
Switch to the Snowflake web UI (Snowsight) and navigate to the 'Tables' section. You should immediately see the demo_table listed.

Inserting Data via SnowSQL
Head back to SnowSQL and insert some data:
INSERT INTO demo_table VALUES (1, 'Chaos Genius');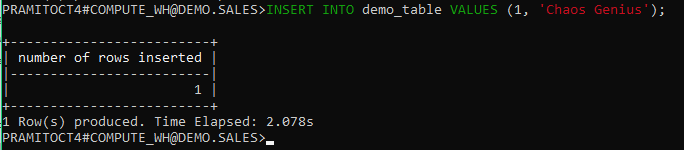
Verifying in Snowflake UI (Snowsight)
Head over to the Snowflake web UI, query the demo_table. You should see the newly inserted record.
select * from demo_table;

As you can see, the moment you make a change in SnowSQL, it instantly pops up in the Snowflake platform. It's like they're perfectly in sync, making sure you see the results of your work right away.
Section 4: How to configuring and use Variables in SnowSQL
SnowSQL allows you to define variables that can be referenced in SQL queries, enabling parameterization and reuse of values. Here are few steps involved in setting up and using variables:
Defining the variables in SnowSQL
Variables can be defined in the SnowSQL config file, on the command line when launching SnowSQL, or within a SnowSQL session using the !define command.
First, connect to Snowflake and create a new database called 'demo', with a schema called 'sales':
CREATE DATABASE demo;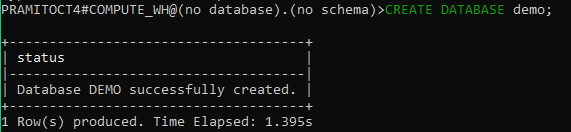
USE DATABASE demo;
CREATE SCHEMA sales;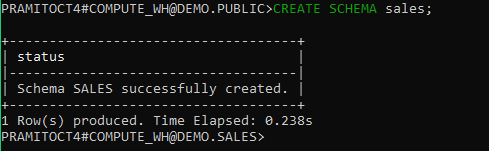
Next, create a table called 'orders' in the 'sales' schema:
CREATE TABLE sales.orders (
id INTEGER,
product VARCHAR,
quantity NUMBER
);
Insert a few rows of sample data into this table:
INSERT INTO sales.orders VALUES
(1, 'Book', 10),
(2, 'Electronics', 5),
(3, 'Toys', 7);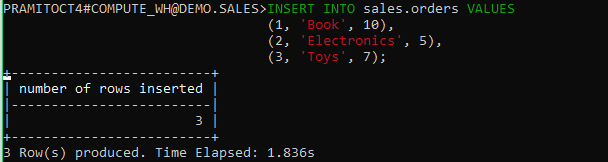
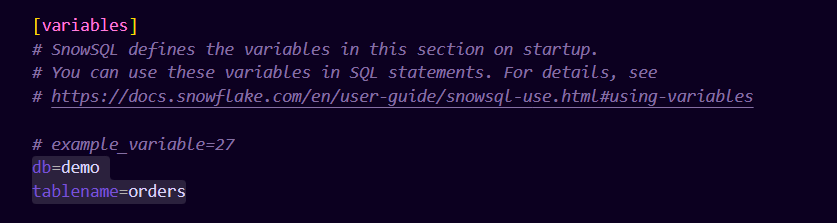
Now we have a demo database with some sample data. Define two variables to reference later - one for the database name, and one for the table name. To do so, head back to your SnowSQL config file and define the variables there.
Now, enable substitution by setting the variable_substitution option to true:
!set variable_substitution=true
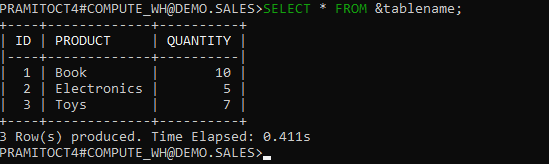
Now we can reference these variables in queries. For example:
SELECT * FROM &tablename;This will output:
Finally, let's view all defined variables:
!variables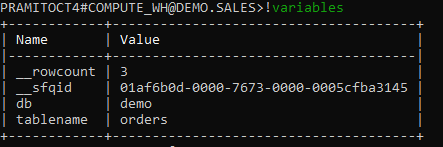
Section 5: How to disconnect from SnowSQL
When you're working within SnowSQL and wish to end the current Snowflake session, you have a couple of command options. You can either type !quit or !exit to safely disconnect.
If you need to re-establish a connection to Snowflake, simply execute the snowsql command again. However, if you're looking to switch between different connections without exiting SnowSQL, you can utilize the following command:
!connect <profile>In the above command, <profile> represents the name of a specific connection profile that you've previously set up. These profiles are stored and configured in the ~/.snowsql/config file, allowing for quick and convenient connection switches without re-entering all the credentials.
List of Available SnowSQL Commands
During a Snowflake session, specific actions can be executed using commands. In SnowSQL, every command begins with an exclamation (!) and is immediately followed by the command's name.
For example, you can use !help to list out all the commands.
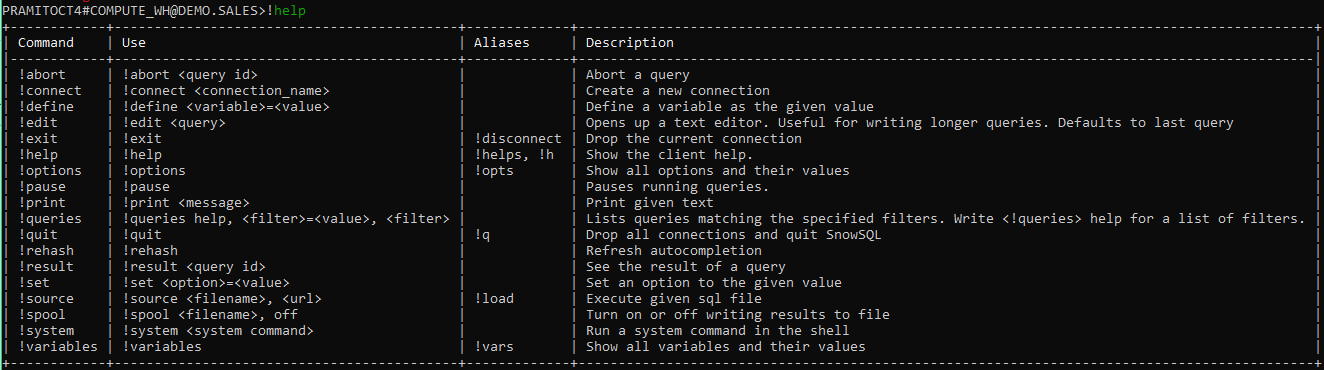
Here's a list of each command available in Snowflake:
| Command | Description |
|---|---|
!abort |
Aborts a specific query using its query ID. |
!connect |
Establishes a new connection using a predefined connection name. |
!define |
Assigns a value to a specified variable. |
!edit |
Opens a text editor, primarily for crafting longer queries. If no query is specified, it defaults to the last one. |
!exit (Aliases: !disconnect) |
Terminates the current connection. |
!help (Aliases: !helps, !h) |
Displays the client's help section. |
!options (Aliases: !opts) |
Lists all available options and their current values. |
!pause |
Halts any running queries. |
!print |
Outputs the provided text. |
!queries |
Shows queries that match given filters. Use !queries help for a list of available filters. |
!quit (Alias: !q) |
Ends all active connections and exits SnowSQL. |
!rehash |
Updates the autocompletion feature. |
!result |
Displays the result of a specific query using its query ID. |
!set |
Modifies an option to the provided value. |
!source (Alias: !load) |
Executes SQL commands from a specified file or URL. |
!spool |
Enables or disables the feature to write query results to a file. |
!system |
Executes a system command within the shell. |
!variables (Alias: !vars) |
Lists all variables and their current values. |
Want to take Chaos Genius for a spin?
It takes less than 5 minutes.

Conclusion
And that wraps up our tour of SnowSQL, the mighty command line interface for Snowflake! SnowSQL really ties everything together into one neat package for working with Snowflake data. So whether you're a data engineer or an analyst exploring data, SnowSQL brings the convenience. In this article, we covered:
- What is SnowSQL?
- How SnowSQL is utilized?
- Step-by-step installation guide for SnowSQL
- Connecting SnowSQL to your Snowflake account
- Executing SQL queries in SnowSQL and observing changes in Snowsight
- Setting up and leveraging variables in SnowSQL
- Comprehensive list of all available SnowSQL commands
Alright, with this guide in your toolkit, you're all set to rock SnowSQL like a pro! So, pop open that terminal and dive right into the Snowflake universe. The data adventure is calling you!!
FAQs
Does SnowSQL require any dependencies to insatall?
No, the SnowSQL installers bundle all required dependencies. There are no prerequisites to install SnowSQL.
How do I upgrade SnowSQL when new versions are released?
Minor and patch releases are handled automatically by SnowSQL's auto-upgrade feature. For major version upgrades, download and install the new version from Snowflake's website.
Can I use SnowSQL to load and unload data in Snowflake?
Yes, SnowSQL supports the full range of DDL, DML, and data manipulations including loading data files and unloading result sets.
Does SnowSQL allow connecting to different Snowflake accounts?
Yes, you can configure connections for multiple accounts and switch between them using named profiles. SnowSQL also supports connecting to multiple accounts concurrently.
Is SnowSQL optimized for scripting and automation?
Yes, SnowSQL enables command line usage for automated workflows. Its batch mode, output formatting, and config profiles excel at scripting.


