


If you've been working with Snowflake, you know tables are crucial. We've previously covered articles on creating Snowflake tables, how to drop them, and adding columns to tables. Today, we'll focus on a more precise operation—dropping columns using Snowflake's DROP COLUMN command.
In this article, we will cover everything you need to know about how to drop columns in Snowflake—using the Snowflake DROP COLUMN command, covering syntax, recovery capabilities, impacts—and best practices for it.
What are Snowflake Tables?
Snowflake tables are schema-level objects that store and organize data in rows and columns, supporting both structured and semi-structured data. They allow users to perform various operations using simple SQL commands. Snowflake offers different types of tables, such as permanent, transient, and temporary, each designed for specific data durability and session scope requirements.
To create a table, you can use the CREATE TABLE statement or the Snowflake Web UI (Snowsight).
CREATE TABLE <table_name> (
  <col_name> <col_type> [options],
  -- Additional column definitions
  [constraints]
);You can see that creating a Snowflake table is simple and straightforward, but table structures often need to evolve due to changing data requirements. Frequent schema updates are necessary, and Snowflake provides the ALTER TABLE statement to modify table schemas. Using this statement, you can modify properties, columns, or constraints.
In a previous piece, we covered how to add columns in Snowflake using the ADD COLUMN statement. Here, we'll dive into how to drop a column in Snowflake without disrupting existing table relationships.
How to Drop a Column in Snowflake—Using Snowflake DROP COLUMN?
Now that we've refreshed our understanding of Snowflake tables, let's turn our attention to the core of this article—dropping a column from tables in Snowflake.
The basic syntax for dropping a column in Snowflake is as follows:
ALTER TABLE <table_name> DROP COLUMN <column_name>;This command will remove the specified column from the table structure, along with all the data it contains.
The full syntax for dropping a column in Snowflake is:
ALTER TABLE <table_name> DROP COLUMN <column_name> [ CASCADE | RESTRICT ];Let's break down each component:
ALTER TABLE <table_name>: This clause specifies which table you want to modify. Replace <table_name> with the actual name of your table.
DROP COLUMN <column_name>: This is the core command that tells Snowflake to remove the specified column. Replace <column_name> with the name of the column you want to drop.
[ CASCADE | RESTRICT ]: These are optional parameters that control how Snowflake handles dependencies:
- CASCADE: Use this with caution. This option automatically drops any objects that depend on the column being dropped.
- RESTRICT: This is the default behavior. It prevents you from dropping the column if any objects depend on it. If dependencies exist, Snowflake will return an error, prompting you to handle those dependencies manually before proceeding.
How Do You Drop Multiple Columns in Snowflake?
As your data model evolves, you might find yourself needing to remove several columns at once. Snowflake makes this task easy.
The syntax for dropping multiple columns is a simple extension of the single-column drop:
ALTER TABLE <table_name> DROP COLUMN <column1>, <column2>, <column3>, ...;Let's break down each component:
ALTER TABLE <table_name>: Just like before, this specifies which table you're modifying.
DROP COLUMN <column1>, <column2>, <column3>, ...: This is where the magic happens. You list out all the columns you want to drop, separated by commas. There's no hard limit on how many columns you can drop in a single statement.
You can also apply the CASCADE or RESTRICT options here, and they will affect all the columns being dropped:
ALTER TABLE <table_name> DROP COLUMN <column1>, <column2>, <column3> CASCADE;For completeness, here's the full syntax for dropping multiple columns:
ALTER TABLE <table_name>
DROP COLUMN <column1> [ CASCADE | RESTRICT ],
           <column2> [ CASCADE | RESTRICT ],
           <column3> [ CASCADE | RESTRICT ],
...;Technically, you can apply CASCADE or RESTRICT individually to each column. However, this is rarely used in practice because it can make the statement hard to read and potentially lead to confusion.
Conditional Column Deletion—with Snowflake DROP COLUMN IF EXISTS
The Snowflake DROP COLUMN IF EXISTS command is useful to avoid errors when the column may not exist. It makes sure the command is executed only if the specified column is present:
ALTER TABLE <table_name> DROP COLUMN IF EXISTS <column_name>;You can also use this with multiple columns:
ALTER TABLE <table_name> DROP COLUMN IF EXISTS <column1>, <column2>, <column3>;In this case, each column is checked individually. Any that exists will be dropped, while those that don't exist are simply ignored.
Step-by-Step Guide: Using Snowflake DROP COLUMN Command
Now that we've covered the various forms of Snowflake DROP COLUMN command, let's walk through a step-by-step guide on how to use it effectively. We'll create a table, populate it with some dummy data, and then go through the process of dropping columns to demonstrate the command's behavior and impact.
Step 1—Create a Table
First, let's create a simple table name students_info:
CREATE TABLE students_info (id INT, name STRING, address STRING, age INT);
Step 2—Insert Data into the Table
Now that we have our table structure, let's populate it with some sample data:
INSERT INTO students_info (id, name, address, age)
VALUES (1, 'Elon Musk', 'San Pablo Rd Brooklyn, NY', 60),
       (2, 'Jeff Bezos', 'University Court Griffin, GA', 60);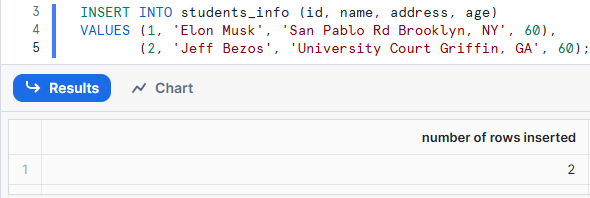
Step 3—Describe the Table
Before making changes, it's good practice to review the table structure:
DESCRIBE TABLE students_info;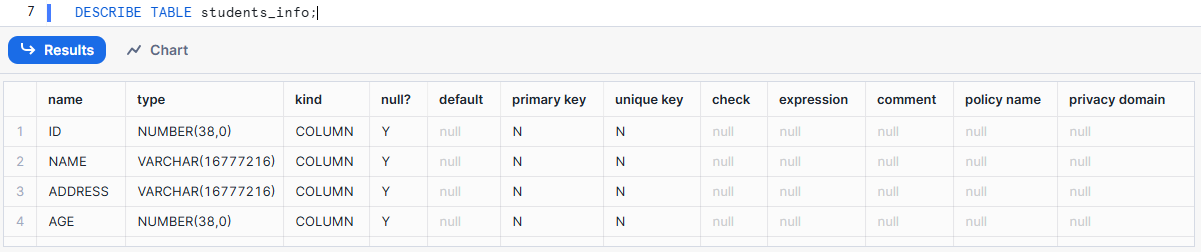
Step 4—Verify the Table and Data
Let's check the data we've inserted:
SELECT * FROM students_info;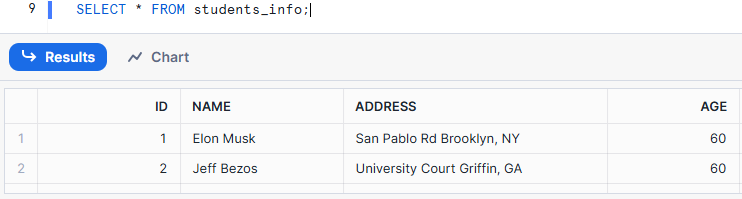
Step 5—Drop Single Column
Now, let's start with dropping a single column.
ALTER TABLE students_info DROP COLUMN age;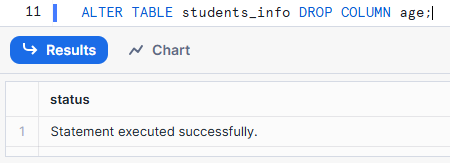
Step 6—Drop Multiple Column
Next, let's drop multiple columns.
ALTER TABLE students_info DROP COLUMN name, address;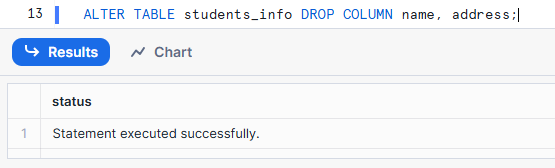
Step 7—Verify the Column is Dropped
It's always a good idea to confirm that our changes took effect:
DESCRIBE TABLE students_info;
Step 8—Verify Data in the Table
While we know the columns are gone, let's double-check that our core data is intact:
SELECT * FROM students_info;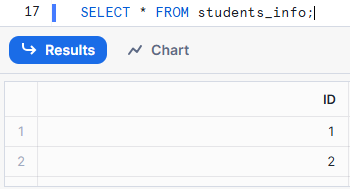
As you can see, in this walkthrough, we successfully dropped individual and multiple columns from our students_info table programmatically vis SQL commands.
Step-by-Step Guide to Drop Column in Snowflake—using Snowsight
While SQL commands offer precision and scriptability, only some people are comfortable writing queries. Snowflake provides Snowsight, a UI web interface that allows you to manage your DB, Schema, and Objects visually.
Let's walk through the process of dropping a column using Snowsight.
Step 1—Login to Snowflake
First, navigate to the Snowflake website (or your organization's Snowflake URL) and log in with your credentials.
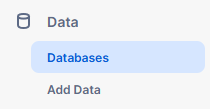
Step 2—Select the "Data" Option
Once you're in the Snowsight dashboard, look for the main menu on the left side. Click on the "Data" option. This is your gateway to visually exploring and managing your Snowflake data assets.
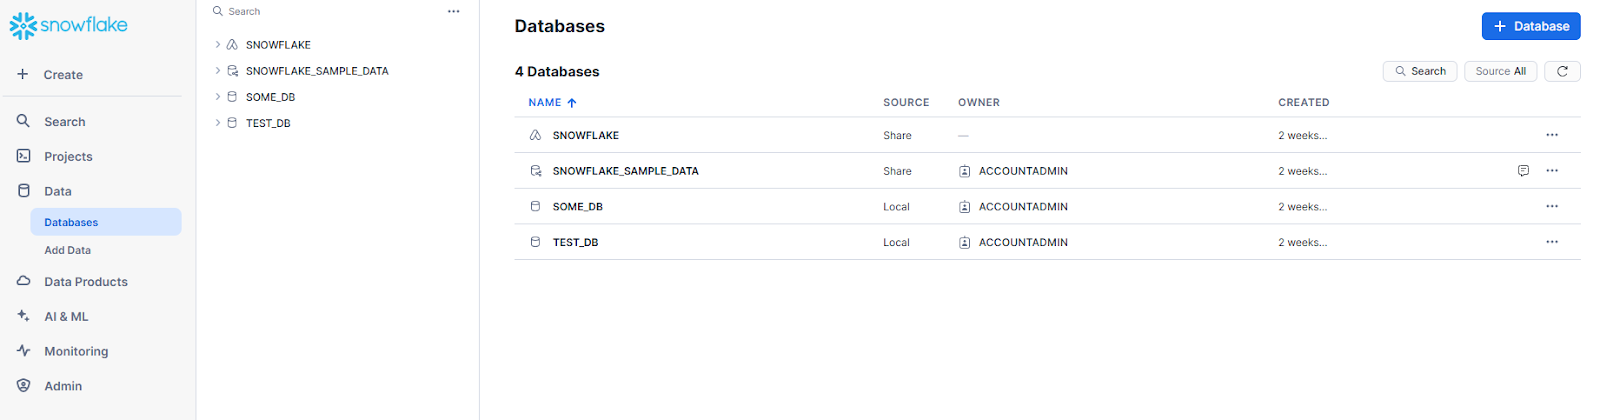
Step 3—Choose the "Database" Option
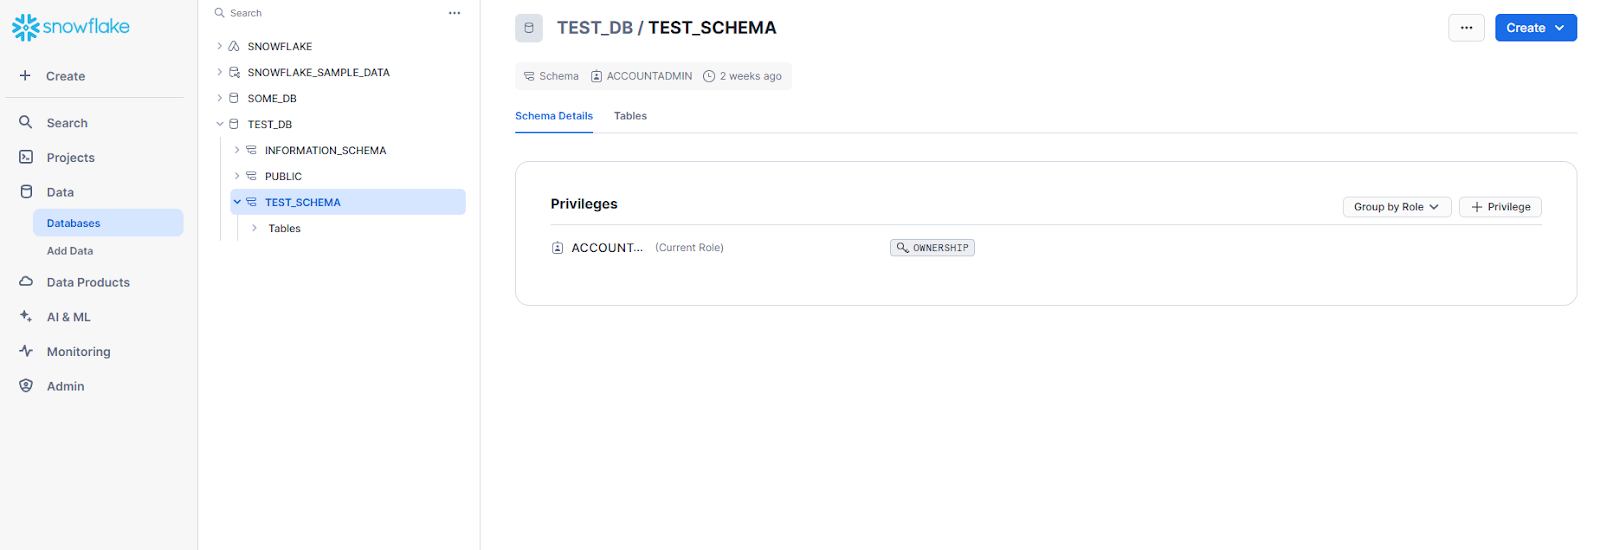
Within the "Data" section, you'll see several sub-options. Click on "Databases." This will display a list of all the databases you have access to in your Snowflake account.
Step 4—Select Your Database and Schema
Find and click on the specific database that contains the table you want to modify. After selecting the database, pick the schema where your target table resides.
Step 5—Select "Tables" option
Once you're in the right schema, you'll see various object types like Tables, Views, and Functions. Click on "Tables" to see a list of all tables in this schema.
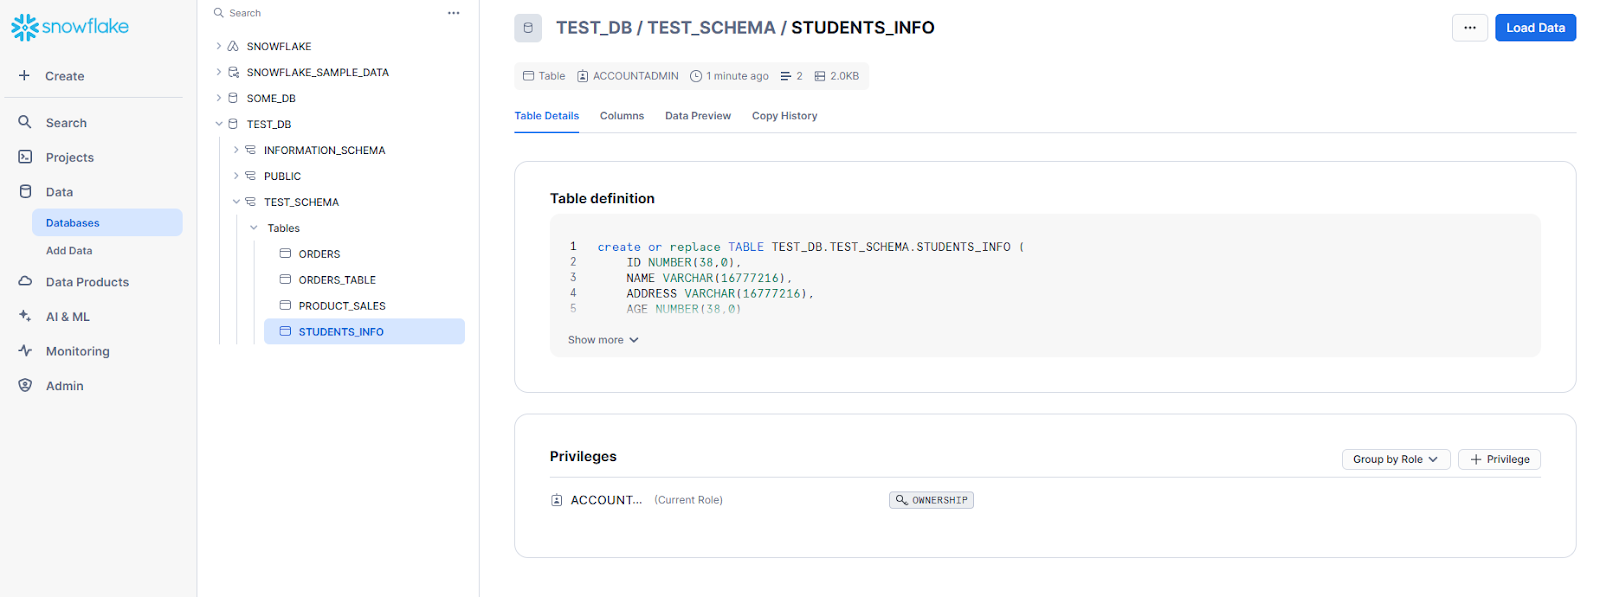
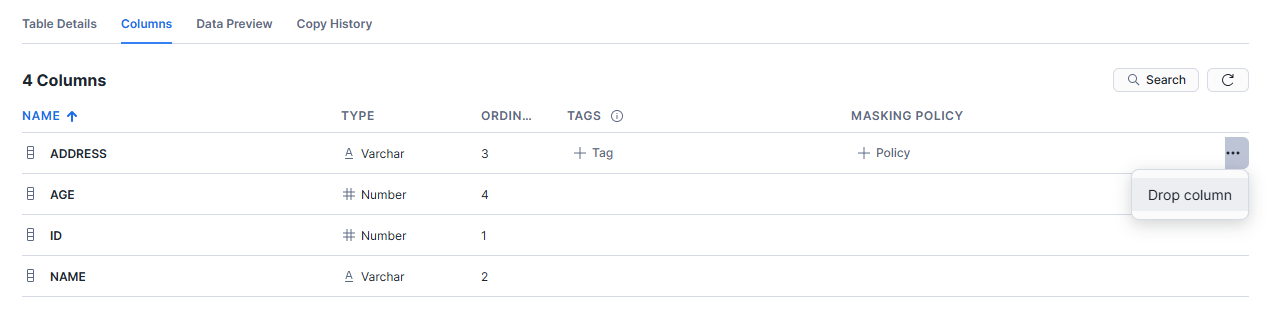
Step 6—Select the Column that you want to DROP
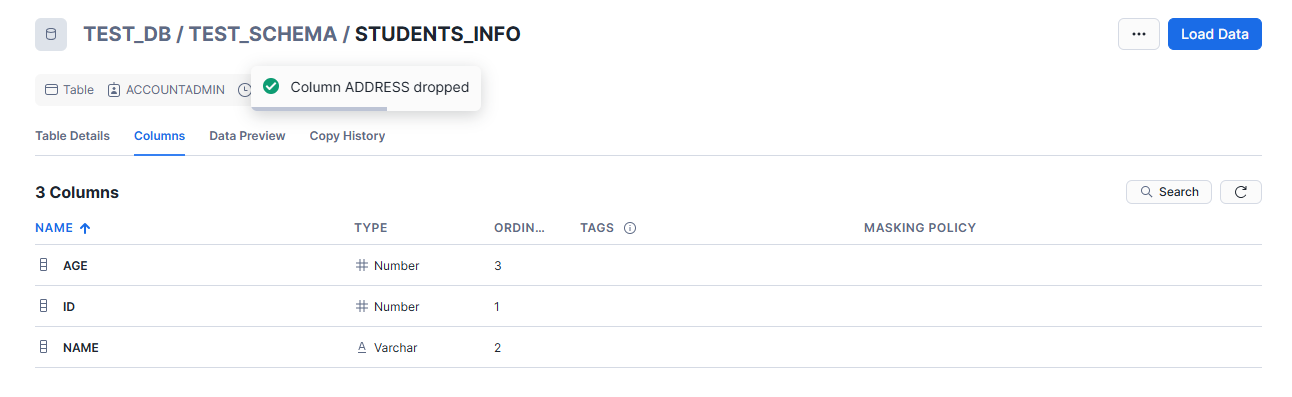
Browse through the list and find your target table—in our case, STUDENTS_INFO. Click on it to open the table details. You'll see a tabular view showing all columns, their data types, and other properties. In the columns list, locate the one you want to drop. Let's say we want to remove the ADDRESS column.
Step 7—DROP the Column
Next to the ADDRESS column, you'll see three dotted icons, Drop column option will appear. Click on it.
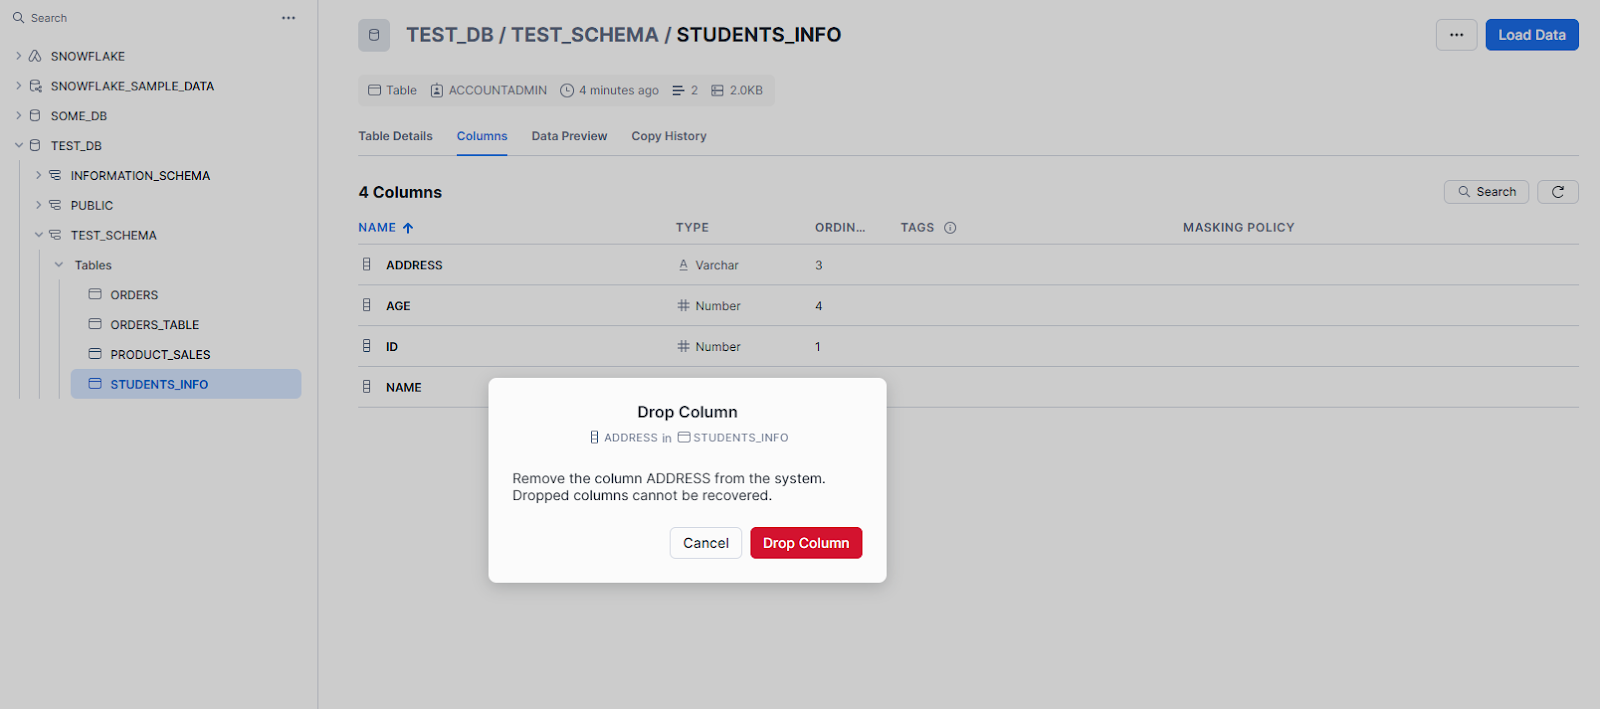
A confirmation dialog will appear, warning you that this action is irreversible and will delete all data in the column. This is Snowsight's way of making sure you really want to proceed.
Step 8—Confirm Action
Read the warning carefully. If you're certain you want to drop the ADDRESS column, click "Drop Column". Snowsight will then send the DROP COLUMN command to Snowflake on your behalf.
Step 9—Refresh Table View to See Changes
After a brief moment, the page might refresh automatically. If not, look for a refresh button or simply reload the page. When you view the ORDERS table again, you'll notice that the ADDRESS column is gone. You can repeat steps 6-9 if you have multiple columns to drop.
Can We UNDROP a Column in Snowflake?
Once a column is dropped in Snowflake, it is permanently removed from the table structure along with its data. This action cannot be undone directly.
However, Snowflake's Time Travel feature allows you to recover dropped columns by restoring the entire table to a point in time before the column was dropped. Time Travel retains historical data for a specified period, enabling you to access and restore previous versions of your table.
Recovering Dropped Column in Snowflake
Option 1—Time Travel and Data Retention
Snowflake's Time Travel feature allows you to access historical data for the following periods:
- Standard Edition: 1 day of Time Travel
- Enterprise Edition: Up to 90 days
- Business Critical Edition: Up to 365 days
Snowflake Time Travel is automatically enabled with a standard 1-day retention period. If you want to customize and extend your retention period, you need to set the data retention policy for that table first. Use the query below to set the actual retention period for a table using the DATA_RETENTION_TIME_IN_DAYS parameter:
ALTER TABLE your_table_name SET DATA_RETENTION_TIME_IN_DAYS = desired_number_of_days;ALTER TABLE students_info SET DATA_RETENTION_TIME_IN_DAYS = 60;Option2—Restoring Dropped Column
To restore a dropped column, you can create a clone of the entire table from a point in time before the column was dropped. Note that this method does not directly restore the column to the original table but creates a new table with the desired state. Use the following query:
CREATE TABLE students_info_table_restore CLONE students_info AT (TIMESTAMP => 'YYYY-MM-DD HH24:MI:SS');Make sure to replace 'YYYY-MM-DD HH24:MI:SS' with the actual timestamp corresponding to the point in time before the column was dropped.
How to Check if a Column Was Dropped?
In the aftermath of a column-dropping incident, you might find yourself in detective mode. Was the column really dropped? When did it happen? Who did it? Snowflake provides several tools to help you unravel these mysteries.
Option 1—Query History
The most immediate way to check if a column was dropped is by examining your query history:
SELECT *
FROM TABLE(INFORMATION_SCHEMA.QUERY_HISTORY())
WHERE QUERY_TYPE LIKE 'DROP'
AND QUERY_TEXT LIKE '%students_info%';If your column was indeed dropped, you'll see the culprit query here.
Option 2—Information_schema
Snowflake's Information Schema provides a wealth of metadata about your objects. To see if a specific column exists:
SELECT *
FROM INFORMATION_SCHEMA.COLUMNS
WHERE table_catalog = 'DEMO'
  AND table_schema = 'DEMO'
  AND table_name = 'STUDENTS_INFO'
AND column_name = 'ADDRESS';If this returns no rows, it confirms that ADDRESS is not currently part of the STUDENTS_INFO table. But what if you can't remember the exact column name? You can list all columns:
SELECT *
FROM INFORMATION_SCHEMA.COLUMNS
WHERE table_catalog = 'DEMO'
  AND table_schema = 'DEMO'
AND table_name = 'STUDENTS_INFO';Snowflake DROP COLUMN—Best Practices
Dropping a column in Snowflake is a powerful operation that, while easy to execute, carries significant implications. Throughout this article, we've explored the mechanics of DROP COLUMN, from basic syntax to advanced recovery techniques. Now, let's synthesize this knowledge into a set of best practices that will help you wield this tool responsibly and effectively.
1) Verify Column No Longer Needed—Double-check before dropping
Before dropping a column, confirm that it is no longer in use by any application, query, or report. This step helps prevent disruptions and data loss. Conduct a thorough review of database logs and query histories to identify dependencies on the column.
2) Clone the Table First
Create a zero-copy clone of the table before dropping a column. This provides a backup that can be used to restore data if necessary. Zero-copy cloning is an efficient way to safeguard data without consuming additional storage.
CREATE TABLE students_info_clone CLONE students_info;3) Double-check Column Names—Prevent accidental drops
Make sure accuracy when specifying column names to avoid accidental drops. Mistyped column names can lead to unintended data loss. Double-checking helps mitigate this risk.
4) Perform Operations During Off-Peak Hours
Schedule the Snowflake DROP COLUMN operations during off-peak hours to minimize the impact on system performance and user activities. This practice helps in reducing the potential performance hit due to schema changes.
5) Backup Data Before Dropping Columns
Always have a backup strategy in place before making schema changes. Utilize Snowflake's data export features to create backups of critical tables.
COPY INTO @my_stage FROM sample_table;6) Use Time Travel Settings Wisely
Leverage Snowflake Time Travel feature to retain historical data for a specified period. Adjust the retention period based on the criticality of the table. This allows for recovery of dropped columns within the retention window.
7) Handle Dependencies
Address any dependencies such as constraints, views, and foreign keys before dropping a column. Dropping a column involved in these dependencies can lead to errors and broken references.
ALTER TABLE sample_table DROP CONSTRAINT constraint_name;8) Monitor Resource Consumption
Monitor resource consumption during the DROP COLUMN operation to ensure it does not adversely affect system performance. Use Snowflake's resource monitoring tools to keep an eye on the workload.
9) Snowflake's Zero-Copy Clone for Safe Testing
Use zero-copy clones to test the impact of dropping a column in a non-production environment. This helps in identifying potential issues without affecting the live data.
CREATE TABLE test_table_clone CLONE production_table;
ALTER TABLE test_table_clone DROP COLUMN column_name;10) Using Tags and Comments
Use tags and comments to mark columns as "droppable." This documentation practice helps future database administrators understand which columns can be safely removed.
ALTER TABLE sample_table MODIFY COLUMN column_name SET TAGS ('droppable');
COMMENT ON COLUMN sample_table.column_name IS 'Droppable column';If you follow these best practices, you can ensure that the process of dropping columns in Snowflake is done safely and efficiently, minimizing the risk of data loss and system performance issues.
Conclusion
And that's a wrap! Managing columns effectively is crucial for maintaining an efficient and optimized Snowflake environment. Dropping a column in Snowflake is straightforward with the DROP COLUMN command. This command allows you to remove any obsolete or unwanted columns from your tables, keeping your Snowflake tables organized and relevant.
In this article, we have covered:
- What are Snowflake Tables?
- How to Drop a Column in Snowflake—Using Snowflake DROP COLUMN
- How Do You Drop Multiple Columns in Snowflake?
- Conditional Column Deletion—with Snowflake DROP COLUMN IF EXISTS
- Step-by-Step Guide: Using Snowflake DROP COLUMN Command
- Step-by-Step Guide to Drop Column in Snowflake—using Snowsight
- Can We UNDROP a Column in Snowflake?
- How to Check if a Column Was Dropped?
- How to See Who Dropped a Column in Snowflake?
- Snowflake DROP COLUMN—Best Practices
…and so much more!
FAQs
What is the basic syntax for dropping a column in Snowflake?
The basic syntax is: ALTER TABLE <table_name> DROP COLUMN <column_name>;
Can I drop multiple columns in a single Snowflake command?
Yes, you can use: ALTER TABLE <table_name> DROP COLUMN <column1>, <column2>, <column3>, ...;
What happens if I try to drop a column that doesn't exist in my Snowflake table?
An error will occur. To avoid this, use the IF EXISTS clause.
What's the difference between CASCADE and RESTRICT options in the DROP COLUMN command?
CASCADE automatically drops objects that depend on the column, while RESTRICT (default) prevents dropping if dependencies exist.
Can I apply CASCADE or RESTRICT individually to each column when dropping multiple columns?
Yes, but it's rarely used as it can make the statement hard to read.
Is it possible to undo a DROP COLUMN operation in Snowflake?
No, you can't directly undo it, but you can use Snowflake's Time Travel feature to restore the table to a point before the column was dropped.
How long can I access historical data with Snowflake's Time Travel feature?
It depends on your edition: Standard (1 day), Enterprise (up to 90 days), Business Critical (up to 365 days).
Can I drop a column using Snowflake's web interface, Snowsight?
Yes, you can navigate through your database, schema, and table, then use the "Drop Column" option next to the column name.
Can I drop a column that's part of a primary key?
No, you must first drop the primary key constraint before dropping the column.
Does dropping a column reduce my Snowflake bill?
Dropping columns can reduce storage costs if the column contains significant data.
Can I schedule column drops for regular cleanup?
Yes, you can use Snowflake's task scheduling features to automate regular cleanup activities.
How does Snowflake DROP COLUMN work with external tables?
Snowflake DROP COLUMN command applies to standard tables, not external tables.


