


Tables are a core component of any database/warehouse system and serve as the foundation for organizing and querying data. Snowflake makes the process of creating and managing tables straightforward with its clear, simple SQL syntax. Creating tables in Snowflake isn't just a task; it's an art that shapes how data is stored, accessed, and utilized.
In this article, we're going to cover everything you need to know about Snowflake tables, while also touching on transient, temporary, permanent, and external table types. We'll explore what Snowflake tables are, how to create these tables using both the Snowflake CREATE TABLE command and the Snowflake Web-UI (Snowsight), advanced table creation techniques—and a whole lot more!!
Let's dive right in!!
What are Snowflake Tables?
Before jumping into the steps to create tables using both the Snowflake CREATE TABLE command and the Snowflake Web-UI (Snowsight), it's important to understand their fundamental role. Imagine tables in Snowflake as the shelves of your data warehouse, where each shelf (or table) neatly organizes your information into rows and columns. Each row in a table corresponds to a single, distinct record, and each column specifies an attribute or property of that record. In Snowflake, tables are defined at the schema level (they are schema-level objects), serving as crucial components for data storage and management. They are the key to efficiently organizing, retrieving, and handling massive volumes of data. Snowflake enhances this basic concept by offering various types of tables each designed to serve specific data storage and usage scenarios.
Here's a brief look into the types of Snowflake tables, though we will cover ‘em in greater detail in the later part of this article.
Types of Snowflake Tables
- Standard/Permanent Snowflake Tables: These are the standard/default Snowflake tables, used for storing persistent data. They are similar to tables in traditional DBs but benefit from Snowflake's architecture, which allows for automatic scaling, performance optimization, and storage efficiency.
- Transient Snowflake Tables: These Snowflake tables are similar to standard/permanent Snowflake tables but with a key difference in data durability. Transient tables are designed for scenarios where data persistence is not a critical requirement, such as temporary data processing or ETL tasks.
- Temporary Snowflake Tables: As the name suggests, these Snowflake tables are temporary or session-specific. They are automatically dropped at the end of the session, making them ideal for temporary data storage, such as storing intermediate calculation results during complex data transformation processes in individual sessions.
- External Tables: These Snowflake tables enable users to directly query data stored in external storage locations—such as S3, Google Cloud Storage, and Azure Blob Storage—using Snowflake. They provide a way to integrate and analyze data that resides outside of the Snowflake environment without the need of having to import it into Snowflake storage.
Now that we understand the critical role tables play in Snowflake, let’s look at how to get set up and start creating tables in Snowflake using Snowflake CREATE TABLE command!
Want to take Chaos Genius for a spin?
It takes less than 5 minutes.

Step-by-Step Guide to Create a Table in Snowflake
Before creating your table, first, you need to have access to your Snowflake account and a basic understanding of Snowflake SQL. Here are some very basic prerequisites:
- Access to a Snowflake Account: If you don’t have one, you can sign up for a free trial account on Snowflake’s website.
- Basic Snowflake SQL Knowledge: Having experience with basic SQL statements like SELECT, INSERT, CREATE, etc. will be helpful.
- Completed Snowflake account setup and can access the UI.
- Basic Understanding of using Snowflake SQL Worksheet: This is where you’ll run SQL statements. The worksheet will auto-execute queries as you type ‘em.
Now that the prerequisites are covered, you’re ready to start creating Snowflake tables.
Basic Table Creation using the Snowflake CREATE TABLE command
We will start by outlining the basic steps and syntax for creating your first Snowflake table using the Snowflake CREATE TABLE command.
Basic syntax:
The basic syntax for creating a table using Snowflake CREATE TABLE command is:
CREATE TABLE table_name (
  column1 datatype,
  column2 datatype,
  ...
  ...
);Full syntax:
Here is the full syntax for creating a table using the Snowflake CREATE TABLE command:
CREATE [ OR REPLACE ]
    [ { [ { LOCAL | GLOBAL } ] TEMP | TEMPORARY | VOLATILE | TRANSIENT } ]
  TABLE [ IF NOT EXISTS ] <table_name> (
    -- Column definition
    <col_name> <col_type>
      [ inlineConstraint ]
      [ NOT NULL ]
      [ COLLATE '<collation_specification>' ]
      [
        {
          DEFAULT <expr>
          | { AUTOINCREMENT | IDENTITY }
            [
              {
                ( <start_num> , <step_num> )
                | START <num> INCREMENT <num>
              }
            ]
            [ { ORDER | NOORDER } ]
        }
      ]
      [ [ WITH ] MASKING POLICY <policy_name> [ USING ( <col_name> , <cond_col1> , ... ) ] ]
      [ [ WITH ] TAG ( <tag_name> = '<tag_value>' [ , <tag_name> = '<tag_value>' , ... ] ) ]
      [ COMMENT '<string_literal>' ]

    -- Additional column definitions
    [ , <col_name> <col_type> [ ... ] ]

    -- Out-of-line constraints
    [ , outoflineConstraint [ ... ] ]
  )
  [ CLUSTER BY ( <expr> [ , <expr> , ... ] ) ]
  [ ENABLE_SCHEMA_EVOLUTION = { TRUE | FALSE } ]
  [ STAGE_FILE_FORMAT = (
     { FORMAT_NAME = '<file_format_name>'
       | TYPE = { CSV | JSON | AVRO | ORC | PARQUET | XML } [ formatTypeOptions ]
     } ) ]
  [ STAGE_COPY_OPTIONS = ( copyOptions ) ]
  [ DATA_RETENTION_TIME_IN_DAYS = <integer> ]
  [ MAX_DATA_EXTENSION_TIME_IN_DAYS = <integer> ]
  [ CHANGE_TRACKING = { TRUE | FALSE } ]
  [ DEFAULT_DDL_COLLATION = '<collation_specification>' ]
  [ COPY GRANTS ]
  [ COMMENT = '<string_literal>' ]
  [ [ WITH ] ROW ACCESS POLICY <policy_name> ON ( <col_name> [ , <col_name> ... ] ) ]
  [ [ WITH ] TAG ( <tag_name> = '<tag_value>' [ , <tag_name> = '<tag_value>' , ... ] ) ]
Source: Snowflake Documentation
To create a basic Snowflake table, all you need to do is to specify:
- The Snowflake CREATE TABLE keywords
- A table name or identifier
- Column names and their respective data types are enclosed in parentheses (We will cover this in-depth in a later section)
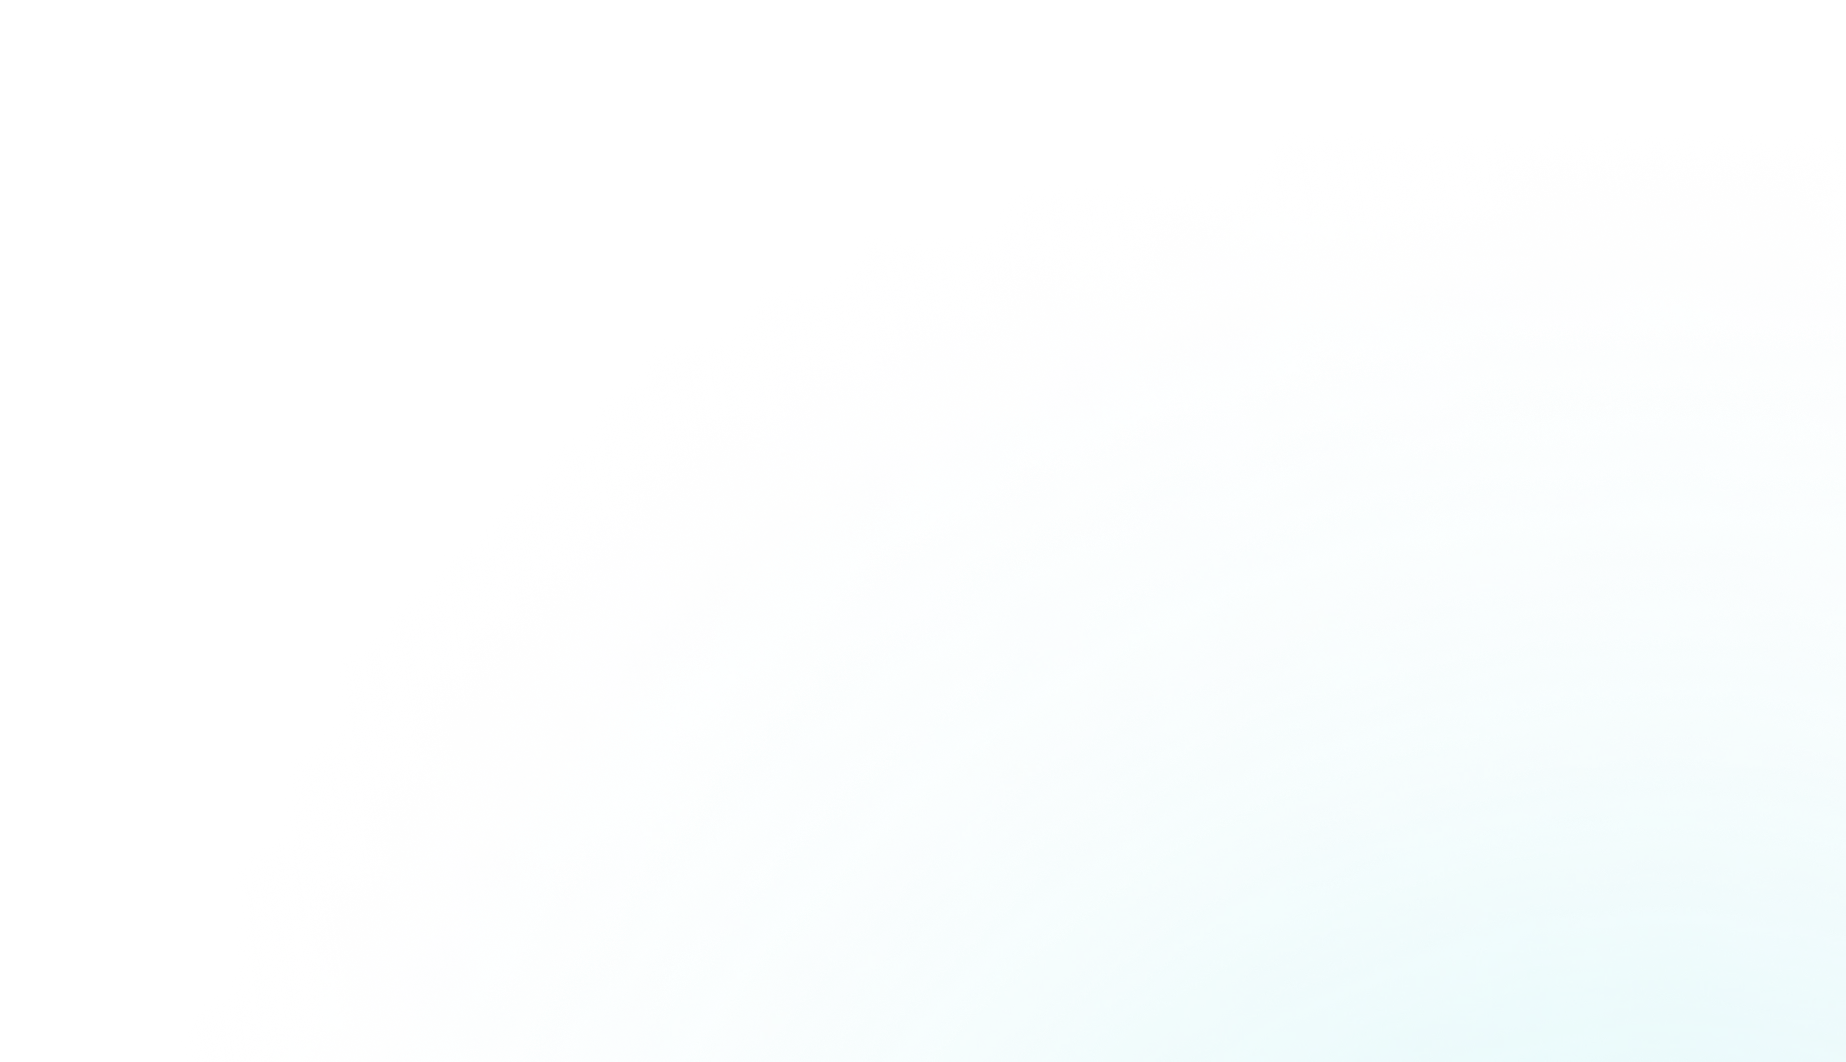
For a simple example:
CREATE TABLE students (
  id INT,
  name VARCHAR(50),
  email VARCHAR(100)
);
As you can see, this would create a basic student table with three columns. While you can create a table with just column names and types, let’s look at some additional options:
How to view tables created using the Snowflake CREATE TABLE command?
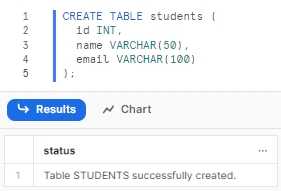
After creating tables, you can view them by querying the Snowflake metadata. The SHOW TABLES command allows you to see tables in the currently selected database and schema.
The basic syntax is:
SHOW TABLES;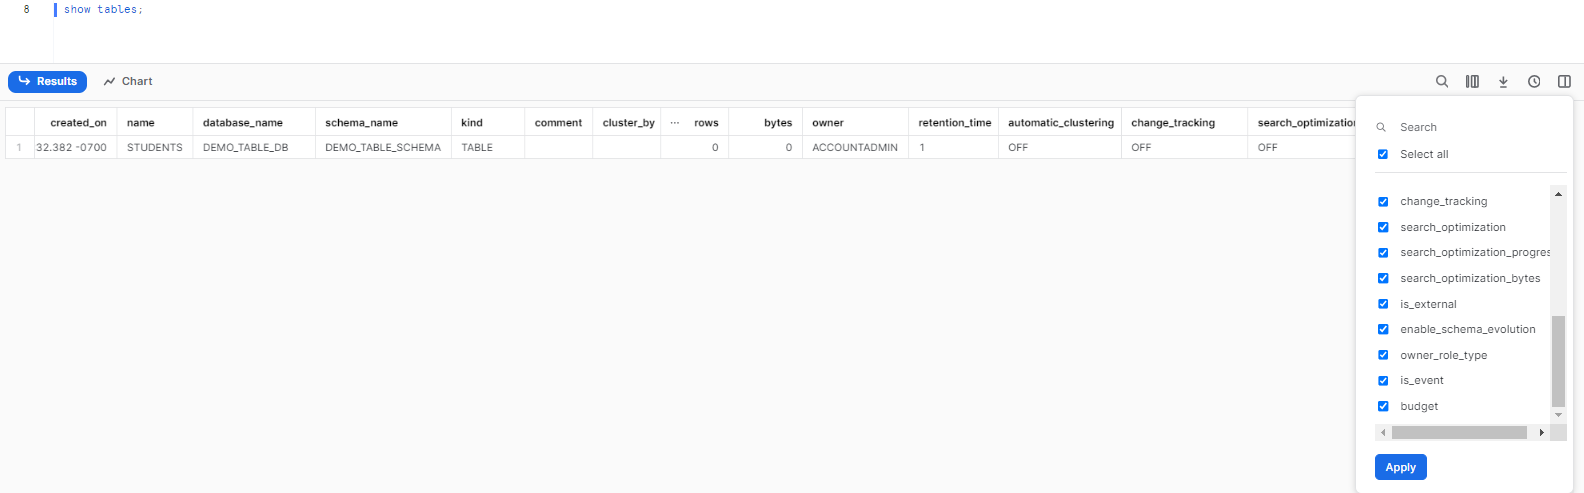
You can see that it will display all tables you have access to. You can also filter the results using a LIKE clause:
SHOW TABLES LIKE '%students%';This command would return any tables containing "students " in the name, such as students, students_123, studnets_highschool, etc.
Here are some other variations:
SHOW TABLES IN DATABASE demo_table_db;

SHOW TABLES IN SCHEMA demo_table_schema;You can even scope it to a specific database or schema.
The output contains details on each table including:
- created_on: Date and time when the table was created.
- name: Name of the table.
- database_name: Database containing the table.
- schema_name: Schema containing the table.
- kind: Table type (TABLE, TEMPORARY, TRANSIENT).
- comment: Table comment text.
- cluster_by: Clustering key column(s).
- rows: Number of rows in the table.
- bytes: Number of bytes scanned for full table scan.
- owner: Role that owns the table.
- retention_time: Time Travel data retention in days.
- dropped_on: Date and time when a dropped table was dropped.
- automatic_clustering: ON or OFF, if enabled for account.
- change_tracking: ON or OFF, tracks data changes.
- search_optimization: ON or OFF, if search optimization is enabled.
- search_optimization_progress: Percentage optimized.
- search_optimization_bytes: Extra storage used.
- is_external: Y or N, if external table.
- enable_schema_evolution: Y or N, if enabled.
- owner_role_type: ROLE or DATABASE_ROLE owning the table.
- is_event: Y or N, if event table.
- budget: Budget name, if the table is in a budget.
Now that we know how to use the SHOW TABLE command to view the details of all tables available in that particular database or schema, it's worth noting there is another command called DESCRIBE TABLEthat helps you obtain in-depth details of a specific table in Snowflake, created using Snowflake CREATE TABLE command.
How to get specific table details with DESCRIBE TABLE command?
DESCRIBE TABLE command provides more in-depth details on a specific table's columns, data types, constraints, comments—and other properties.
The basic syntax is:
DESCRIBE TABLE table_name;For example:
DESCRIBE TABLE students;
As you can see, the output returns a result set with the following columns:
- Name: The column name
- type: The data type (VARCHAR, NUMBER, DATE, etc)
- kind: Whether it is a column or table constraint
- null: If NULL values are allowed
- default: Any default value set
- primary key: Marks primary key column(s)
- unique: Marks columns with a uniqueness constraint
- check: Check constraint for column
- expression: Expression for the computed column
- comment: Comment on the column
Now, let's move on to the next section where we will learn about the data types available and how to add them while creating a table in Snowflake using the Snowflake CREATE TABLE command.
Supported Column Data Types
Snowflake supports many data types for table columns including:
- Numeric: INT, FLOAT, DOUBLE, DECIMAL, NUMBER
- String: VARCHAR, STRING, CHAR, TEXT
- Date/Time: DATE, TIMESTAMP, TIME
- Semi-structured: VARIANT, OBJECT, ARRAY
—and more!
For example, we can update our student's table to use more specific types:
CREATE OR REPLACE TABLE students (
  id INT,
  name VARCHAR(50),
  email VARCHAR(100),
  registration_date DATE
);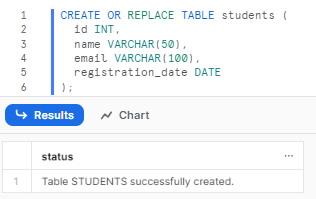
Now, the name and email fields will have a set string length, and we have a column for date values. To get detailed information about this specific table, you can use the DESCRIBE TABLE command, which we discussed in an earlier section.

Adding Table Constraints
Constraints allow enforcing data validation rules in a table. For example, you can add:
- NOT NULL: Require a value to be provided
- UNIQUE: Only allow unique values in a column
- PRIMARY KEY: Uniquely identify table records
- FOREIGN KEY: Reference a column in another table
Let's add some constraints within the Snowflake CREATE TABLE command:
CREATE OR REPLACE TABLE students (
  id INT PRIMARY KEY,
  name VARCHAR(50) NOT NULL,
  email VARCHAR(100) UNIQUE
);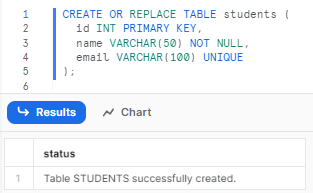
Again, to get the details of this specific table, you can make use of the DESCRIBE TABLE command.

Default Values
For columns that have predictable default values, you can define those rather than making every insert specify it:
CREATE OR REPLACE TABLE students (
  id INT PRIMARY KEY,
  name VARCHAR(50) NOT NULL,
  registration_date DATE DEFAULT CURRENT_DATE
);Here we set new records to default to today's date.

Adding a comment to the table created using Snowflake CREATE TABLE command
The main reason for adding comments to the table is to make it more understandable for humans. Comments can describe the specific reason for creating that table, what it does, outline the logic behind it, or provide other relevant information.
To do so:
CREATE OR REPLACE TABLE students (
  id INT PRIMARY KEY,
  name VARCHAR(50) NOT NULL,
  registration_date DATE DEFAULT CURRENT_DATE
) COMMENT= 'Students data';To verify whether the comment has been added correctly, you can use the SHOW TABLES command to check the comment of that particular table

After setting up the basic table, columns, and constraints, you can start adding data and querying it! But Snowflake has many more advanced table creation methods we still need to cover.
Advanced Table Creation Techniques
Beyond the basic Snowflake CREATE TABLE command, Snowflake provides additional syntax options for creating tables:
1) CREATE TABLE ... AS SELECT (CTAS)
Creates a new table populated with data returned by a SELECT query. This is also known as CTAS.
The full syntax is:
CREATE [ OR REPLACE ] TABLE <table_name> [ ( <col_name> [ <col_type> ] , <col_name> [ <col_type> ] , ... ) ]
  [ CLUSTER BY ( <expr> [ , <expr> , ... ] ) ]
  [ COPY GRANTS ]
  AS SELECT <query>
[ ... ]Source: Snowflake Documentation
For example:
CREATE OR REPLACE TABLE recent_students AS
SELECT id, name, registration_date
FROM students
WHERE registration_date > '2023-01-01';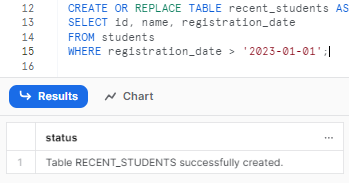
You can see that this example creates a new table recent_students with data selected from the student table, specifically targeting records with a registration_date after January 1, 2023.
2) CREATE TABLE … USING TEMPLATE
Creates a new table based on the schema inferred from a set of staged files. It's particularly useful when working with semi-structured data like JSON, CSV, Parquet, etc.
The full syntax is:
CREATE [ OR REPLACE ] TABLE <table_name>
  [ COPY GRANTS ]
  USING TEMPLATE <query>
[ ... ]Source: Snowflake Documentation
For example,
CREATE TABLE student_data
USING TEMPLATE INFER_SCHEMA('@stage/studnets.json');Notes on COPY GRANTS
- COPY GRANTS clause is only valid with the OR REPLACE clause.
- It copies permissions from the table being replaced, not from the source table in the SELECT statement.
- For CREATE TABLE … USING TEMPLATE and CREATE TABLE … CLONE, if the new table replaces an existing table, the grants are copied from the table being replaced. If there's no existing table, the grants are copied from the source table being cloned.
Check out this documentation to learn more about COPY GRANTS.
3) CREATE TABLE … LIKE
Creates a new table with the same structure as an existing table but doesn't copy the data. It's useful for creating tables with a predefined schema.
The full syntax is:
CREATE [ OR REPLACE ] TABLE <table_name> LIKE <source_table>
  [ CLUSTER BY ( <expr>, ... ) ]
[ COPY GRANTS ];Source: Snowflake Documentation
For example,
CREATE OR REPLACE TABLE students_backup LIKE students;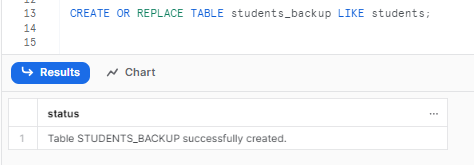
You can see that this example creates a new table students_backup with the same structure as the students' table but does not copy the data.
Now, to get detailed information and see whether it worked or not, you can use the DESCRIBE TABLE command.
describe table students_backup;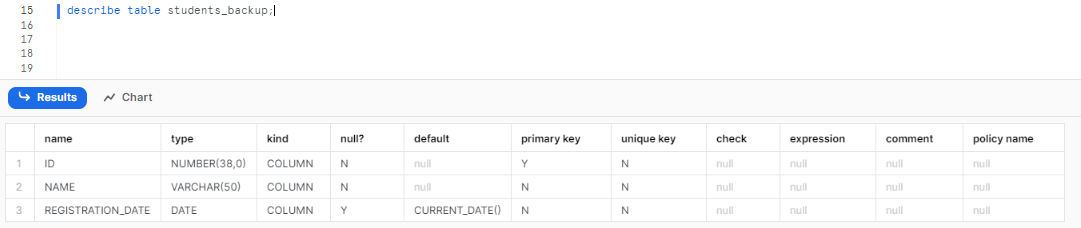
4) CREATE TABLE … CLONE
Creates a new table by cloning an existing table, including its data, without physically copying the data. It's efficient for duplicating tables, especially for backup or testing purposes.
The full syntax is:
CREATE [ OR REPLACE ] TABLE <table_name> CLONE <source_table>
  [ { AT | BEFORE } ( { TIMESTAMP => <timestamp> | OFFSET => <time_difference> | STATEMENT => <id> } ) ]
[ COPY GRANTS ];Source: Snowflake Documentation
For example,
CREATE OR REPLACE TABLE students_clone CLONE students
AT (TIMESTAMP => '2023-11-01 21:49:14.914 -0700');You can see that this example clones the students table as it existed at the specified timestamp, creating a new table students_clone with the same data and structure as of November 1, 2023, at 21:49:14.914 -0700.
What are the types of tables in Snowflake?
Users can create tables of three distinct types—Permanent tables, Temporary tables, and Transient tables. Among these, the Permanent table is set as the default type.
1) Temporary Tables
Temporary tables provide localized, session-based storage for transient data. When the session ends, the table is automatically dropped.
What are Temporary Tables?
A temporary Snowflake table exists only within the session that created it. Once that login session ends, Snowflake automatically drops the temporary table. Temporary tables are not visible to any other sessions, even if they run concurrently. The temporary table's data and structure are isolated.
How to create Temporary Snowflake Tables?
To create a temporary table, use the CREATE TEMPORARY TABLE syntax:
CREATE TEMPORARY TABLE table_name (
  column1 datatype,
  column2 datatype,
  ...
);The TEMPORARY keyword tells Snowflake this table has a limited lifespan.
For example:
CREATE TEMPORARY TABLE temp_studnets (
  id INT,
  name VARCHAR(50)
);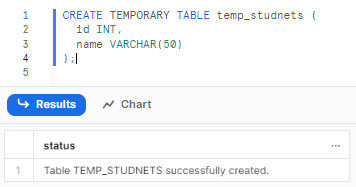

As you can see, this table will only exist for the duration of the session. Once the connection ends, Snowflake removes the table automatically.
Use Cases of Temporary Snowflake Tables
Common use cases for temporary tables are:
- Staging data for a large transformation pipeline that spans multiple steps. Temporary tables allow passing data between pipeline stages.
- Isolating transactional data being manipulated instead of altering permanent tables directly.
- Storing iterative analysis results like ML model outputs.
- Reducing redundant re-creation of static lookup tables needed during a session.
2) Transient Tables
Transient tables persist past a session but can be manually dropped at any time. They are ideal for temporary storage use cases.
What are Snowflake Transient Tables?
Like temporary tables, transient tables are designed for temporary data. However, transient tables:
- Persist beyond the session that created them.
- Are visible to any user with access privileges.
- Are manually dropped rather than dropping automatically.
Because of this, it makes Snowflake Transient Tables more preferable over temporary tables when data needs to be shared across sessions.
How to create Transient Snowflake Tables?
To create a transient table, use the CREATE TRANSIENT TABLE syntax:
CREATE TRANSIENT TABLE table_name (
  column1 datatype,
  column2 datatype,
  ...
);For example,
CREATE TRANSIENT TABLE temp_stock_prices (
  symbol VARCHAR(10),
  price DECIMAL(8,2),
  price_date DATE
);

As you can see, this table persists outside the session but can be dropped at any time.
Use Cases of Transient Snowflake Tables
Common use cases for Snowflake transient tables include:
- Staging backup or archival data before loading into permanent tables or external systems.
- Sharing incomplete datasets across users and sessions before finalizing ‘em into permanent tables.
- Providing data engineers/DS/ML/AI teams with disposable workspace without cluttering shared permanent tables.
3) Permanent Tables
Permanent tables are the standard table type for long-term data assets. They persist indefinitely and make up the majority created in Snowflake.
What are Permanent Snowflake Tables?
Permanent tables are the default table type created with the Snowflake CREATE TABLE command. Here are a few things you need to remember about Snowflake Permanent tables:
- They persist until explicitly dropped with the DROP TABLE command.
- They are visible to all users with access privileges.
- They have a higher overhead than temporary or transient tables but enable long-term storage.
- They support advanced features like Time Travel and fail-safe for data recovery.
- Most analytics databases leverage permanent tables for core business data, such as customers, orders, inventory, etc.
How to create Permanent Snowflake Tables?
To create a Permanent table, use the CREATE TABLE syntax:
CREATE TABLE table_name (
  column1 datatype,
  column2 datatype,
  ...
);For example,
CREATE TABLE students (
  id INT,
  name VARCHAR(50),
  email VARCHAR(100)
);This creates a permanent table since we did not specify TRANSIENT or TEMPORARY.
Use Cases of Permanent Snowflake Tables
When it comes to permanent tables, they're mostly used for:
- Essential business datasets, where maintaining data integrity is vital.
- Analytical tables that are crucial for tasks like modeling, creating dashboards, and generating reports.
- Tables that play a key role in complex ETL (Extract, Transform, Load) pipelines and workflows.
- For any business-critical data where having recovery options like Time Travel and fail-safe mechanisms is advantageous.
Step-by-Step Guide to Create Table in Snowflake using Snowsight
Snowflake provides a web-based UI (Snowsight) that allows easily creating and managing tables, letting you skip the intricate SQL commands for a more visual, interactive experience.
Before creating a table, make sure you have the necessary permissions and access to Snowsight.
Step 1—Login to Snowflake
Start by logging into your Snowflake account. Enter your credentials on the login page. Once logged in, you'll be directed to the Snowflake Snowsight interface.
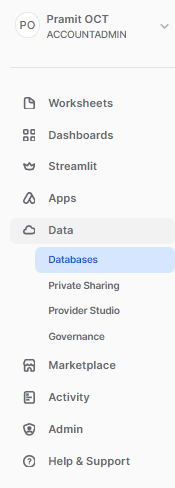
Step 2—Select the “Data” Option
On the left-hand side panel of the Snowflake UI, you'll find several options. Click on the Data option.
Step 3—Choose the “Database” Option
Within the Data section, you'll see an option for Databases. Click this to view a list of all the databases you have access to in your Snowflake account.
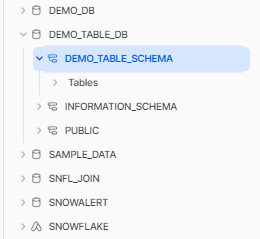
Step 4—Select Your Database and Schema
From the list of databases, select the one in which you intend to create your new table. After selecting a database, you'll need to choose the appropriate schema.
Step 5—Click the “Create” Dropdown option
After selecting your database and schema, look for a table section and select the blue button located at the top right-hand side of the interface. This button is typically labeled with “Create”
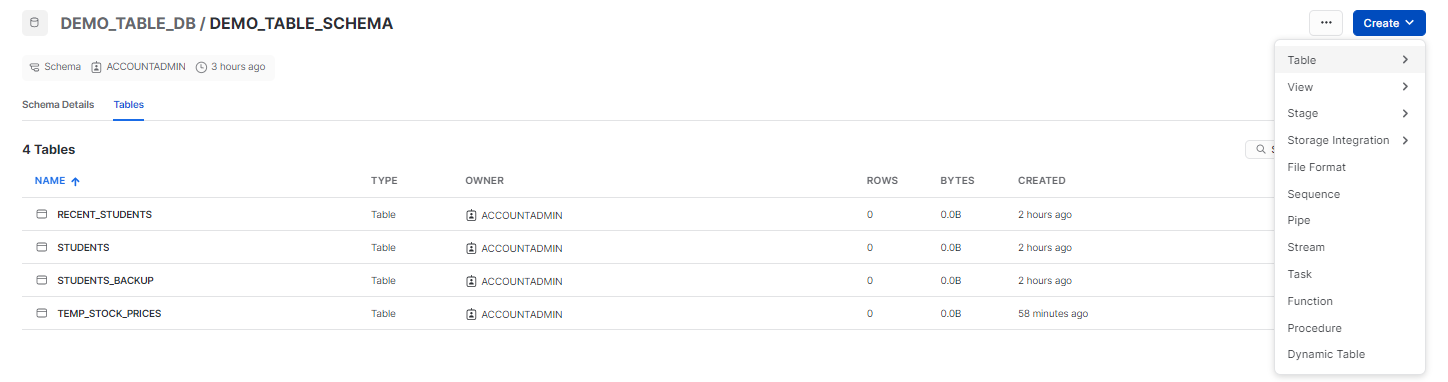
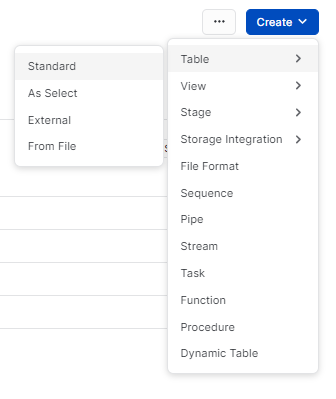
Step 6—Choose “Standard” Table Option
Upon clicking the Create button, a menu will appear with several options for creating different types of tables—such as Standard, As Select, External, From File. For this guide, we will choose the Standard option. This option is used for creating a new, regular table where you can define columns, data types—and other properties.
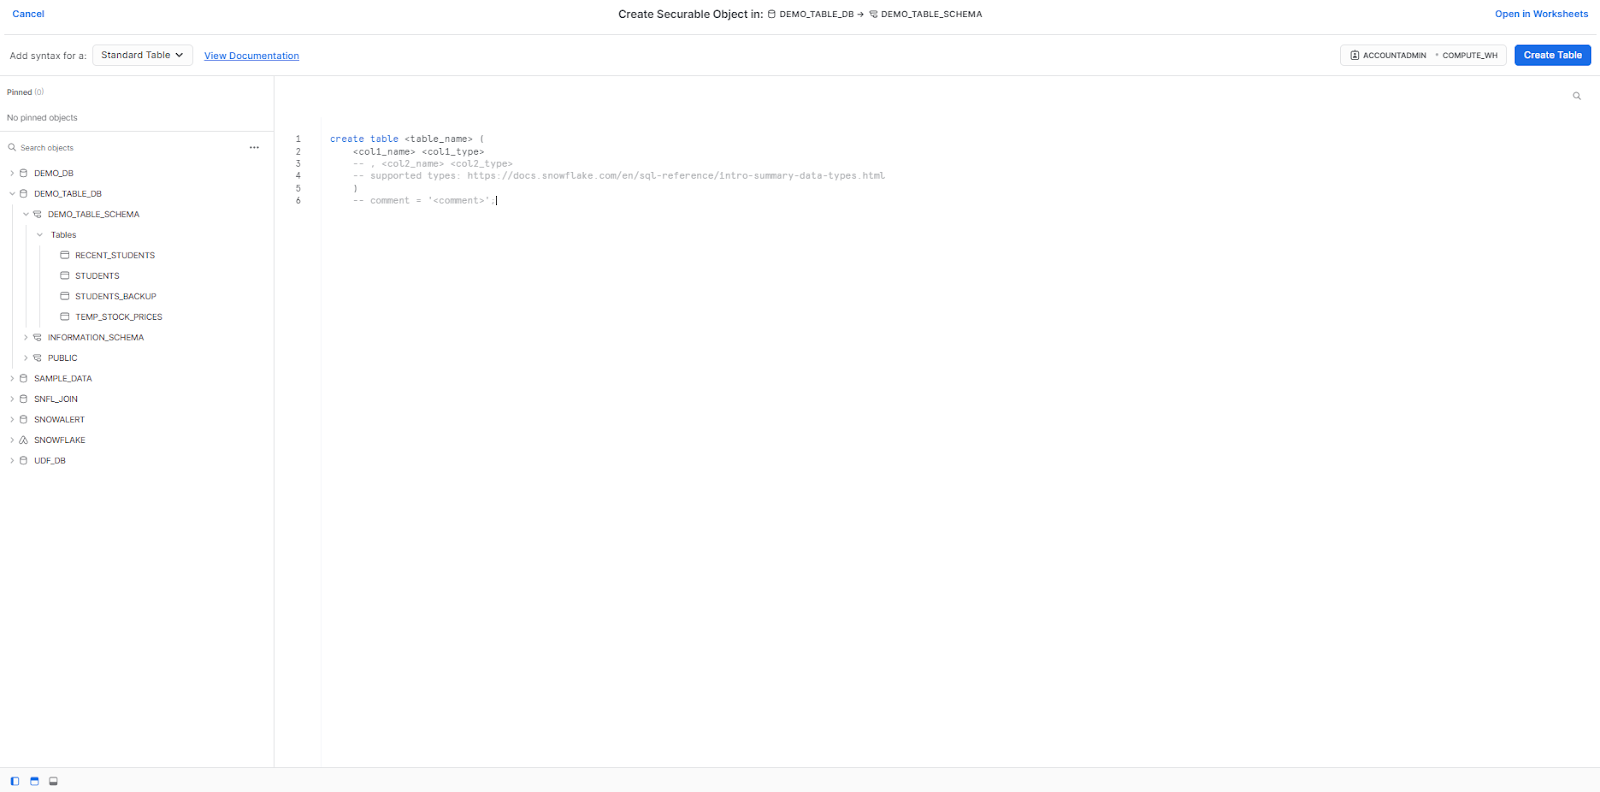
Step 7—Define Table Details
In the “Standard” table creation, you will need to:
- Add Your Table Name: Enter a meaningful name for your table
- Add Columns: For each column in your table, specify:
- Column Name: Write a descriptive name that clearly indicates what data the column will hold.
- Column Data Type: Specify the data type for each column (e.g., VARCHAR, NUMBER, DATE).
Just like that, with a few clicks in Snowsight, creating a table in Snowflake becomes surprisingly simple. It's all about selecting a few options, clicking some buttons, and a bit of typing — no need for heavy lifting with complex code.
Save up to 30% on your Snowflake spend in a few minutes!


Conclusion
And that's a wrap! We've covered everything you should know about creating tables in Snowflake. You should now have a strong grasp on creating and configuring tables of all types. We've gone through all the core basics—from understanding the concept of Snowflake tables to writing your first Snowflake CREATE TABLE command.
In this article, we covered:
- What Snowflake tables are and the critical role they play
- Step by step guide to creating a table using both Snowflake CREATE TABLE command and Snowflake Web-UI (Snowsight)
- Adding columns, constraints, clustering keys—and more
- Advanced techniques like CTAS, cloning, and visual table building in Snowsight
- Different Snowflake table types like temporary, transient—and permanent
Creating a table in Snowflake is like setting up a new bookshelf. Just as you decide the number of shelves and their arrangement to best organize your books, in Snowflake, you define columns and rows to efficiently structure your data.
FAQs
What are the basic components of a table in Snowflake?
Tables consist of rows and columns. Each row represents a record and columns define the attributes for that record.
What is a constraint in Snowflake?
Constraints enforce validation rules on a column such as UNIQUE, NOT NULL, PRIMARY KEY, etc.
How do you create a set table in Snowflake?
To create a Snowflake table, you can use Snowflake CREATE TABLE command followed by the table name and column definitions. Example:
CREATE TABLE students (id INTEGER, name VARCHAR, email VARCHAR);How do you view created tables in Snowflake?
Use the SHOW TABLES command or query the table metadata.
What is the DESCRIBE command used for in Snowflake?
DESCRIBE TABLE shows detailed metadata about a specific table's columns, data types, constraints, etc.
What are some advanced table creation methods in Snowflake?
CREATE TABLE AS SELECT, CREATE TABLE LIKE, and CREATE TABLE CLONE allow advanced table creation.
How does CREATE TABLE AS SELECT work in Snowflake?
It creates a new table populated with data from a SELECT query. The column structure is inferred from the query.
What are the three types of tables in Snowflake?
Snowflake offers three types of tables—Temporary, Transient, and Permanent.
What is a temporary table in Snowflake?
A temporary table exists only for the session it was created in and is automatically dropped after.
What is a transient table in Snowflake?
A transient table persists after the session ends but must be manually dropped. It is visible to all users with access.
What is a permanent table in Snowflake?
A permanent table persists indefinitely, is visible to all users, and is the default table type created with CREATE TABLE.
Can you create Snowflake tables without writing SQL?
Yes, Snowflake's visual UI "Snowsight" allows creating tables through a graphical interface.
How do you create a table from an existing table's structure in Snowflake?
You can use CREATE TABLE ... CLONE or CREATE TABLE ... LIKE to clone a table.
How are primary keys defined in Snowflake?
You can make use of PRIMARY KEY constraint on one or more columns to define a primary key.
What is the AUTOINCREMENT keyword used for in Snowflake?
It enables auto-incrementing values in a numeric column like IDs.
How can you tell if change tracking is enabled on a Snowflake table?
The SHOW TABLES command displays a change_tracking column indicating if it is ON or OFF.
Where can you view the DDL statement used to create a table in Snowflake?
The Table Details page in Snowsight displays the SQL CREATE statement for a table.
How can you tell if a table in Snowflake is temporary or permanent?
The kind column in SHOW TABLES displays TABLE for permanent and TEMPORARY for temporary tables.
What is the difference between CREATE TABLE and create view in Snowflake?
CREATE TABLE makes a new table. CREATE VIEW makes a new virtual view in the current/specified schema, based on a query of one or more existing tables. Views don't store data.
How do I create a table from a Snowflake in CSV?
You can make use of CREATE TABLE + COPY INTO command to load data from a CSV file into a new or existing Snowflake table. Alternatively, you can use CREATE TABLE AS SELECT to ingest the CSV data via SELECT.


