


Databricks Jobs provide a way to schedule and automate workflows on Databricks. Out of the box, Databricks allows you to visually create and manage scheduled jobs directly through the UI. But as the number of jobs increases to hundreds, thousands, or even millions, manually interacting with each one in the UI becomes impractically slow and error-prone. This is the problem that the Databricks Jobs API is designed to solve. The Databricks Jobs API allows you to programmatically create, manage, delete and monitor Databricks jobs—instead of using the UI.
In this article, we will take a deep dive into, what is Databricks Jobs API, how the Databricks Jobs API works, its key benefits, common operations, examples of how to get started with it and its limitations.
What is Jobs API in Databricks?
Databricks Jobs API provides a programmatic interface for managing Databricks jobs and job runs. It exposes a set of REST endpoints that allow you to perform CRUD (create, read, update, delete) operations on jobs and runs without needing to use the UI.
Under the hood, the Jobs API exposes a full set of endpoints mapped to CRUD (create, read, update, delete) operations on jobs and their runs. Things like:
- Create new jobs: Define and schedule notebooks, JARs, Python scripts on a specified schedule or trigger.
- Manage existing jobs: Get, list, update, reset and delete existing jobs. Change job settings like name, schedule, tasks, clusters, libraries etc.
- Run jobs on-demand: Trigger one-time or recurring runs of existing jobs. Pass parameters to jobs at run time.
- Monitor runs: List runs of a job, get details of a run, export run output, cancel a run, delete a run etc.
- Permissions: Set view and manage permissions on jobs.
- Export/Import Jobs: Export and import jobs between Databricks workspaces.
- Run workflows: Trigger runs of multitask workflows.
- Robust error handling: Retrieve run errors, logs and output to debug failed runs.
- Repair runs: Fix inconsistent run states if a job run crashes or gets stuck.
What Are the Benefits of Using Databricks Jobs API?
Databricks Jobs API provides a wide range of benefits for automating and streamlining job scheduling and monitoring on Databricks. Some key advantages are:
1) Automating Job Management
Databricks Jobs API allows creating, running, and deleting Databricks jobs programmatically using API requests, which enables job automation based on events or triggers from external systems.
For instance, you could automatically spin up a Databricks job to process new data when files arrive in cloud storage. Or trigger a daily job report based on a schedule.
2) Integration With External Systems
On top of automation based on triggers, Databricks Jobs API also facilitates integrating job scheduling and monitoring with external workflow orchestration systems.
For instance, you could manage Databricks jobs from workflow tools like Apache Airflow, Dagster, Jenkins or GitHub to programmatically kick off jobs as task steps. Or automatically create Databricks jobs from CI/CD platforms when deploying notebooks.
3) Granular Job Analytics
Databricks Jobs API provides granular data on job runs including run details, times, durations, statuses, and results.
This data can feed into analytics systems to track job success rates, performance metrics, usage over time—and more. The APIs enable robust analytics on Databricks job executions.
4) Scalable Job Management
Databricks Jobs API supports easily managing thousands of jobs programmatically. This scalable job orchestration isn't practical through the Jobs UI.
Whether you have hundreds of automated ETL pipelines or recurring jobs, the API handles bulk job creation, scheduling and monitoring efficiently at a very large scale.
5) Higher Speed & Efficiency
Automating jobs through the API is far more efficient than manual approaches. All changes can be scripted and applied instantly across many jobs.
This brings both time savings and consistency relative to using the UI. Ops teams can manage jobs faster and with less effort.
What can be done with Databricks Jobs API ?
Databricks Jobs API supports a wide range of actions for managing Databricks jobs programmatically. They are:
| Databricks Jobs API Request | Action | Description |
| GET /api/2.0/permissions/jobs/{job_id} | Get job permissions | Get the permissions for a job |
| PUT /api/2.0/permissions/jobs/{job_id} | Set job permissions | Set the permissions for a job |
| PATCH /api/2.0/permissions/jobs/{job_id} | Update job permissions | Update the permissions for a job |
| GET /api/2.0/permissions/jobs/{job_id}/permissionLevels | Get job permission levels | Get the permission levels for a job |
| POST /api/2.1/jobs/create | Create a new job | Create a new job with a specific name, cluster, libraries, notifications, timeout, retries, and schedule |
| GET /api/2.1/jobs/list | List jobs | List all jobs in your workspace or filter them by name, creator, or type |
| GET /api/2.1/jobs/get | Get a single job | Get a single job by its ID and view its settings and status |
| POST /api/2.1/jobs/reset | Update all job settings (reset) | Overwrite and update all job settings, such as changing the cluster configuration, adding or removing libraries, modifying the schedule, or enabling or disabling the job |
| POST /api/2.1/jobs/update | Update job settings partially | Update some of the job settings, such as changing the name, adding or removing notifications, or changing the timeout or retries |
| POST /api/2.1/jobs/delete | Delete a job | Delete a job by its ID and remove it from your workspace |
| POST /api/2.1/jobs/run-now | Trigger a new job run | Trigger a new job run by its ID and start the job immediately or at a specified time |
| GET /api/2.1/jobs/runs/list | List job runs | List all job runs in your workspace or filter them by job ID, run ID, status, or time range |
| GET /api/2.1/jobs/runs/get | Get a single job run | Get a single job run by its ID and view its details, such as cluster, task, output, and errors |
| POST /api/2.1/jobs/runs/submit | Create and trigger a one-time run | Create and trigger a one-time run with a custom task, cluster, and libraries |
| GET /api/2.1/jobs/runs/export | Export and retrieve a job run | Export and retrieve a job run by its ID and download its output or logs |
| POST /api/2.1/jobs/runs/cancel | Cancel a run | Cancel a run by its ID and stop the job execution |
| POST /api/2.1/jobs/runs/cancel-all | Cancel all runs of a job | Cancel all runs of a job by its ID and terminate all the active runs of the job |
| GET /api/2.1/jobs/runs/get-output | Get the output for a single run | Get the output for a single run by its ID and view the result of the job execution, such as notebook HTML, JAR output, or pipeline state |
| POST /api/2.1/jobs/runs/delete | Delete a job run | Delete a job run by its ID and remove it from your workspace |
| POST /api/2.1/jobs/runs/repair | Repair a job run | Repair a job run by its ID and fix the job run state if it is stuck or inconsistent |
This covers all the capabilities needed to fully automate Databricks jobs.
Next, we'll guide you through step-by-step examples of using the Databricks Jobs API in practice.
Step-By-Step Guide to Control/Monitor Databricks Jobs API With Practical Examples
Let's go through practical step-by-step examples of using the Databricks Jobs API to create, monitor, and manage jobs programmatically.
Before we dive into examples of using the Databricks Jobs API, you need to configure the API client to authenticate the API requests. For this article, we will be utilizing Hoppscotch.

Setting Up Hoppscotch Workspace
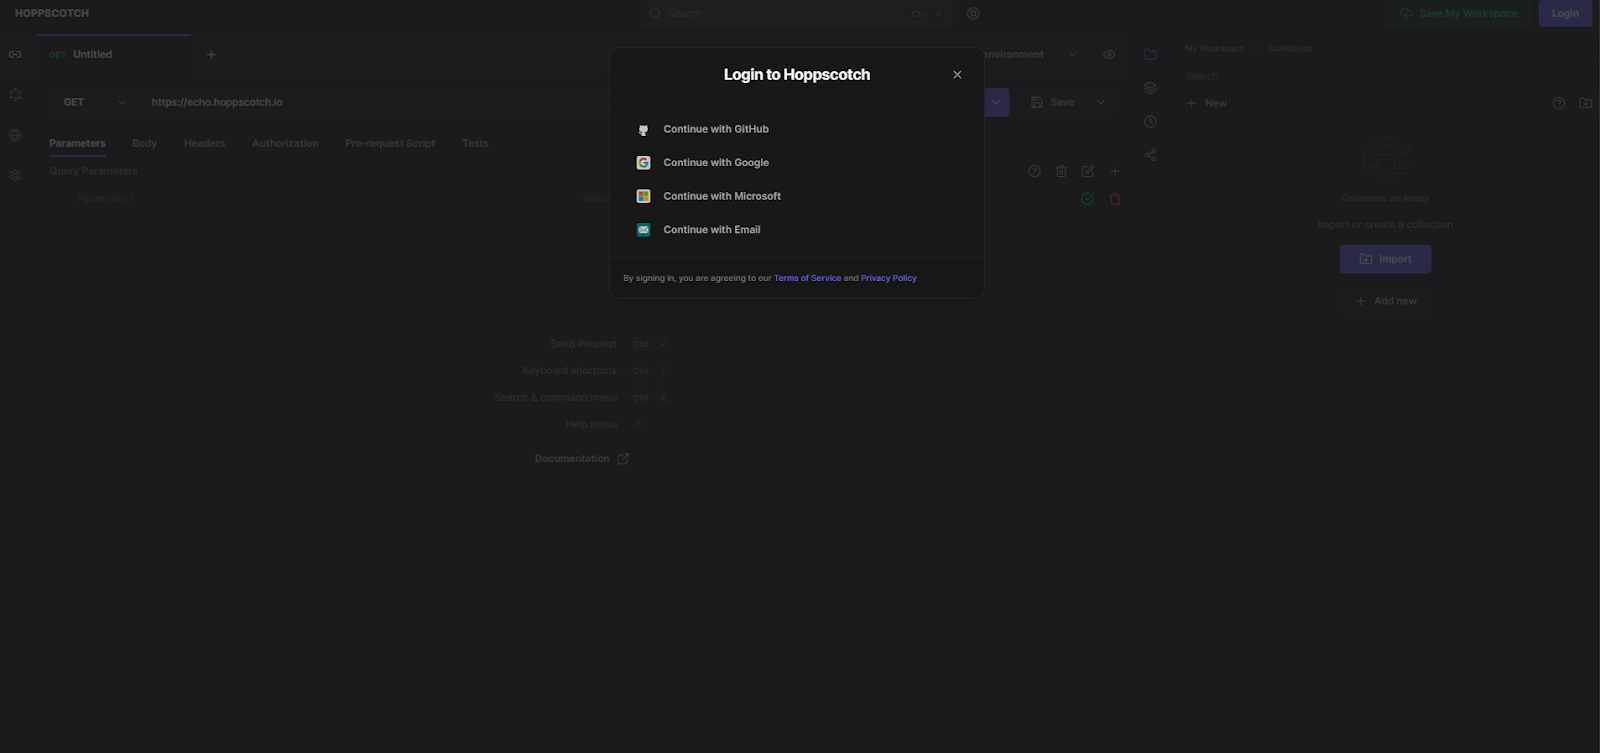
What is Hoppscotch? — Hoppscotch is an open source API development suite that allows users to test APIs directly in their browser, eliminating the need to juggle multiple applications. Hoppscotch offers robust sets of features—and it works across browsers and devices, and can be installed as a PWA.
Now that we understand Hoppscotch—let's log in, create a workspace, and build a collection to harness its full power.
To use Hoppscotch as your API client, follow these steps to set up and configure your workspace:
First—Go to hoppscotch.io and create an account if you don't already have one. Accounts let you save workspaces.
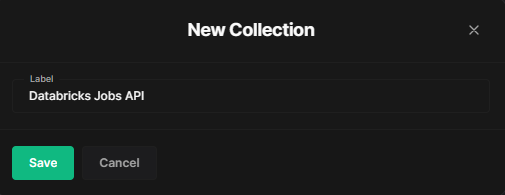
Second—Once logged in, create a new collection by clicking the "Create Collection" button and naming it something like "Databricks Jobs API". This will be the container for your API requests.
Third—Populate the environment variables by either importing existing variables or manually entering keys and values. The environment stores parameters like URLs, credentials, etc. Enter the URL of your Databricks workspace, and then add the personal access token, which you can generate easily in Databricks.
Check out this article on how to generate a personal access token in Databricks.
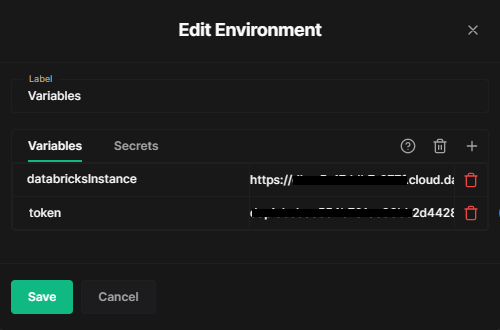
Fourth—If importing variables, click the environment menu on the right and choose your import option.
Fifth—Select the environment you just created by clicking "Environment" at the top and choosing it from the dropdown.
Sixth—Finally, head over to the Authorization section and configure by adding that token as a Bearer token. Like this:
Check out this documentation to learn more about configuring environment variables in Hoppscotch.

That’s it! You've now successfully set up your Hoppscotch workspace and can make authenticated API calls to Databricks.
Step 1—Fetching the Permissions of Databricks Jobs
You can check the permissions configured for a job using the HTTP method GET and the endpoint /api/2.0/permissions/jobs/{job_id}.
This requires the job ID and returns the permission levels granted to users and groups on that job. For instance, this is our job ID, 1097649951024472, so we will simply replace {job_id} with 1097649951024472.
API Request: [GET]
https://<databricks-instance>.cloud.databricks.com/api/2.0/permissions/jobs/1097649951024472Sample Response:
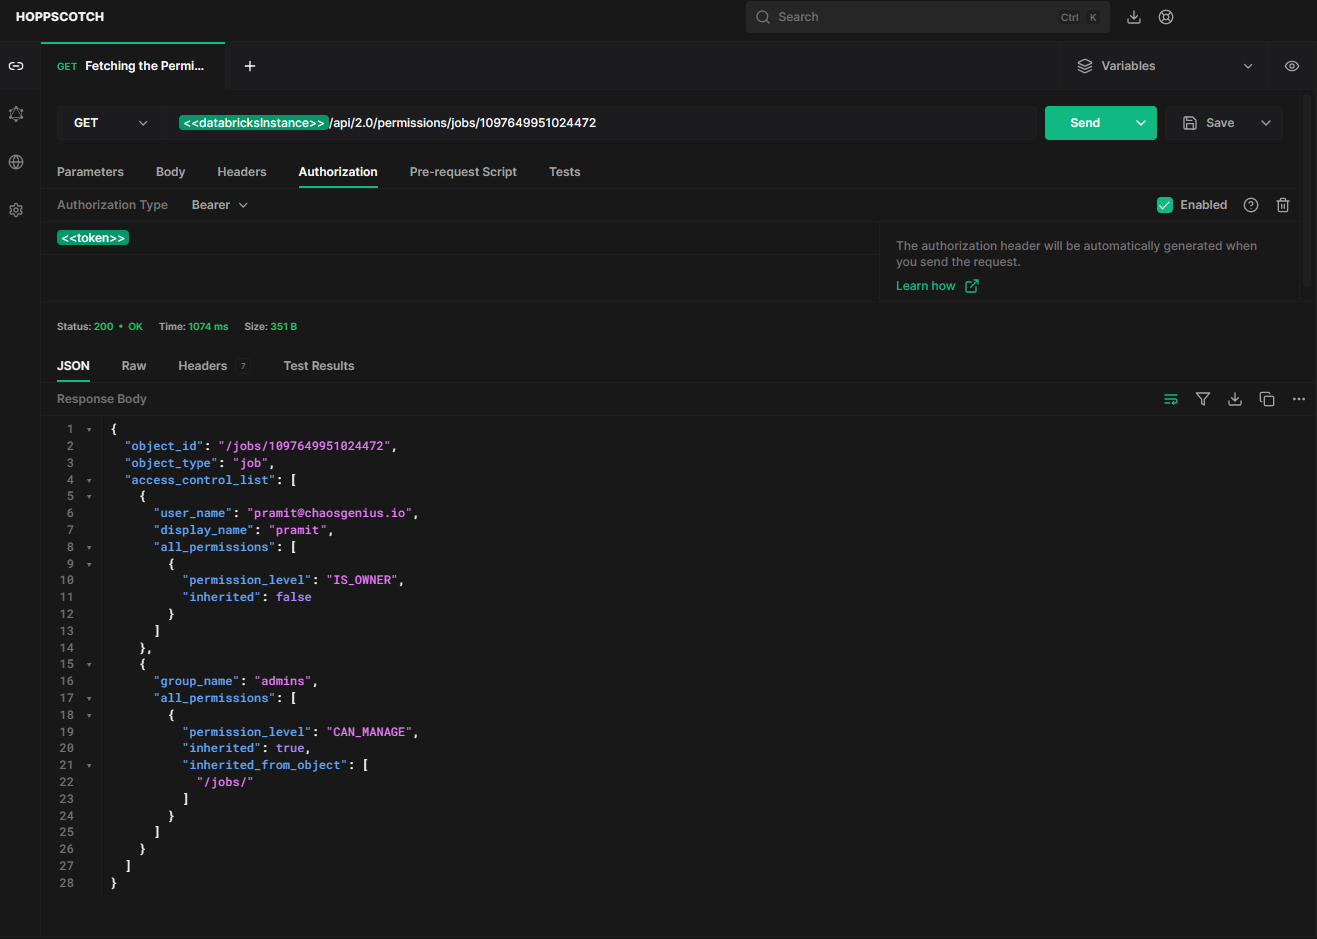
As you can see, the response will contain the username that created the job, associated groups, and the permissions level (e.g. CAN_VIEW, CAN_MANAGE, CAN_MANAGE_RUN , IS_OWNER) granted to each.
Step 2—Setting the Permissions of Databricks Jobs
To programmatically set permissions for a job, you can use the HTTP method POST and the endpoint /api/2.0/permissions/jobs/{job_id} with request payload.
API Request: [PUT]
https://<databricks-instance>.cloud.databricks.com/api/2.0/permissions/jobs/1097649951024472The request payload should contain the job ID in the path and a JSON body with a list of ACL (Access Control List) entries specifying users/groups and their permission levels.
Sample Request Payload:
{
  "access_control_list": [
    {
      "user_name": "[email protected]",
      "permission_level": "IS_OWNER"
    },
    {
      "group_name": "admins",
      "permission_level": "CAN_VIEW"
    }
  ]
}
Sample Response:

As you can see, this shows the user “[email protected]” has owner permissions, while group "admins" has “CAN_MANAGE” and “CAN_VIEW”.
Step 3—Updating the Permissions of Databricks Jobs
To programmatically set permissions for a job, you can use the HTTP method PATCH and endpoint /api/2.0/permissions/jobs/{job_id} with request payload.
API Request: [PATCH]
https://<databricks-instance>.cloud.databricks.com/api/2.0/permissions/jobs/1097649951024472The request payload is the same JSON structure containing updated ACL entries with users/groups and new permission levels.
Sample Request Payload:
{
  "access_control_list": [
    {
      "user_name": "[email protected]",
      "permission_level": "IS_OWNER"
    },
    {
      "group_name": "admins",
      "permission_level": "CAN_VIEW"
    }
  ]
}
Sample Response:
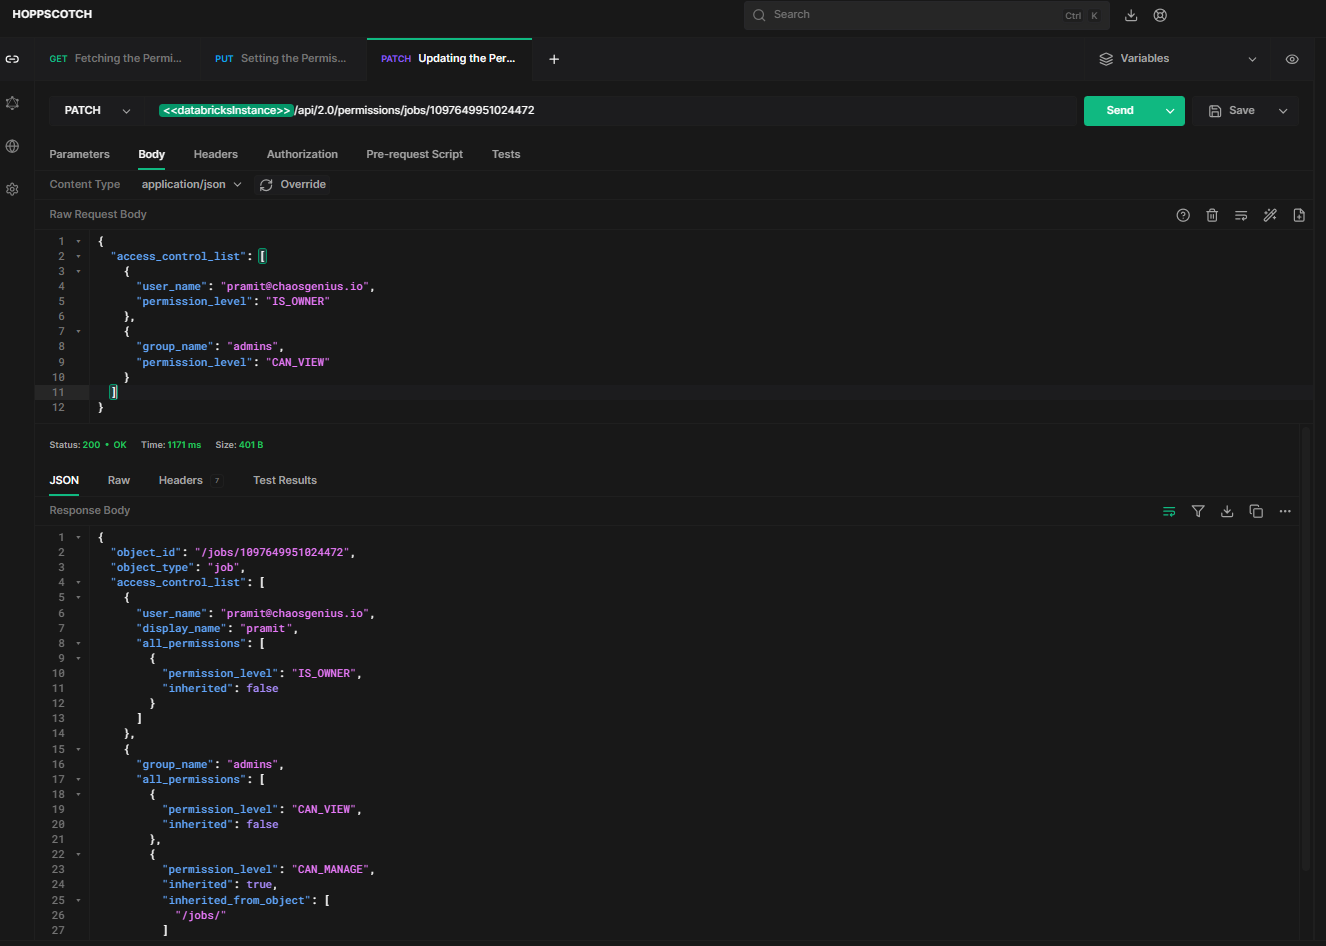
As you can see, this will update the permissions for "admins" group to CAN_RUN for the specified job, while keeping other permissions unchanged.
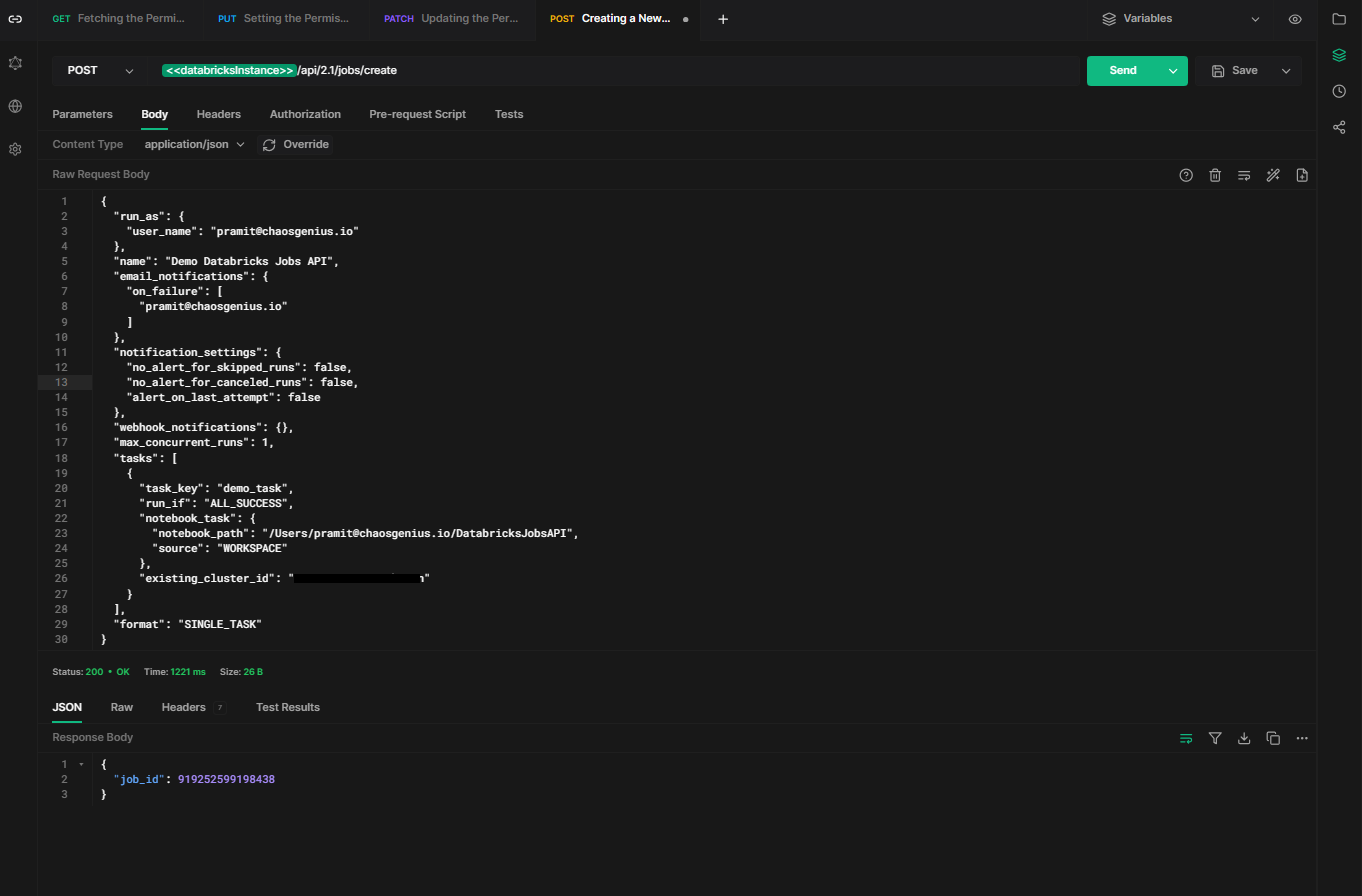
Step 4—Creating a New Databricks Jobs
To programmatically create a new job, you can use the HTTP method POST and endpoint /api/2.1/jobs/create with request payload.
API Request: [POST]
https://<databricks-instance>.cloud.databricks.com/api/2.1/jobs/createThe request payload should contain a JSON body with details like job name, schedule, notebook path, cluster ID, email notifications etc.
Sample Request Payload:
{
  "run_as": {
    "user_name": "[email protected]"
  },
  "name": "Demo Databricks Jobs API",
  "email_notifications": {
    "on_failure": [
      "[email protected]"
    ]
  },
  "notification_settings": {
    "no_alert_for_skipped_runs": false,
    "no_alert_for_canceled_runs": false,
    "alert_on_last_attempt": false
  },
  "webhook_notifications": {},
  "max_concurrent_runs": 1,
  "tasks": [
    {
      "task_key": "demo_task",
      "run_if": "ALL_SUCCESS",
      "notebook_task": {
        "notebook_path": "/Users/[email protected]/DatabricksJobsAPI",
        "source": "WORKSPACE"
      },
      "existing_cluster_id": "<cluster_id>"
    }
  ],
  "format": "SINGLE_TASK"
}
As you can see, the request body to create a job contains:
- run_as: The user account that will execute the job runs.
- name: The name for the Databricks job.
- email_notifications: Emails to notify on job failure.
- notification_settings: Settings to control notifications for skipped, canceled and failed runs.
- webhook_notifications: Webhook endpoints to call on job events.
- max_concurrent_runs: Maximum concurrent runs of this job.
- tasks: An array of job tasks to execute. In this case, a single notebook task.
- notebook_task: Parameters for the notebook task like path and data source.
- existing_cluster_id: The ID of an existing cluster to use for runs.
Sample Response:
Step 5—Listing All Databricks Jobs
You can retrieve a list of all jobs on your workspace using the HTTP method GET and endpoint /api/2.1/jobs/list .
API Request: [GET]
https://<databricks-instance>.cloud.databricks.com/api/2.1/jobs/listSample Response:
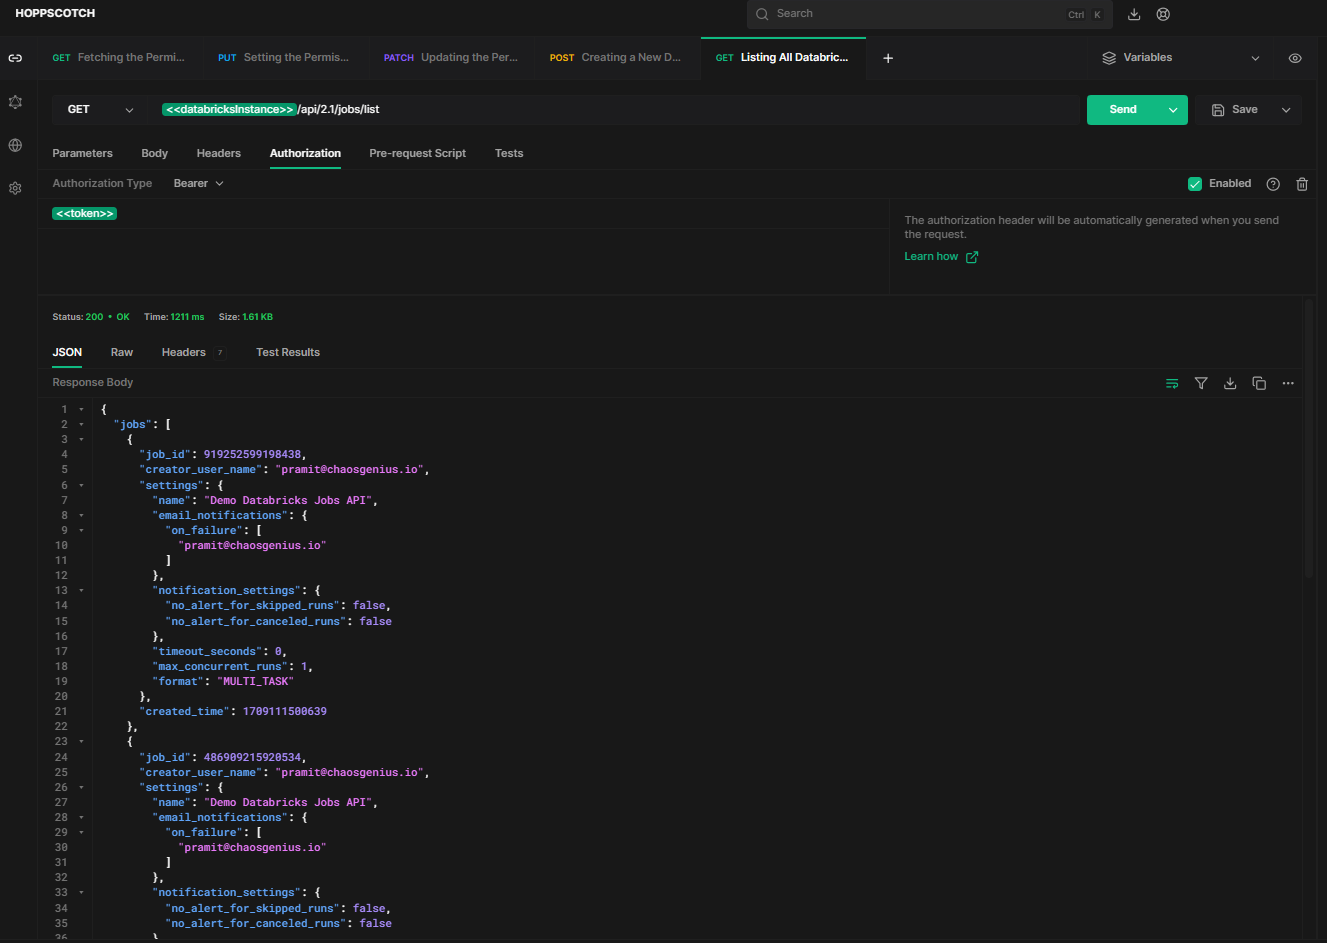
As you can see, the response will contain an array of JSON objects with job IDs, names, creator details and other metadata.
Step 6—Listing Single Databricks Job
To programmatically get the settings and details of a specific job, use the HTTP method GET and endpoint /api/2.1/jobs/get?job_id={job_id}.
For instance, this is our job ID => 919252599198438, so we will simply replace {job_id} with 919252599198438.
API Request: [GET]
https://<databricks-instance>.cloud.databricks.com/api/2.1/jobs/get?job_id=919252599198438Sample Response:
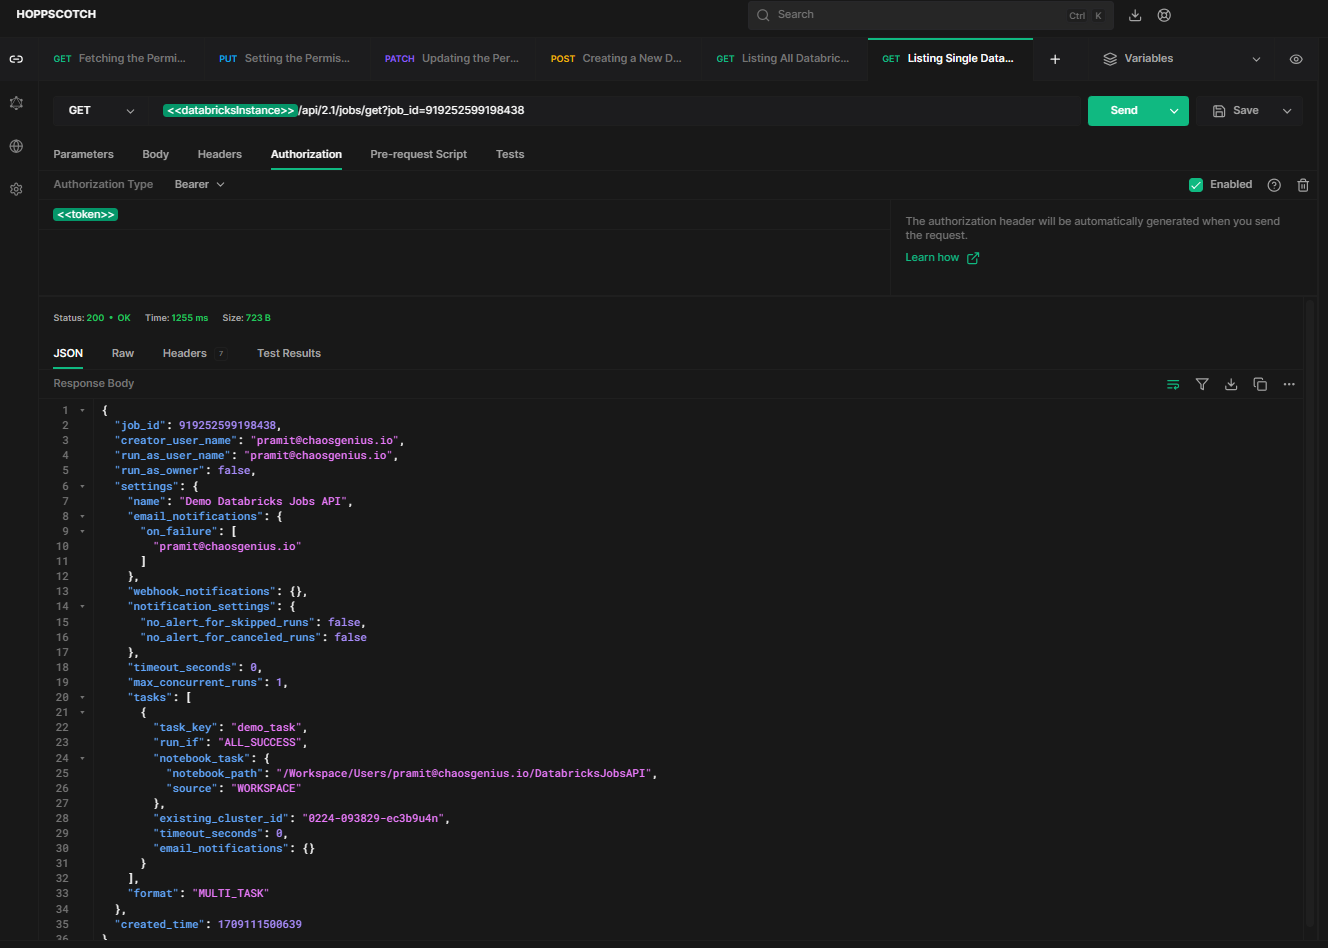
As you can see, this returns the full configuration of job ID 919252599198438.
Step 7—Deleting Single Databricks Job
To permanently delete a Databricks job, use the HTTP method POST and endpoint /api/2.1/jobs/delete?job_id={job_id}.
For example, to delete the job with job ID 486909215920534, substitute {job_id} with 486909215920534.
API Request: [POST]
https://<databricks-instance>.cloud.databricks.com/api/2.1/jobs/delete?job_id=486909215920534Sample Response:
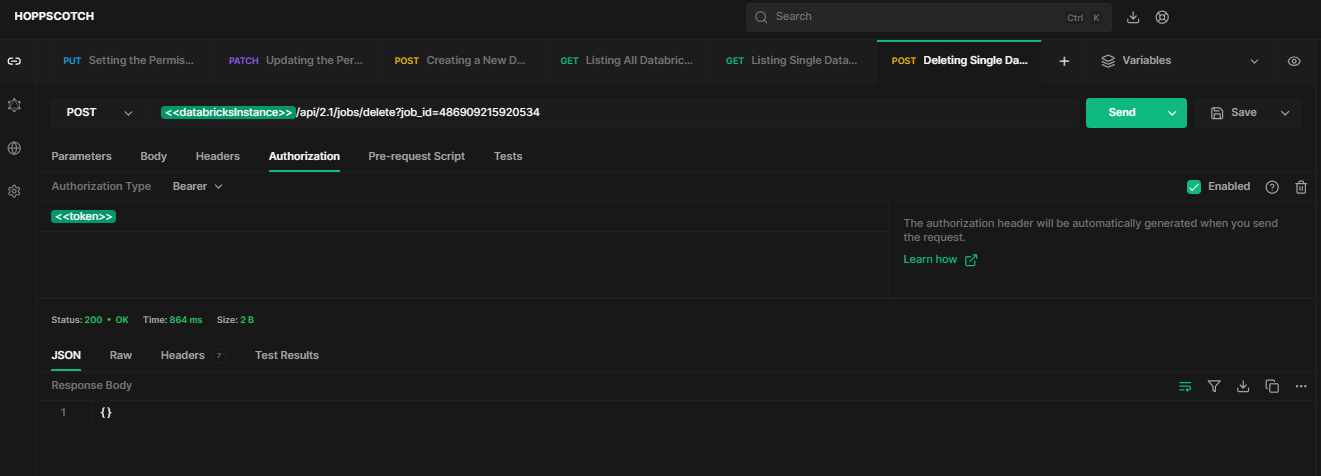
As you can see, this removes the job and its run history from Databricks based on the provided job ID.
Step 8—Triggering a New Databricks Job Run
You can programmatically trigger a run of a job using the HTTP method POST and endpoint api/2.1/jobs/run-now?job_id={job_id}.
For example, to run the job with job ID 919252599198438, substitute {job_id} with 919252599198438.
API Request: [POST]
https://<databricks-instance>.cloud.databricks.com/api/2.1/jobs/run-now?job_id=919252599198438This will immediately trigger job 919252599198438 to start a run with its configured settings.
If you see a response like this, 👇which confirms the run has been initiated:
{
  "run_id": 688107498864107,
  "number_in_job": 688107498864107
}
Sample Response:
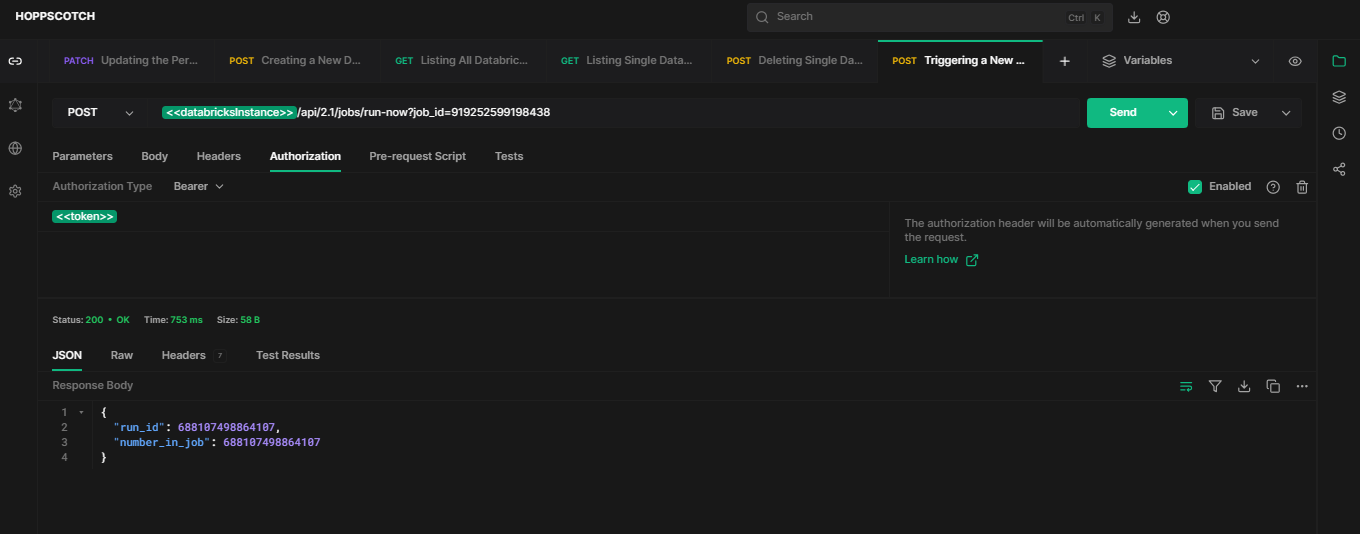
You will see that the response will contain the run ID that can be used to track the status of the triggered run, which we will use in a later section.
Step 9—Listing All Databricks Job Runs
You can get a list of all runs of a job using HTTP method GET and endpoint /api/2.1/jobs/runs/list.
API Request: [GET]
https://<databricks-instance>.cloud.databricks.com/api/2.1/jobs/runs/listSample Response:
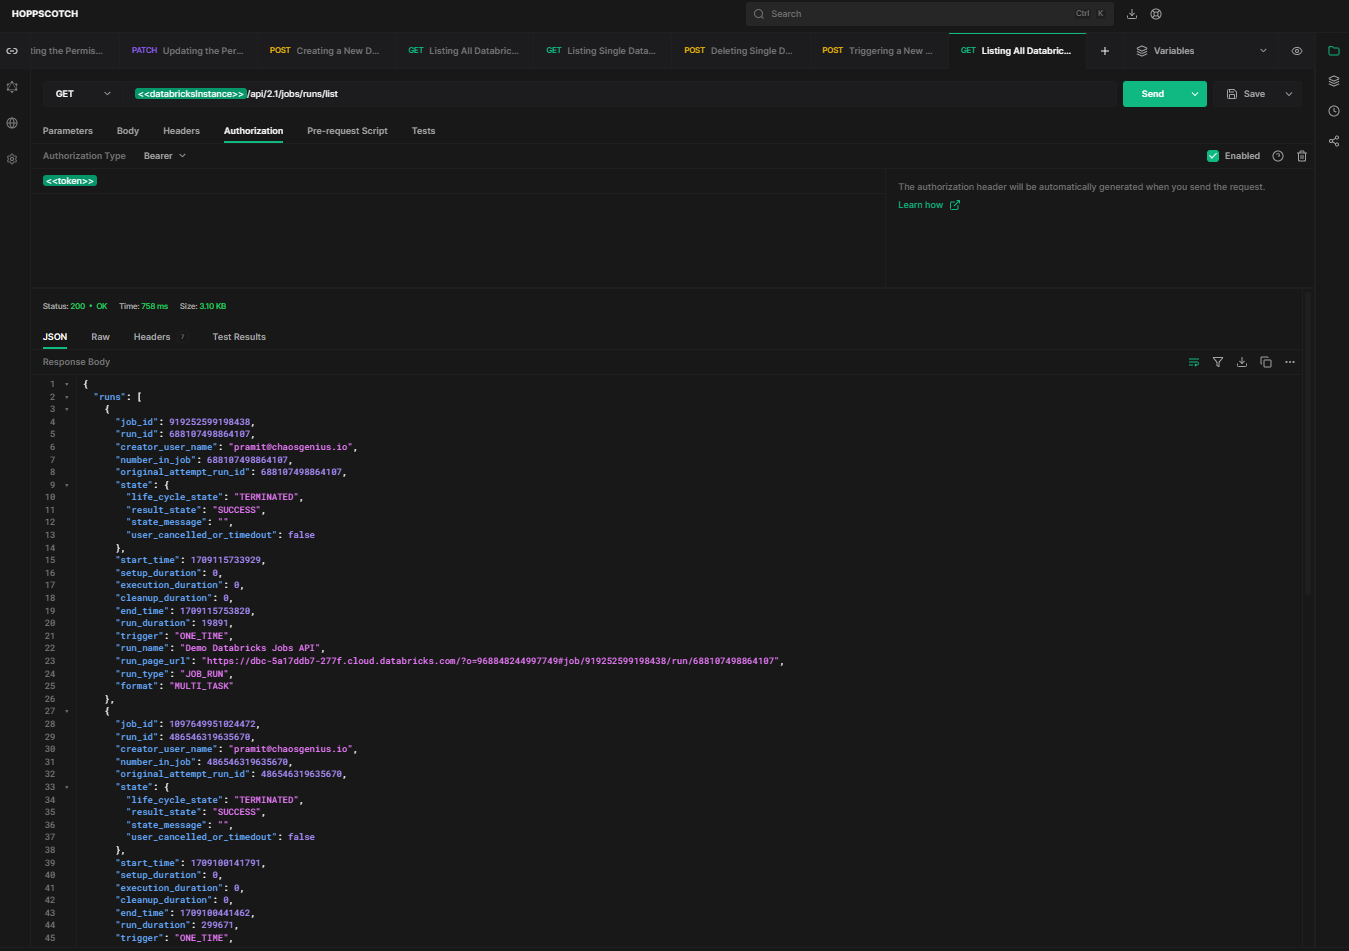
Pass the {job_id} parameter to list a specific job run. For example, to check if a particular job is running or not, you can enter a particular job ID.
API Request: [GET]
https://<databricks-instance>.cloud.databricks.com/api/2.1/jobs/runs/list?job_id=919252599198438Sample Response:

As you can see, the response will contain an array of run IDs, details, statuses and metadata.
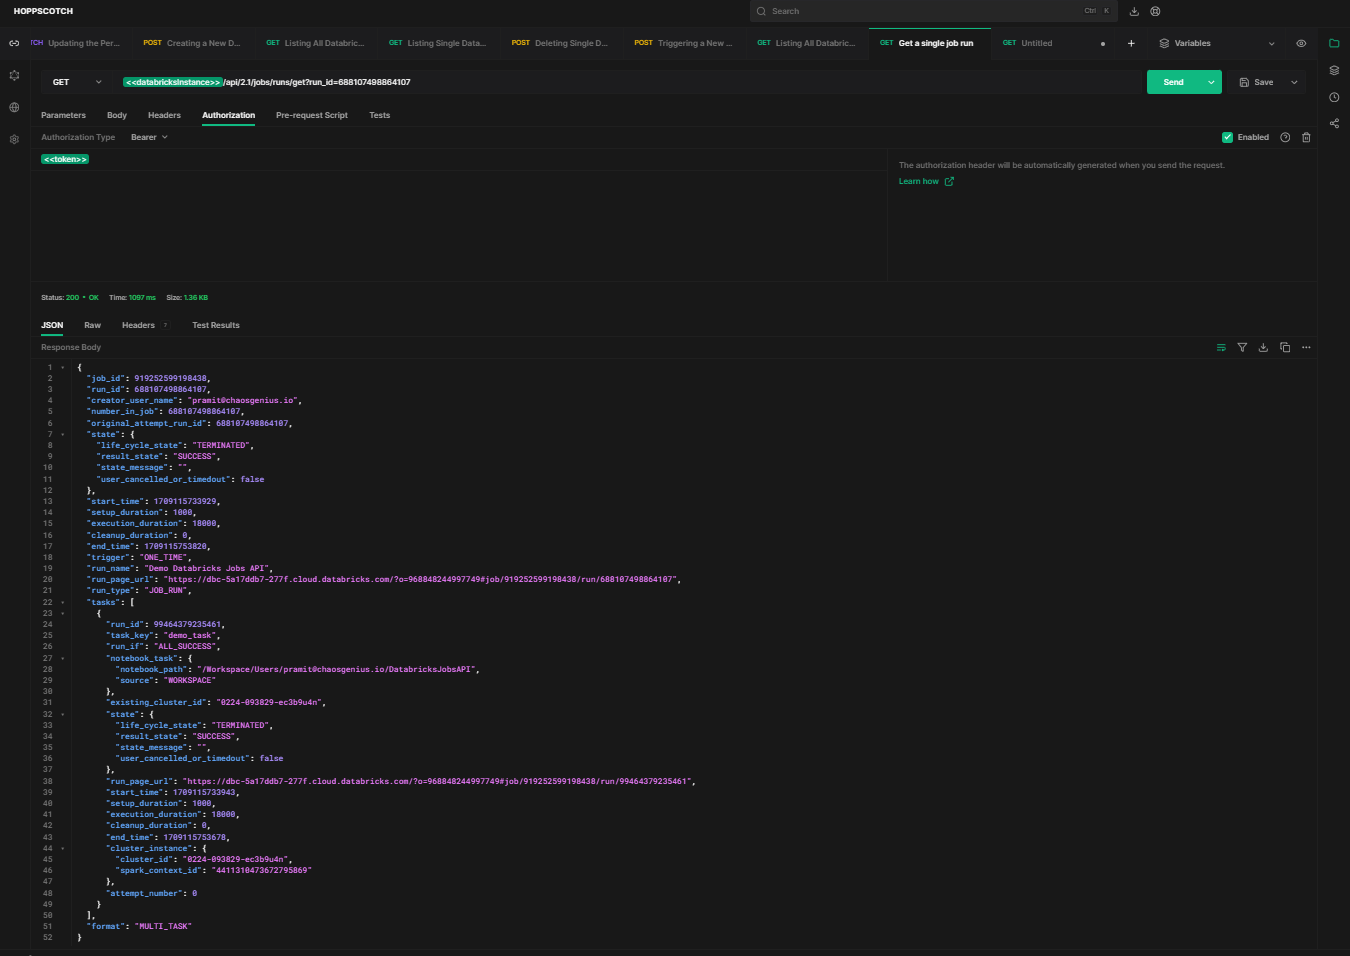
Step 10—Listing Single Databricks Job Runs
Now, to retrieve the entire metadata of specific Databricks job runs, you can do so by using HTTP method GET and endpoint /api/2.1/jobs/runs/get?run_id={run_id} API.
For example, to retrieve the entire metadata of a particular job run, you can enter the run ID of that job.
API Request: [GET]
https://<databricks-instance>.cloud.databricks.com/api/2.1/jobs/runs/get?run_id=688107498864107Sample Response:
Step 11—Terminating a Single Databricks Job Runs
To programmatically cancel a single running Databricks job, use the HTTP method POST and endpoint /api/2.1/jobs/runs/cancel?run_id={run_id}.
API Request: [POST]
https://<databricks-instance>.cloud.databricks.com/api/2.1/jobs/runs/cancel?run_id=688107498864107Sample response:
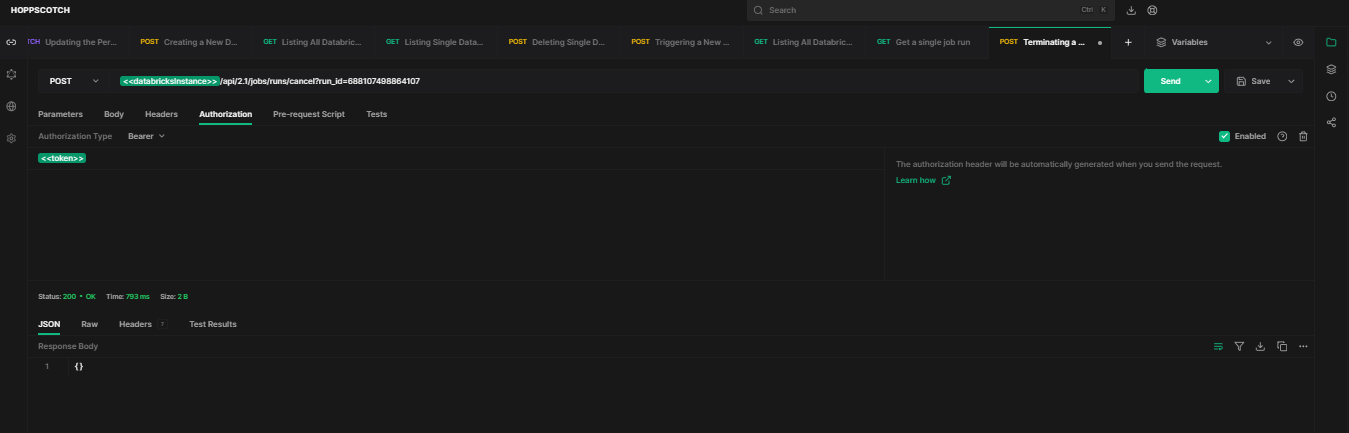
As you can see, this will terminate the run with ID 688107498864107.
Step 12—Terminating All Databricks Job Runs
To cancel all currently running instances of a job, use HTTP method POST and endpoint /api/2.1/jobs/runs/cancel-all?job_id={job_id}.
API Request: [POST]
https://<databricks-instance>.cloud.databricks.com/api/2.1/jobs/runs/cancel-all?job_id=919252599198438Sample response:
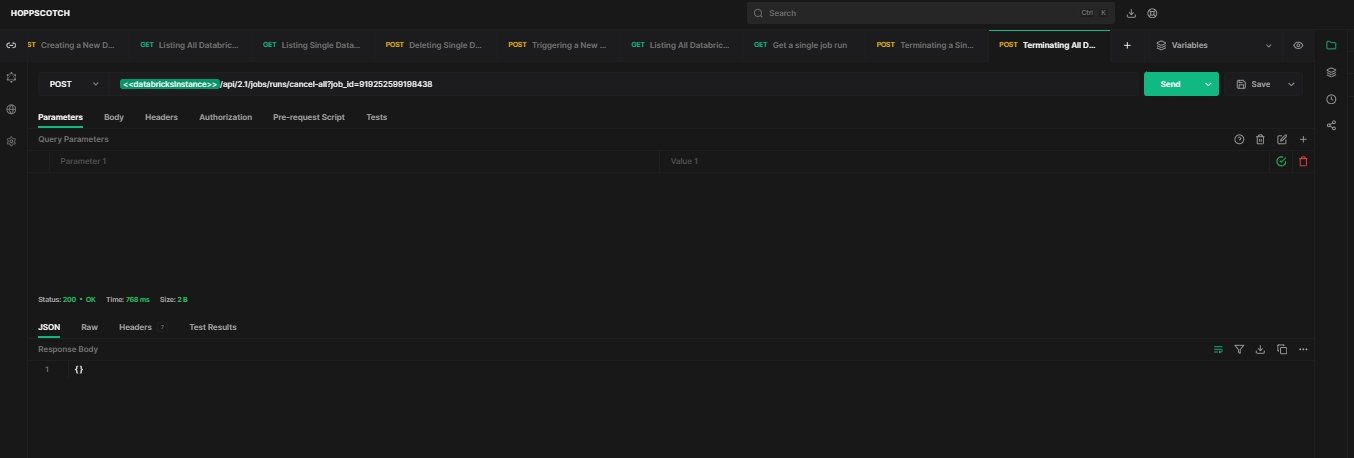
As you can see, this will cancel all active runs of job 919252599198438.
Step 13—Deleting All Databricks Job Runs
To programmatically delete all records of runs for a job, use HTTP method POST and endpoint /api/2.1/jobs/runs/delete?run_id={run_id}.
API Request: [POST]
https://<databricks-instance>.cloud.databricks.com/api/2.1/jobs/runs/delete?job_id=919252599198438Sample response:
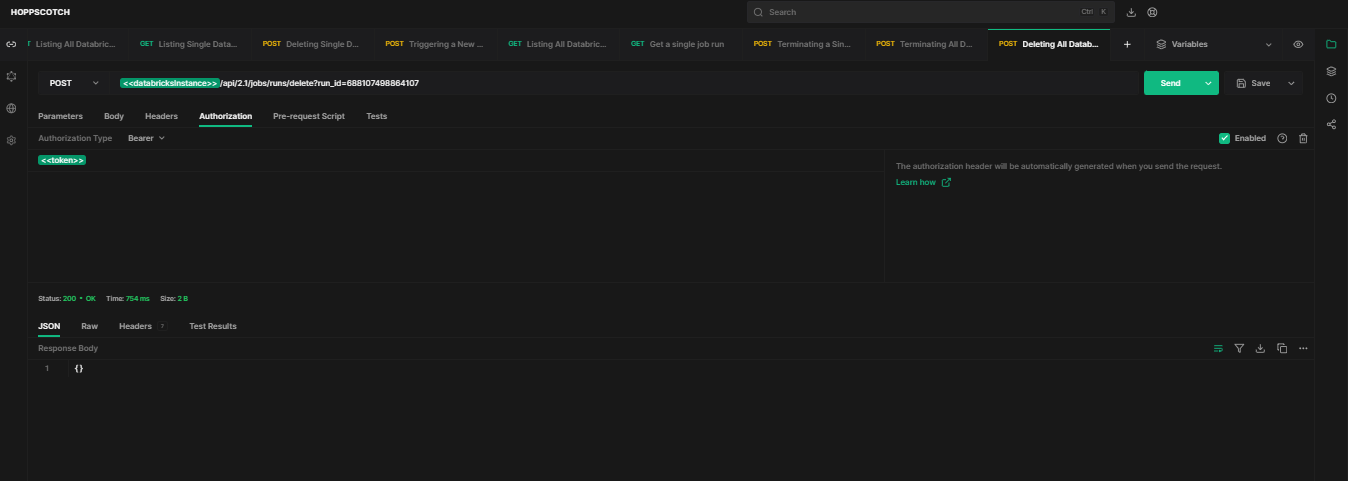
As you can see, this will remove records of all runs of job 919252599198438 from Databricks.
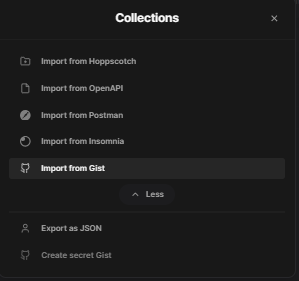
Check out this GitHub gist, where we've included our complete Hoppscotch collection.
To import the collection into your Hoppscotch workspace, simply copy this gist URL and navigate to your Hoppscotch workspace. In the collection options, click the folder 📂 menu, where you'll find an option to import the collection. Paste the gist URL, and you're good to go. Make sure to update the Databricks instance URL and token with your own credentials.
Limitations of the Databricks Jobs API
Databricks Jobs API provides a robust interface for creating and managing jobs, it does have some limitations to be aware of. They are:
1) Lack of Cost Visibility
One major limitation is that the Databricks Jobs API does not expose any kind of endpoint to show any cost data associated with runs. It provides no visibility into the cloud infrastructure costs or Databricks usage costs incurred by jobs. To get basic aggregate cost data, you would need to use the Accounts API and query the account usage tables. But this only provides high-level numbers, not job or run-specific costs.
So if you need transparency into the costs of specific jobs and runs, Databricks Jobs API falls short. You would have to build additional logic on top querying the system tables, cloud billing data and other sources.
2) Intelligent Cluster Management
Another limitation is that the Databricks Jobs API does not provide any optimization of Databricks clusters. It simply runs notebooks on a specified static cluster.
In practice, users often want intelligent auto-scaling, pooling and cost optimization of job clusters, which requires additional orchestration to start clusters just-in-time for runs, safely share clusters between jobs, and shut down clusters after runs complete.
Databricks Jobs API alone does not implement any smart optimization of clusters across jobs. So if you have complex requirements like auto-scaling clusters to control cost and performance, the out-of-the-box Databricks Jobs API is insufficient. You would need to build a custom cluster management system on top of it.
3) Limited Flexibility in Job Tasks
Databricks Jobs API only supports running notebook tasks, Python scripts or JAR tasks. There is no native way to run R scripts, Scala scripts, Shell scripts or other types of jobs. You can package these into notebooks or JARs, but it requires additional overhead.
4) No Support for Advanced Job Dependencies
Databricks Jobs API only allows specifying simple job dependencies like run after completion of another job. But it does not have native support for more advanced dependency patterns like completion of multiple parent jobs, conditional dependencies, etc. These would need to be orchestrated externally.
5) No Resource or Concurrency Controls
Databricks Jobs API does not allow specifying resource limits like maximum memory, cores, or runtime for jobs. There are also no controls for concurrency limits per user or queues to throttle job execution. So unbounded jobs could impact quality of service on a multi-tenant cluster.
6) Monitoring and Alerting Functions
While you can list job runs, the monitoring capabilities are limited. There are no APIs for checking live run metrics or setting alerts based on performance thresholds. So you can't easily build self-healing jobs that watch their own health.
7) Difficult to Reproduce and Replay Failures
When a job run fails, the Databricks Jobs API provides limited debugging data. To properly diagnose, you often need to reproduce the run with the same code versions, data snapshots, and parameters. But the Databricks Jobs API alone does not snapshot all these details to easily recreate failures.
These are some key limitations to note if you plan to use Databricks Jobs API.
Why Migrate From Databricks Jobs API 2.0 to 2.1?
Now that we've covered everything you need to know about Databricks Jobs API and its limitations, let's dive into why migrating from Databricks Jobs API version 2.0 to 2.1 is crucial. As illustrated in the step-by-step example above, you've seen two API versions: 2.0 and 2.1. Now, let's explore the reasons for migrating from 2.0 to 2.1.
The main reason for upgrading to Jobs API 2.1 is to gain support for multi-task jobs. Databricks Jobs API Version 2.0 only allows defining a single notebook or JAR tasks within a job. But with Databricks Jobs API Version 2.1, you can orchestrate much more complex multi-step workflows by configuring multiple tasks with dependencies. For instance, you could chain together a data ingest task, a data cleansing task, and an analysis task within one job. This is not possible in 2.0. The multi-task architecture provides more flexibility to build end-to-end pipelines natively within Databricks Jobs.
Another benefit of Databricks Jobs API Version 2.1 is the ability to define shared job clusters. With Databricks Jobs API Version 2.0, each task had to configure its own cluster. But in Databricks Jobs API Version 2.1, you can create shared clusters at the job level that can be reused across tasks. This allows for better cluster optimization and cost management.
Also, new features and improvements are only being added to the Databricks Jobs API Version 2.1. So sticking with 2.0 means you won't be able to leverage the latest capabilities. The 2.1 API provides access to richer job configuration options beyond just chaining multiple tasks.
And last but not least, the Databricks Jobs API Version 2.1 introduces a more structured request and response format to make integration much, much easier. The separation of job, task, and cluster settings provides more flexibility for building clients.
Conclusion
And that’s a wrap! The possibilities are endless. Databricks Jobs API provides powerful capabilities to automate and integrate job scheduling and workflows. It enables managing jobs at scale programmatically based on triggers or external events.
In this article, we have covered:
- What is Jobs API in Databricks?
- What Are the Benefits of Using Databricks Jobs API?
- What can be done with Databricks Jobs API?
- Step-By-Step Guide to Control/Monitor Databricks Jobs API With Practical Examples
- Limitations of the Databricks Jobs API
- Why Migrate From Databricks Jobs API 2.0 to 2.1?
…and so much more!
FAQs
What is the Databricks Jobs API?
Databricks Jobs API provides a programmatic way to create, manage, monitor, and automate Databricks jobs instead of using the UI.
What are some key benefits of the Databricks Jobs API?
Benefits like: automating job scheduling, integrating with external systems, getting granular analytics on job runs, scaling to manage thousands of jobs, and higher speed/efficiency.
What types of actions does the Databricks Jobs API support?
Databricks Jobs API supports creating, reading, updating, deleting (CRUD) jobs and runs along with actions like triggering runs, getting run outputs, canceling runs, etc.
How do you authenticate Jobs API requests?
You authenticate Databricks Jobs API requests by configuring an API client like Hoppscotch with the Databricks workspace URL and a personal access token.
How can you check the permissions configured for a Databricks job?
You can use the GET /permissions/jobs/{job_id} API to retrieve the permissions granted to users/groups on a job.
How do you create a new Databricks job via the API?
Use the POST /jobs/create API and pass a JSON payload specifying the job name, schedule, tasks, cluster, and other parameters.
How can you list all the jobs in your Databricks workspace?
Call the GET /jobs/list API endpoint, which returns an array of JSON objects for each job with metadata.
How do you delete a Databricks job using the API?
You can use the POST /jobs/delete API, passing the job_id parameter of the job you want to delete.
How can you trigger a run of a Databricks job on-demand?
Use the POST /jobs/run-now API and pass the job_id of the job you want to trigger a run for.
How do you get details of a job run like the cluster used and output?
Call GET /runs/get, passing the run_id to retrieve full metadata like cluster details, task, duration, output, etc.
How can you cancel a running job programmatically?
Use POST /runs/cancel, passing the run_id of the running job instance you want to cancel.
How do you terminate all currently running instances of a job?
Use POST /runs/cancel-all and pass the job_id of the job whose runs you want to cancel.
What are some limitations of the Jobs API to be aware of?
It lacks cost visibility, has limited cluster management abilities, supports only a few task types, and has no advanced job dependency or resource control capabilities.
What are the key reasons to migrate from Jobs API 2.0 to 2.1?
Main reasons are support for multi-task jobs, shared job clusters, latest features, and improved structured request/response format.
Can you configure multiple tasks for a job in Jobs API 2.0?
No, Jobs API 2.0 only supports single notebook or JAR tasks. Multi-task jobs are only supported in 2.1.
Does Jobs API 2.1 allow sharing clusters across tasks?
Yes, 2.1 allows defining shared clusters at the job level to reuse across tasks, unlike 2.0.
Can you run Python or Shell scripts natively using the Databricks Jobs API?
No, only notebook and JAR tasks are supported. You'd need to package scripts into notebooks or JARs.
Can Databricks Jobs API configure conditional dependencies between tasks?
No, only simple linear dependencies are supported natively. Advanced dependencies need external orchestration.
Does the Databricks Jobs API provide any optimization of job clusters?
No, the Databricks Jobs API does not natively implement intelligent auto-scaling or optimization of clusters.
Can you retrieve cost data associated with job runs via Databricks Jobs API?
No, the Databricks Jobs API does not expose any job run cost data. You need to query account usage tables separately.
Does Databricks Jobs API require admin permissions?
No, you can use the Databricks Jobs API with regular user permissions. But certain actions like managing permissions need advanced permissions.