


Databricks CLI provides a convenient way to interact with the Databricks platform and helps users effectively manage Databricks objects/resources, including clusters, notebooks, jobs, and users—directly from their local machine's command-line interface (CLI). It offers an alternative to using the graphical user interface (GUI). The Databricks command-line interface (CLI) is useful for automating repetitive tasks, integrating workflows with other tools, and providing a more programmatic way to interact with Databricks resources.
In this article, we will dive into everything you need to know about Databricks CLI—what it is, why it is useful, how to install and set it up, the various commands it provides, and real-world examples of using those commands.
What Is Databricks CLI Used For?
Databricks CLI provides command-line access to various functionalities offered by the Databricks workspace. It acts as an alternative to the web UI and allows the automation of admin tasks, making workflows more convenient and efficient. Here are several advantages of using a CLI like Databricks CLI over the Databricks web UI:
- Automated Execution: Databricks CLIs allow the automated execution of commands via scripts, helping to automate repetitive tasks and workflows.
- Talk to Databricks APIs: The Databricks CLI makes it easy to use most of the Databricks REST APIs with simple commands.
- Manage Databricks objects: You can create, change, and manage things like clusters, jobs, notebooks, libraries, MLflow experiments, and Delta tables.
- Run workflows: You can write Databricks CLI commands to run workflows that create clusters, run jobs and notebooks, train models, log metrics, and build end-to-end ML pipelines.
- Access DBFS: You can work directly with Databricks File System (DBFS).
- Control permissions: You can set permissions on Databricks objects at different levels through the Databricks CLI.
- Retrieve info/details: You can get details on your Databricks environment, such as usage statistics, audit logs, and metadata.
- Portability: Databricks CLI is available across major platforms like macOS, Linux, and Windows.
…and so much more!!!
TL;DR: Databricks CLI provides an efficient, programmatic, and customizable way to manage the Databricks workspace. It is well-suited for automation, remote access, easy configurations—and much much more compared to using the web UI alone.
Some key usages of the Databricks CLI are:
- Listing, creating, updating, and deleting Databricks clusters
- Exporting, importing, and running notebooks
- Triggering ad-hoc jobs and job submissions with configuration files
- Managing Databricks permissions and users through commands
- Executing SQL queries directly
- Browsing and downloading logs and files
- Configuring authentications and profiles for multiple users/subscriptions
- Integrating Databricks workflows with other DevOps tools via APIs
How to Install Databricks CLI?
Databricks CLI can be easily installed on macOS, Linux, and Windows using package managers like Homebrew, Curl for macOS/Linux or WinGet, WSL, and Chocolatey for Windows. If you prefer, you can also manually install it using the source/binary file provided by Databricks, which works on all operating systems.
Let's go through the step-by-step installation guide for the Databricks CLI on different operating systems.
Step-By-Step Guide to Installing Databricks CLI on Various Operating Systems:
1) Installing on Linux

Follow these steps to install Databricks CLI on Linux:
First, make sure that your Linux system is up and running. You can use any distro of your choice, but make sure that your Linux version is at least greater than v3.

Step 1—Check if Curl / Homebrew Is Already Installed
Check if curl or brew is already available by running the following command:
curl --version
brew --version 
Take a look at this guide and this guide for installing Homebrew and Curl on a Linux operating system.
Step 2—Download Databricks CLI using Curl / Homebrew
- Using Curl:
You can use curl to download and install the Databricks CLI executable by running the following command:
curl -fsSL https://raw.githubusercontent.com/databricks/setup-cli/main/install.sh | sh
- Using Homebrew:
You can use Homebrew to add the databricks/homebrew-tap repo to your list of available Homebrew Tap repositories:
brew tap databricks/tap
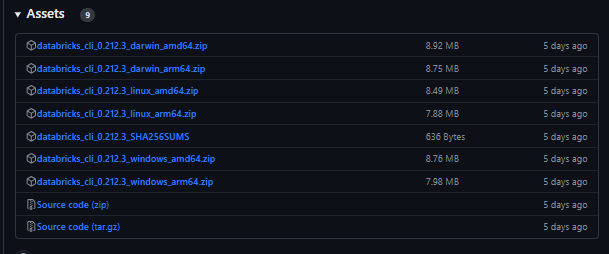
- Manual Install from Source:
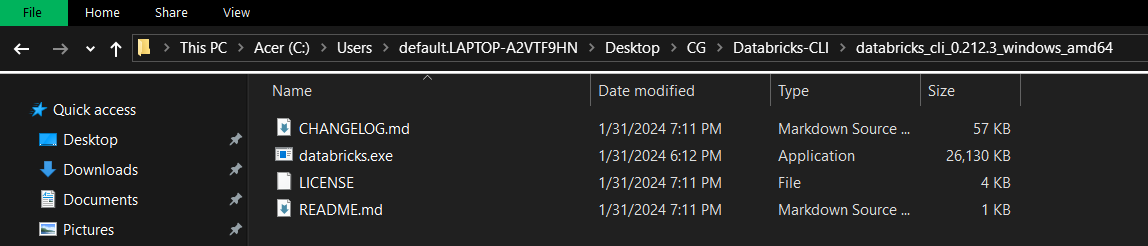
For manual installation, you need to download the “.zip” file and then manually extract the Databricks CLI executable from the downloaded “.zip” file.
But first, to download the right Databricks CLI version for your Linux OS, you need to check which architecture of Linux you are using. For that, you can use the command mentioned below:
uname -mor
lscpuor
sudo lshw -c cpu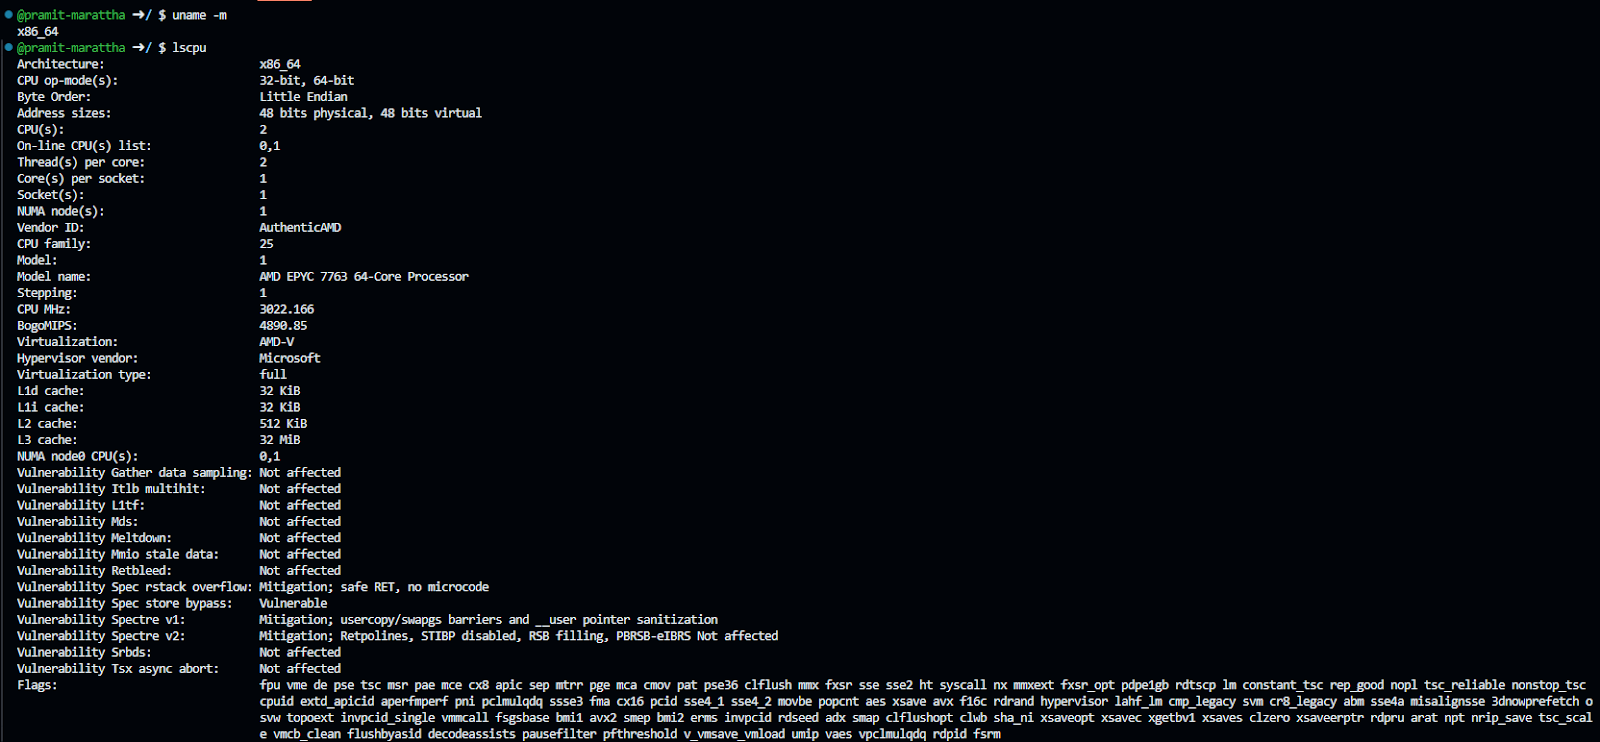
All you need to do now is extract the contents of the downloaded “.zip” file.

Step 3—Install Databricks CLI Using Curl / Homebrew / Source
- For Curl:
There is no need to execute any installation using the Curl command if you've followed the steps mentioned earlier; you likely have already downloaded and installed the Databricks CLI.
- For Homebrew:
Once you have added the “databricks/homebrew-tap” repo to your list of available Homebrew Tap repositories, you can use Homebrew to instruct the databricks/homebrew-tap repository to download and install the Databricks CLI executable.
brew install databricks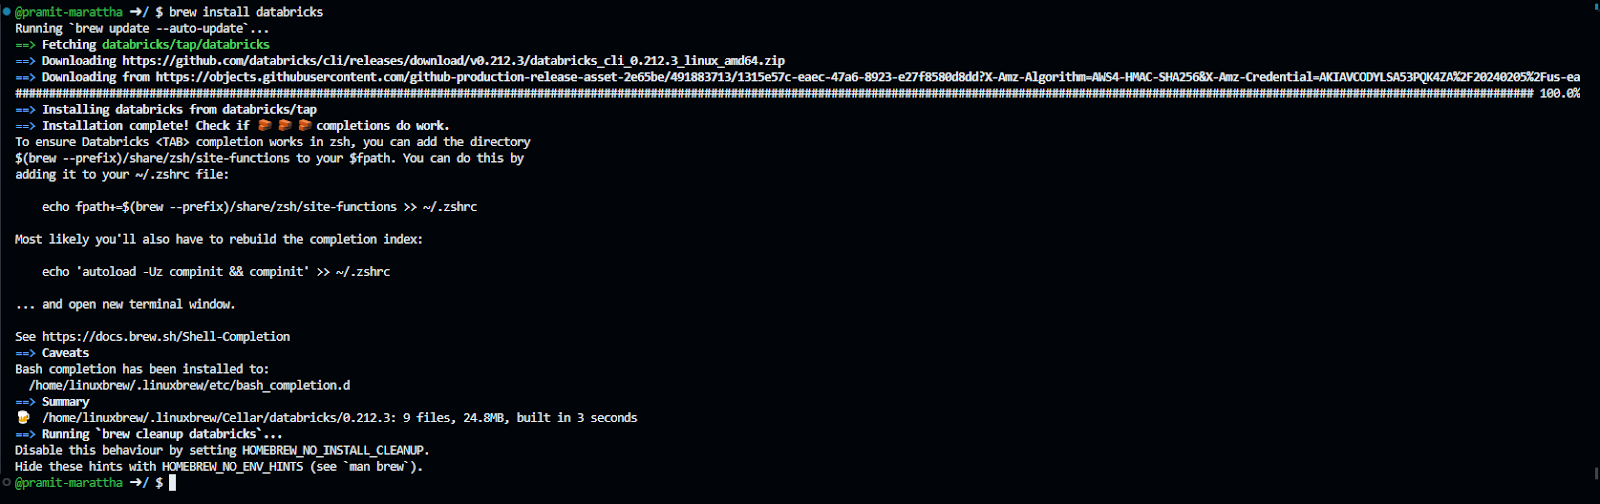
- For Source:
If you've followed the previous steps, you should have already downloaded and extracted the zip file. In the extracted content, you'll find the Databricks CLI executable. You can choose to leave the Databricks CLI executable there, or you can copy or move it to another location.
Step 4—Verify the Installation
To check if the Databricks CLI is successfully installed on your Linux system, execute the command mentioned below.
databricks --version
As you can see, you have successfully installed the Databricks CLI on your Linux machine. If you execute the command mentioned above, it will print the version if the CLI is installed correctly.
2) Installing on macOS
Step 1—Check if Curl/Homebrew is Already Installed on Your macOS
Before proceeding with the Databricks CLI installation, make sure that Curl or Homebrew is already installed on your macOS. You can check their versions using the following commands:
curl --version
brew --version 
If these commands return version information, it indicates that Curl or Homebrew is installed. If not, you may need to install them.
For an in-depth guide on installing Homebrew and Curl on a macOS operating system, refer to this guide and this guide.
Step 2—Download Databricks CLI using Curl / Homebrew on macOS
- Using Curl:
You can effortlessly download and install the Databricks CLI executable with Curl by executing the following command:
curl -fsSL https://raw.githubusercontent.com/databricks/setup-cli/main/install.sh | sudo sh
- Using Homebrew:
Integrate the databricks/homebrew-tap repo into your available Homebrew Tap repositories with the following commands:
brew tap databricks/tap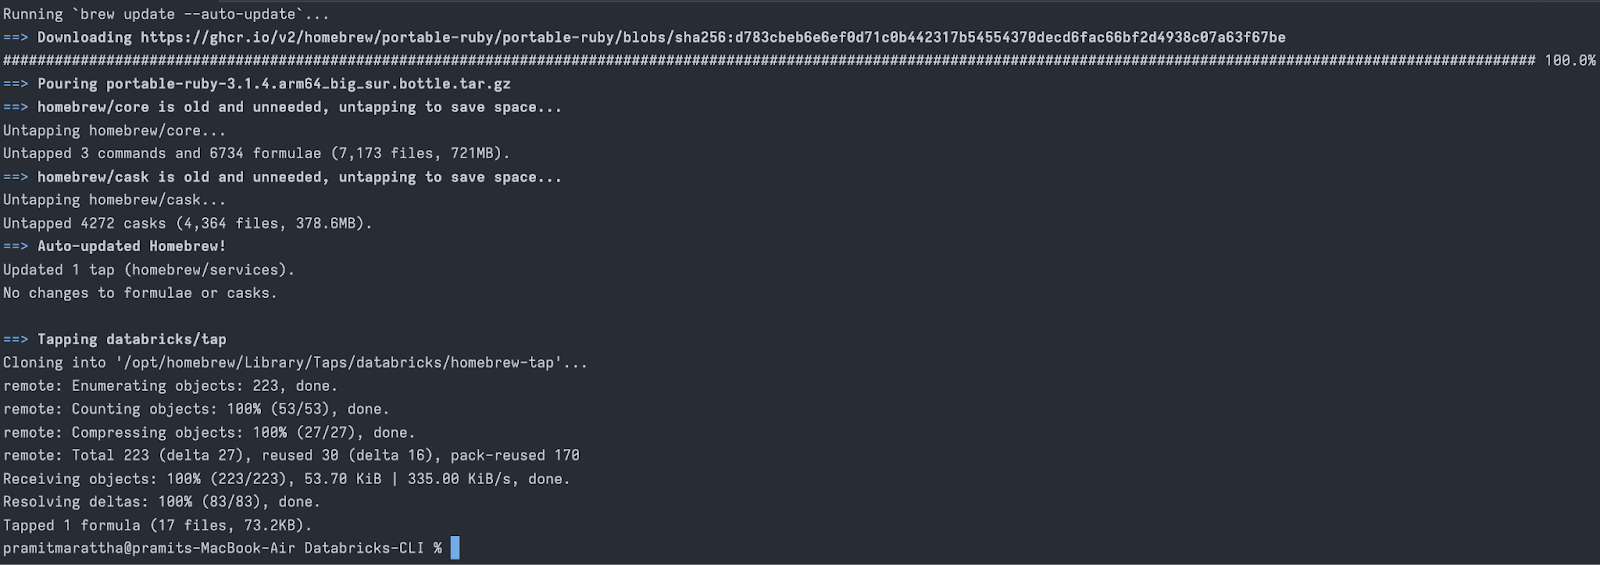
- Manual Install from Source:
For a manual installation, download the ".zip" file and manually extract the Databricks CLI executable. Make sure you download the correct Databricks CLI version for your macOS architecture.

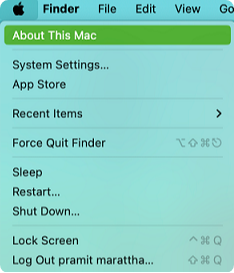
To determine your macOS architecture, click on the Apple icon in the menu > About This Mac.
Or,
Execute the following command:
uname -m
After obtaining the right version, simply extract the contents of the downloaded ".zip" file.

Step 3—Install Databricks CLI Using Curl / Homebrew / Source
- For Curl:
If you've followed the earlier steps, there's no need to execute any additional installation using the Curl command; you likely have already downloaded and installed the Databricks CLI.
- For Homebrew:
After adding the "databricks/homebrew-tap" repo to your list of available Homebrew Tap repositories, use Homebrew to instruct the repository to download and install the Databricks CLI executable with the following command:
brew install databricks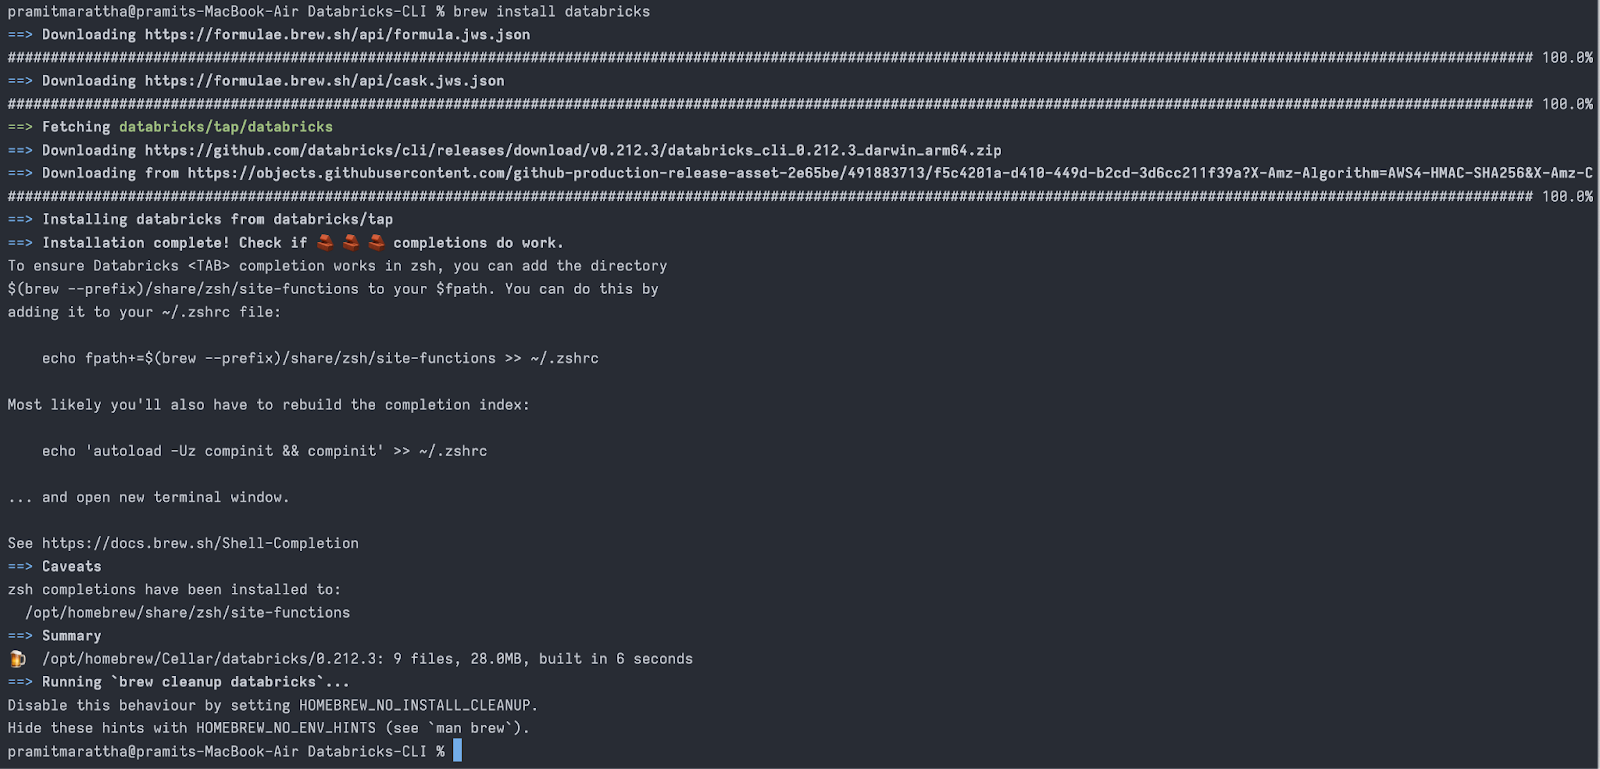
- For Source:
If you followed the earlier steps, you should have downloaded and extracted the zip file by now. Within the extracted content, you'll find the Databricks CLI executable. You can choose to leave it there, or alternatively, copy or move it to another location based on your preference.
Step 4—Verify the Installation
Make sure the Databricks CLI is successfully installed on your macOS machine by executing the following command:
databricks --version
As you can see, if the installation was successful, running this command will display the version of the Databricks CLI.
3) Installing on Windows
Finally, let's see how to install the Databricks CLI on the Windows operating system.
Below are the steps to install Databricks CLI on Windows:
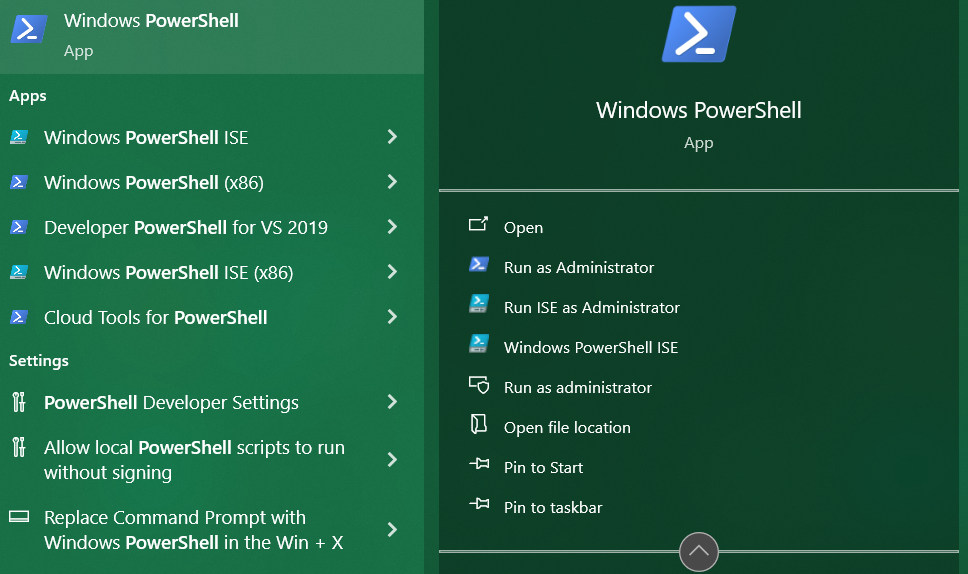
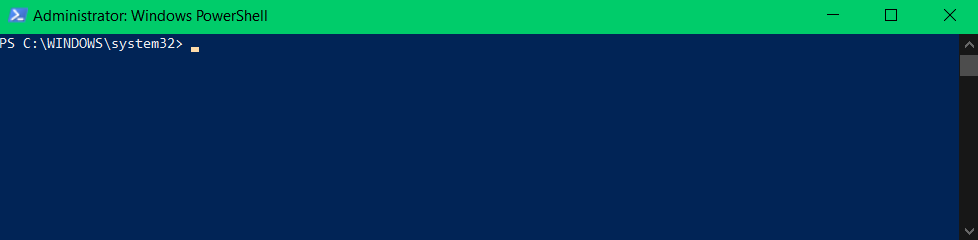
Step 1—Open PowerShell as Administrator
Search for Windows PowerShell, right click and select "Run as Administrator".
Check if Winget or Chocolatey are already available by running the following command:
winget --version
choco -- version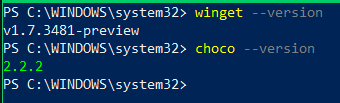
Check out this guide and this guide for comprehensive instructions on installing WinGet and Chocolatey on a Windows operating system.
Step 2—Download Databricks CLI via WinGet / WSL / Chocolatey / Source
There are several options for installing the Databricks CLI on Windows, including using Winget, Chocolatey, Windows Subsystem for Linux (WSL), or installing manually from the source code.
- Using WinGet:
Winget is the package manager built into Windows 10 and 11. To download the Databricks CLI using Winget, first open a command prompt. Then run the following command:
winget search databricks
- Using Chocolatey:
Chocolatey is a popular third-party package manager for Windows. To install using Chocolatey, open a Command Prompt and run the following command. You don't have to download anything; simply execute the command below, and Chocolatey will download and install the Databricks CLI for you:
choco install databricks-cli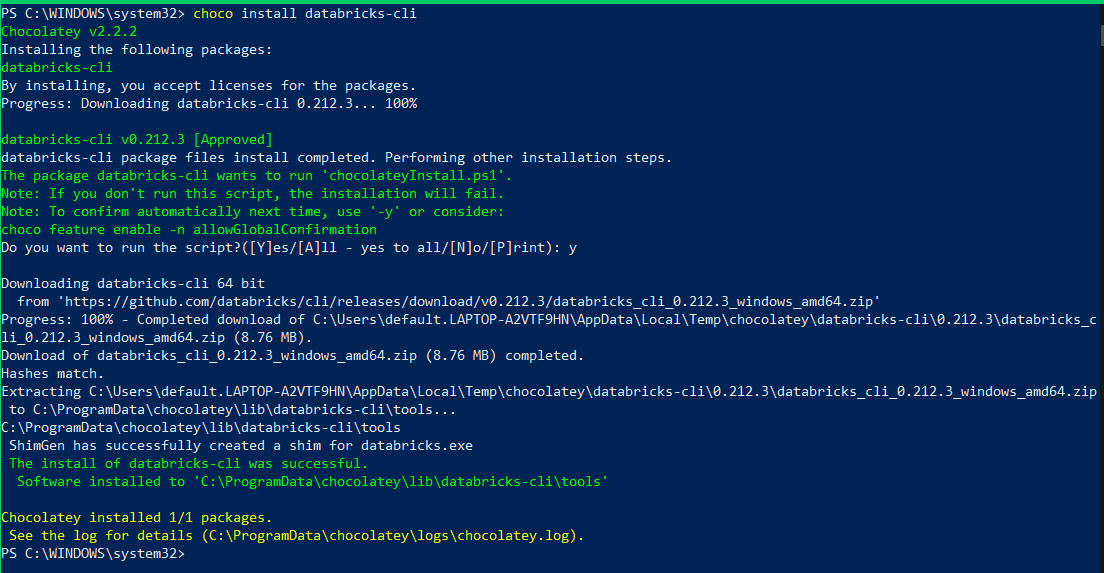
- Using Windows Subsystem for Linux:
To download and install Databricks CLI using WSL, it's the same process as installing it on Linux. All you need to do is follow the steps above and download the Databricks CLI using Curl.
- Manual Install from Source:
You can also manually download the Databricks CLI executable from the releases page on GitHub.

First, check your Windows version by running:
Using Powershell:
$processorArchitecture = $env:PROCESSOR_ARCHITECTURE
Write-Host "Processor Architecture: $processorArchitecture"
Using CMD:
echo %PROCESSOR_ARCHITECTURE%
Then download the zip file for your architecture. Extract the databricks CLI executable.
Step 3—Install Databricks CLI Using WinGet / Chocolatey / WSL / Source
- For WSL:
If you've followed the earlier steps, there's no need to execute any additional installation using WSL; you likely have already downloaded and installed the Databricks CLI.
- For WinGet:
To install the Databricks CLI using Winget, first open a Command Prompt, and then run the following command:
winget install Databricks.DatabricksCLI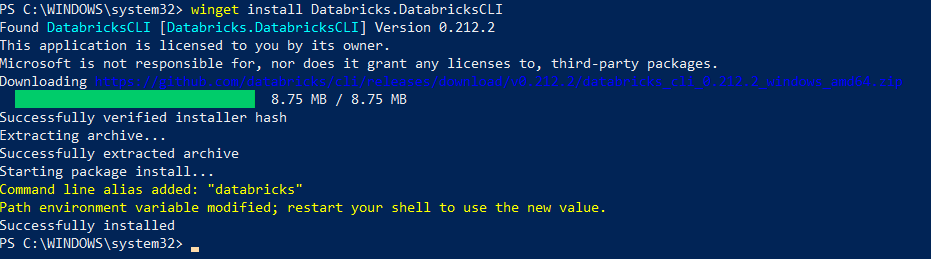
- For Chocolatey:
You don't need to install anything using Chocolatey because if you follow the previous steps, you should have your Databricks CLI up and running.
- For Source:
If you followed the earlier steps, you should have downloaded and extracted the zip file by now. Within the extracted content, you'll find the Databricks CLI executable. Execute that file.
Step 4—Verify the Installation
After installing the Databricks CLI, it's important to verify that it is installed correctly. To check if the Databricks CLI executable is successfully installed, open a new terminal window or tab, then run the following command:
databricks --version
As you can see if the Databricks CLI is installed properly, this will print out the version number of the CLI.
If you get an error like "command not found" then the CLI is not correctly installed or available on your system PATH. Go back and ensure you followed each installation step correctly, especially adding the Databricks CLI to your PATH.
Now let's move on to the next step, where we will set up the authentication for the Databricks CLI.
How to Setup Authentication for the Databricks CLI?
After installing the CLI, you need to configure authentication so it can connect to your Azure Databricks workspace. There are a few methods to do this:
1) Generating Personal Access Token
An access token functions like a password and authenticates your CLI to Databricks. Follow these steps:
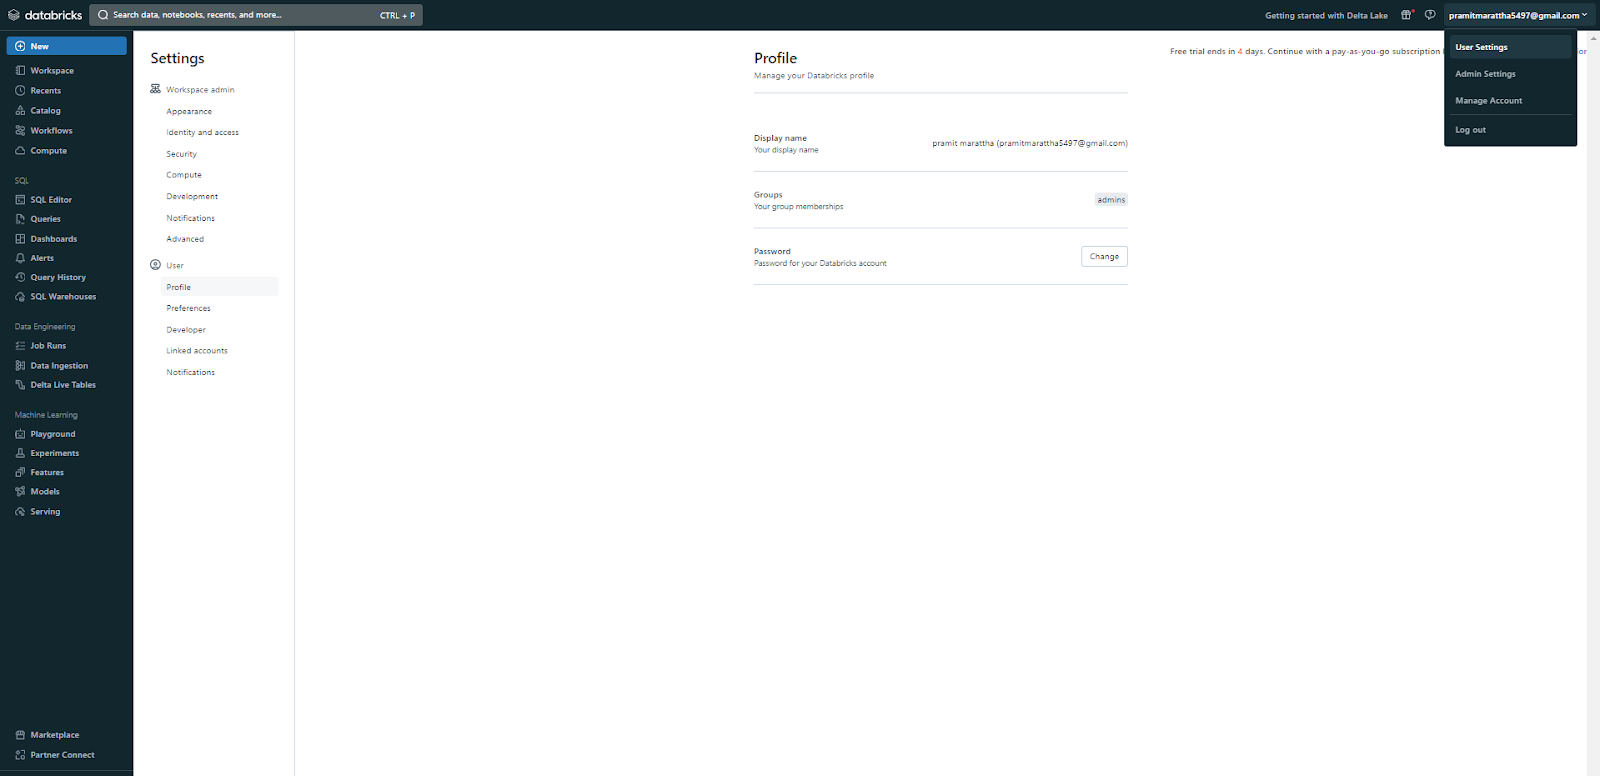
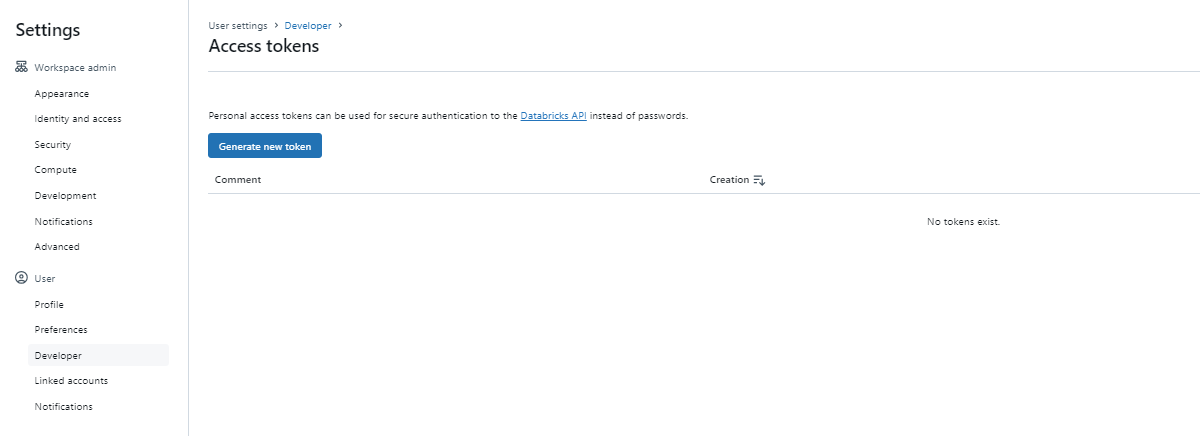
Step 1—Click on Your Username and Select "User Settings" (In Databricks Workspace)
Go to the User Settings section of your Databricks workspace.
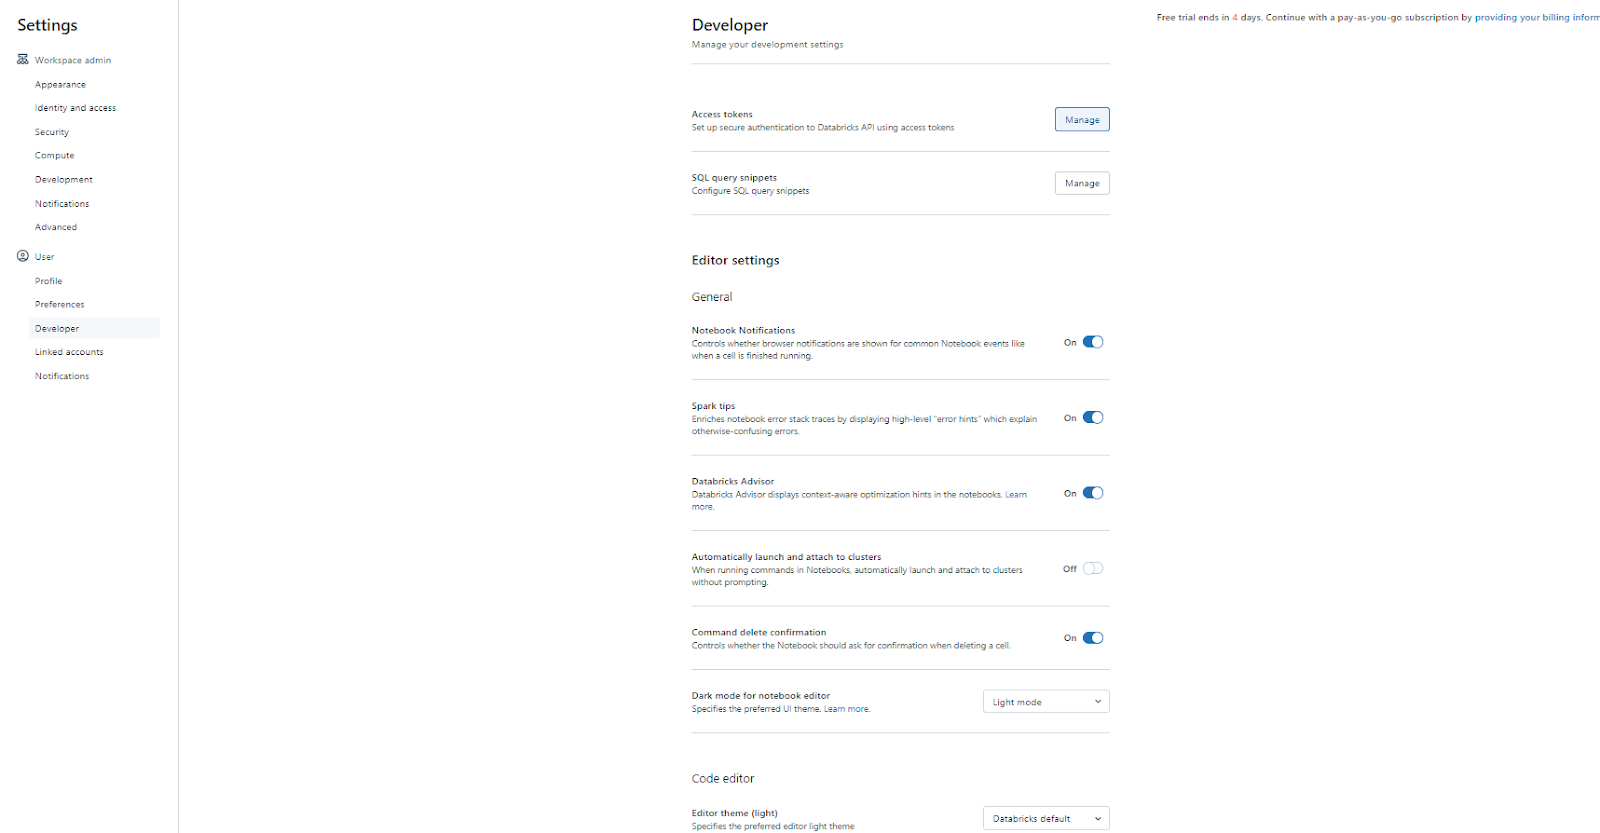
Step 2—Go to the “Developer” Section and Generate a New Token
Navigate to the Developer section and specifically look for the "Manage" option within the Access Token settings.
Step 3—Give Token a Comment and Set Lifetime
Add a comment identifying the token's purpose and set lifetime.
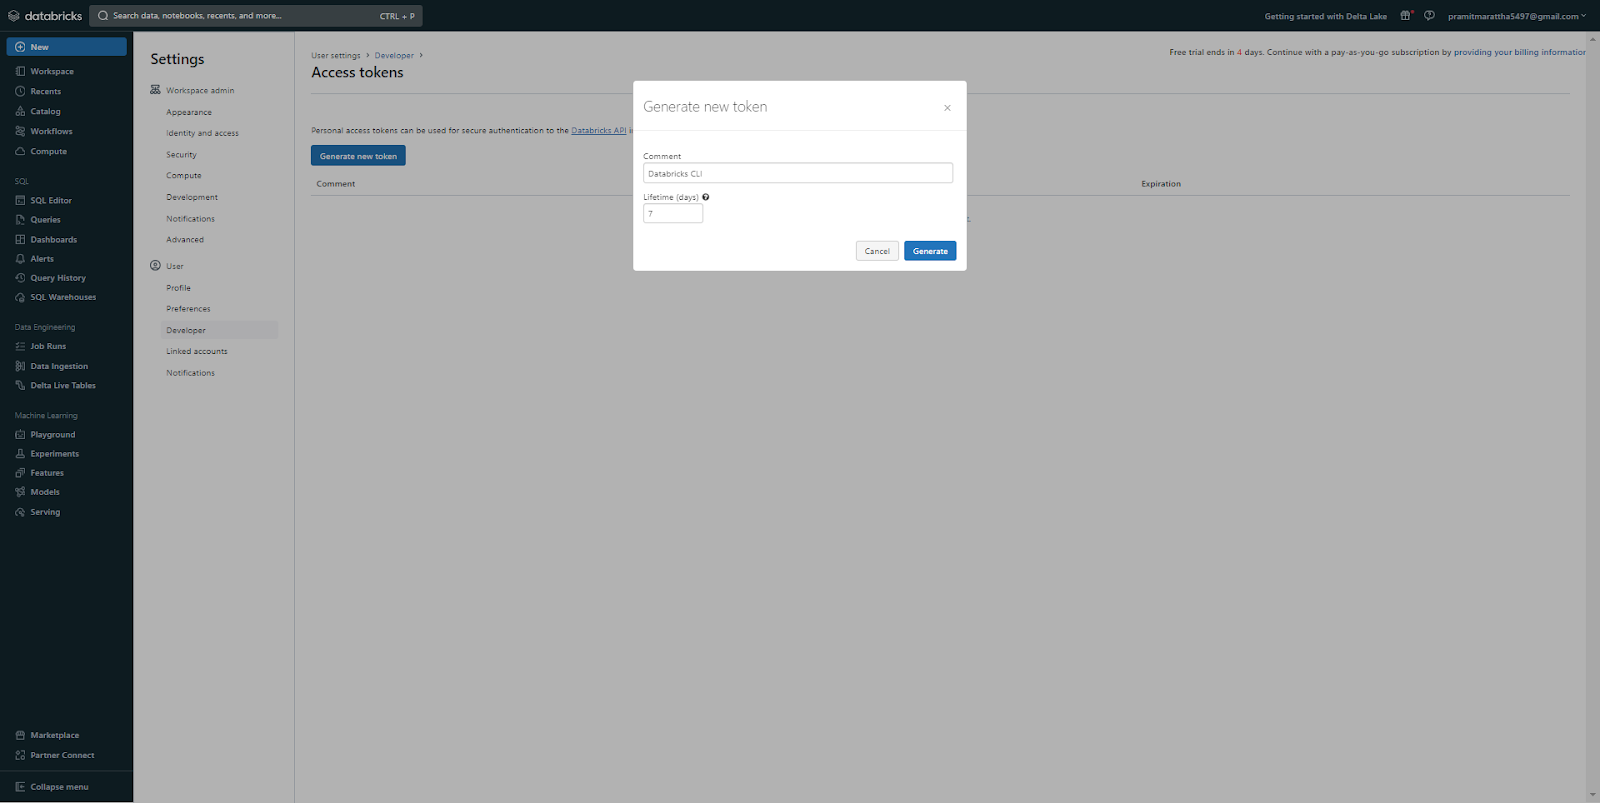
Step 4—Click "Generate"
This generates the access token. Copy it to the clipboard.
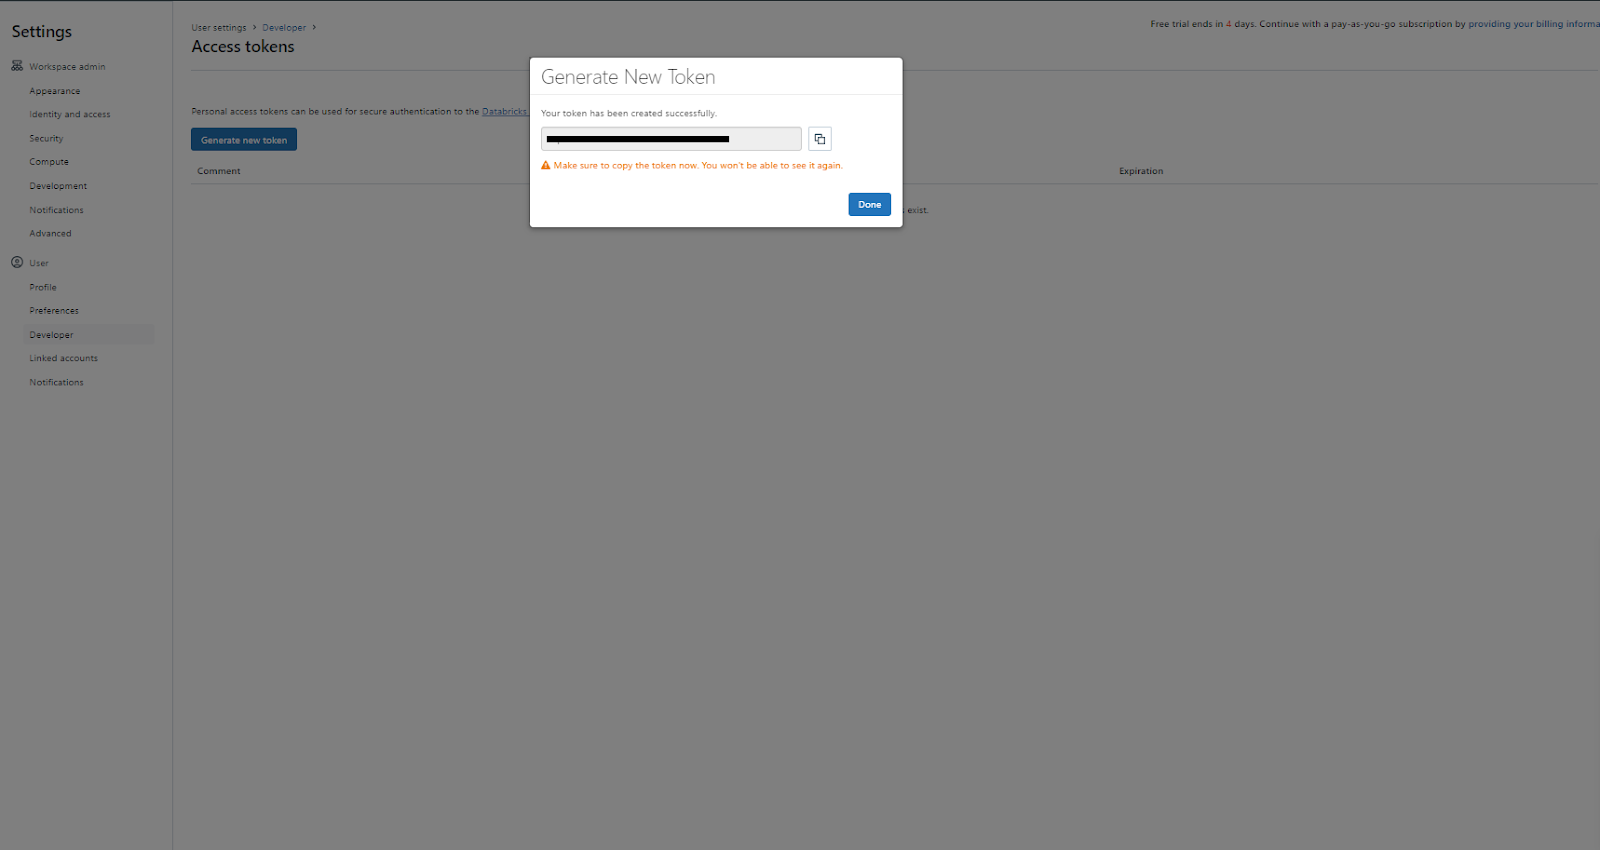
Note: If you lose the token, you will need to generate a new one, as the old token cannot be retrieved.
2) Setting Up Configuration Profile
To set up and utilize personal access token authentication for Databricks, you need to create a configuration profile. To do this, follow the steps mentioned below.
Step 1—Open a Terminal/Command/Powershell Prompt on Your Machine
On your local machine, open your preferred terminal or command-line application and optionally navigate to the directory where you want to create the configuration.
Step 2—Run the Databricks Configure Command
Type the command mentioned below and press Enter to run it. This will start the configuration process.
databricks configure Step 3—Enter Databricks Workspace URL
You will be prompted to enter the "Databricks Host" URL. Enter your full Databricks workspace URL like 👉 https://dbc-123456789.cloud.databricks.com

Step 4—Enter Personal Access Token
Next, you will be prompted to enter a "Personal Access Token". Paste or type your token from the earlier step. This will create a configuration profile in your .databrickscfg file.

(Optional Step) Manually Creating Configuration Profile
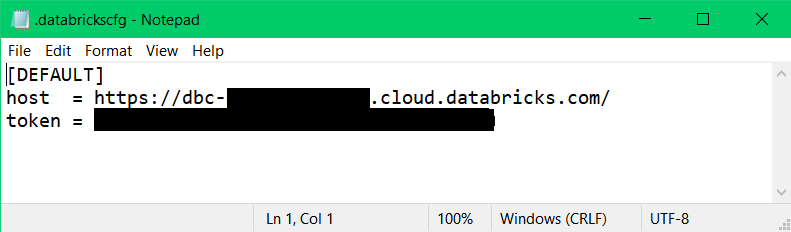
First—Create a “.databrickscfg” manually.
You can manually create a “.databrickscfg” file in your home folder (~) on Unix, Linux, or macOS, or in your %USERPROFILE% folder on Windows. Also, you have the option to change the default path of the “.databrickscfg” file by setting the environment variable.
[DEFAULT]
host = https://xxxx.cloud.databricks.com
token = XXXXXXXXXXXXXXXXXXXXSecond—Add the Profile and Save It
<profile-name>]
host = https://yyyy.cloud.databricks.com
token = XXXXXXXXXXXXXXXXXXXX
Step 5—Verify Authentication
To get information about all available profiles, run the auth profiles command:
databricks auth profiles
To verify if you have set up authentication correctly, you can execute the following command:
databricks clusters spark-versions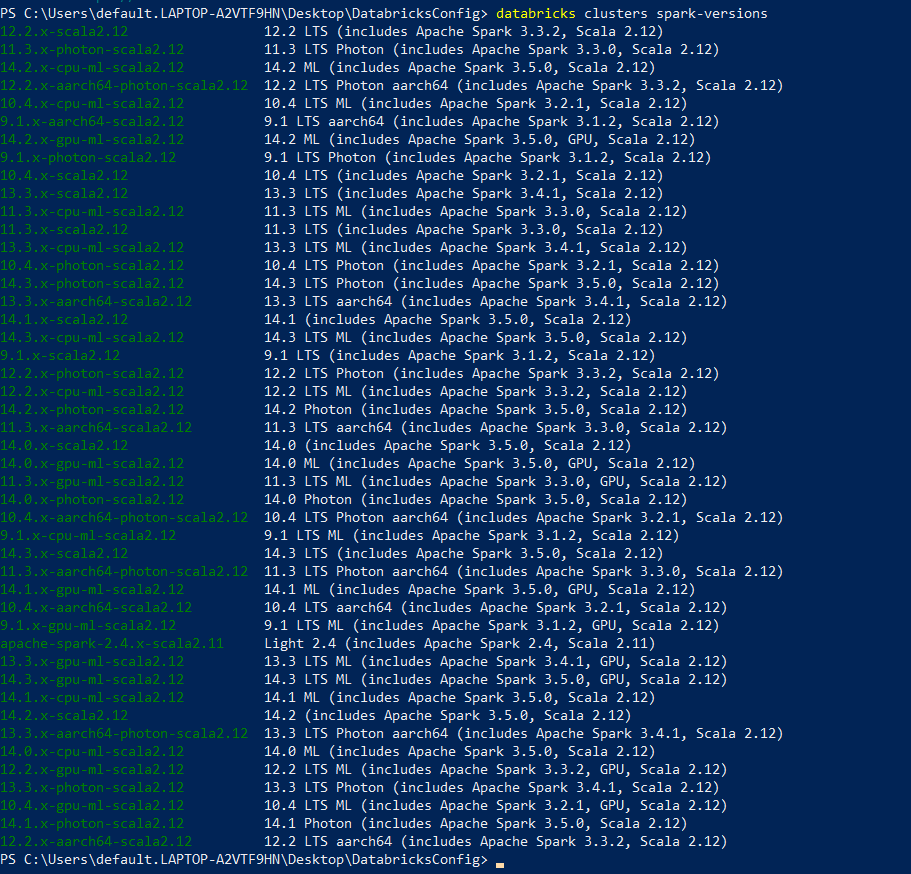
As you can see, this command lists the available Databricks Runtime versions for the Databricks workspace associated with your DEFAULT profile. Once you've established a configuration profile, you can use it to authenticate with Databricks in your code.
List of Databricks CLI commands
Databricks CLI provides a rich set of commands to perform various actions programmatically. There are two main types of commands supported by the Databricks CLI:
1) CLI Command Groups
Commands are organized into logical groups based on the task or functionality they perform. Each command group contains multiple individual commands focused on performing tasks within that domain. Here is the list of the main command groups:
| Command Group | Description |
| account | Databricks account operations. |
| alerts | Databricks SQL alerts operations. |
| api | Call any Databricks REST API. For advanced use cases. |
| auth | Manage Databricks CLI authentication. |
| bundle | Databricks Asset Bundle operations. |
| catalogs | Unity Catalog catalog operations. |
| clean-rooms | Clean room operations. |
| cluster-policies | Cluster policy operations. |
| clusters | Cluster operations. |
| completion | Enable CLI autocompletion. |
| configure | Manage the CLI configuration. |
| current-user | Get information about authenticated users. |
| dashboards | Dashboard operations. |
| data-sources | List SQL warehouse connections. |
| experiments | MLflow experiment operations. |
| external-locations | Unity Catalog external location operations. |
| fs | Databricks File System (DBFS) operations. |
| functions | Unity Catalog UDF operations. |
| git-credentials | Git credentials operations. |
| global-init-scripts | Global init scripts operations. |
| grants | Unity Catalog access grant operations. |
| jobs | Databricks job operations. |
| libraries | Library operations. |
| metastores | Unity Catalog metastore operations. |
| model-registry | Model registry operations. |
| permissions | Databricks object/endpoint permission operations. |
| pipelines | Delta Live Tables pipeline operations. |
| policy-families | Cluster policy family operations. |
| providers | Delta Sharing provider operations. |
| queries | Databricks SQL query operations. |
| query-history | Databricks SQL query history operations. |
| recipient-activation | Delta Sharing recipient activation operations. |
| recipients | Delta Sharing recipient operations. |
| repos | Databricks Repos operations. |
| schemas | Unity Catalog schema operations. |
| tokens | Personal access token operations. |
| users | Databricks user operations. |
| warehouses | Databricks SQL warehouse operations. |
| workspace | Notebook and folder operations. |
…and so much more!
Help for these command groups and their individual commands is provided within the Databricks CLI. For example;
To show help for a command group and a list of its commands, execute:
databricks <command-group> -h.Let's say you want to get help for clusters and a list of its commands. Execute:
databricks clusters -hor
databricks clusters --helpThis will print all commands related to clusters.
To show help for a specific command, execute:
databricks <command-group> <command-name> -hLet's say you want to get help for clusters and their specific commands. Execute:
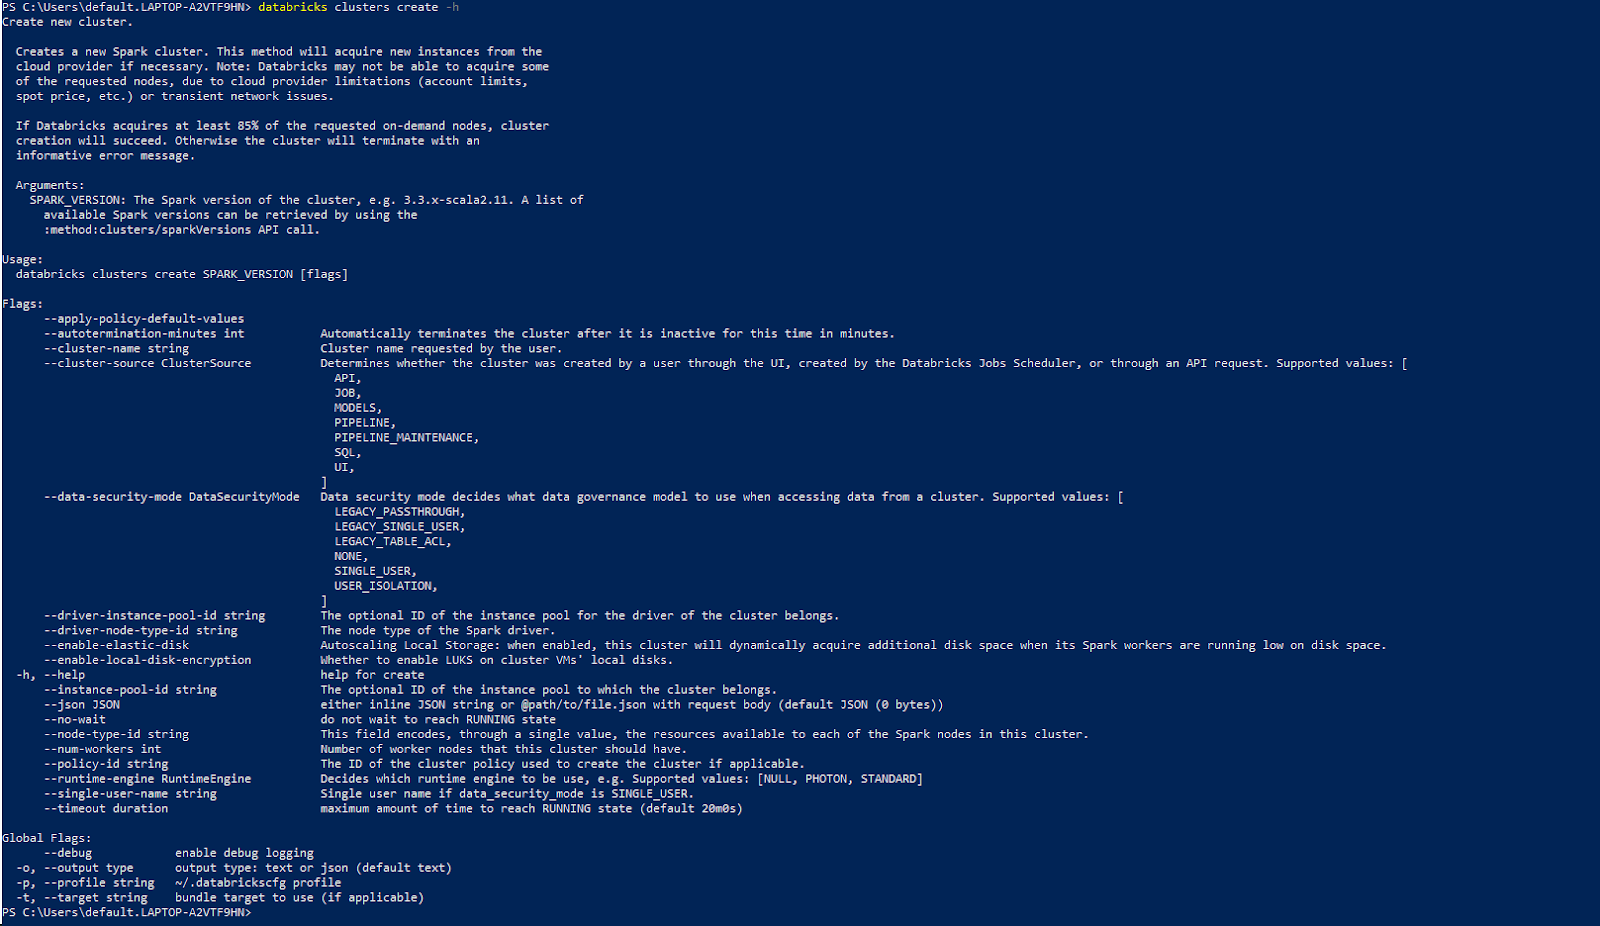
As you can see, this will print all commands related to clusters and their specific command.
2) Global Flags
Global flags are options that can be applied to multiple commands. They allow customizing the behavior of commands through modifiers. Here is a list of common flags that are available for all Databricks CLI commands. Note that some flags may not apply to certain commands.
|
Flags |
Description |
|
-h, --help |
Displays help for CLI, command group, or command. |
|
--version |
Displays Databricks CLI version |
|
--debug |
Print debug logs |
|
-e, --environment |
Specifies the environment bundle to use for the command. |
|
--log-file |
Specifies the file path to write logs to. The default is stderr. |
|
--log-format |
Specifies the log format as text or JSON. The default is text. |
|
--log-level |
Sets the log level. Disabled by default. |
|
-o, --output |
Specifies the output format as text or JSON. The default is text. |
|
-p, --profile |
Specifies profile in “.databrickscfg” file. The default is DEFAULT if it exists. |
|
--progress-format |
Specifies the format for progress logs (default, append, inplace, JSON). Default is the default. |
These global flags can be passed to any CLI command.
Now that we know everything about Databricks CLI, from its setup and authentication to its commands and flags, it's time for us to delve into some practical examples demonstrating the usage of Databricks CLI commands for common scenarios.
How to use Databricks CLI Commands—Practical Real-World Examples
Here are some basic examples of using common Databricks CLI commands:
Example 1—Listing CLI Command Groups
To view a list of top-level CLI command groups, run:
databricks --help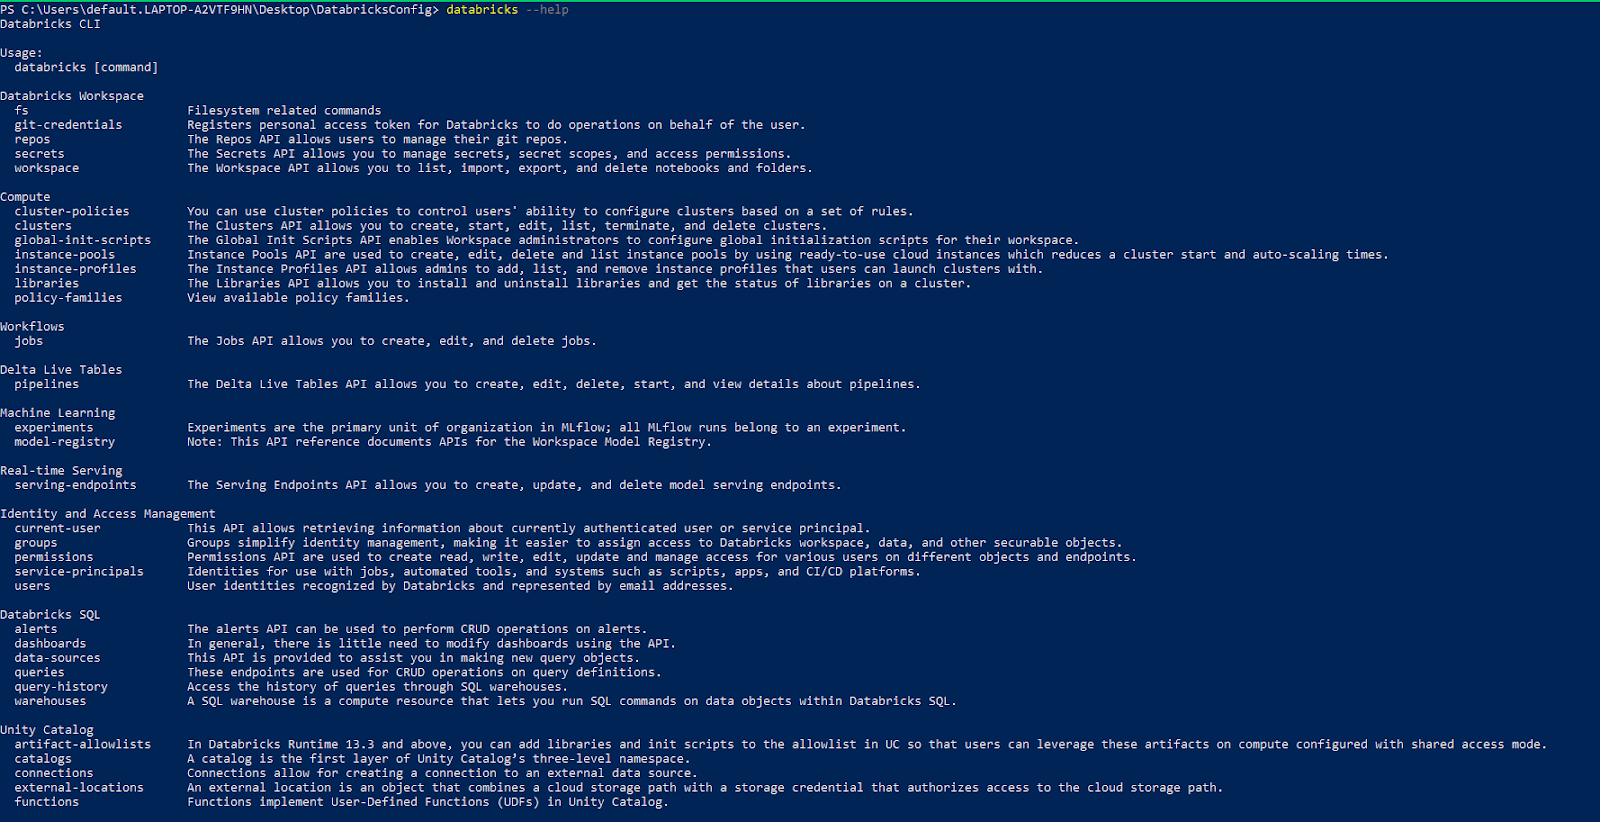
Example 2—Viewing Command Help
To learn about the commands under a group, you can use the “--help” flag. For example:
databricks clusters --helpThis print helps for all cluster-related sub-commands.
Example 3—Listing Databricks Clusters
To list existing clusters in your workspace:
databricks clusters list
You can also use flags to filter the output:
databricks clusters list --output JSONThis prints the cluster list in JSON format.
Example 4—Getting Status of Databricks Workspace
To obtain the status of the Databricks workspace, all you need to do is specify the workspace command with the get-status subcommand and the path of that particular workspace:
databricks workspace get-status /Path/to/the/workspace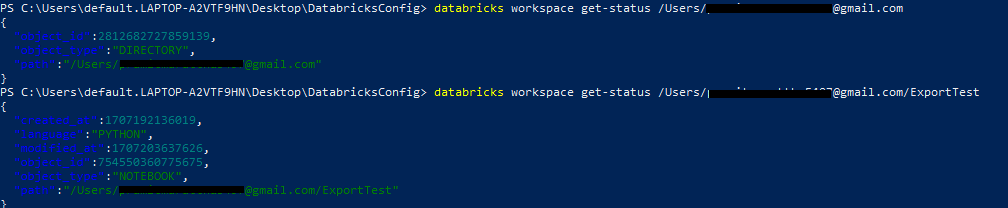
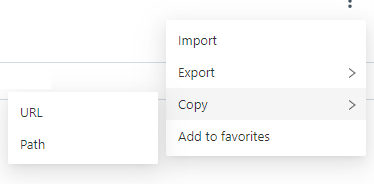
To obtain the path to the workspace, all you need to do is go to your workspace, click on the three-dot icon located next to the share button, copy the specific path, and then use that path.
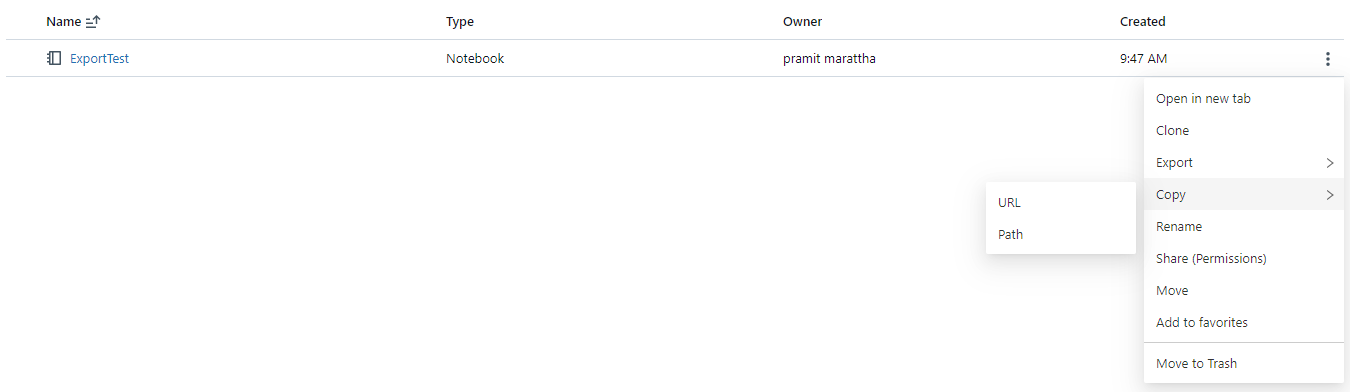
To obtain the path, all you need to do is go to your workspace, navigate to your notebook, click on the three-dot icon located at the right-hand side of that particular notebook, copy the specific path, and then use that path.
Alternatively, you can also use the terminal directly to obtain the paths for all your notebooks in your workspace. For that, all you need to do is add the workspace command with the list subcommand, then provide the path and execute it. You will receive details and a list of all the notebooks inside that workspace, along with their IDs, paths, and file types/languages. Here is the command for that:
databricks workspace list /path/to/the/workspace
Example 5—Exporting Workspace Directory and Notebooks
Exporting the workspace and notebooks is also pretty straightforward. All you need to do is add a workspace command with the export subcommand, paste the path to your notebook, add the “--format” flag with the desired export format, and then use the “--file” flag to export to the particular directory where you want to export.
databricks workspace export /Users/<your-path>/<Notebook-name> --format SOURCE --file <local-directory>\DatabricksExport.py
Example 6—Importing Notebooks to Workspace
Importing a notebook into your workspace is a straightforward process. First, specify the workspace command along with the import subcommand. Once you have done that, provide the path to the notebook. Remember that you can choose any desired name after specifying the path. Additionally, note that you need to use the “--language” flag while importing. Finally, use the “--file” flag to specify the local path from which you want to import it.
databricks workspace import /path/to/workspace/<Name-of-notebook> --language PYTHON --file path/of/your/file
Now, to verify whether the import worked or not, you can head over to your GUI and check if it worked.

As you can see, it worked. We have successfully imported the notebook from our local path to the Databricks workspace.
Note: The examples covered here are just the tip of the iceberg of what you can achieve with Databricks CLI.
TL;DR: The Databricks CLI allows you to programmatically perform almost any task that can be done through the Databricks’ web interface.
To learn more about Databricks CLI and what you can do with it, check out this Databricks Documentation.
Conclusion
And that’s a wrap! Databricks CLI provides a powerful and flexible way to manage Databricks workflows from the command line. It enables the automation of admin tasks and offers a whole lot of efficiency through the scripting of repetitive jobs. No more logging into the web UI to kick off workflows or configure resources - just write a quick script and run it from the comfort of your terminal.
In this article, we have covered:
- What Is Databricks CLI Used For?
- How to Install Databricks CLI ?
- Step-By-Step Guide to Install Databricks CLI on Various Operating System (macOS/Linux/Windows)
- How to Setup Authentication for the Databricks CLI?
- List of Databricks CLI commands
- How to use Databricks CLI Commands—Practical Real-World Examples
—and more!
FAQs
What is Databricks CLI?
Databricks CLI provides a convenient way to interact with the Databricks platform directly from the terminal. It offers an alternative to the Databricks web interface/GUI.
How can you install Databricks CLI?
You can install it on Linux, macOS, and Windows using package managers like Homebrew, Curl, Winget, or Chocolatey. Or manually install the source code.
What are the main CLI command groups supported?
The main commands are: workspace, clusters, jobs, fs, etc. Help is available using the -h or --help flag.
What are some common global flags for Databricks CLI?
Useful global flags are: -h, --help, -o, --output, -p, --profile, --debug, --version etc.
How can you list available CLI commands and groups?
You can use databricks --help to see top-level groups and databricks <group> -h for group commands.
How can you authenticate CLI with a personal access token?
Generate a token in Databricks, then configure CLI with the token using Databricks configure.
How can you run CLI commands against different workspaces?
Configure multiple profiles in the “.databrickscfg” file, then use the -p <profile> flag.
How do I list existing Databricks clusters?
You can use the Databricks cluster list command to view existing clusters.
How do I create a new cluster using Databricks CLI?
Use databricks clusters create along with cluster configuration options like node type, Spark version etc.
How do I delete a cluster using Databricks CLI?
Use databricks clusters delete --cluster-id <id> to delete a cluster by its ID.
How do I export a notebook using Databricks CLI?
Use databricks workspace export along with the notebook path and export destination to export a notebook from the workspace.
How do I import a notebook using Databricks CLI?
Use databricks workspace import along with the notebook file path and import destination to import a notebook into the workspace.
How do I list available clusters using Databricks CLI?
Use databricks clusters list to view existing clusters along with their state, node types etc.
How can you manage permissions with the CLI?
You can use the permissions command group to set permissions on objects.
What are some real-world uses of Databricks CLI?
Automating workflows, integrating with CI/CD pipelines, and managing objects like clusters, notebooks, jobs, etc.
How do I check the Databricks CLI version?
You can use the Databricks --version flag to check the installed version of the Databricks CLI.