


Databricks is a powerful platform for performing various tasks related to data engineering, data science, and ML workloads. It provides a unified space called Databricks Workspace—a one-stop solution for data teams to collaboratively build end-to-end analytics solutions, all within the platform itself. The workspace contains a variety of objects, including clusters, notebooks, libraries, and models, to streamline the data lifecycle. In particular, Databricks Notebook is a key component that enables you to integrate code, visualizations, and documentation within an interactive canvas. Notebooks are where all the magic happens—you can perform tasks ranging from exploration to modeling to orchestration collaboratively using languages like Python, R, Scala, and SQL directly inside notebooks. You can schedule notebooks to deploy reproducible workflows with just a few clicks, integrate ‘em with version control systems, simplify collaboration—and much more!
In this article, we will cover everything you need to know about Databricks notebooks, and we will walk you through a step-by-step guide to using notebooks for data analysis. This will cover aspects like the notebook interface, creating and managing notebooks, writing and executing code, working with outputs, automating with jobs, and more. On top of that, we will also dive into 7 powerful tricks to master notebooks.
What Are Notebooks in Databricks?
Databricks Notebook is an interactive coding canvas within the Databricks platform where you can write, execute, and collaborate on code. Notebooks allow you to easily visualize, document, and share your data analysis process in an organized manner.

Here are some of the notable features of Databricks notebooks:
- Cell-based structure: Databricks notebooks consist of individual code cells that can contain SQL, Python, Scala, or R code.
- Interactive Execution, Cell by Cell: Each cell can be run independently to view live outputs such as text, plots, or tables.
- Notebook interface: Databricks notebooks provide features like collapsible headings, a toolbar, and sidebar navigation for effective organization.
- Collaboration: Multiple users can collaborate and co-author notebooks in real time using comments and mentions.
- Code modularization: Reusable snippets can be created using the %run magic command or standalone Repos.
- Scaling Notebook: You can attach a Databricks notebook to clusters that provide the compute resources for running your code.
- Automation: Databricks notebooks can easily be automated using the Databricks jobs feature. You can schedule your notebooks to run periodically or trigger them on demand or by events.
- Output visualization: Databricks notebooks provide flexible options to view outputs as text, tables, or plots.
- Version history: Every change in Databricks notebooks is tracked, allowing the restoration of previous states.
- Formatting: Databricks notebooks provide syntax highlighting options for code blocks and markdown support for documentation.
…and more!
These are just a glimpse of what you can do with Databricks notebooks. They are more than just code execution environments; they are powerful tools that help you unlock the full potential of your data.
Step-by-Step Guide on Using Databricks Notebooks for Comprehensive Data Analysis
Now that we have covered the basics of Databricks notebooks, without further ado, let's jump right in and discuss how to leverage notebooks step-by-step for end-to-end data analysis.
Step 1—Getting Familiar With Databricks Notebook Interface and Controls
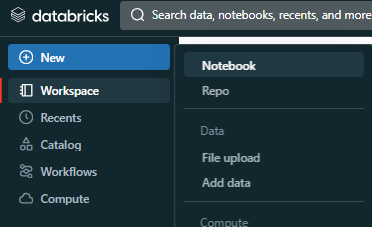
Upon logging into your Databricks workspace, you will see a "+ New" button located on the left sidebar navigation bar of the Databricks workspace.
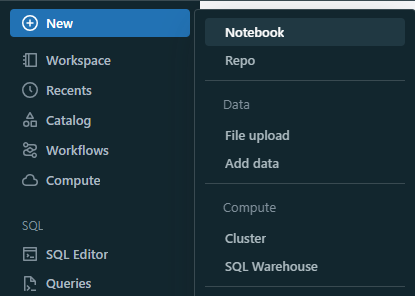
All you have to do is click on that button, and a new menu will appear that should display options to create objects. In that menu, you should see an option called "Notebook". Click on that, and you will get redirected to the new Databricks notebook.
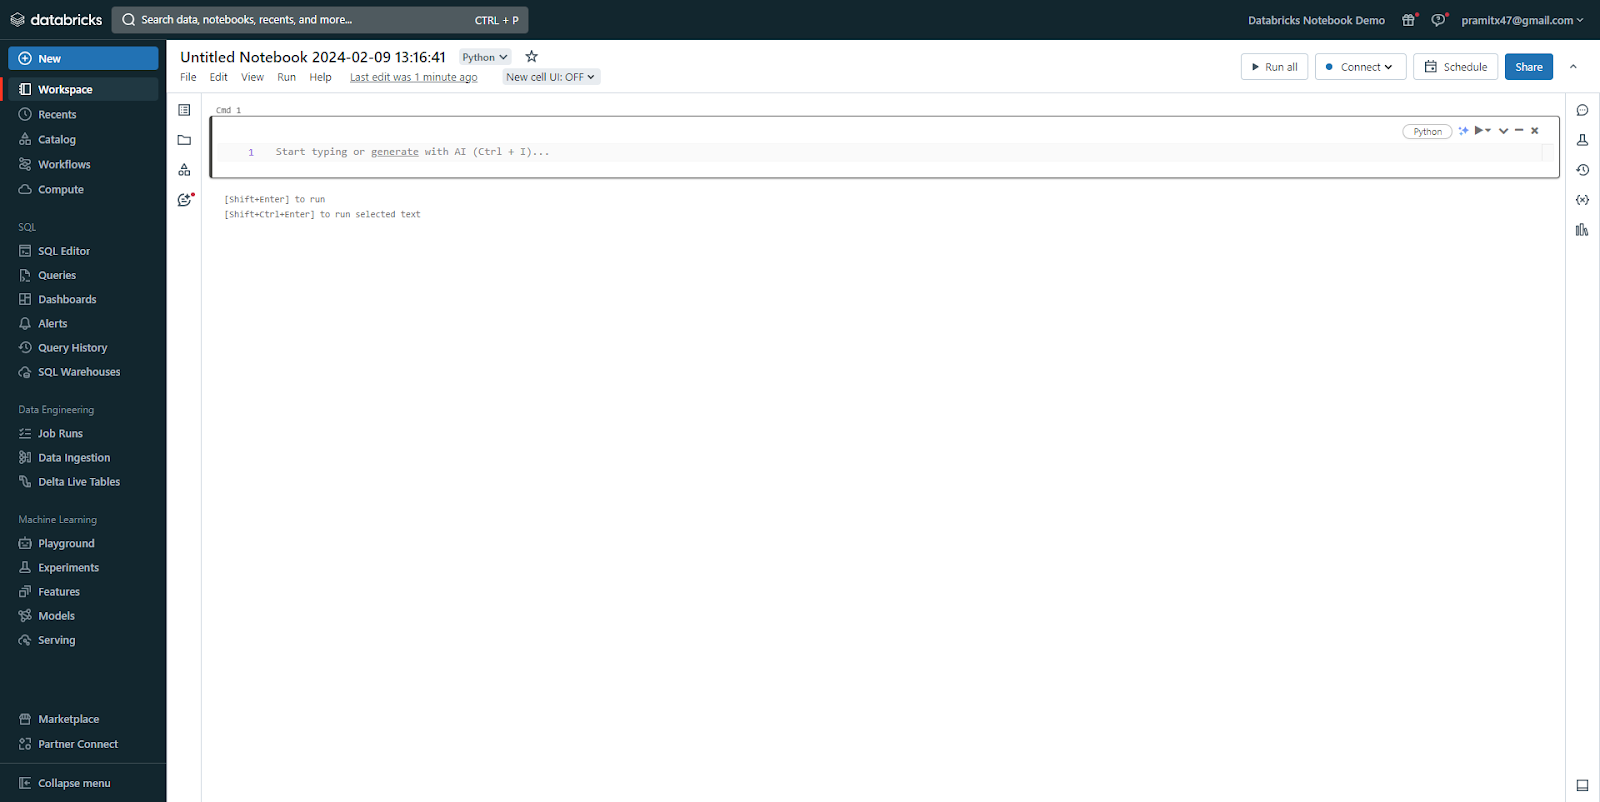
As you can see, now you will have access to the Databricks notebook interface, where you can interact with your notebook, write and run code, view outputs, and access various notebook features and settings.
The Databricks notebook interface consists of the following components:
1) Notebook Toolbar
The toolbar at the top contains menus, icons, and buttons to manage and edit the notebook.

a) Notebook Name
At the very top of the Databricks notebook interface, you will see a randomly generated name with a timestamp and date. You can change the notebook name by double-clicking it.

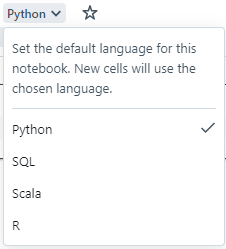
b) Language dropdown
Next to the notebook name, there is a dropdown button to change the default language used in that particular notebook.
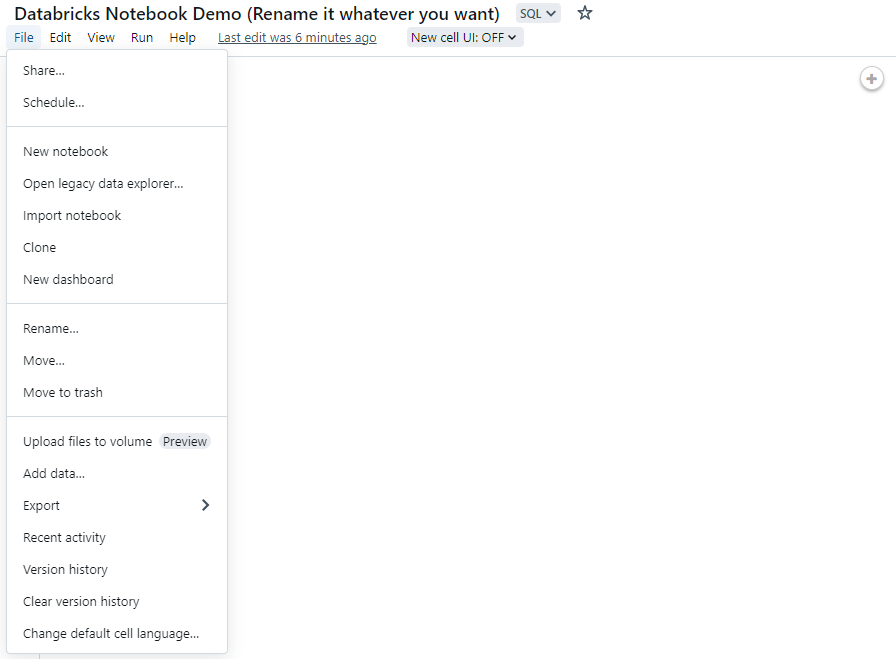
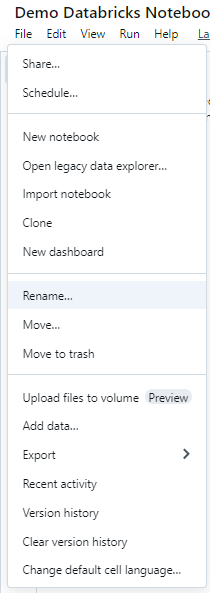
c) File Menu
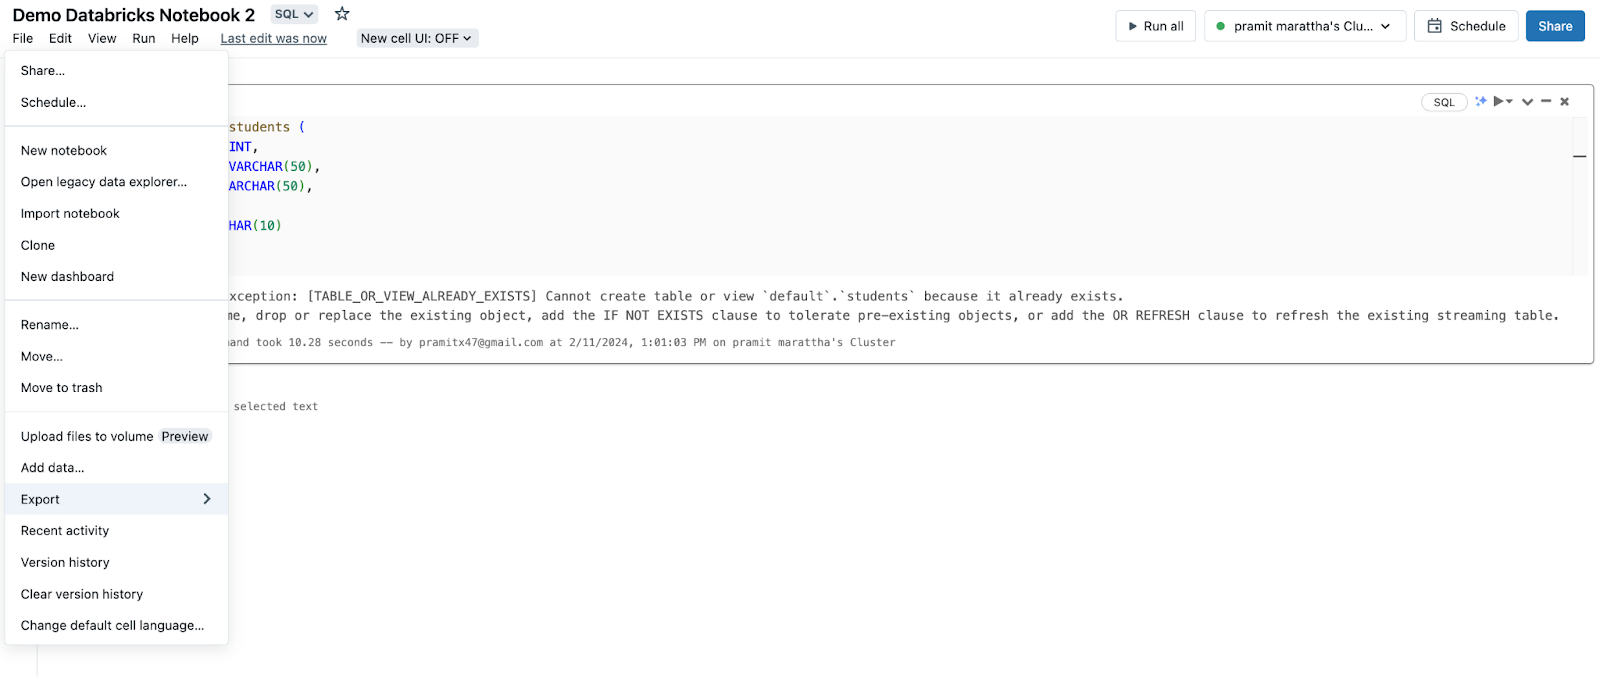
Right below the notebook name, you will see a “File” menu. This menu provides shortcut actions to share the notebook, schedule it, create a new notebook, import, clone, rename, move to trash, or delete it. Also, users can upload external data, export the notebook, view recent activity, check version history, clear version history, and change the default language of the notebook.
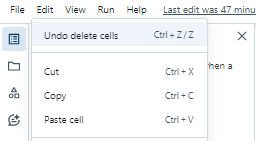
d) Edit Menu
Next to the File menu is the “Edit” menu. This menu allows you to undo/redo actions, cut/copy/paste, delete cells, insert cells, move cells, add widgets, format cells/code/notebook, and clear cell outputs. Keyboard shortcuts are listed for each action.

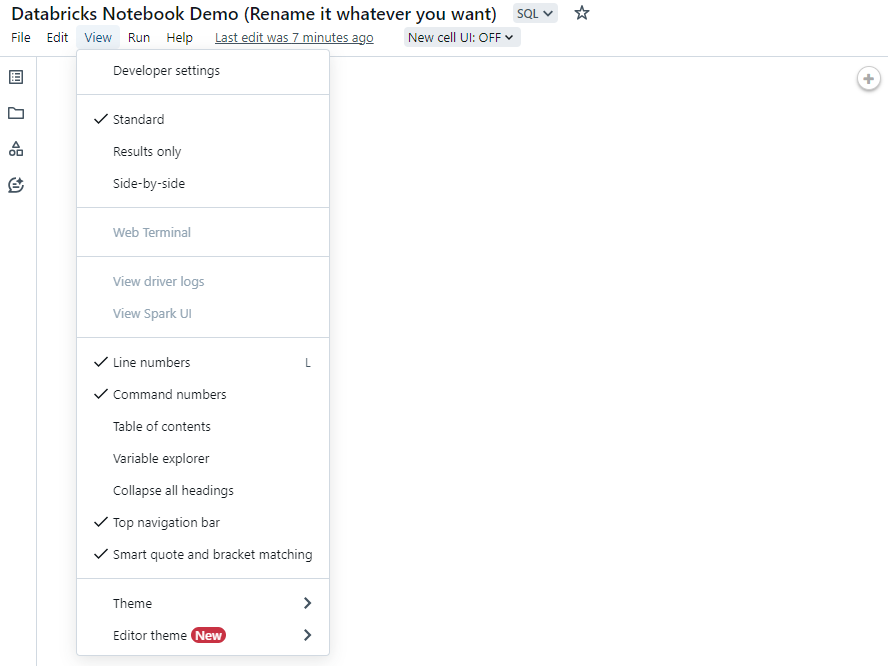
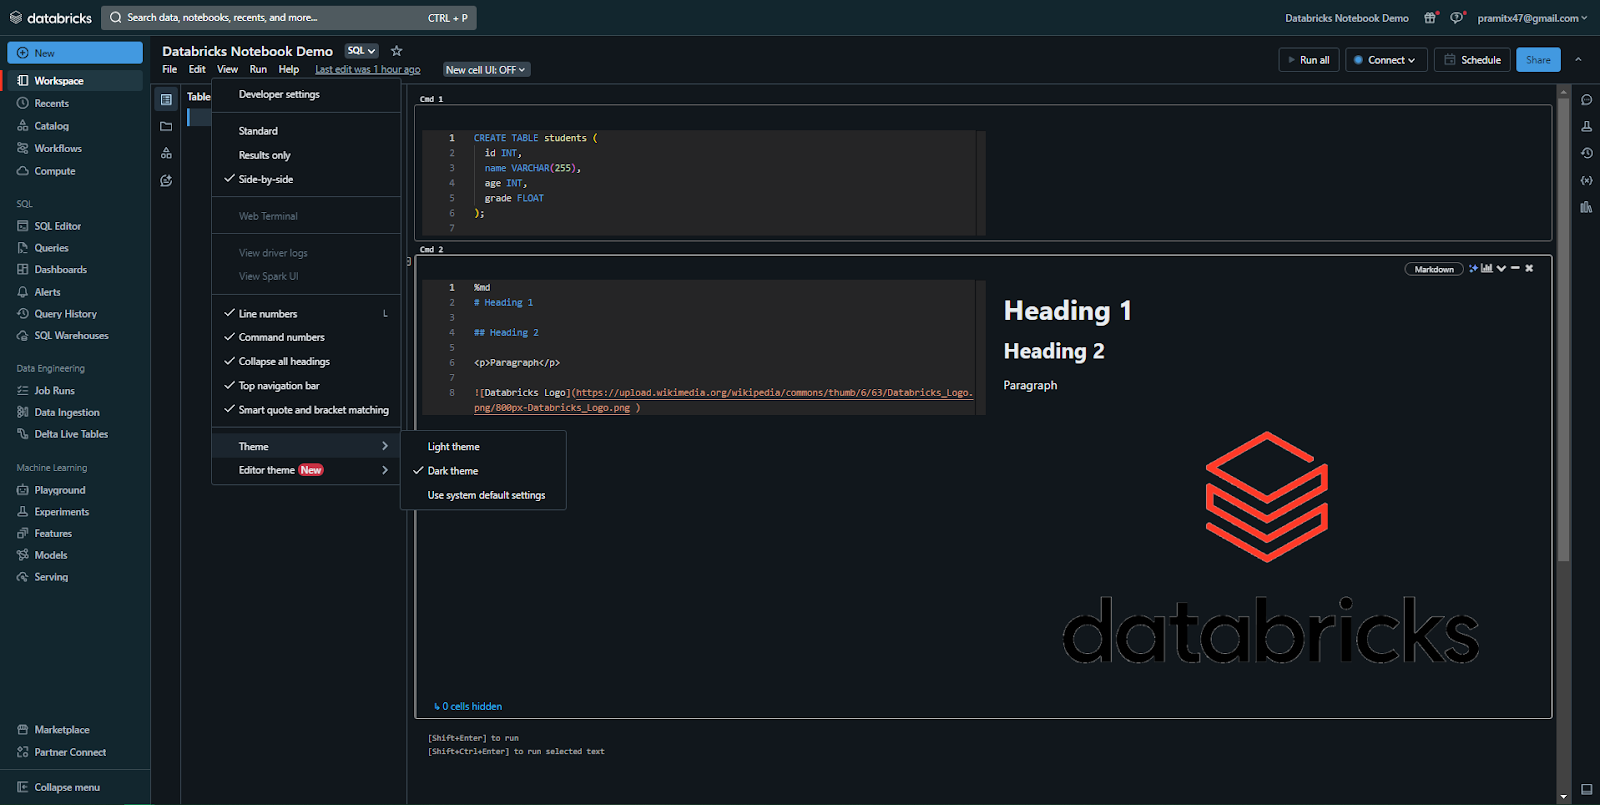
e) View Menu
Next to the Edit menu is the “View” menu. Here you can configure output formatting, open a web terminal, view logs, toggle line numbers, command numbers, table of contents, collapsible headings, centered layout, and switch between light and dark themes. You can also change the code editor theme.
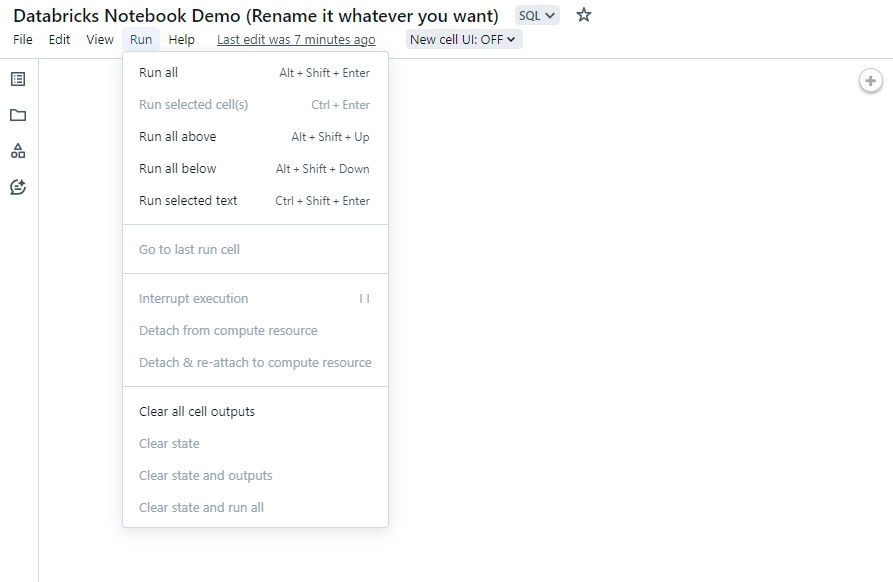
f) Run Menu
The “Run” menu provides shortcuts to run selected cells, run all cells, cancel running cells, and clear cell outputs.
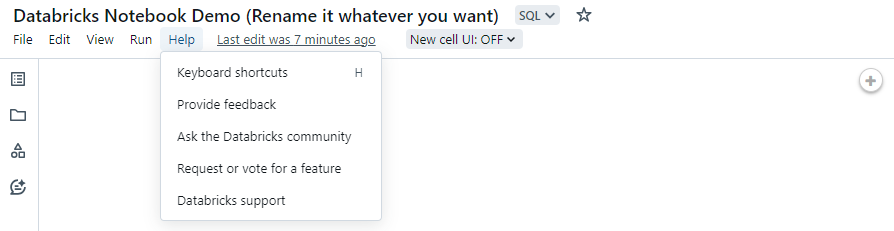
g) Help Menu
Next to the Run menu is the “Help” menu. This menu lists all keyboard shortcuts and provides links to submit feedback, get support, request features—and more.
h) Last Edit
Click the "Last edit was..." text to view previous versions of the Databricks notebook.
i) New UI
Next to the Last edit ..., there is an option to toggle between the new UI and the original UI. To do this, click on the dropdown, and you will find the option to switch to the new cells UI. Toggle it on and reload the entire page. The new cell UI for the notebook provides an updated look and feel, improved performance, and new features.

j) Run All/Interrupt
Run all cells or stop execution. Button name changes depending on the notebook state.

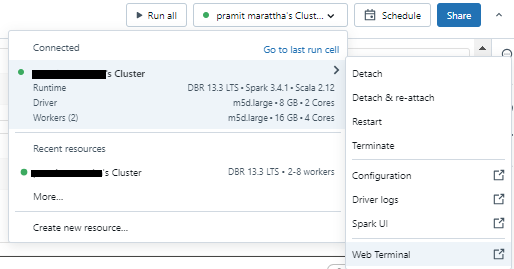
k) Compute
Next to “Run all”, click on “Connect” to open the compute selector and attach the notebook to a cluster or SQL warehouse. It displays the attached resource.
l) Schedule
Next to “Connect”, click on “Schedule” to open a dialog to schedule notebook execution.
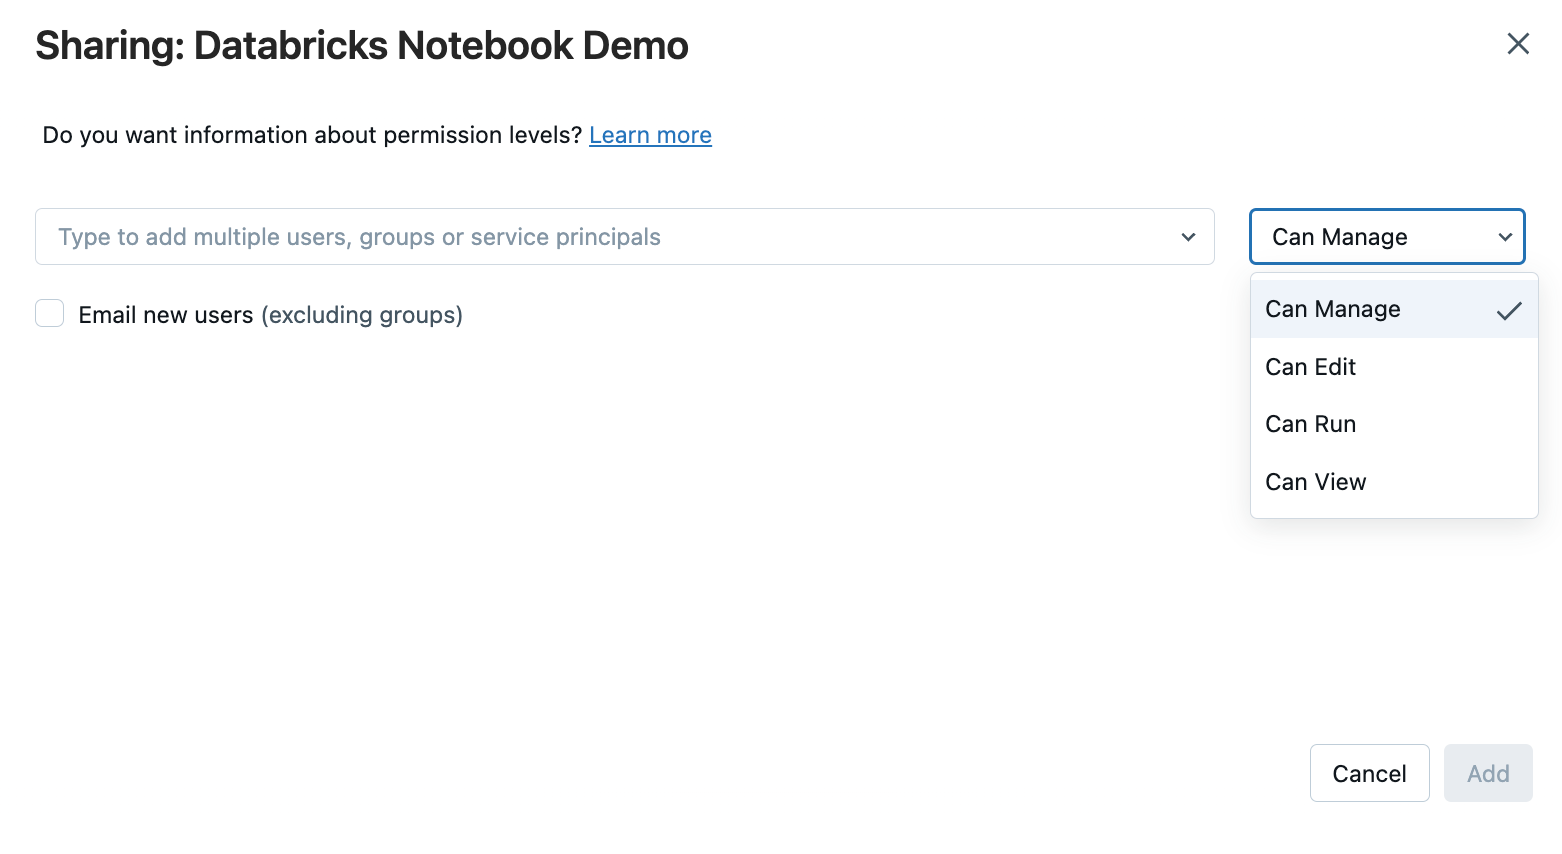
m) Sharing
Finally, there is an option to share the notebook as well. For that, there is an option next to “Schedule” called “Share”. If you click it, it opens a permissions dialog, and then you can share your notebook with anyone.
2) Right Sidebar Actions
There are several actions available from the Databricks notebook’s right sidebar:
a) Notebook Comments
The notebook comments icon opens a panel on the right sidebar where you can add and view comments on the notebook.
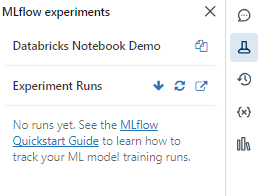
b) MLflow Experiment
The MLflow experiment icon appears if the notebook is part of an MLflow experiment for tracking machine learning models. Clicking this icon opens the experiment tracking UI. You can view run details, metrics, parameters, tags, artifacts, and more.
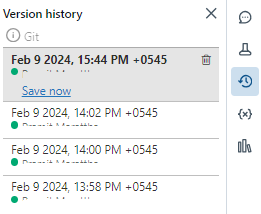
c) Notebook Version History
This opens the notebook version history panel, allowing you to view previous versions of the notebook, compare changes between versions, and restore earlier versions.
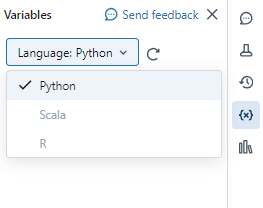
d) Variable Explorer
The variable explorer shows all defined variables and their values for the Python kernel. It allows inspecting and modifying variables dynamically from the sidebar. This is available in Databricks Runtime 12.1 and above for Python notebooks.
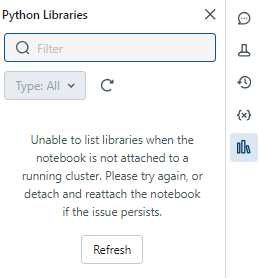
e) Python Environment Panel
This panel shows all of the installed Python libraries and versions available to the notebook kernel. It includes libraries installed on the cluster, those installed in the notebook environment specifically, and libraries included with the Databricks Runtime like Spark, NumPy, Pandas, etc.
3) Notebook Cells
Notebooks contain code cells and markdown cells:
- Code Cells: Contain executable code in Python, R, Scala, SQL, etc.

- Markdown Cells: Contain text, images, and media rendered from Markdown formatting. It is used for documentation purposes.

You can add, remove, and rearrange cells as necessary. Also, you can execute a single cell, a group of cells, or the entire notebook at once.
Note: Each notebook cell has a maximum capacity of 10MB, and the output generated by a notebook cell is limited to 20MB.
4) Cell Actions Menu
Cells are organized within notebooks, and there are several options for configuring cells. The cell actions menu located in the top-right of each cell provides options to cut, copy, paste, delete, run, and manage cells.
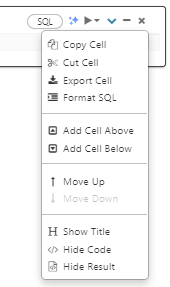
In the original UI, the menu can be accessed by clicking the down arrow icon in the top right corner of the cell. It lets you cut, copy, run, minimize, hide code/results, or delete a cell.
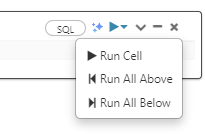
From this menu, you can also run code cells:
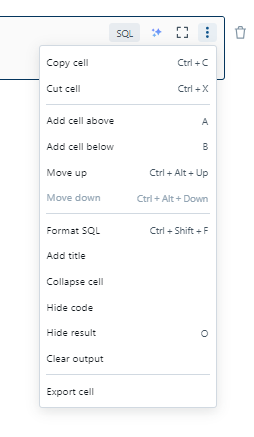
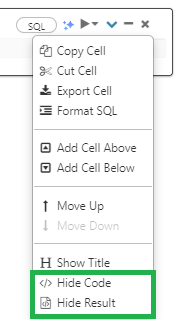
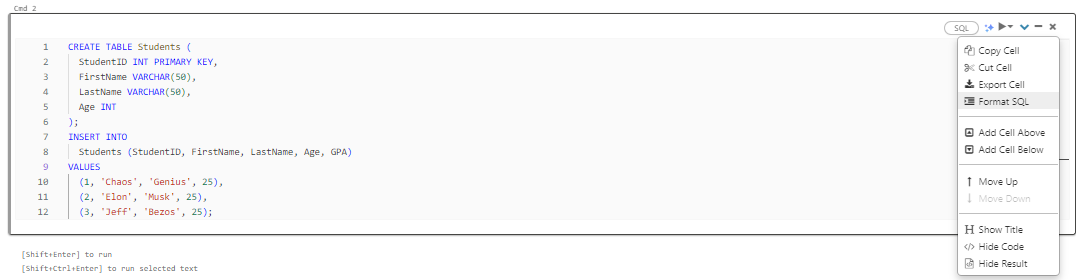
In the new UI, the menu is accessed by clicking the three-dot icon (Kebab icon). It provides similar options along with additional features like adding a cell title, hiding code/results, collapsing the cell, etc.
Beyond the cell actions menu, there are various keyboard shortcuts, display options, and features for managing cells. New cells can be created by hovering over existing cells and clicking the "+" icon or language buttons for code or markdown cells. The cell language or type can be changed by selecting from the button in the top-right. Cells can be selected individually or as a group using the shift+up/down arrow keys.
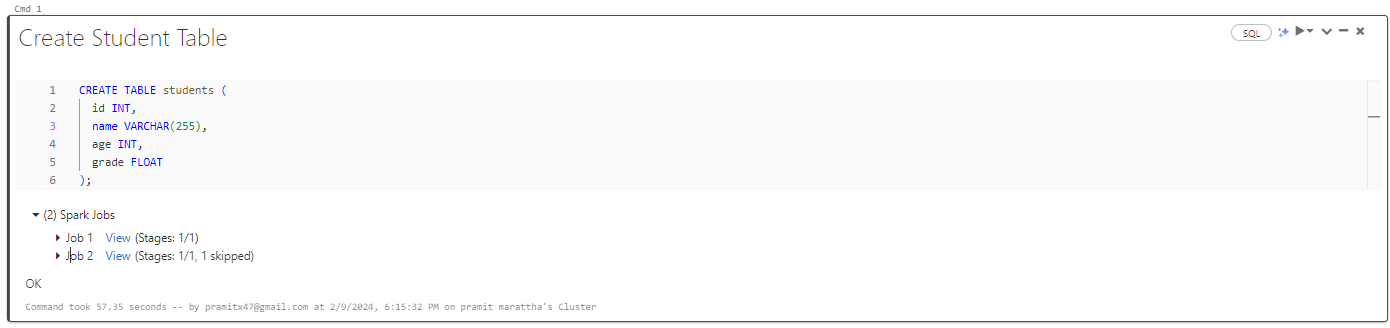
5) Running Notebook Cells
Running cells is a core part of notebooks. Code cells are executed by clicking the run icon or down arrow in the top-left. After running, elapsed time and performance metrics are visible. Any values assigned in code cells become variables that can be accessed in subsequent cells. Cell outputs like matrices, plots, or tables appear below the code.
6) Notebooks and Cell Customization
The display of notebooks and cells can be easily customized. Options under the View menu allow toggling line numbers, command numbers, sidebar layout, light/dark theme, and formatting cells. Standard, results-only, or side-by-side views define how code and outputs are rendered.
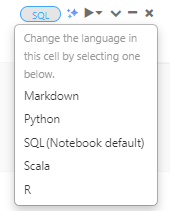
7) Cell Language
Each cell has a language associated with it to specify if it contains code or Markdown. The language can be changed using the button next to the cell number. This button provides an easy way to toggle a cell between codes. Remember that a proper language setting is required for cells to render and execute as intended.
8) Create and Manage Cells
Notebooks consist of cells that act as building blocks. New cells can be added using the "+" icon in the original UI and the “Code” or “Text” to create a code or Markdown cell, respectively in the new UI.


You can cut, copy, and paste cells in Databricks notebooks using the cell menu, keyboard shortcuts, or edit menu.
To cut or copy, select the cell menu or use keyboard shortcuts (Ctrl/Cmd+X to cut, Ctrl/Cmd+C to copy). Then paste (Ctrl/Cmd+V) below the current cell.
To select multiple cells, click a cell and use the Shift+Up/Down arrows. Or use Edit ➤ Select All Cells (Ctrl/Cmd+A). You can then cut, copy, paste, or delete the selected cells together.
You can also perform undo actions with Ctrl/Cmd+Z.
9) Databricks Assistant
Databricks Assistant is an AI tool that provides help and suggestions for code in cells. To activate it, click the assistant icon in the top right corner of a code cell (next to the language selector). This opens a text box where you can type a text prompt.

10) Hide and Show Cell Content
The content of cells can be hidden or collapsed for brevity using options in the cell menu. This includes hiding codes or results separately.
Expanding collapsed cells makes the content visible again. This feature helps focus on specific parts while hiding unnecessary details from the viewer.
11) Compute Resources
You have the choice to execute a notebook either on a Databricks cluster or, for SQL commands specifically, you can opt to utilize a SQL warehouse—a specialized computing resource optimized for SQL analytics.
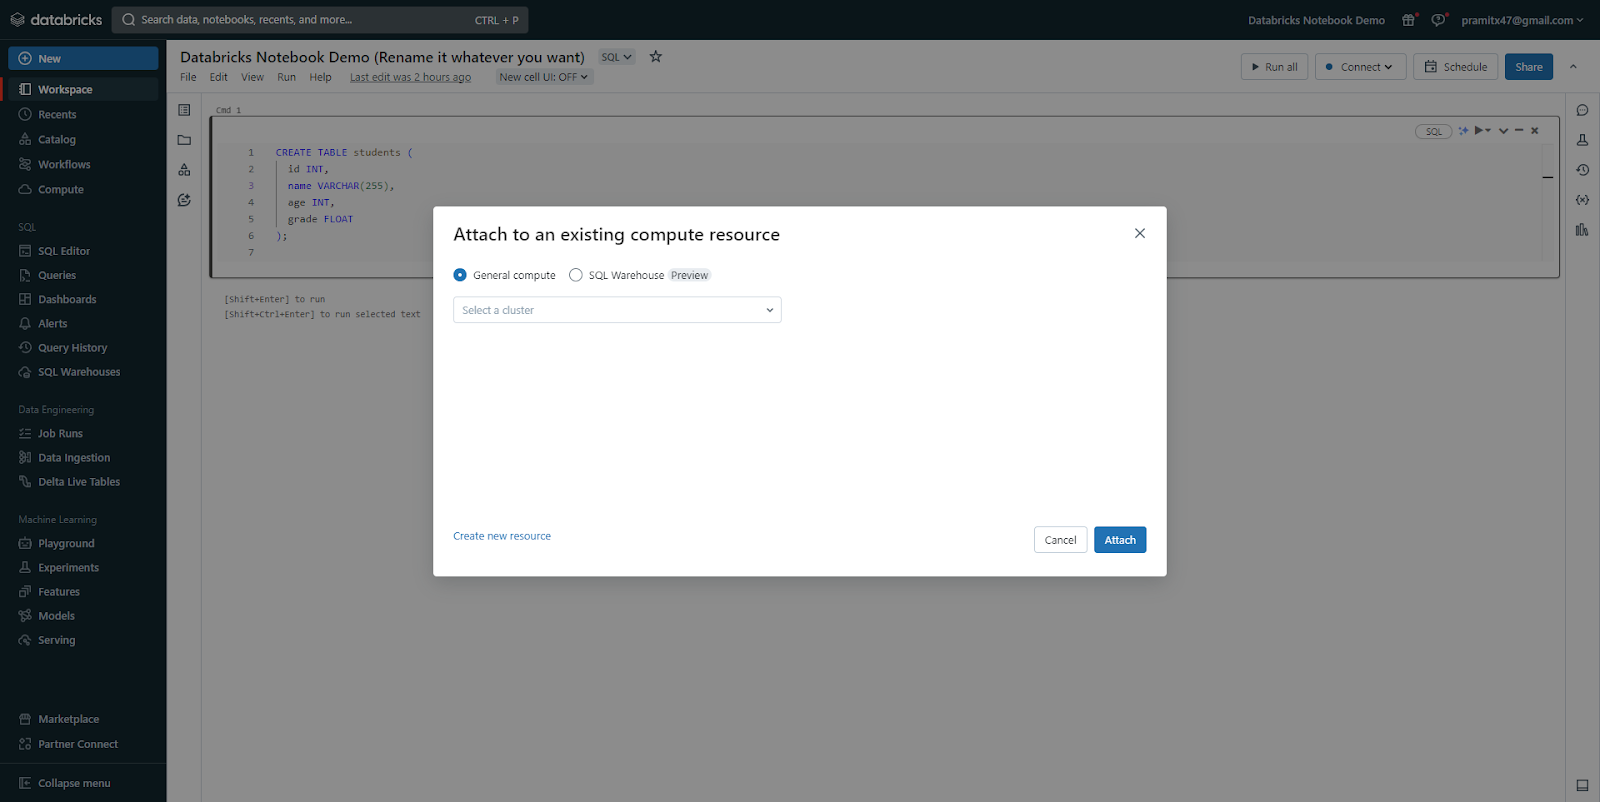
a) Attaching notebooks to clusters
To attach a notebook to a cluster, you need the CAN ATTACH TO CLUSTER permission on that cluster.
Attaching a notebook to a cluster grants any user with CAN RUN permission on the notebook access to the cluster.
To attach a notebook to a cluster:
- Click the compute selector in the notebook toolbar and select a cluster from the dropdown menu. This shows recently used clusters and running clusters.
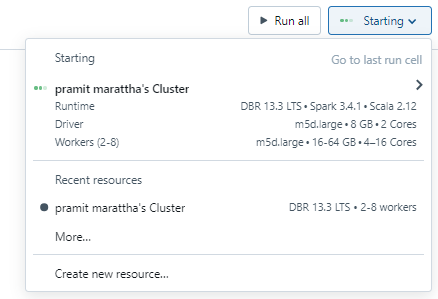
- To see all available clusters, click “More” and select a cluster from the full list.

- You can also create a new cluster by selecting Create new resource...
Note: The attached notebooks have the Spark variables sc, sqlContext, and spark pre-defined. Do not re-declare these to avoid inconsistent behavior.
b) Using notebooks with SQL warehouses
When attached to a SQL warehouse, notebooks can only run SQL and Markdown cells. Running other languages, like Python, will cause errors.
SQL queries run on a warehouse appear in its query history. Users can view query profiles from the notebook by clicking the elapsed time.
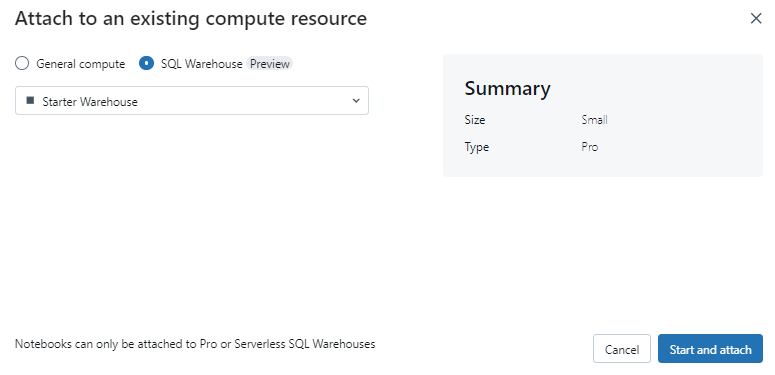
Attaching to a SQL warehouse requires a Pro or Serverless tier. You need access to the workspace and warehouse.
To attach to a SQL warehouse:
- Click the compute selector and select a warehouse from the dropdown menu or click the More… option.
- In the dialog, select SQL Warehouse and choose a warehouse, then click Attach.
Limitations when using SQL warehouses:
- Idle timeout after 8 hours
- Max results size of 10,000 rows or 2MB
- No support for notebook parameters or widgets
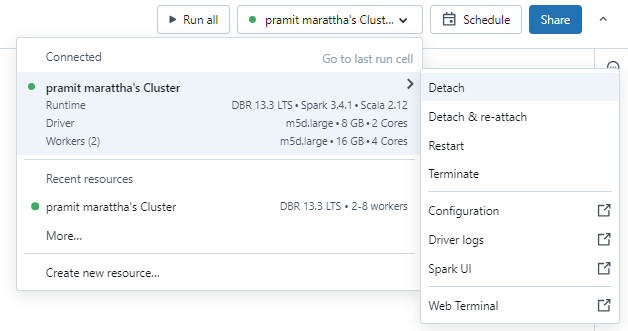
12) Detaching Clusters From Databricks notebooks
To detach a notebook, click the compute selector and hover over the attached resource. Select Detach from the side menu.
You can also detach from the cluster details page.
Detaching removes the execution context and clears computed variables.
Now, let's move on to the next step.
Step 2—Creating and Managing Databricks Notebooks
In this section, we will learn how to actually create and manage Databricks notebooks.
1) Creating Databricks notebooks
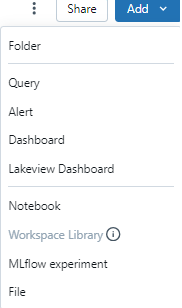
You can initiate the creation of a new notebook by clicking the "+" button and selecting the Notebook option in your Databricks workspace.
Alternatively,
You can create a notebook by navigating to your workspace, clicking on the “Add” dropdown menu, and then selecting “Notebook” to initiate the creation of a new one.
You can then specify the name and language (Python, R, SQL, and Scala) of your notebook. Note that you can also change the language later by using the magic commands.
To create a new notebook in any folder (for example, in the Shared folder), follow these steps:
- On the left sidebar, click the Workspace icon.
- Right-click on the name of the folder where you want to create the notebook and select Create ➤ Notebook. Databricks will open a new, blank notebook in the selected folder.
- Enter the name of your notebook, and select the language and the cluster for your notebook.
2) Opening an existing notebook
You can open an existing notebook by clicking on the notebook name on the left sidebar. You can also hover over the notebook name to see the notebook path, which is the location of the notebook in the workspace or the repos.
3) Deleting a notebook
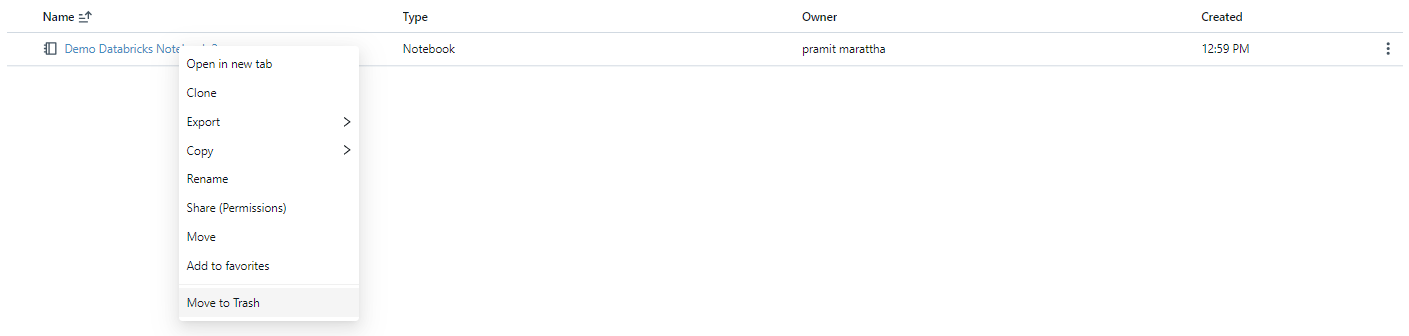
You can delete a notebook by following these steps:
- On the left sidebar, click the Workspace icon.
- Right-click on the name of the notebook that you want to delete, and select Move to Trash. Databricks will ask you to confirm your action.
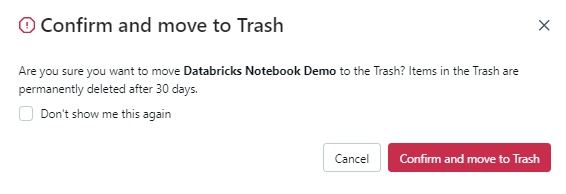
- Click “Confirm and move to Trash” to remove the notebook from the workspace or the repos. Databricks will move the notebook to the Trash.
- To restore or permanently delete the notebook from the trash, go to the Trash page in the Databricks workspace and select the appropriate option. You can either permanently delete it, restore it, or empty the trash.

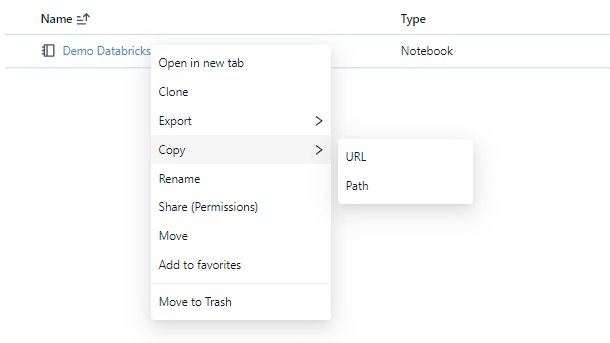
4) Copying the notebook path or URL
You can copy the notebook path or URL without opening the notebook. To do so, right-click the notebook and select Copy Path or Copy URL from the menu.
5) Renaming Databricks notebook
You can rename a notebook by following these steps:
- Open the notebook that you want to rename.
- Click on the notebook name located at the top left corner of the notebook, and enter the new name of the notebook.

- You can also click on File ➤ Rename and enter the new name of the notebook.
6) Controlling access to a notebook
If your Databricks account has the Premium plan or above, you can use workspace access control to control who has access to a notebook. You can assign different roles and permissions to different users or groups, such as view, edit, run, or manage.
7) Configuring editor settings
You can configure the editor settings of your notebook to customize various aspects of your notebook editor, such as the font size, the line numbers, the word wrap, the auto-completion, the auto-indentation, the syntax highlighting, the code formatting, the bracket matching, the whitespace visibility—and more.
To configure the editor settings of your notebook, follow these steps:
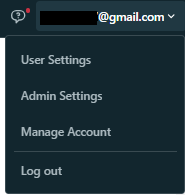
- Click on your username located at the top right corner of the notebook, and select User Settings from the drop-down menu.
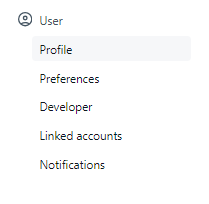
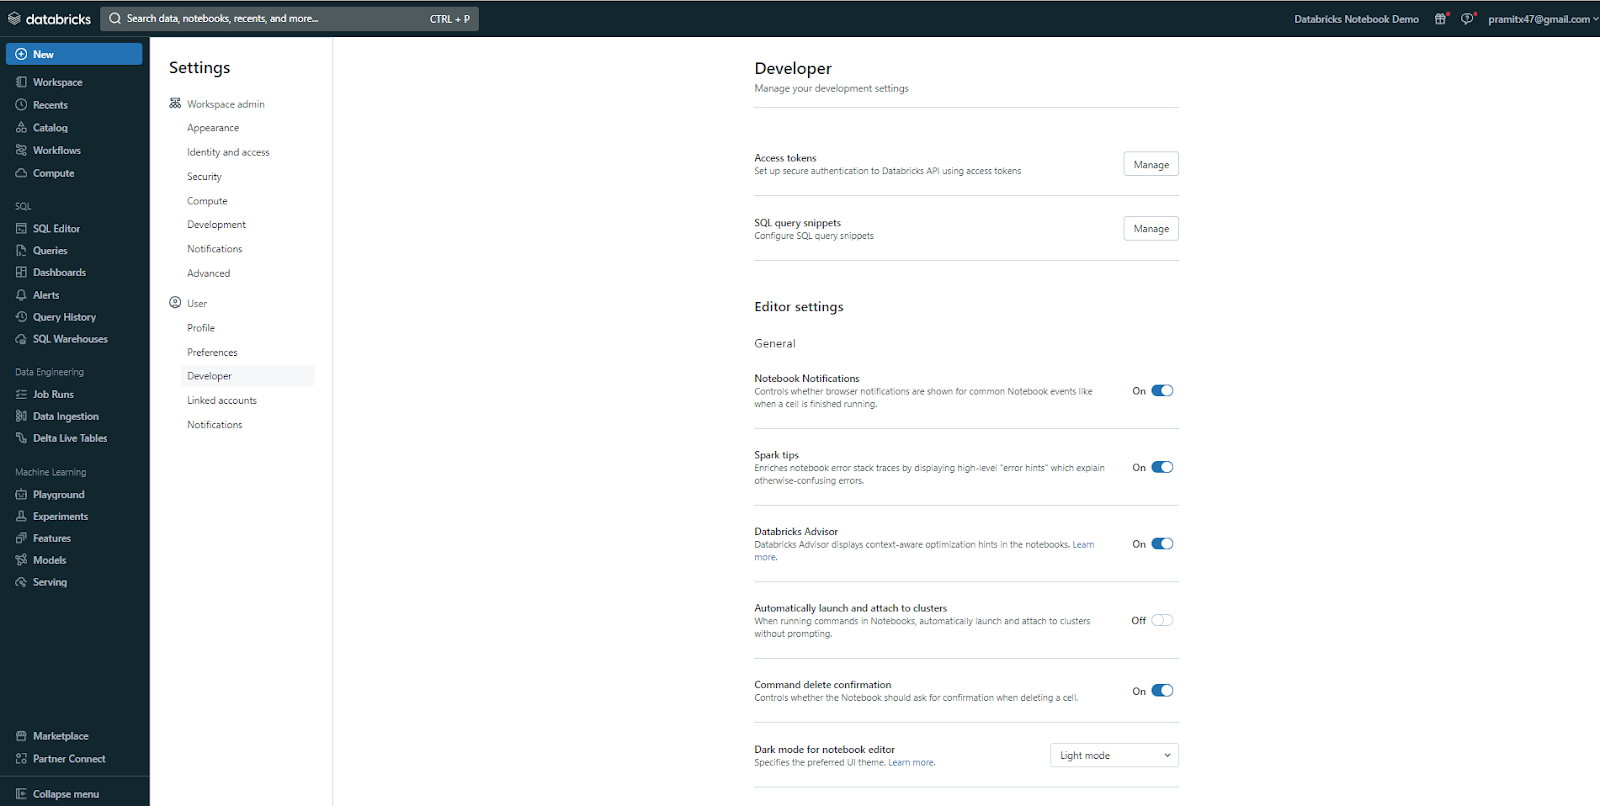
- On the Settings sidebar, select Developer.
- On the Developer page, you can see and change the editor settings of your notebook.
8) Viewing notebooks attached to a cluster
You can view the notebooks that are attached to a cluster by following these steps:
- Open the notebook that is attached to the cluster that you want to view.
- Click on the Cluster icon on the top right corner of the notebook, and select View notebooks attached to this cluster from the menu. You can also click on the Notebooks tab on the right sidebar and select View Notebooks attached to this cluster from the pop-up menu.
- On the Notebooks page, you can see the list of notebooks that are attached to the same cluster as your notebook, and access their outputs and logs. You can also detach or attach your notebook to a different cluster from the same page.

Step 3—Writing Code in Databricks notebooks
Databricks notebooks allow you to write code (and queries) using different programming languages. In this section, we will dive deep into how you can write and execute code in Databricks notebooks. But first, you need to open the notebook; for that, you can follow the earlier step. Once that notebook is opened, you can start coding.
1) Supported languages—Python, R, SQL, and Scala
Databricks notebooks support four languages: Python, R, SQL, and Scala. You can use any of these languages in your notebooks and switch between them using the magic commands. Magic commands are special commands that start with a % symbol and allow you to perform various tasks, such as changing the language, running external scripts, executing shell commands, accessing file systems—and more.
To change the language of a cell, you can use the following magic commands:
- %python: to use Python
- %r: to use R
- %SQL: to use SQL
- %scala: to use Scala
For example, if you want to use Python in a cell, you can write:
%python
# Python cell
print("Hello, There!")
Note: By default, cells use the notebook's default language.
2) Running code cells and selected code
You can run code cells and selected code in your notebooks and see the output below the cell. You can run each cell individually or run the entire notebook at once. You can also run selected code within a cell without running the whole cell.
To run a cell, you can either click on the run icon on the right side of the cell, or directly press Shift + Enter on your keyboard, or use the Run menu on the toolbar and select "Run Cell".

To run the entire cell in that particular notebook, you can either click on the "Run All Above" or “Run All Below” icon in the top right corner of the cell or use the Run menu on the toolbar and select "Run All".
3) Browsing Available Datasets
To browse available datasets in the Databricks notebook, use the schema browser panel to explore tables, views, and files available in the notebook. Click the notebook Catalog icon (or press Ctrl + Alt + C) on the left to open the schema browser.

There are two options that you will see: one is “All”, and the other is “For You”. The “All” option shows you all the data, whereas the “For You” section displays tables you've recently used or marked as favorites.
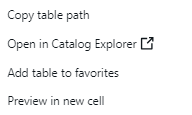
To view actions for an item, hover over or click on its name to open the kebab menu. For tables, the available actions are as follows:
- Copy table path: Copies the path to the table.
- Open in Catalog Explorer: Opens the table in a new Catalog Explorer tab.
- Add to favorites: Adds the table to your favorites list.
- Preview in new cell: Automatically creates a cell to display the table data.
For catalogs and schemas, you can copy the path or open it in Catalog Explorer.
To insert a name into a cell, place your cursor where you want to insert it, hover over the name in the browser, and click the double arrow icon.
4) Keyboard Shortcuts
To see the list of available keyboard shortcuts in Databricks, you can either click “H” on the keyboard directly, or you can head over to the Help menu and then select "Keyboard shortcut" to open it. Here is the list of keyboard shortcuts that Databricks provides:

5) Find and Replace Code/Text
To find/replace code or text in a notebook, go to Edit ➤ Find and Replace. Matching text is highlighted. Using this tool, you can:
- Click Replace to replace the current match.
- Click Replace All to replace all matches in the notebook.
- Use the Prev and Next buttons to navigate between matches.
- Press Shift+Enter or Enter to go to the previous or next match.
- Press Escape or click the delete icon to close the find/replace tool.

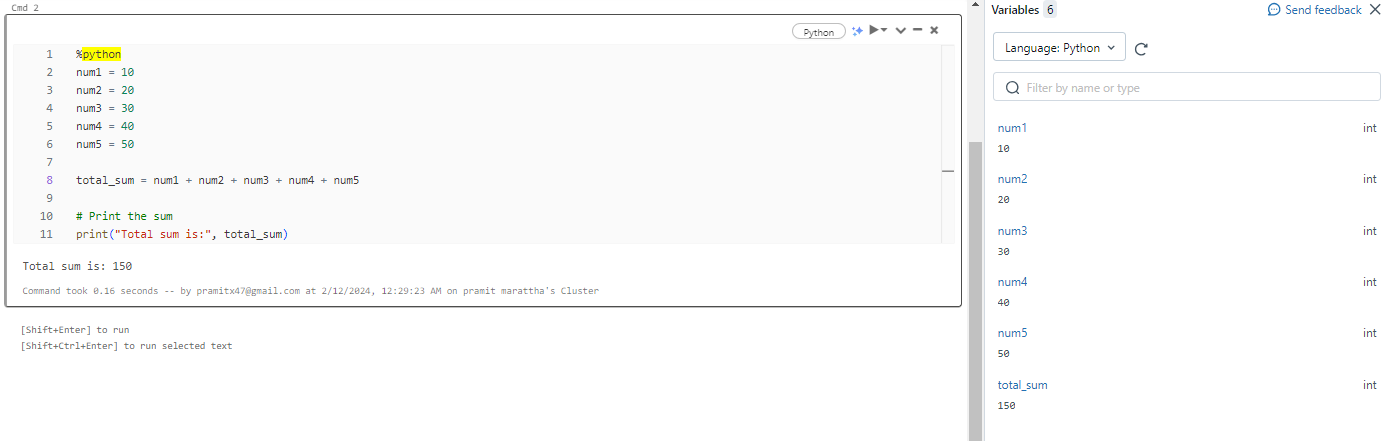
6) Observing Variables in Variable Explorer
For Python, R, and Scala, you can directly view notebook variables and their values/types in the variable explorer panel. To do this, first, click the variable explorer icon in the right sidebar to open it. It will display all currently defined variables in the notebook. Variable values update automatically when you run cells, and you can type in the search box to filter the variable list.
7) Format Python (or SQL) Code
You can format your Python and SQL code cells in your notebooks, to make them more readable and consistent.
Formatting Python Code
The notebook must be attached to a cluster with the black and tokenize-rt libraries installed. These are preinstalled on Databricks Runtime 11.2 and above.
For older runtimes, you must install black==22.3.0 and tokenize-rt==4.2.1 from PyPI in the notebook or on the cluster.
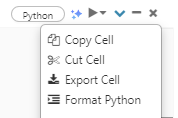
How to Format Cells?
You need the CAN EDIT permission on a notebook to format it.
To format code:
- Single-cell: Use the keyboard shortcut Cmd/Ctrl+Shift+F, or select Format SQL/Python in the cell menu.
- Multiple cells: Select the cells, then go to Edit ➤ Format Cells.
- All cells: Go to Edit ➤ Format Notebook to format all Python and SQL cells.
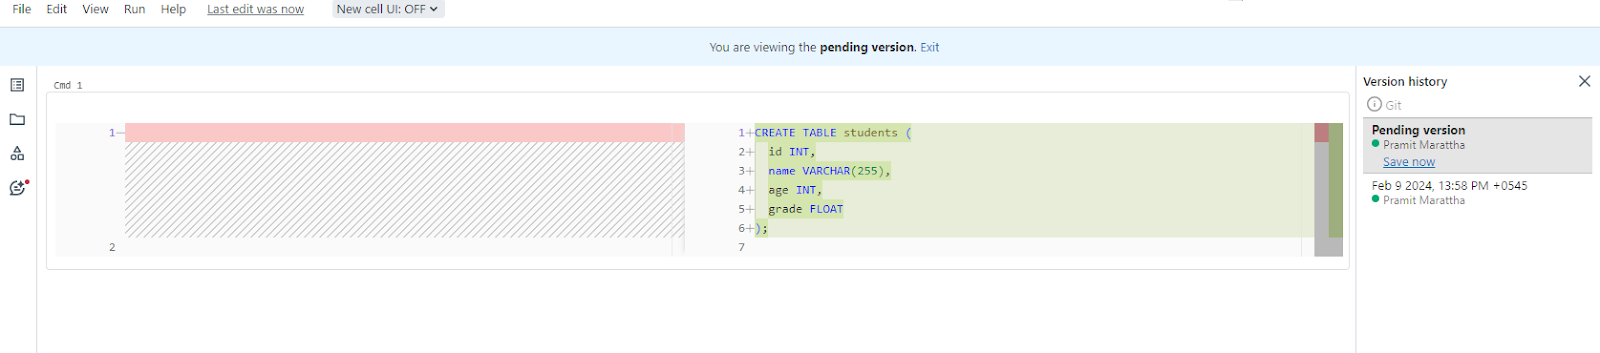
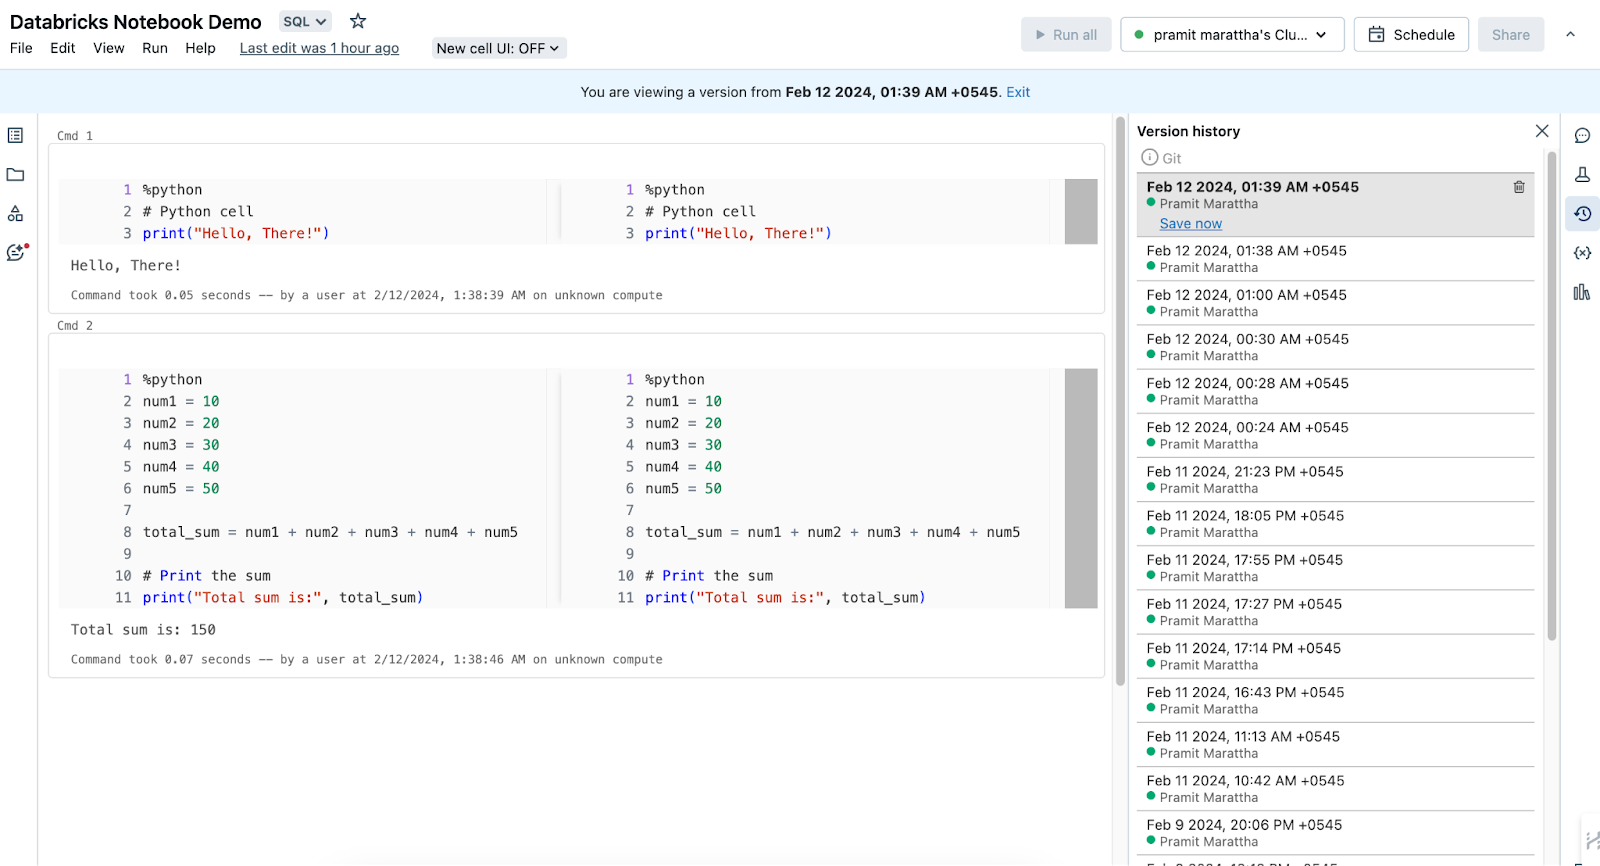
8) Tracking/Accessing Version History
Databricks notebooks maintain a version history, allowing you to view, restore, and delete previous snapshots. You can also add comments to specific versions.
To access it, click the version history icon in the right sidebar or go to File ➤Version History.
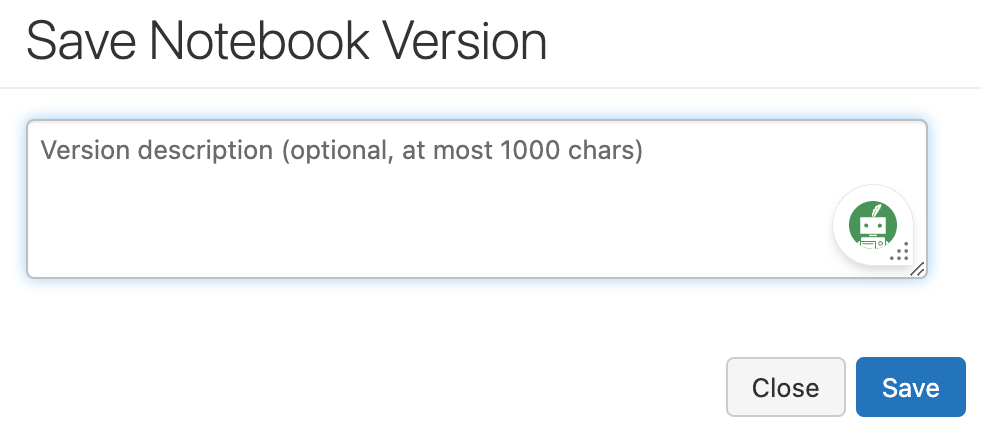
Adding Comments
To add a comment to the most recent version, follow these steps: First, select the latest version entry. Next, click on "Save Now". A dialog will appear, prompting you to input your comment text. Once you've entered your comment, click on "Save" to finalize and append your comment to the latest version.
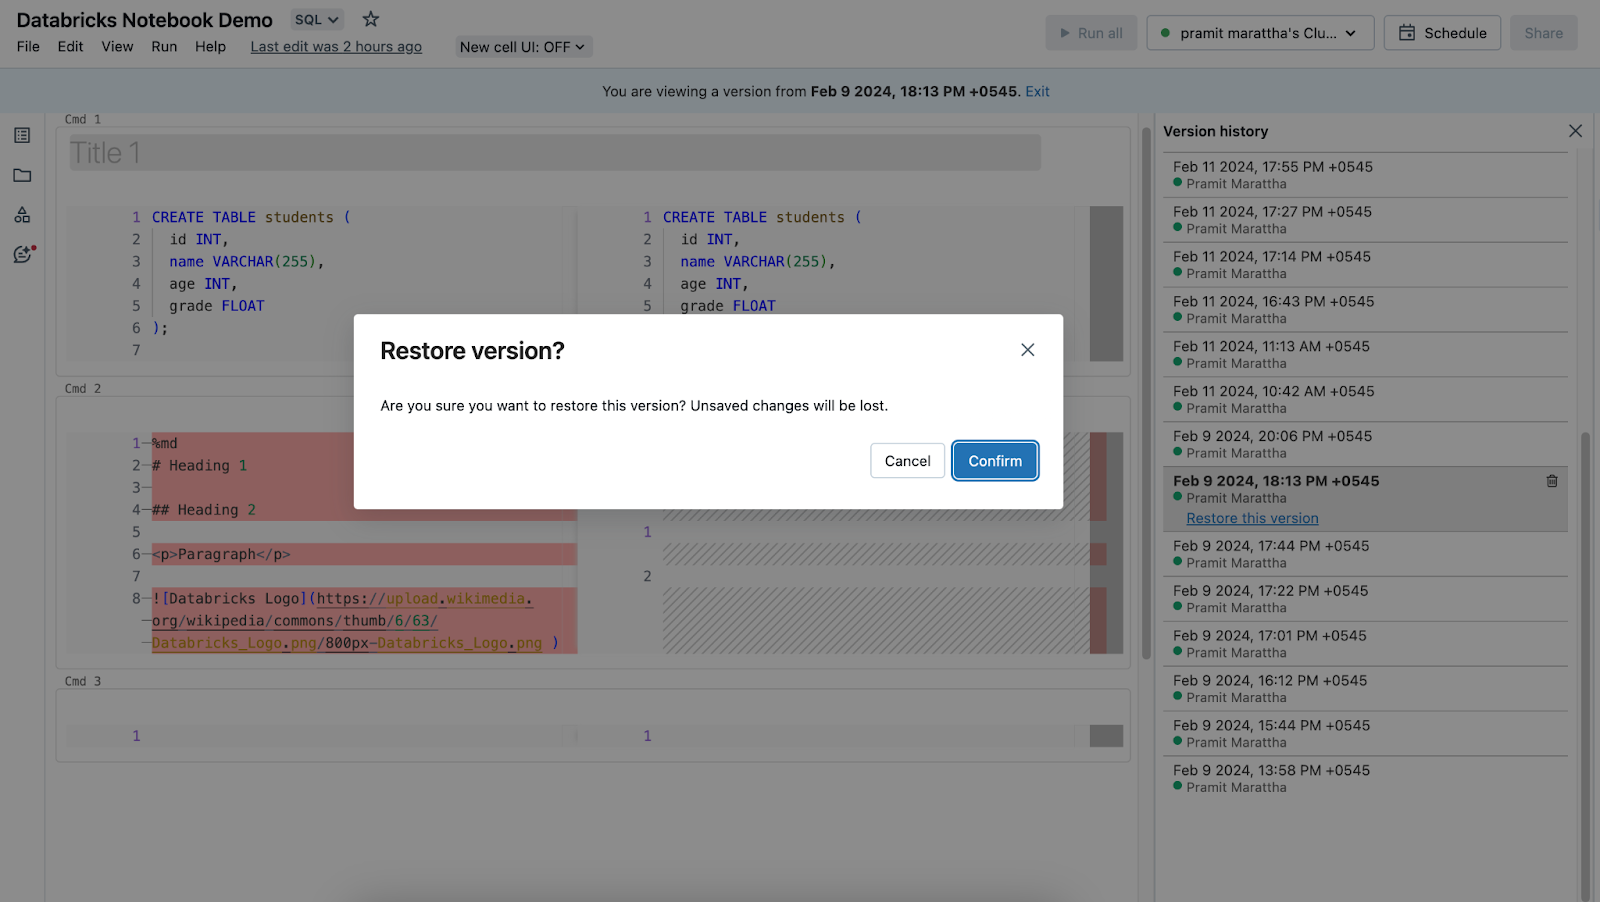
Restoring a Version
To revert to a previous version, follow these steps: Start by clicking on the version entry that you wish to restore. Subsequently, click on "Restore This Version" to initiate the restoration process. Confirm the action by verifying the restoration of the snapshot. As a result, the chosen version will now be set as the most recent version.
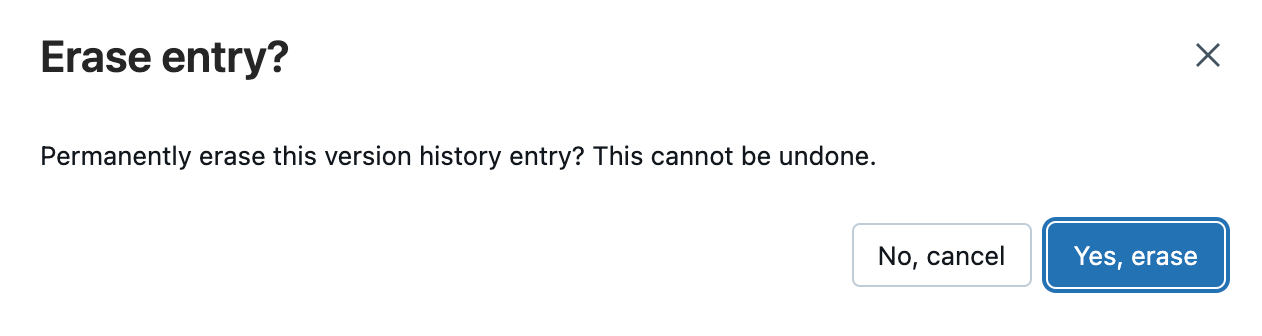
Delete a Version
To permanently remove a particular version, follow these steps: First, click on the version entry you intend to delete. Then, locate and click on the trash 🗑️ icon. Confirm the deletion by acknowledging the prompt that appears. As a result, the selected version will be permanently removed from the version history.

Clearing All Versions
To erase the entire version history, follow these steps: Navigate to the "File" menu and select "Clear Version History". Confirm it when prompted.
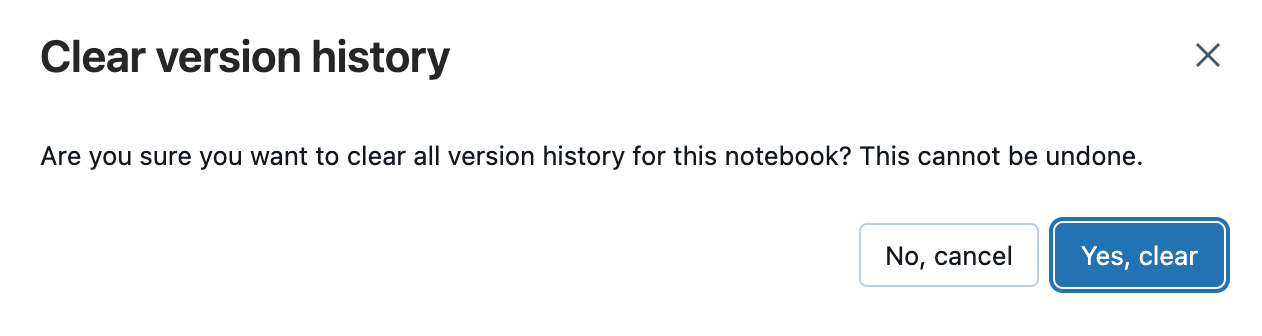
Note: The version history cannot be recovered once cleared.
Step 4—Working with Outputs
After running cells in a notebook, you will see outputs, and your notebook will retain its state. Now, let's delve in and see how the output format will appear. Also, let's explore how to manage these outputs, handle the state, utilize download options, and adjust settings related to notebook results.
After running cells in a notebook, you will see outputs, and your notebook will retain its state. Now, let's delve in and see how the output format will appear. Also, let's explore how to manage these outputs, handle the state, utilize download options, and adjust settings related to notebook results.
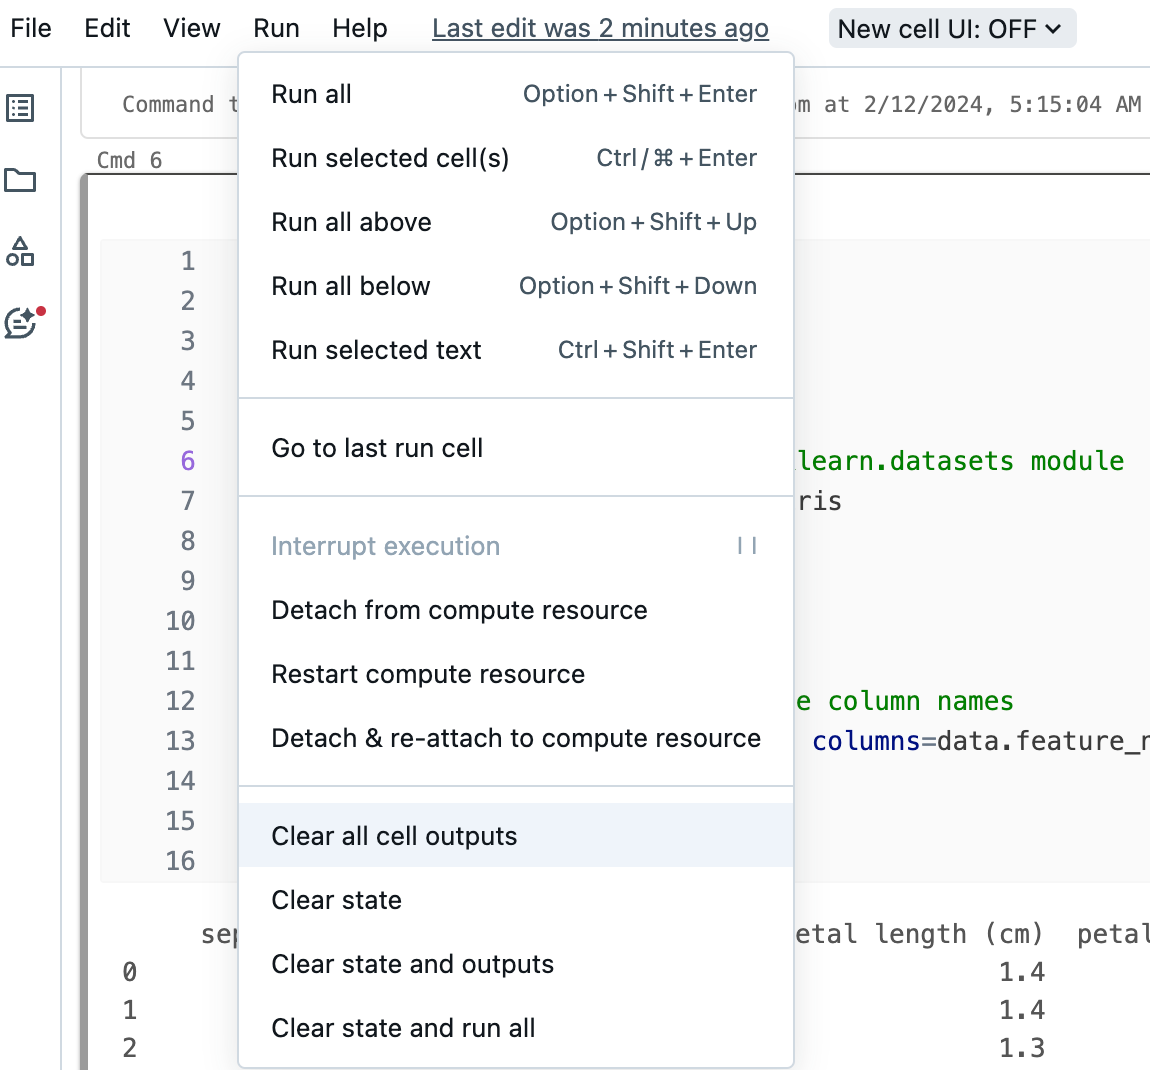
Clearing Databricks Notebook Outputs/State
As you run cells in a notebook, the runtime state accumulates, including variables, functions, imported libraries, and cell outputs. At times, you may want to clear this state to start with a clean environment. Databricks notebooks provide options to clear state and outputs.
- Clear All Cell Outputs option clears only the outputs generated by each cell while retaining notebook state like imported libraries and variable definitions. This can be useful for sharing the notebook logic without visualizations or outputs.
- Clear State option clears all notebook runtime state, including function definitions, data variables, and imported libraries. This resets the environment but retains cell outputs.
- Clear both state and outputs, select the Clear State and Outputs option. This will remove all notebook state and all cell outputs, providing a completely fresh runtime environment.
- Clear State and Run All options will clear state and re-run all cells from top to bottom. This re-executes the entire notebook with a fresh state.
Displaying Cell Outputs and Results
By default, Databricks notebooks limit the amount of data returned to the client to avoid performance issues or browser crashes. For tables, a maximum of 10,000 rows or 2MB of data is returned, whichever limit is reached first. For text results, the limit is 50,000 characters.
To increase the text result limit, you (as an admin) can configure the Spark parameter spark.databricks.driver.maxReplOutputLength (supported only on Databricks Runtime 12.1 and above).
Accessing SQL Results in Python
You can load data using SQL and explore it using Python. In a Databricks Python notebook, table results from a SQL language cell are automatically made available as a Python DataFrame.
New Cell Result Table (Public Preview)
Databricks has released a preview of a new interactive cell result table. To enable this, click the “New result table” toggle in the upper right of any table output.
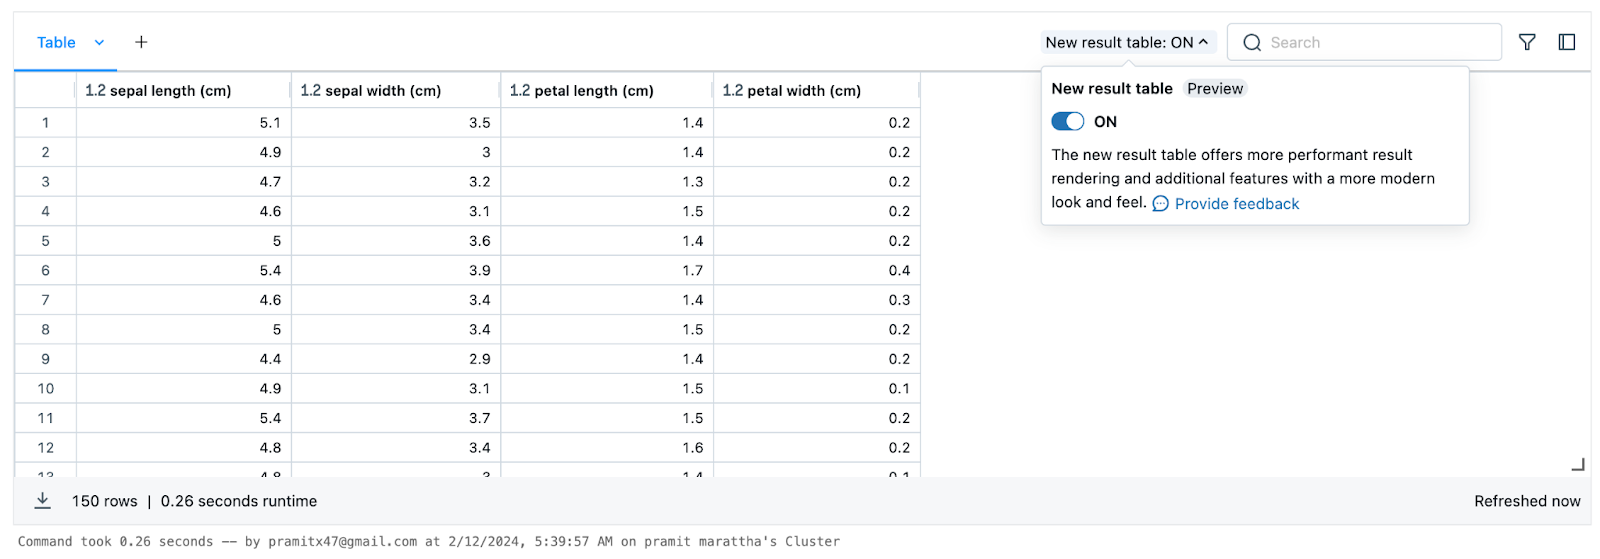
This new table helps to improve the notebook output experience with enhanced interactivity and control. As this feature is in preview, interfaces may change before general availability.
Downloading Notebook Results
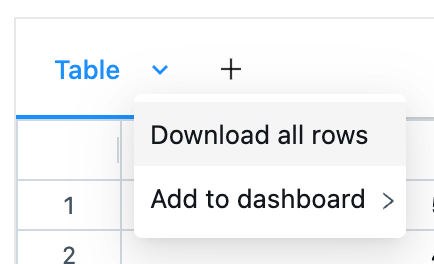
By default, users can download CSV exports of any tabular output in a notebook. This allows full access to result data instead of just the sampled displayed output.
To download, click the down arrow icon in the table output header and select “Download all rows”. This will export the entire table contents to a file named export.csv on your local file system.
Downloading output can be disabled by admins if needed. This may be relevant for notebooks exposed publicly or containing sensitive data.
Note that users who can view a shared notebook can also download results unless downloading is explicitly disabled.
Multiple Outputs per Python Cell
Unlike earlier versions, modern Python notebooks in Databricks allow multiple outputs in a single cell.
For example, you can display both a plot and a table in one cell:
from sklearn.datasets import load_diabetes
import pandas as pd
import matplotlib.pyplot as plt
# Load diabetes data
diabetes_data = load_diabetes()
# Create dataframe from data
df = pd.DataFrame(diabetes_data.data, columns=diabetes_data.feature_names)
# Display dataframe
display(df.head())
# Create scatter plot btn  two features
plt.scatter(df['bmi'], df['s1'])
# Add axis labels
plt.xlabel('BMI')
plt.ylabel('S1')
plt.show()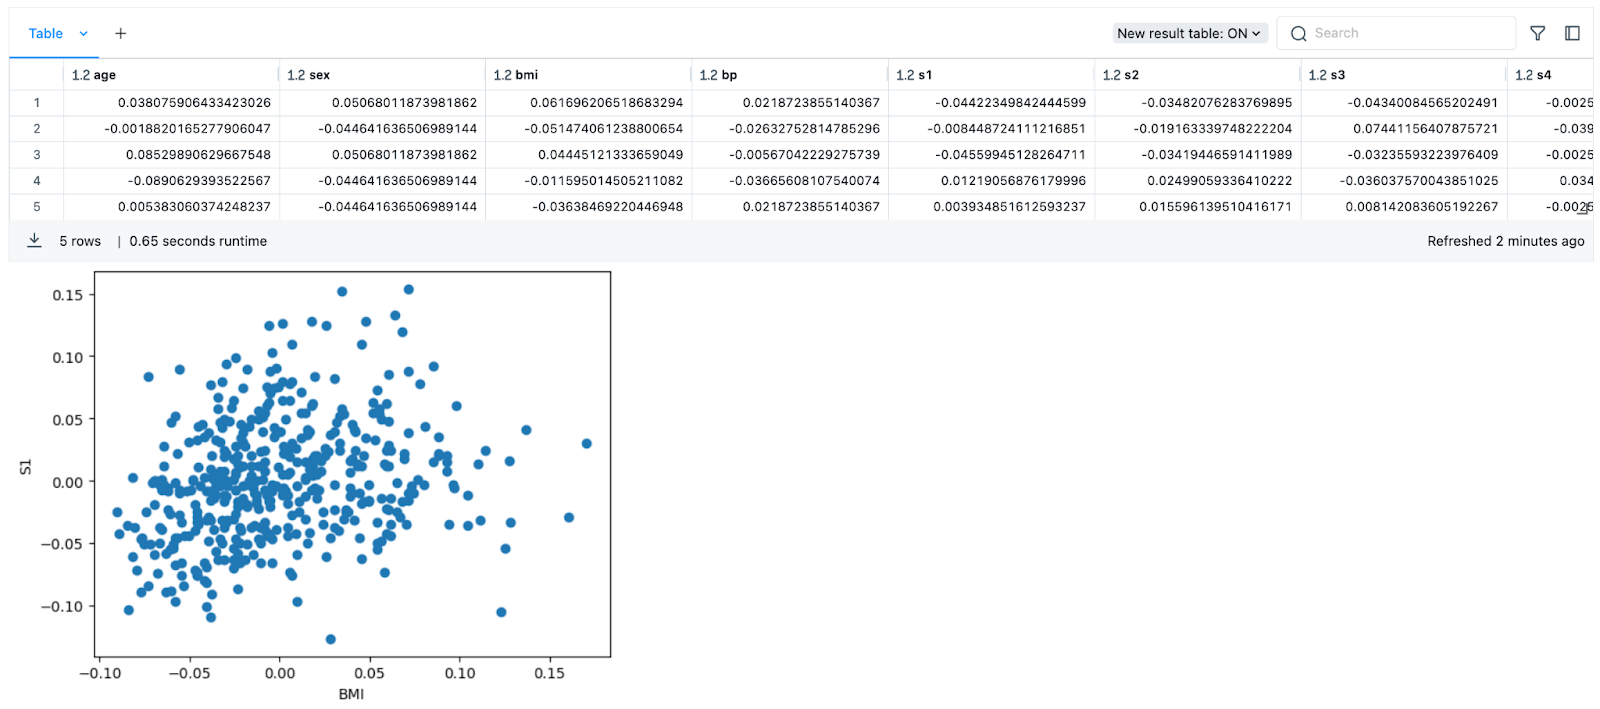
Step 5—Automating with Databricks notebooks
You can automate and schedule Databricks notebooks to run as jobs on a regular basis. Jobs can be triggered manually or on a schedule.
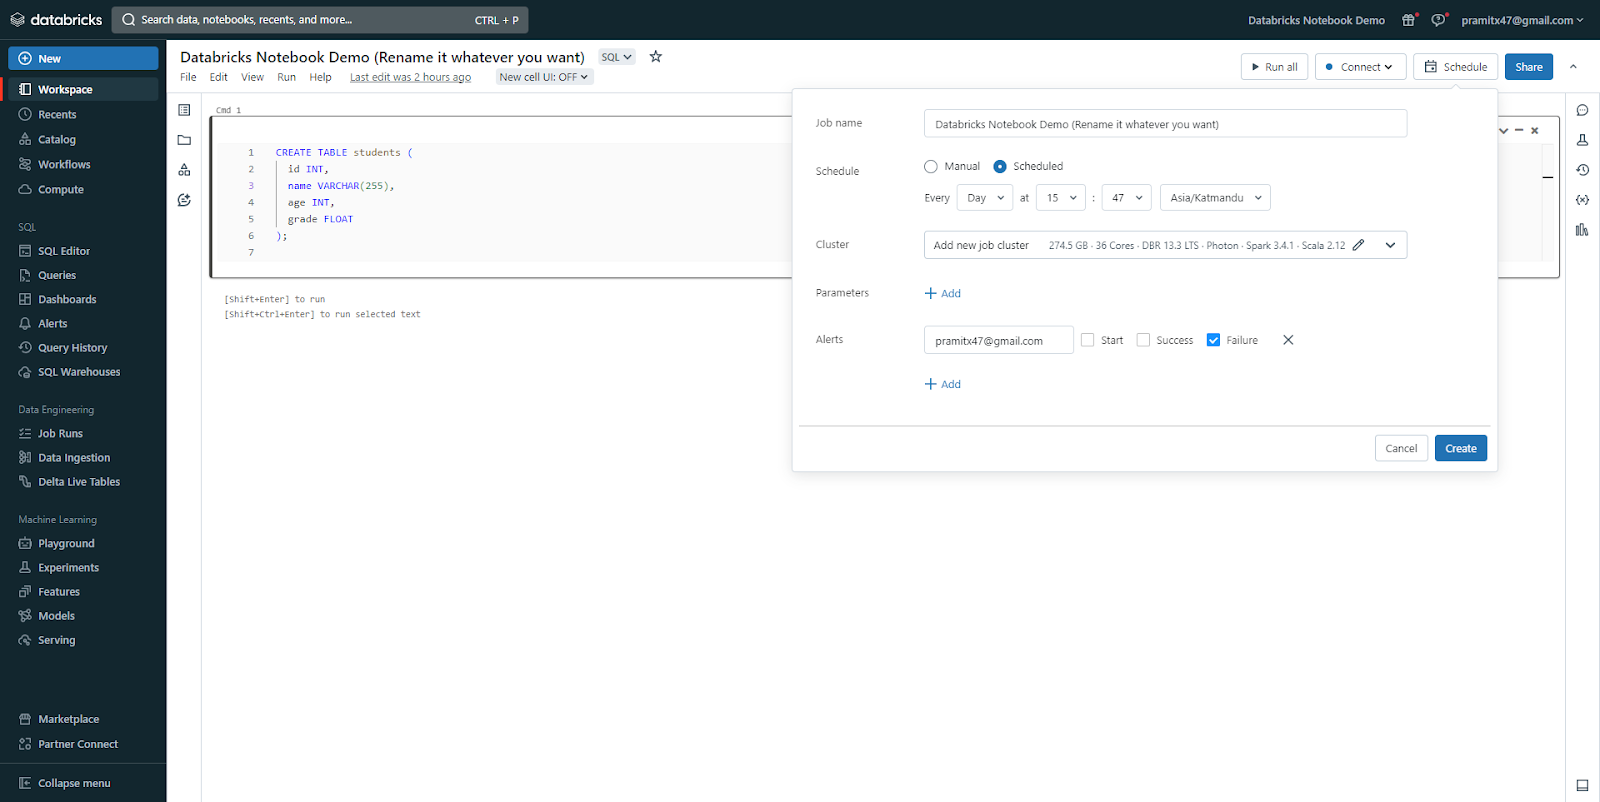
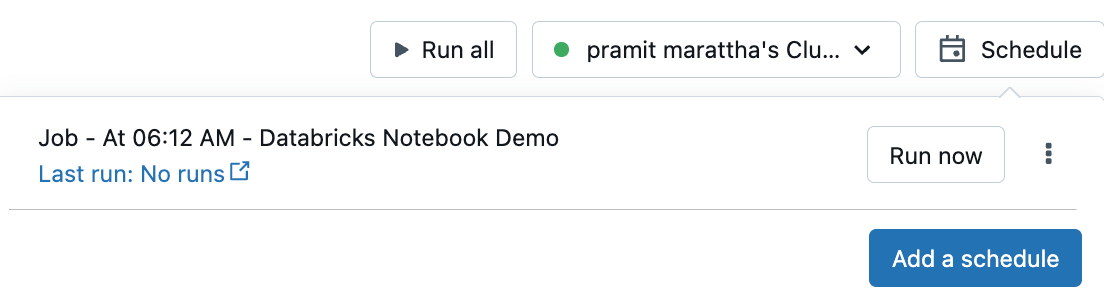
To schedule a notebook job:
- In the notebook, click the "Schedule" button in the top right corner.
- If no jobs exist for the notebook, the "Schedule Notebook" dialog will appear. If jobs already exist, the "Jobs List" dialog will appear instead. Click "Add a Schedule" to open the "Schedule Notebook" dialog.
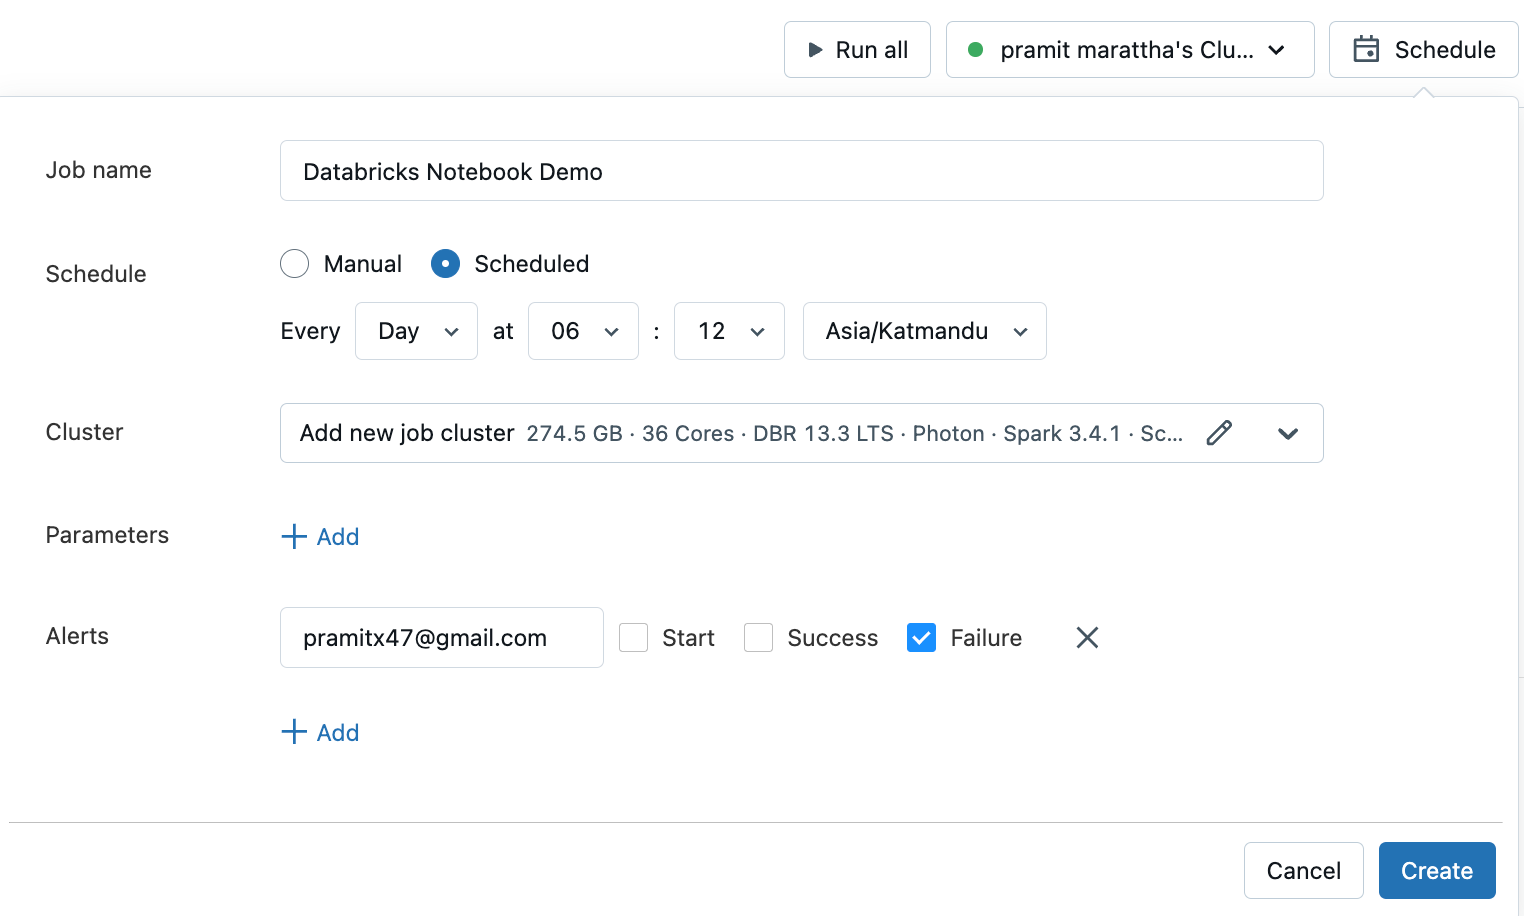
- Enter a name for the job. The default name is the notebook name.
- Select "Manual" to trigger runs manually, or "Scheduled" to set a schedule. If scheduled, choose the frequency, time, and time zone.
- Choose the compute resource to run the job. By default, it runs on the cluster the notebook is attached to or a new job cluster if you have permission.
- Optionally enter parameters to pass to the job as key-value pairs. Use dynamic value references to pass limited dynamic values.
- Optionally set up email alerts for job events.
- Click "Submit" to create the scheduled job.
To execute a job manually, click the "Schedule" button, and then select "Run Now" for the job.
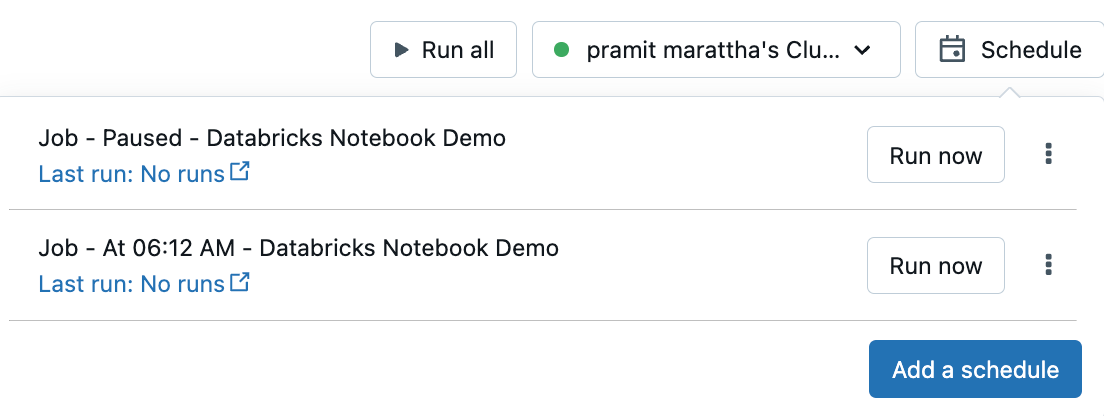
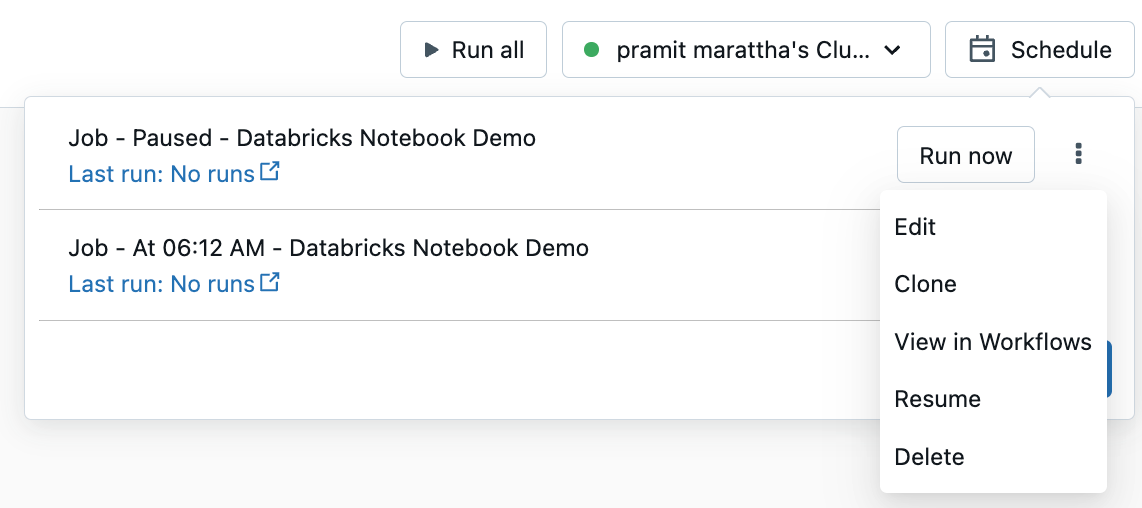
To manage jobs, click the "Schedule" button, and then click the vertical ellipsis next to a specific job. From the options presented, you can choose actions such as editing, cloning, viewing details, pausing, resuming, or deleting the job.
Step 6—Collaborating on notebooks
Databricks notebooks support collaboration features like sharing, permissions, and comments. These features require Databricks Premium or above.
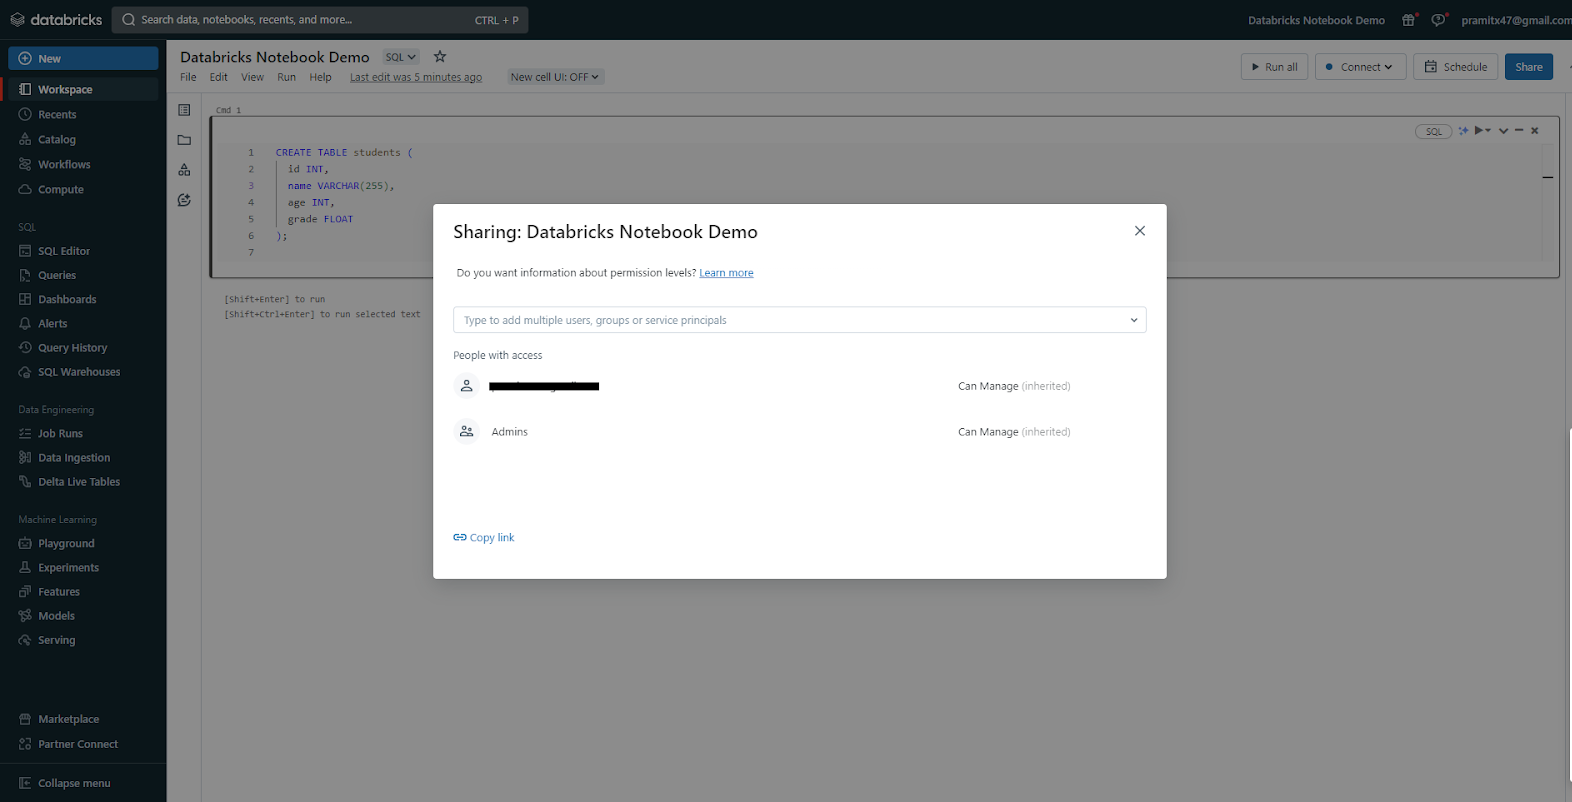
Share Notebooks
To manage sharing settings for a notebook, click the "Share" button at the top of the notebook to access the Sharing dialog. From there, select the users or groups you want to share the notebook with and choose an appropriate permission level.
Manage Permissions with Folders
You can control notebook permissions by placing them into folders. Notebooks within a folder inherit all the permission settings assigned to that particular folder.
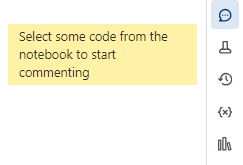
Commenting on Code
To manage comments in your workspace, you can use the Comments icon, which serves as a toggle for the comments sidebar. If you click this icon, you can easily access and navigate the comments section. To add comments to specific code sections, highlight the code and click the comment icon.

You also have the option to edit, delete, or reply to comments directly from the sidebar.
Step 7—Importing and Exporting Databricks Notebooks
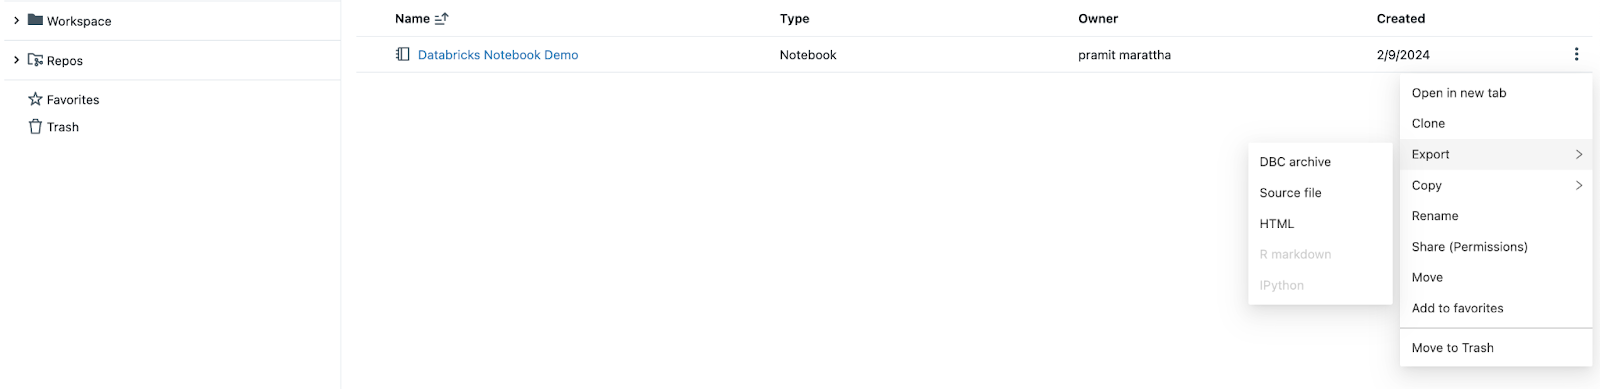
Databricks supports importing and exporting notebooks in various formats. Here are the list of supported Databricks notebooks formats:
- Source File (.scala, .py, .sql, .r)
- HTML (.html)
- DBC Archive
- IPython Notebook (.ipynb)
- RMarkdown (.Rmd)
How to import Databricks notebook?
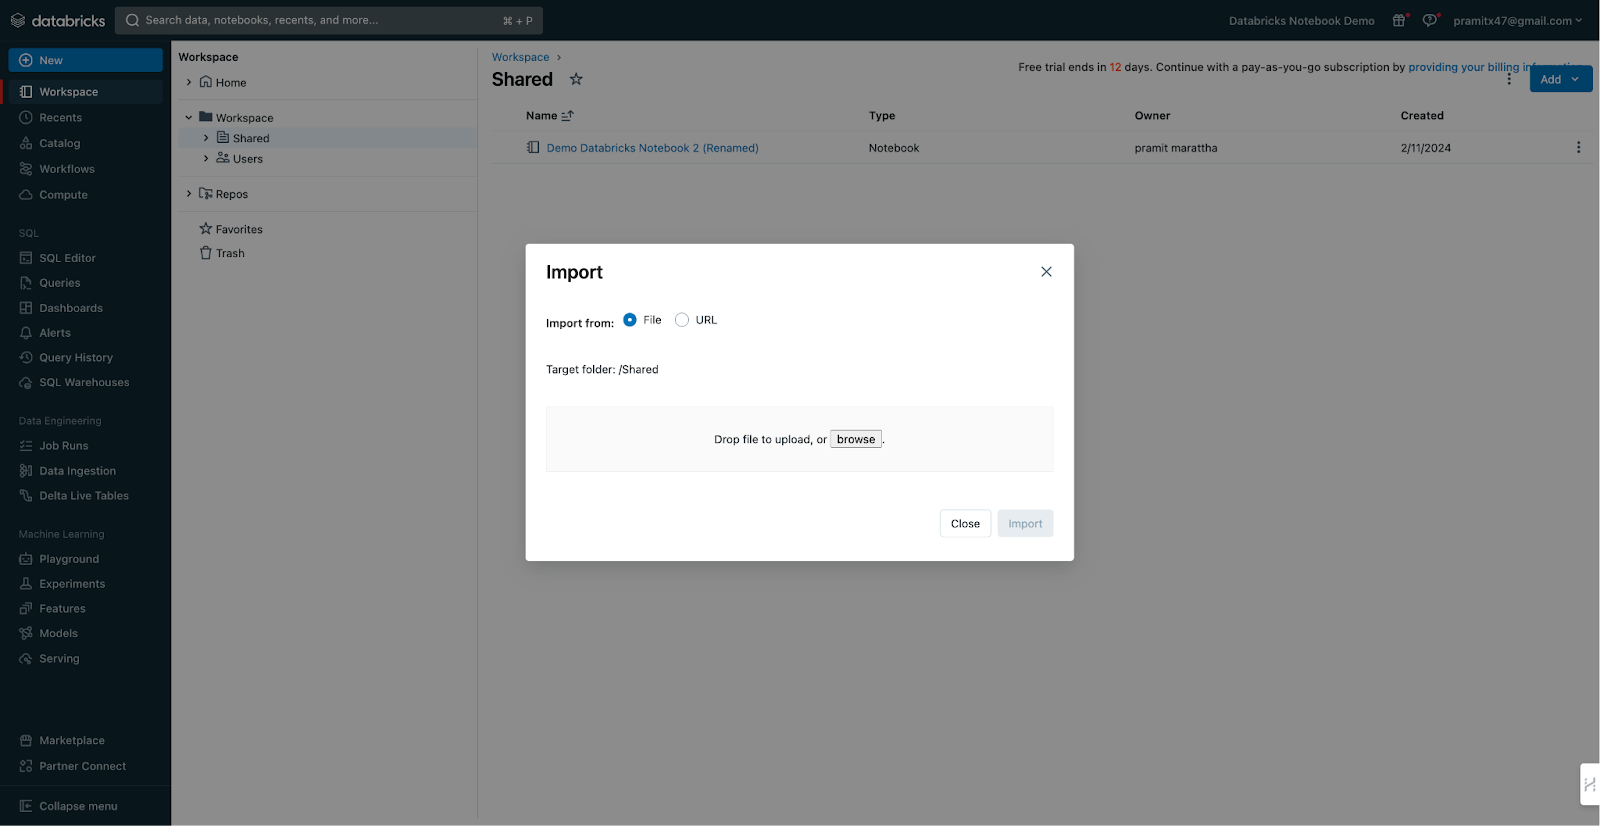
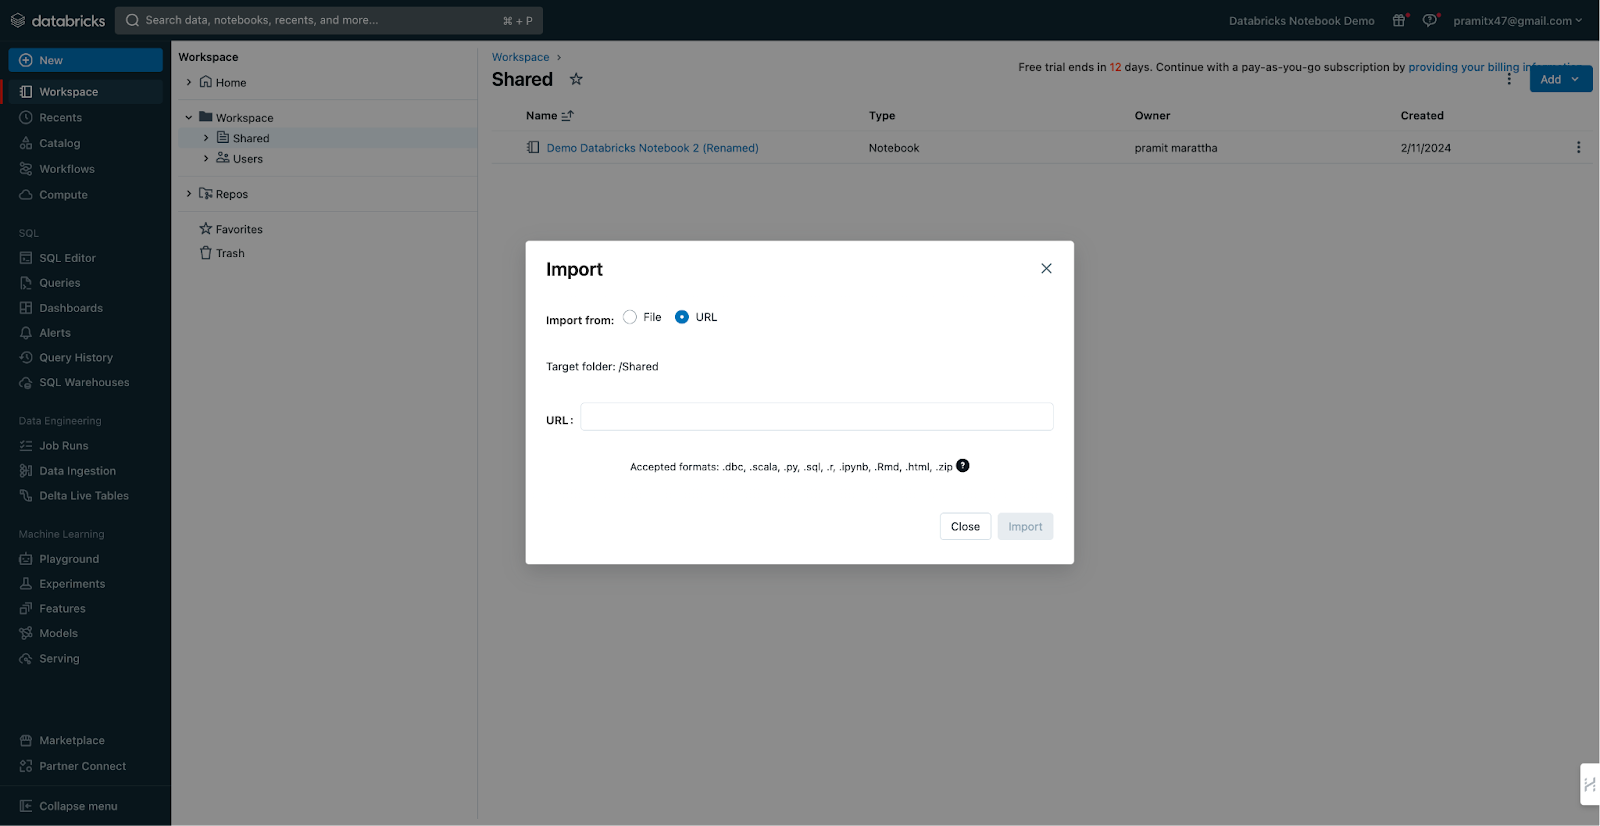
To import notebooks in Databricks, the process is fairly simple and straightforward. First, click on "Workspace", then choose "Import" in the folder you want. When prompted, provide a URL or select a file in a supported format as the source. After that, the notebooks will be imported into the folder you've selected.
How to export Databricks notebook?
To export your Databricks notebooks, follow these simple steps:
Click on "Export" in the toolbar of a specific notebook if you want to export that notebook alone. If you need to export multiple notebooks, right-click on a folder and select "Export". When prompted, choose the desired format, such as Source, HTML, or DBC Archive.
Step 8—Testing Databricks notebooks Effectively
Thorough testing is key before deploying notebooks to production. Databricks provides the following testing capabilities:
- Unit testing: Libraries like PyTest can be used to write unit tests for Python code cells.
- Isolated environments: Notebooks can be tested on different clusters through attach/detach.
- Parameterization: Notebooks can be executed with different inputs using widgets.
- Scheduled tests: Automated testing jobs can be configured via Cron schedules.
Testing early and often while incrementally building notebooks enables you to identify bugs early. It also prevents production failures.
By now, you should have a good grasp of the basics of working with Databricks notebooks. We've gone through the notebook creation process from start to finish, covering essential features. Now that we've covered the basics, let's dive into the next section where we will discuss 7 tips and tricks to effectively utilize Databricks notebooks.
7 Must-Know Tricks to Master Databricks Notebook
Let's discuss some power user tips and tricks to boost your productivity with Databricks notebooks:
Trick 1—Using Databricks Magic Commands
Databricks magic commands are special commands that start with a % symbol, and allow you to perform various tasks, such as changing the language, running external scripts, executing shell commands, accessing file systems, and more. You can use magic commands in any cell of your notebook, and they will override the default language of the cell.
Some of the commonly used magic commands are:
- %run: Run another notebook within current notebook
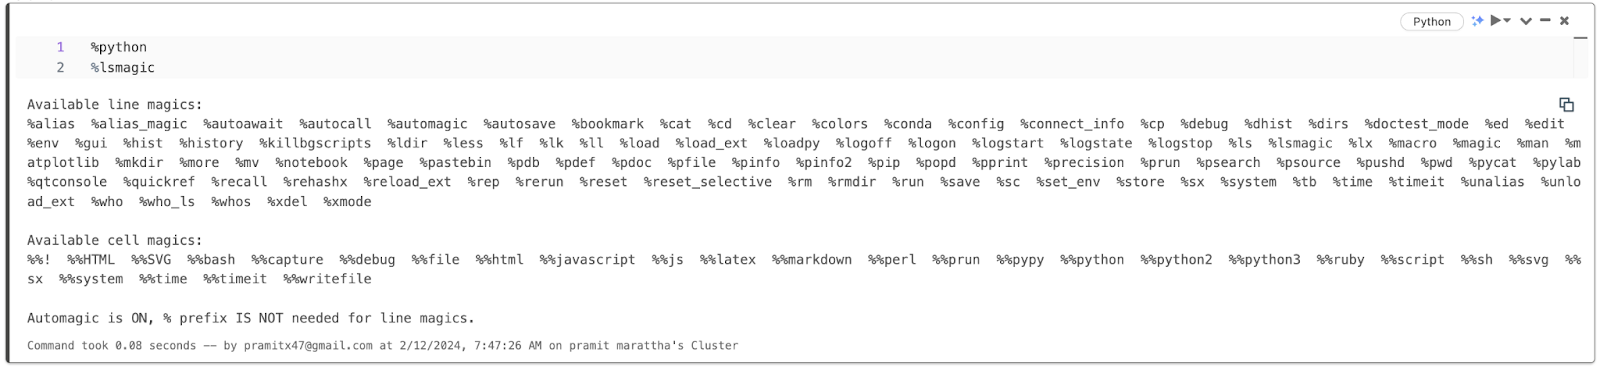
- %lsmagic: List all available magic commands
- %sh: Run Linux shell commands
- %fs: Interact with DBFS file system
- %sql: Run SQL query on cluster
- %scala: Write Scala code
- %python: Run Python code
- %md: Render Markdown text
- %r: Run R code
- %pip: Install Python libraries
- %matplotlib: Render Matplotlib charts inline
- %who: Display variables defined in notebook
- %env: Show Spark cluster environment
These are some of the magic commands that you can use in your notebooks, but there are many more. You can use the %lsmagic command to see the full list, and experiment with them in your notebooks.
Trick 2—Schedule and Parameterize Databricks notebooks
Databricks notebooks can be scheduled and parameterized, which means that you can automate your notebooks to run periodically or trigger them on demand or by events. You can also pass parameters to your notebooks and use widgets to customize the input and output of your notebooks.
Scheduling your notebook is a straightforward process. We have covered all the steps above, so feel free to check ‘em out.
Now, let's move on to the next step and learn how to parameterize the notebook.
To parameterize your notebook, you can use the following steps:
- Open the notebook you want to parameterize.
- Click on the Edit menu in the top right corner of the notebook and select "Add widgets" from the menu.
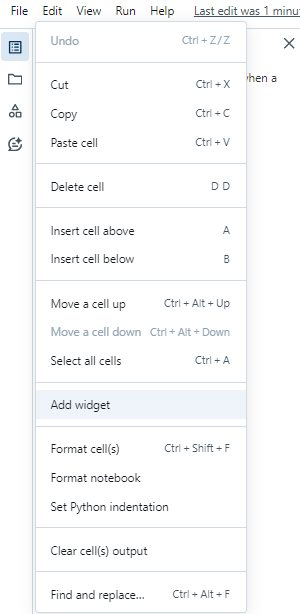
- In the "Add Widget" popup, specify the parameter name, widget label, widget type, and default parameter value. Choose from different types of widgets like text, number, dropdown, combo-box, multi-select, etc.
- Click on the "Add widget" button and wait for Databricks to create your widget. You can then see your widget at the top of your notebook and use it to input or output values in your notebook.

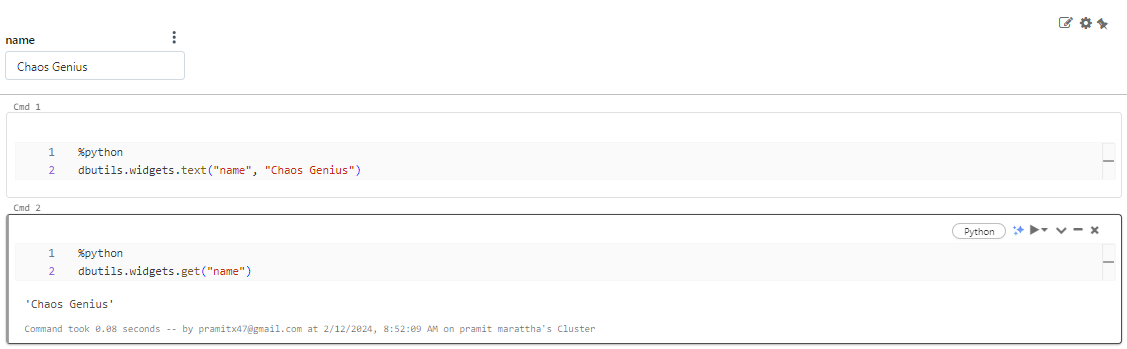
- You can also use the dbutils.widgets library to create and access widgets in your notebook. For example, dbutils.widgets.text("name", "Chaos genius") will create a text widget with the name “name” and the default value “Chaos Genius”, and dbutils.widgets.get("name") will get the value of the widget “name”.
Trick 3—Collaborate on Databricks notebooks
As we have already covered above, Databricks notebooks can be shared and collaborated on with other users using various features such as sharing, Git integration, comments, and co-authoring. Here are some tips to enhance collaboration in Databricks notebooks:
- Use fine-grained controls to securely share notebooks with other users or groups.
- Integrate notebooks with your Git-based version control system.
- Leave comments and @ mention colleagues for discussions.
- Track edit history and seamlessly roll back changes.
Trick 4—Upload Local Data Directly to Databricks Notebook
Databricks notebooks can access data from various sources, such as the Databricks file system (DBFS), the Databricks data lake, the Databricks SQL warehouse, and external data sources. However, sometimes you might want to upload your local data directly to your notebook without using any intermediate storage. You can do this by using the upload data feature in your notebook. This feature helps you transfer local data to your workspace. While the default target directory is set to /shared_uploads/<user-name>, you have the flexibility to choose a different destination and utilize the code provided in the Upload File dialog to access your files.

Trick 5—Utilizing Handy UI Enhancements
Databricks notebooks have some handy UI enhancements that can make your notebook experience more convenient and enjoyable. Some of these UI enhancements are:
Undo Delete Option to Recover Deleted Cells
The undo delete feature allows you to restore a cell that you have deleted by mistake. You can use the undo delete feature by heading over to Edit ➤ Undo delete cells, or by pressing Ctrl + Z on your keyboard.
Integrated Web-Based Terminal
The web terminal feature allows you to access a terminal session in your cluster and execute shell commands from your notebook. You can access the web terminal feature by clicking on the attached cluster and selecting the web terminal. You don't have to close your notebook.

Markdown Editing
Markdown editing feature enables you to edit and preview markdown text in your notebook, which is quite helpful for writing documentation for your code. You can use the markdown editing feature by selecting the markdown language located at the right-hand corner of the cell or by using the %md magic command in your cell. Then, you can write markdown text in your cell and use the preview button to see how it will look in your notebook.

Code Formatting
Exhausted from copying your code and pasting it elsewhere for formatting? Isn't it tiresome? What if there were a way to format your code without relying on any third-party tools, software, or websites? Well, Databricks has an inbuilt feature for that. The code formatting feature allows you to format your code in your notebook according to the language style guide. You can also directly use the formatting feature by pressing Ctrl + Alt + F on your keyboard or by using the Edit menu on the toolbar and selecting Format Cell.
These examples merely scratch the surface of the useful UI enhancements that Databricks provides. There are many more new features and enhancements, with updates regularly introduced.
Trick 6—Searching notebooks Effectively
Databricks notebooks can be searched effectively by using the global search or the search within a folder or workspace.
To utilize the global search feature in Databricks, follow these steps. First, navigate to the left sidebar and click on the search icon. In the search box that appears, input the desired keyword or phrase.
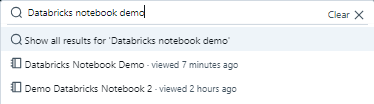
Also, you can use the advanced search option to fine-tune your search by applying filters such as language, cluster, date—and more.
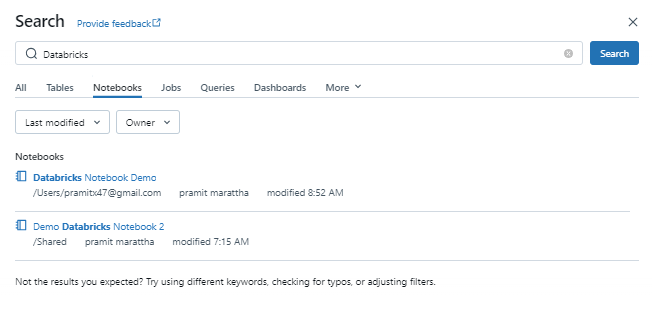
After entering your search criteria, click on the search button and wait for the results.
You can also search for text within a specific folder or only search for notebook names.
Trick 7—Restore Previously Saved Revisions
All edits made to a notebook are automatically version-controlled.
You can view the revision history timeline, preview old versions, restore an older version, or permanently delete old revisions no longer needed.
This enables an effortless rollback to previous points in time.
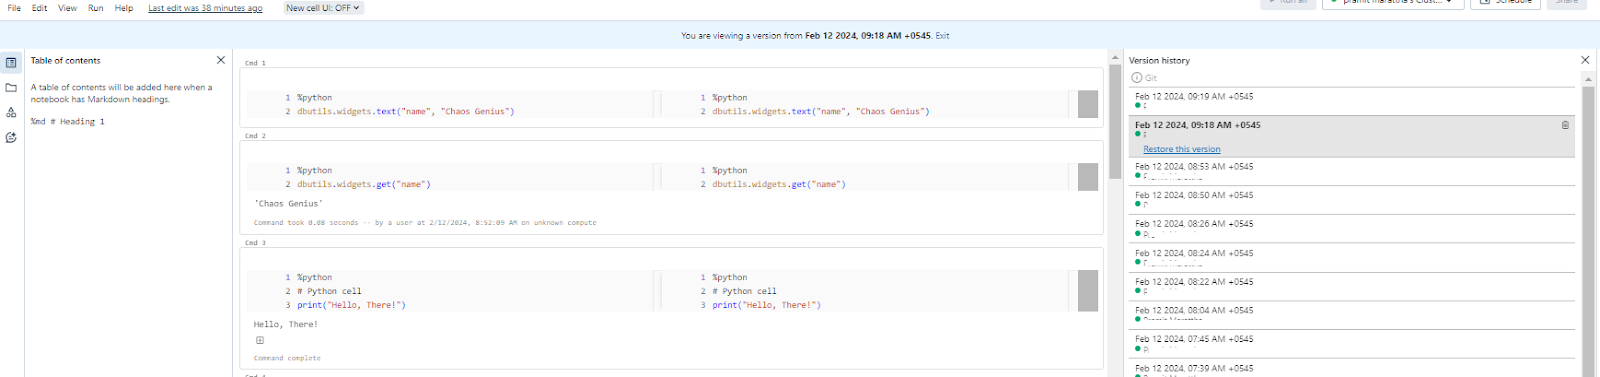
Refer to the above section for a detailed, step-by-step guide on how you can effectively use this feature.
Conclusion
And that’s a wrap! There you have it. Databricks notebook is extremely useful if you are working with data in Databricks. Without it, you will not be able to do much. Databricks notebooks provide a flexible and interactive canvas for data teams to streamline their end-to-end analytics workflows.
In this article, we have covered:
- What Are Notebooks in Databricks?
- Step-by-Step Guide on Using Databricks Notebooks for Comprehensive Data Analysis
- 7 Must-Know Tricks to Master Databricks Notebook
…and so much more!
FAQs
What is a Databricks notebook?
Databricks Notebook is an interactive coding canvas within the Databricks platform where you can write, execute, and collaborate on code.
What languages are supported in Databricks notebooks?
Databricks notebooks support four main programming languages - Python, R, SQL, and Scala. Cells can be switched between these languages using magic commands.
How do I open an existing notebook?
To open an existing notebook, click on the notebook name listed on the left sidebar. You can also hover over the name to view the notebook path.
How do I run code cells in a notebook?
You can run individual code cells by clicking the run icon on the right side of the cell. To run the entire notebook, click "Run All" at the top of the page. The keyboard shortcut is Shift + Enter.
How do I delete a notebook?
Right-click the notebook name and select "Move to Trash". Then confirm the deletion. Notebooks moved to the trash can be restored or permanently deleted.
How do I change the default language of a notebook?
You can change the default language of an existing notebook by clicking on the language button at the top of any cell and selecting the desired option.
How do I browse available datasets in a notebook?
Use the catalog icon on the left sidebar to open the schema browser panel. Here you can explore tables, files, and other data available in your workspace.
How do I format code in a notebook?
Select the code cells and either use the Format drop-down in the cell menu or press Cmd/Ctrl + Shift + F. This will auto-format Python/SQL code based on language conventions.
How do I share a notebook with other users?
Click the share button at the top and specify users/groups to share with along with their permission levels in the sharing dialog box.
How do I schedule a notebook to run as a job?
Use the Schedule button and configure the frequency, time, parameters, and compute resources for automated execution.
How do I view previous versions of a notebook?
Click the version history icon on the right sidebar to see the revision timeline. Older versions can be restored.
How do I import an external notebook?
Click Import from the Workspace menu and select a file or provide a URL for the source notebook.
How do I export a notebook?
Click Export from the notebook toolbar or right-click a notebook/folder and select Export to download it in a file format.
How do I attach a notebook to a cluster?
Click the Connect button and select a cluster from the dropdown menu or click More to see all available options.
How do I parameterize a notebook using widgets?
You can add widgets from the Edit menu to define parameters.
How do I add comments to a notebook?
Use the comments icon on the right sidebar to leave and view comments on specific code sections.
How do I clear outputs/state in a notebook?
You can use the Clear All Outputs or Clear All options under the Edit menu to clear outputs or reset the state respectively.
How do I search for text within notebooks?
You can use the search icon on the left sidebar and enter keywords to search globally or within a specific folder.
Can you run notebooks on an automated schedule?
Yes, Databricks notebooks can be scheduled using Cron syntax via the Jobs UI.
Where are notebook execution results stored?
Results are stored on the worker nodes of the attached cluster.
Can you co-author notebooks in real time?
Yes, Databricks enables multiple concurrent users to edit the same notebook.
What formats can you export a notebook in?
HTML, Jupyter Notebook (.ipynb), R Markdown (.Rmd), Python (.py), etc.