


Databricks offers a range of data objects such as Catalog, Database, Table, View, and Function which streamline the process of organizing and managing data. A Databricks table is one of the core objects for structured data storage and manipulation. Tables provide an organized way to access and manage large datasets, enabling operations like querying, filtering, and aggregation. Databricks supports creating and managing tables using different approaches, including SQL DDL (Databricks CREATE TABLE) statements, the DataFrame API, or the DeltaTableBuilder API. The choice of approach depends on factors such as the data source, the desired table format, and the programming language (SQL, Python, R or Scala).
In this article, we will cover everything you need to know about creating tables using Databricks CREATE TABLE commands, DataFrame API & DeltaTableBuilder API—including a detailed walkthrough, advanced techniques, examples, best practices, and considerations for each approach.
What are Databricks Tables?
Databricks table is a structured collection of data, organized into rows and columns, which facilitates the storage, querying, and manipulation of data within the Databricks. The data itself is stored as a directory of files in cloud object storage, while the table's metadata, including its schema and other properties, is maintained in the metastore, registered within a specific catalog and database. By default, Databricks utilizes Delta Lake as its storage layer, meaning that tables created on the Databricks platform are Delta Lake tables unless otherwise specified. These Delta Lake tables are equipped with advanced features such as ACID transactions, scalable metadata handling, time travel (data versioning), and unification of streaming and batch data processing.
Note: It is possible to create tables on Databricks that are not Delta tables.
Databricks supports two primary types of tables: managed tables and unmanaged (external) tables.
- Managed Tables: Managed tables are fully controlled and managed by Databricks. The data for these tables is stored in a location specified by Databricks, typically within the Databricks File System (DBFS) or a cloud storage location managed by Databricks. Managed tables offer automatic data lifecycle management, including data replication, backups, and optimizations.
- Unmanaged Tables: Unmanaged tables, also known as external tables, are tables whose data is stored outside the Databricks-managed storage locations, in an external location such as an object store (e.g., Amazon S3, GCS, Azure Data Lake Storage Gen2 and Blob Storage) or a distributed file system (e.g., HDFS). You have full control over the data location and management for these tables, but you also bear the responsibility for maintaining and securing the data.
TL;DR:
| Managed Tables | Unmanaged (External) Tables |
| Data is stored and managed within the Databricks File System (DBFS). | Data is stored in an external location, such as cloud object storage (e.g., Amazon S3, Azure Blob Storage) or a distributed file system (e.g., HDFS). |
| Databricks handles data lifecycle management, including data replication, backups, and optimizations. | Users are responsible for managing the data lifecycle, including backups and replication. |
| Deleting a managed table also deletes the underlying data files. | Deleting an external table does not delete the underlying data files. |
| Performance is optimized for the Databricks platform. | Performance depends on the characteristics of the external storage system. |
Step-By-Step Guide to Create Table in Databricks
Before we dive into the step-by-step guide for creating tables in Databricks, let's review the prerequisites:
Prerequisites:
- Access to a Databricks workspace: You'll need an active Databricks workspace to create and manage tables.
- Understanding basic Databricks concepts: Familiarity with Databricks clusters, notebooks, and the workspace environment is essential.
- Familiarity with Spark SQL or PySpark (if using Python): While not strictly required, having a basic understanding of Spark SQL (for Scala or SQL users) or PySpark (for Python users) will make the table creation process more intuitive.
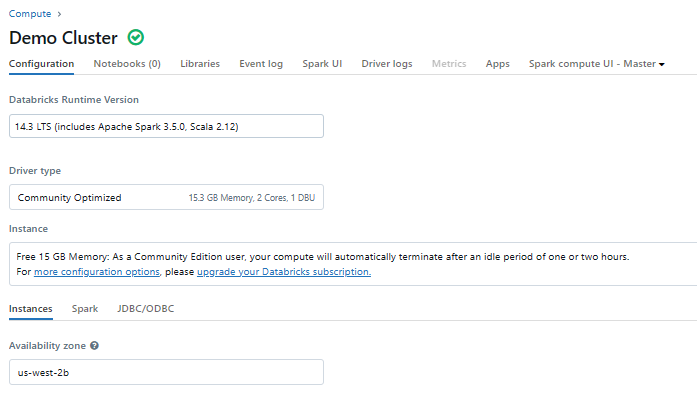
Step 1—Start a Databricks Cluster
Before you can create tables or perform any data operations in Databricks, you need to start a Databricks cluster. A cluster is a collection of compute resources that Databricks provisions to run your workloads.
To start a cluster in Databricks, follow these steps:
1) Log in to your Databricks workspace.
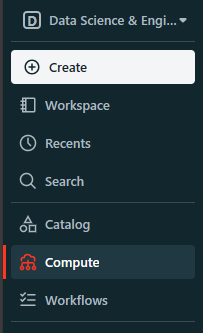
2) In the left-hand navigation pane, click on "Compute".
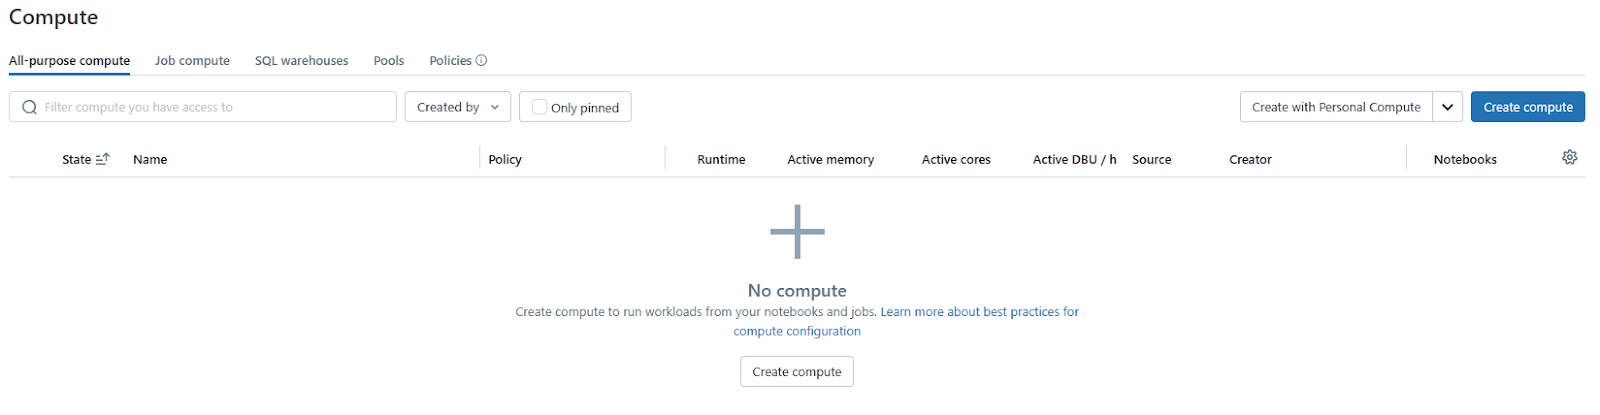
3) Click on the "Create Compute" button.
4) In the compute configuration page, configure the cluster settings according to your requirements, such as the cluster mode (e.g., single-node or multi-node), worker specifications (e.g., instance types, number of workers), and autoscaling options.
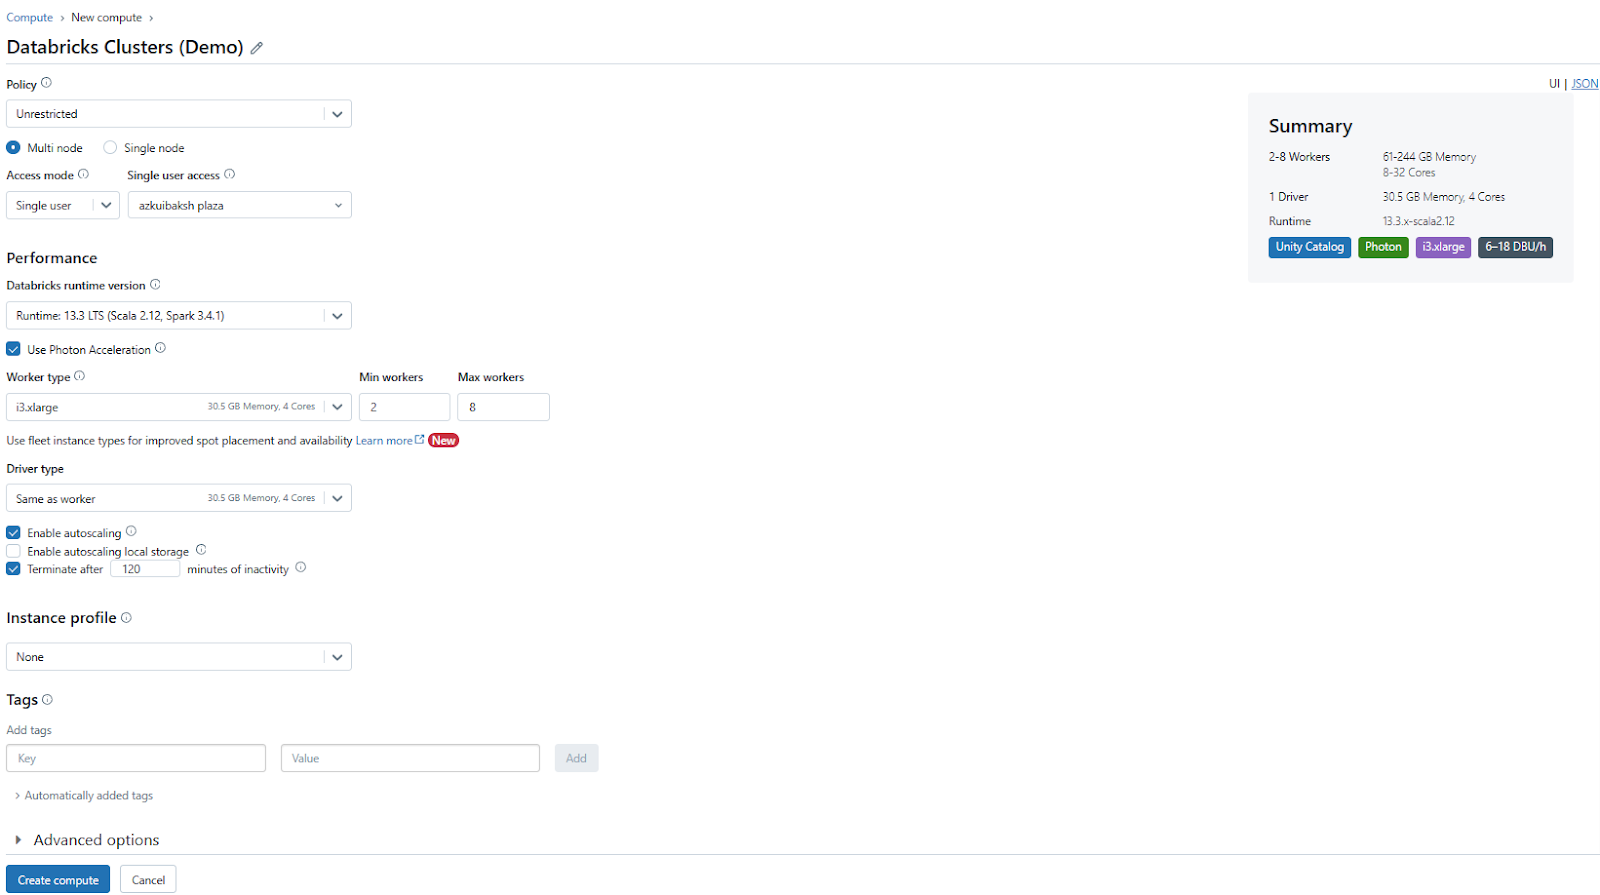
5) Optionally, you can select the Spark version, enable or disable specific features (like Photon), and configure advanced options like init scripts or cluster libraries.

6) Click "Create Compute" to start the provisioning process.
Check out this article, to learn more in-depth about creating Databricks clusters.
Databricks will provision the requested resources and start the cluster. Once the cluster is running, you can attach it to a notebook or other workspace objects to begin your data operations, including creating and managing Databricks tables.
If you already have a running cluster, you can skip this step and proceed to the next one.
Heads up! For this article, we'll be using the free Databricks Community Edition. With the Community Edition, you cannot configure and create custom compute clusters. Instead, you'll be using a pre-defined shared cluster that Databricks provides. Now, this shared cluster is a bit limited in its resources and capabilities compared to the beefy paid clusters you can get with Databricks' commercial offerings.
Step 2—Create Databricks Notebook
Databricks notebook is an interactive coding canvas that allows you to write, execute, and share code for data processing and analysis tasks. They support multiple languages, including SQL, Python, R or Scala, making them versatile tools for working with data in Databricks.
To create a new notebook in Databricks, follow these steps:
1) Open your web browser and navigate to the Databricks workspace URL. Log in using your credentials.
2) Once logged in, you'll find yourself in the Databricks workspace interface. Look for the navigation bar on the left-hand side of the screen.
3) Within the navigation bar, locate the "+ Create" button and click on it.
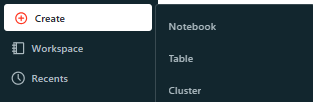
4) After clicking the "+ Create" button, a dropdown menu will appear. Look for the option labeled "Notebook" within this menu. Once you've located the "Notebook" option, click on it to proceed.
5) After clicking on the "Notebook" option, the interface will redirect you to the new Databricks notebook.
6) Provide a name for your notebook and choose the appropriate language (Scala, Python, R, or SQL).

Once you’ve created a notebook, you can start writing and executing code within its cells.
Check out this article, to learn a step-by-step guide to create Databricks notebook.
Step 3—Connect to Data Source
Before you can create a table, you'll need to connect to a data source and load the data into Databricks. Databricks supports a wide range of data sources.
In this step, we'll focus on loading CSV files in Databricks using Databricks File System (DBFS). However, the general process is similar for other data sources.
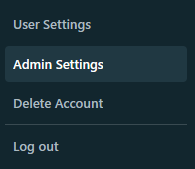
1) Navigate to your Databricks workspace and click on the Admin Settings icon in the top right corner.
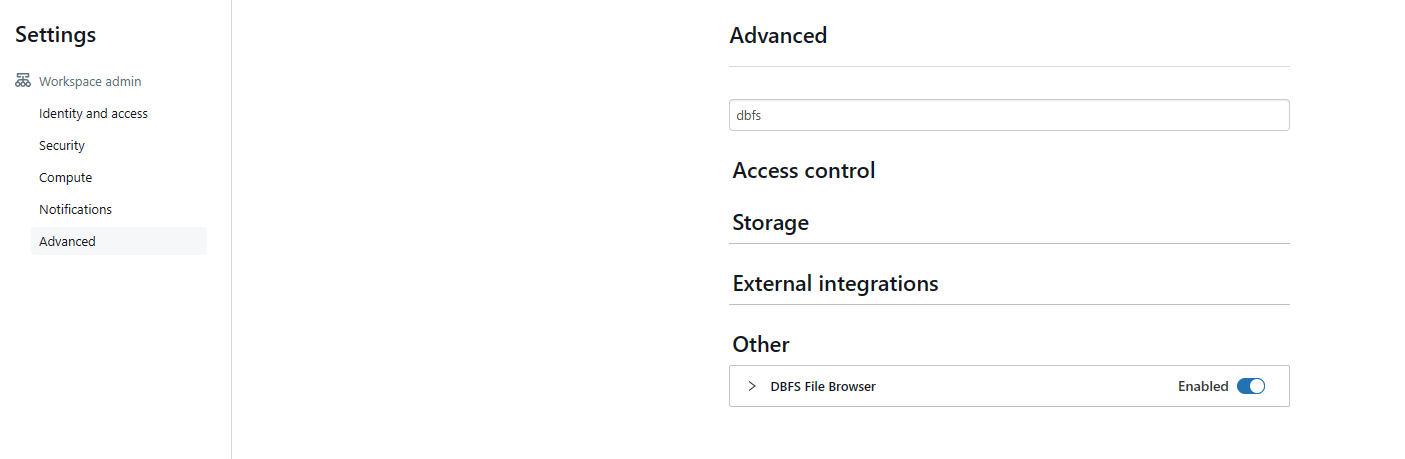
2) Click on the Workspace settings tab.
3) Scroll down to the Advanced section and search for DBFS.
4) Check the box next to "Enable DBFS File Browser". Refresh the page for the change to take effect.
5) In your Databricks workspace, locate the "DBFS" tab in the Catalog section.
6) Click on the "DBFS" tab to open the DBFS File Browser.
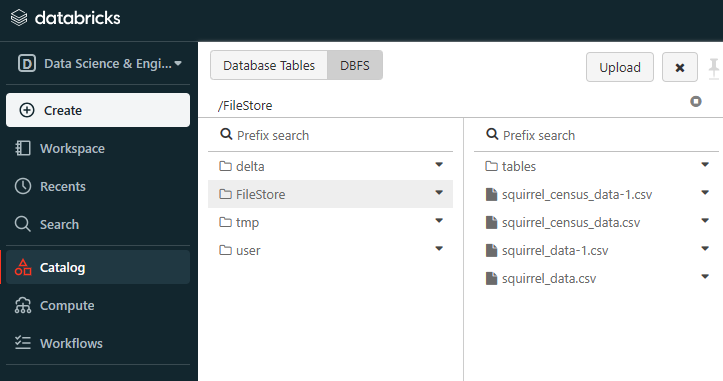
7) In the DBFS File Browser, click on the "Upload" button.
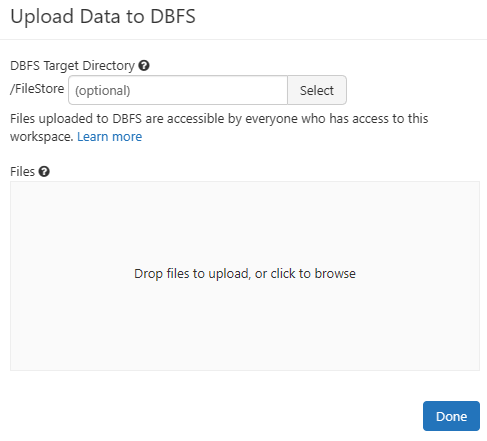
8) Select the CSV or other file you want to upload from your local system. The file will be uploaded into the "/FileStore" folder in DBFS by default. You can create custom folders within DBFS using the UI if desired.
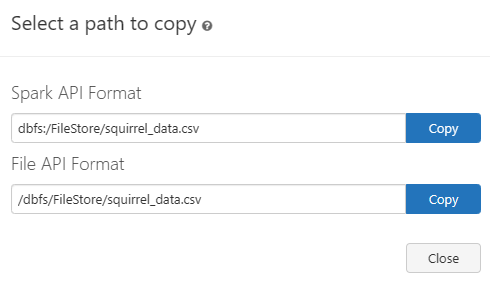
9) Now, create a DataFrame from the Uploaded CSV File. To do so, head over to your Notebook and then create a DataFrame from the CSV file that you just loaded. To obtain the path of the CSV file you just loaded, all you have to do is double-click on the CSV file. You will get two options: one is Spark API Format, and the other one is File API Format. Copy the Spark API format and proceed to the next step.
10) Now, let's create a DataFrame from the CSV file using the following code:
df = spark.read.format("csv").option("header", "true").load("dbfs:/FileStore/squirrel_census_data.csv")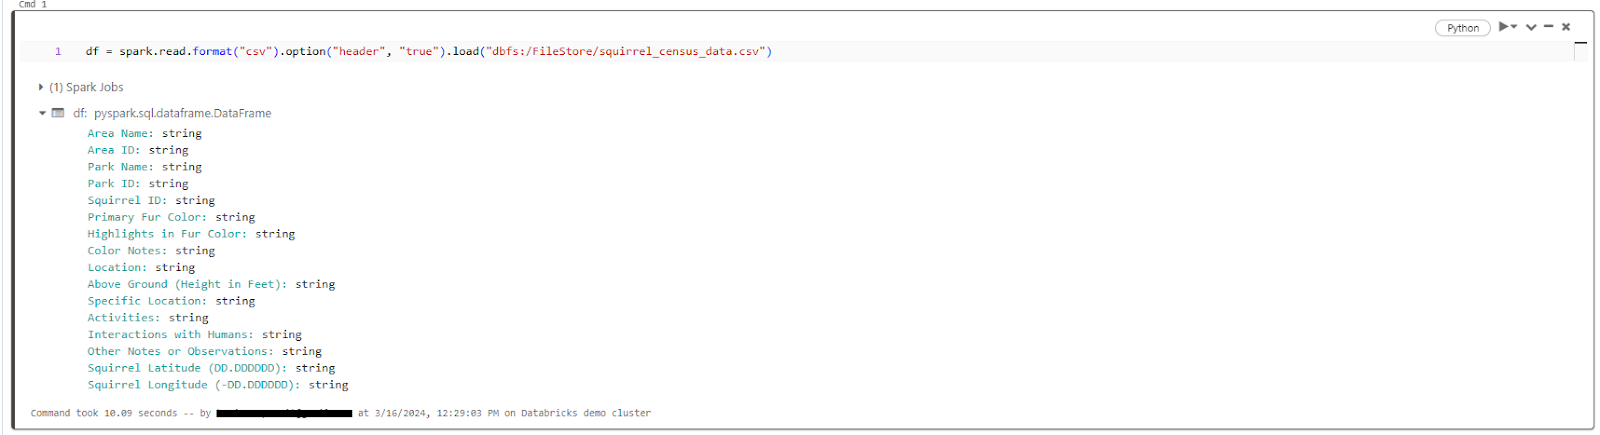
11) Next, let's create a temporary view from the DataFrame. Execute the code below:
df.createOrReplaceTempView("squirrel_census_data")
After loading the data into Databricks and creating a temporary view, you can preview and inspect the data before creating tables.
Step 4—Preview and Inspect the Data
Before we begin creating tables in Databricks, it's essential to preview and inspect the data to understand its structure, data types, and potential issues or inconsistencies. Previewing the data can help you make decisions about table schemas, partitioning strategies, and data cleaning or transformation steps.
In Databricks, you can use the following methods to preview and inspect your data:
- Previewing Data Using display(df): If you're working with DataFrames in Python or Scala, you can use the display(df) command to display the contents of the DataFrame in a tabular format within the notebook.
display(df)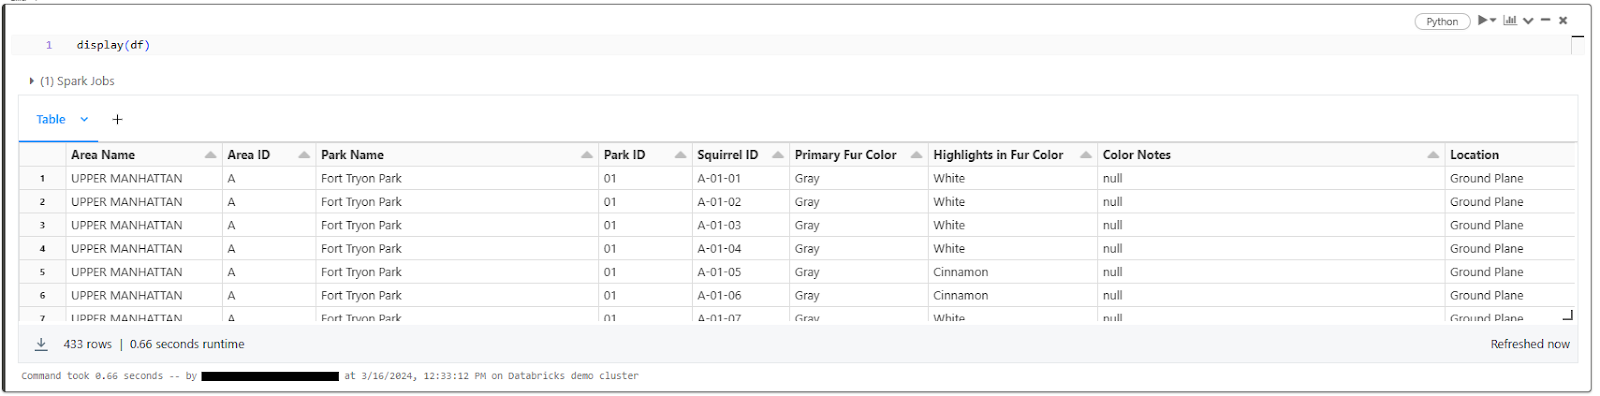
- Previewing Data Using df.show(): The show() method in DataFrames provides a way to display the first few rows of the DataFrame. By default, it shows the first 20 rows, but you can specify the number of rows to display by passing an argument to the method.
df.show(10)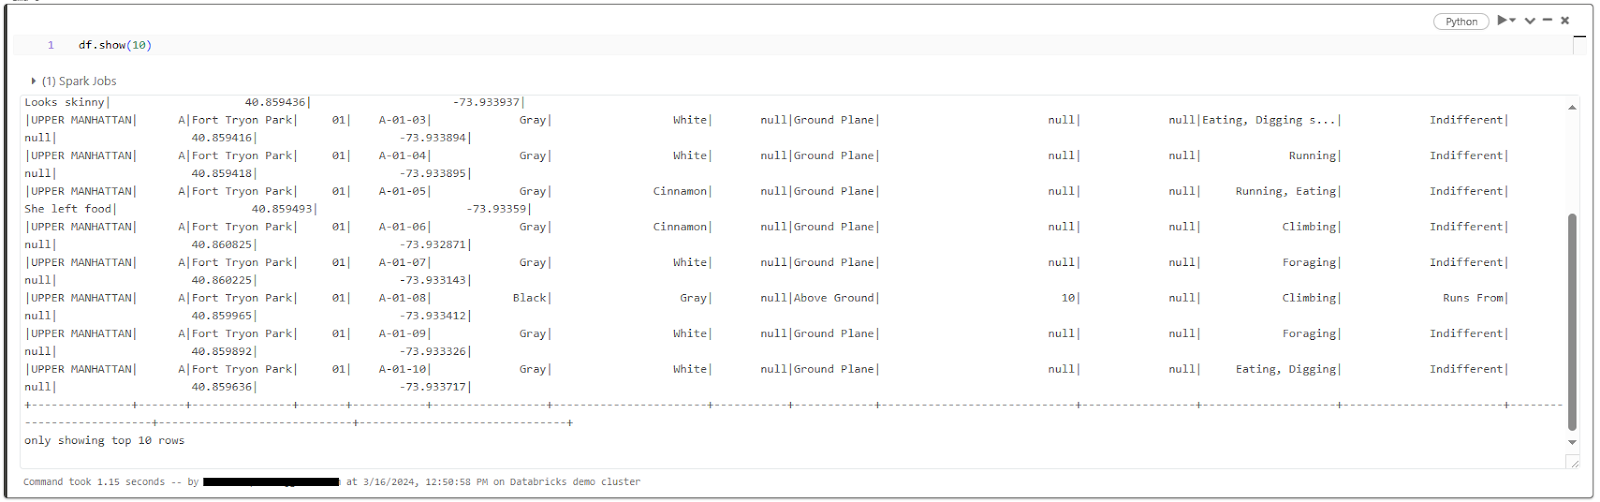
- Inspecting the Schema: To understand the column names, data types, and other metadata associated with your data, you can inspect the schema of the DataFrame or view.
df.printSchema()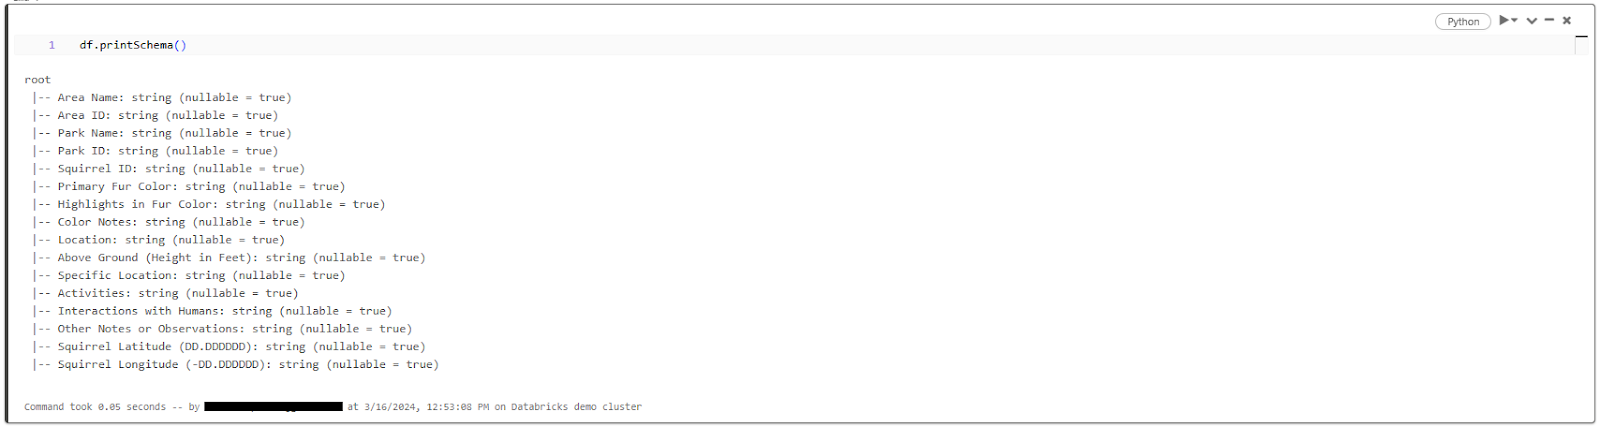
Using SQL:
%sql
DESCRIBE squirrel_census_data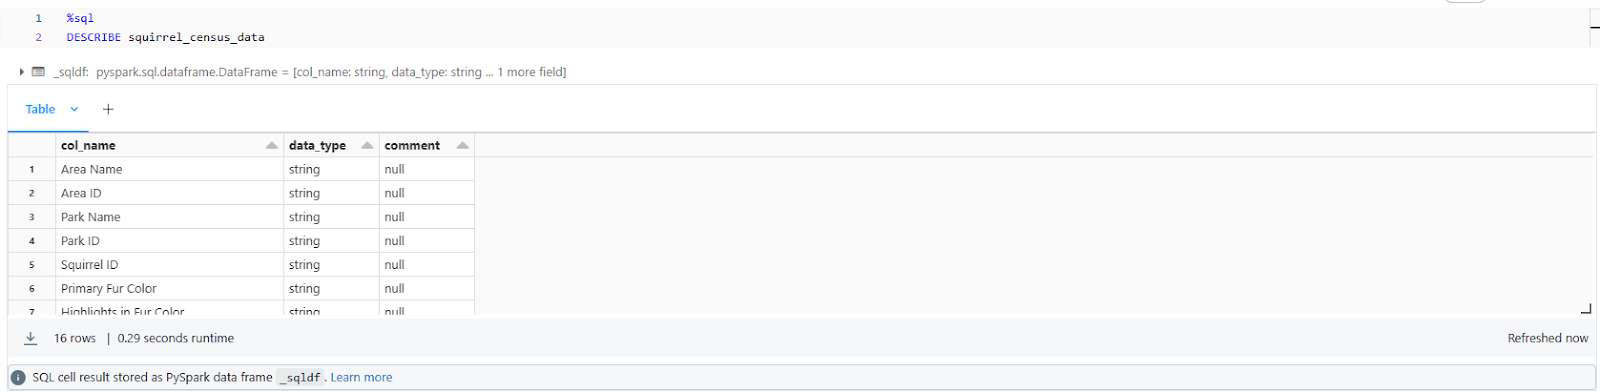
Once you’re done with previewing and inspecting your data, you can identify potential issues, such as missing values, incorrect data types, or outliers, and take appropriate actions before creating tables. This step is crucial for ensuring data quality and optimizing table performance.
How Do I Create a Table in Databricks?
Databricks provides several methods to create tables, each catering to different use cases and preferences. Whether you prefer SQL, Python, or Scala, Databricks offers a range of options to suit your needs. In this section, we'll explore various techniques for creating tables in Databricks, including the simple Databricks CREATE TABLE command, advanced SQL methods, the DataFrame API, and the DeltaTableBuilder API.
Step 5—Create Table Using Simple Databricks CREATE TABLE Command
Databricks CREATE TABLE command in Databricks SQL is a straightforward method for creating tables. It allows you to define the table schema, specify table properties, and optionally load data from an existing source.
The Databricks CREATE TABLE command in Databricks follows a similar syntax to other SQL dialects:
CREATE TABLE [IF NOT EXISTS] table_name (
   column1 data_type [column_constraint ...],
   column2 data_type [column_constraint ...],
   ...
)
[USING delta]
[LOCATION '/path/to/table/location']
[TBLPROPERTIES (table_property_key=table_property_value, ...)]Let's break down the components of this command:
1) Creating an Empty Table with a Specified Schema
To create an empty table with a specified schema, you can use the following syntax:
CREATE TABLE IF NOT EXISTS squirrel_census_demo_table (
    squirrel_id INT,
    area_name STRING,
    area_id STRING,
    park_name STRING,
    primary_fur_color STRING,
    location STRING,
    specific_location STRING,
    activities STRING
)
USING delta;
This command creates an empty Delta table named squirrel_census_demo_table with the specified columns and data types. The IF NOT EXISTS clause make sure that the table is created only if it doesn't already exist, and the USING delta clause specifies that the table should be a Delta table.
2) Creating a Table from an Existing Data Source
Alternatively, you can create a table by loading data from an existing source, such as a CSV file or another table.
We will delve into this in more depth in a later section, specifically in step 6.
Let's assume that the squirrel census data is stored in a CSV file located at /FileStore/squirrel_census_data.csv. We can create a table from this data using the following command:
CREATE TABLE squirrel_census_existing_data_table
USING csv
LOCATION '/FileStore/squirrel_census_data.csv'
As you can, this command creates a Delta table named squirrel_census and loads the data from the specified CSV file. The USING csv clause indicates that the data source is a CSV file.
3) Specifying Table Properties
When creating a table, you can also specify various table properties to control its behavior and performance. For example, you can set the location where the table data will be stored using the LOCATION clause:
CREATE TABLE squirrel_census
USING delta
LOCATION '/path/to/table/location';Also, you can set table properties using the TBLPROPERTIES clause:
CREATE TABLE demo_test
USING delta
TBLPROPERTIES (
    'delta.autoOptimize.optimizeWrite'='true',
    'delta.autoOptimize.autoCompact'='true'
);
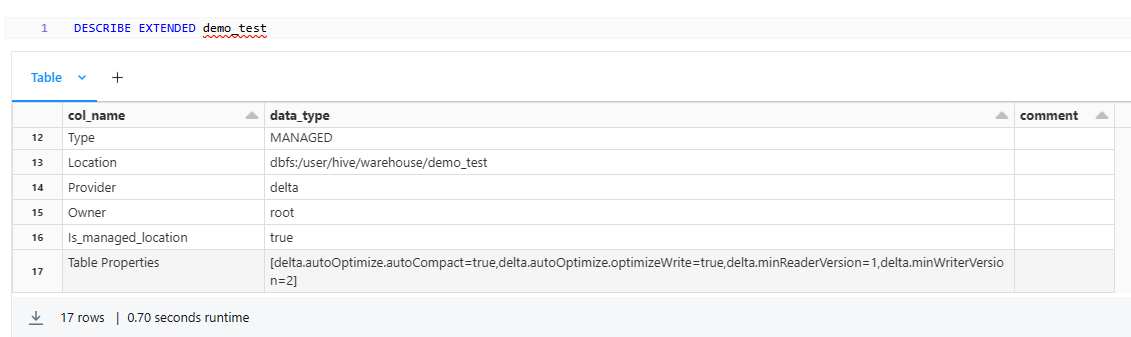
As you can see, in this example, we've set two table properties:
- delta.autoOptimize.optimizeWrite
- delta.autoOptimize.autoCompact.
These properties enable automatic optimization and compaction of the Delta table, respectively, which can improve query performance and reduce storage footprint.
Step 6—Advanced Databricks Table Creation Techniques
While the simple Databricks CREATE TABLE command is useful for basic scenarios, Databricks does provide more advanced techniques for creating tables, offering greater flexibility and control over the table creation process.
a) Databricks CREATE TABLE ... AS SELECT (CTAS)
The Databricks CREATE TABLE ... AS SELECT (CTAS) command allows you to create a new table by querying data from an existing table or view, which is particularly useful when you want to create a subset of an existing table or perform transformations on the data before creating the new table.
Here's the syntax for the Databricks CREATE TABLE AS SELECT (CTAS) command:
CREATE TABLE new_table_name
[USING file_format]
[OPTIONS (option_key=option_value, ...)]
AS SELECT ... FROM ...;First, let's create our parent table which contains the entire data from the squirrel census CSV file:
CREATE TABLE squirrel_census_demo (
  Area_Name STRING,
  Area_ID STRING,
  Park_Name STRING,
  Park_ID STRING,
  Squirrel_ID STRING,
  Primary_Fur_Color STRING,
  Highlights_in_Fur_Color STRING,
  Color_Notes STRING,
  Location STRING
)
USING csv
OPTIONS (
  PATH '/FileStore/squirrel_census_data.csv',
  HEADER 'true'
);As you can see, we use the Databricks CREATE TABLE statement to define a new table named squirrel_census_demo with nine columns. Then we populate it with data from the CSV file located at “/FileStore/squirrel_census_data.csv”. The HEADER ‘true’ option indicates that the first row of the CSV file contains column headers, which are used to name the columns in the table.
Now, let's say we want to create a new table that contains only the data for squirrels with a specific primary fur color, such as "Black". We can use the CTAS command like this:
CREATE TABLE black_squirrels
USING delta
AS SELECT *
FROM squirrel_census
WHERE primary_fur_color = 'Black';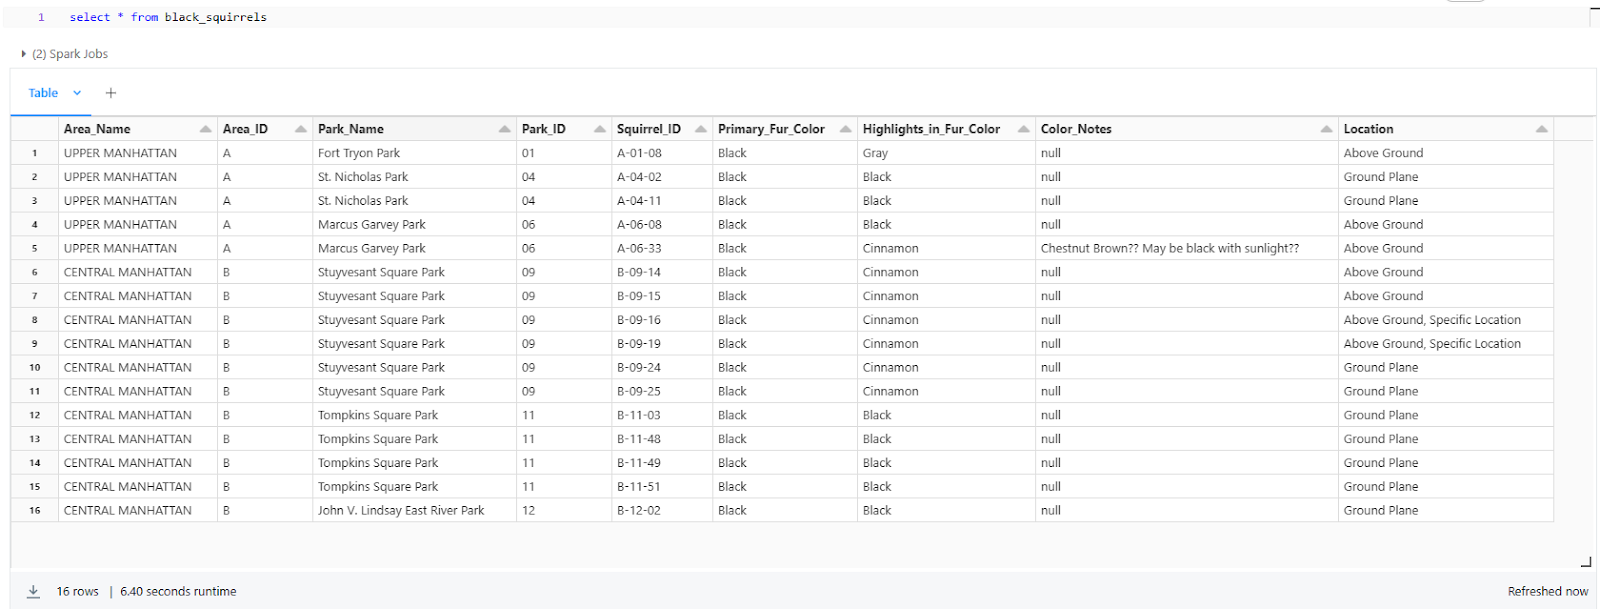
You can see that this command creates a new Delta table named black_squirrels that contains only the rows where the primary_fur_color column is 'Black'.
b) Databricks CREATE TABLE ... [USING]
Databricks CREATE TABLE ... USING command allows you to create a new table based on a specific file format and location, and optionally load data into the table from a query or another data source.
Here's the full syntax for this command:
{ { [CREATE OR] REPLACE TABLE | CREATE [EXTERNAL] TABLE [ IF NOT EXISTS ] }
  table_name
  [ table_specification ]
  [ USING data_source ]
  [ table_clauses ]
[ AS query ] }- The command starts with either Databricks CREATE TABLE or CREATE OR REPLACE TABLE.
- REPLACE option allows you to replace an existing table with the new definition.
- You can optionally specify EXTERNAL to create an external table, where the data is stored in an external location that you manage.
- IF NOT EXISTS clause ensures that the statement is ignored if a table with the same name already exists.
- table_name is the name you want to give to the new table.
Next, you can optionally provide a table_specification to define the table's schema:
table_specification
  ( { column_identifier column_type [ column_properties ] } [, ...]
[ , table_constraint ] [...] )- column_identifier is the name of the column.
- column_type specifies the data type of the column.
- column_properties is an optional clause that allows you to define properties for the column, such as NOT NULL, GENERATED ALWAYS AS, GENERATED AS IDENTITY, DEFAULT, COMMENT, column_constraint, or MASK clause.
The [USING] clause specifies the file format for the table:
[ USING data_source ]- The data_source to use for the table must be specified with one of the following options: AVRO, BINARYFILE, CSV, DELTA, JSON, ORC, PARQUET, or TEXT.
You can also define various table_clauses for the new table:
table_clauses
  { OPTIONS clause |
    PARTITIONED BY clause |
    CLUSTER BY clause |
    clustered_by_clause |
    LOCATION path [ WITH ( CREDENTIAL credential_name ) ] |
    COMMENT table_comment |
    TBLPROPERTIES clause |
WITH { ROW FILTER clause } } [...]- OPTIONS clause sets or resets user-defined table options.
- PARTITIONED BY clause partitions the table by a subset of columns.
- CLUSTER BY clause clusters a Delta Lake table by a subset of columns.
- clustered_by_clause clusters the table or each partition into a fixed number of hash buckets.
- LOCATION path specifies the directory where the table data is stored, optionally with a storage credential.
- COMMENT table_comment adds a comment or description for the table.
- TBLPROPERTIES clause sets one or more user-defined properties for the table.
- WITH ROW FILTER clause adds a row filter function to the table for fine-grained access control.
Finally, the [AS query] clause allows you to populate the table with data from a specified query:
[ AS query ]The clustered_by_clause has its own syntax for specifying clustering and bucketing options:
clustered_by_clause
  { CLUSTERED BY ( cluster_column [, ...] )
    [ SORTED BY ( { sort_column [ ASC | DESC ] } [, ...] ) ]
INTO num_buckets BUCKETS }- CLUSTERED BY specifies the columns to cluster each partition (or the table if no partitioning is specified) by.
- SORTED BY optionally maintains a sort order for rows within each bucket.
- INTO num_buckets BUCKETS specifies the number of buckets to divide each partition (or the table) into.
As you can see, these are the main components of the Databricks CREATE TABLE ... USING command in Databricks, allowing you to create tables with various file formats, schemas, partitioning, clustering, and other options.
For example, let's say we want to create a new Delta table named squirrels_above_ground and load data into it from the squirrel_census_demo table, but only for squirrels that were above ground location:
CREATE TABLE squirrels_above_ground
USING delta
LOCATION '/user/hive/warehouse/squirrels_above_ground'
AS SELECT *
FROM squirrel_census_demo
WHERE Location = 'Above Ground';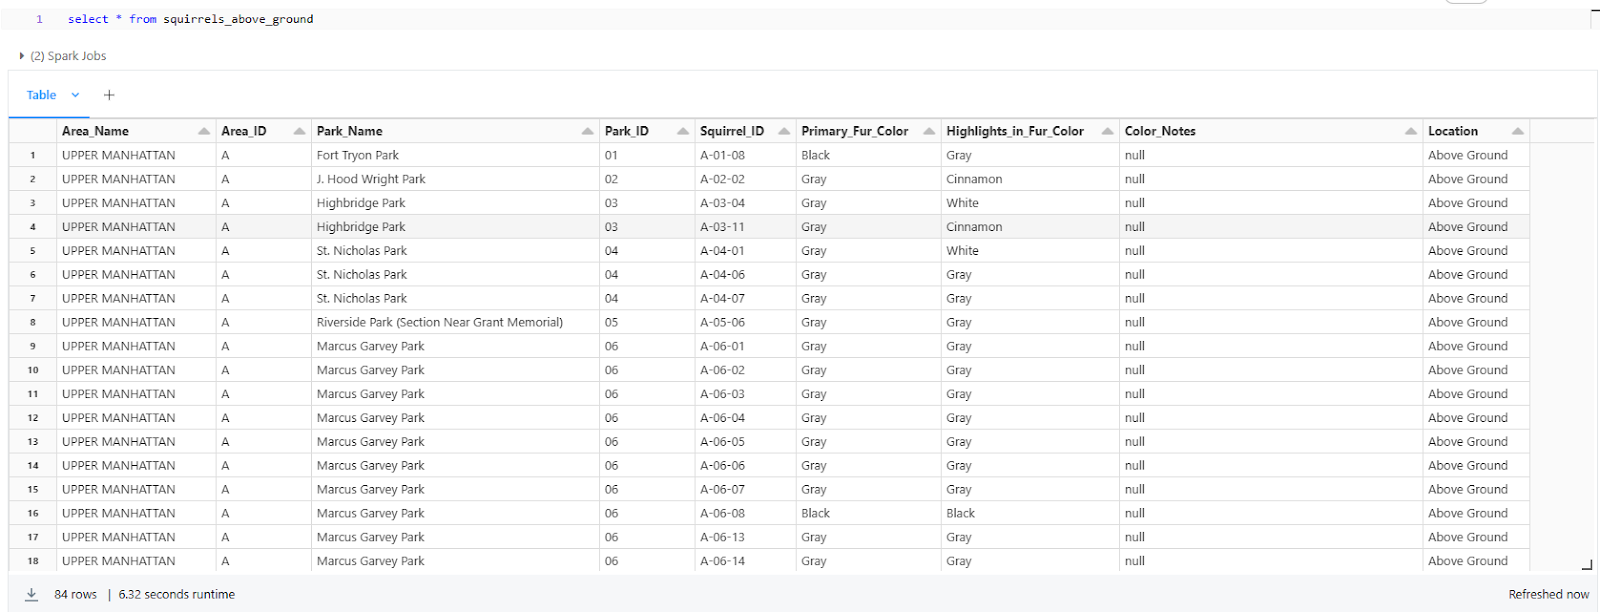
As you can see, this creates a new Delta table named squirrels_above_ground at the specified location, and populates it with data from the squirrel_census_demo table, filtering for only the rows where Location is “Above Ground”.
c) Databricks CREATE TABLE ... [LIKE]
Databricks CREATE TABLE ... LIKE command allows you to create a new table with the same schema and properties as an existing table. This is useful when you want to create a copy of an existing table for testing, development, or other purposes.
Here's the full syntax for this command:
CREATE TABLE [ IF NOT EXISTS ] table_name LIKE source_table_name [table_clauses]- IF NOT EXISTS: If specified, this clause ensures that the statement is ignored if a table with the same table_name already exists.
- table_name: The name of the new table you want to create.
- source_table_name: The name of the existing table or view whose definition will be used to create the new table.
- table_clauses: Optional clauses to specify additional properties for the new table, such as the data source, location, table properties, row format, and storage format.
The table_clauses can include the following sub-clauses:
table_clauses
   { USING data_source |
     LOCATION path |
     TBLPROPERTIES clause |
     ROW FORMAT row_format |
STORED AS file_format } [...]- USING data_source: Specifies the file format for the new table, such as AVRO, BINARYFILE, CSV, DELTA, JSON, ORC, PARQUET, or TEXT
- LOCATION path: Specifies the directory where the table data is stored. If provided, the new table becomes an external table; otherwise, it's a managed table.
- TBLPROPERTIES clause: Sets one or more user-defined properties for the new table.
- ROW FORMAT row_format: Specifies the row format for the new table, including delimiters, escape characters, and null value representation.
- STORED AS file_format: Specifies the file format for storing the table data, such as TEXTFILE, SEQUENCEFILE, RCFILE, ORC, PARQUET, or AVRO.
The row_format sub-clause has its own syntax for specifying row-level properties:
row_format
   { SERDE serde_class [ WITH SERDEPROPERTIES (serde_key = serde_val [, ...] ) ] |
     { DELIMITED [ FIELDS TERMINATED BY fields_terminated_char [ ESCAPED BY escaped_char ] ]
       [ COLLECTION ITEMS TERMINATED BY collection_items_terminated_char ]
       [ MAP KEYS TERMINATED BY map_key_terminated_char ]
       [ LINES TERMINATED BY row_terminated_char ]
[ NULL DEFINED AS null_char ] } }- SERDE serde_class: Specifies a custom SerDe class and its properties for the new table.
- DELIMITED: Specifies the field, collection item, map key, line, and null value delimiters and escape characters for a delimited file format.
Note: Delta Lake does support CREATE TABLE LIKE in Databricks SQL and Databricks Runtime 13.0 and above
For example, let's say we want to create a copy of the squirrel_census_demo table named squirrel_census_demo_copy, but store it in a different location:
CREATE TABLE squirrel_census_demo_copy
LIKE squirrel_census_demo
USING csv
LOCATION '/FileStore/squirrel_census_data.csv';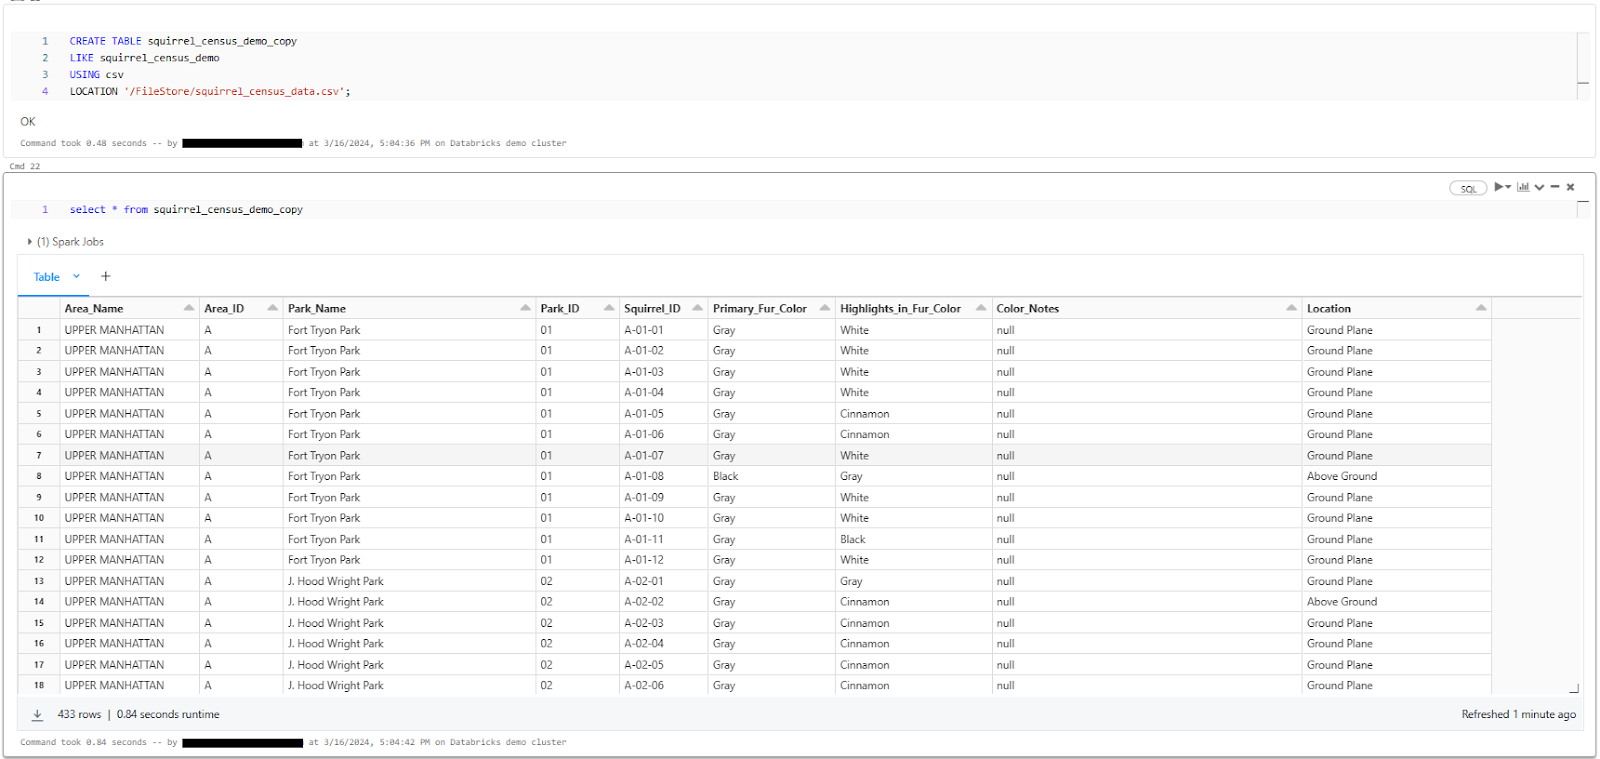
d) Databricks CREATE TABLE … [CLONE]
Databricks CREATE TABLE … [CLONE] statement in Databricks allows you to create a new Delta Lake table by cloning an existing Delta, Parquet, or Iceberg table at a specific version. The new table can be a deep clone, which creates a complete independent copy of the source table's data and metadata, or a shallow clone, which copies only the table's metadata and references the source table's data files.
Here's the full syntax:
CREATE TABLE [IF NOT EXISTS] table_name
[SHALLOW | DEEP] CLONE source_table_name [TBLPROPERTIES clause] [LOCATION path][CREATE OR] REPLACE TABLE table_name
[SHALLOW | DEEP] CLONE source_table_name [TBLPROPERTIES clause] [LOCATION path]- IF NOT EXISTS: If specified, this clause ensures that the statement is ignored if a table with the same table_name already exists.
- CREATE OR REPLACE: If specified, the statement will replace an existing table with the same name; otherwise, a new table will be created.
- table_name: The name of the new Delta Lake table to be created.
- SHALLOW CLONE or DEEP CLONE: Specifies whether to create a shallow clone or a deep clone of the source table.
- SHALLOW CLONE: Makes a copy of the source table's definition but refers to the source table's data files. This option is only available for Unity Catalog managed tables in Databricks SQL and Databricks Runtime 13.1 and above.
- DEEP CLONE: Makes a complete, independent copy of the source table's data and metadata. This is the default behavior if neither SHALLOW nor DEEP is specified.
- source_table_name: The name of the source Delta, Parquet, or Iceberg table to be cloned. The name may include a temporal specification (e.g., @v1 for a specific version).
- TBLPROPERTIES: Optionally sets one or more user-defined properties for the new table.
- LOCATION path: Optionally specifies the location where the data for the new table should be stored, creating an external table. If not specified, a managed table is created.
It's important to note that there are significant differences between shallow and deep clones:
- Shallow clones share the same underlying data files as the source table, which means any changes made to the source table will be reflected in the cloned table, and vice versa. Shallow clones are primarily useful for creating read-only copies of a table for specific operations or for creating temporary tables for testing or experimentation.
- Deep clones create a completely independent copy of the source table, including all its data and metadata. Changes made to the deep clone or the source table will not affect each other. Deep clones are useful for creating independent copies of a table for long-term use, backup, or migration purposes.
Note: When cloning Parquet or Iceberg tables to Delta Lake, Databricks CREATE TABLE CLONE statement creates a deep clone by default, as these source formats do not support shallow cloning.
For example, let's say we want to create a complete shallow clone of the squirrels_above_ground table, including both the schema and data:
CREATE TABLE squirrel_census_clone_demo SHALLOW CLONE delta.`/user/hive/warehouse/squirrels_above_ground`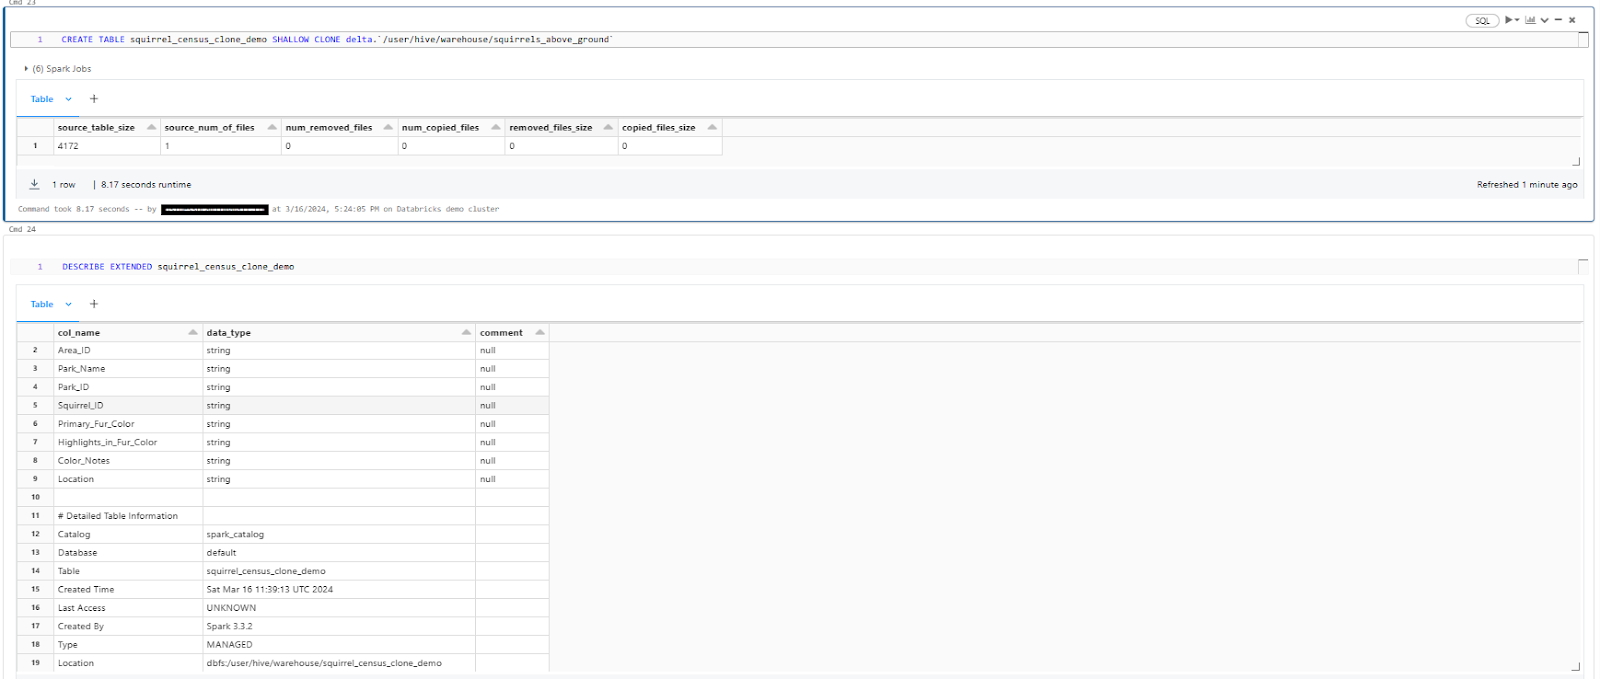
As you can see, this creates a new Delta table named squirrel_census_clone_demo that is an exact clone of the squirrels_above_ground table.
Step 7—Create Table Using DataFrame API
On top of SQL commands, Databricks also lets you create tables using the DataFrame API.
Here's the general process for creating a table using DataFrame API:
1) Read Data into a DataFrame
First, you need to read the data into a DataFrame. You can read data from various sources, such as files, databases, or existing tables. For example, to read the squirrel census data from a CSV file using Python:
squirrel_census_df = spark.read.format("csv").option("header", "true").load("dbfs:/FileStore/squirrel_census_data.csv").select("Area Name", "Area ID", "Park Name", "Park ID", "Squirrel ID", "Primary Fur Color", "Highlights in Fur Color", "Color Notes", "Location", "Specific Location", "Activities")
2) Refining Data
Now let's rename the columns in the squirrel_census_df DataFrame by replacing spaces with underscores.
squirrel_census_df = squirrel_census_df.toDF(*(col.replace(' ', '_') for col in squirrel_census_df.columns))
3) Write DataFrame to a Delta Table
Once you have the data in a DataFrame, you can write it to a Delta table using write or save methods:
squirrel_census_df.write.format('delta').save('/user/hive/warehouse/squirrels_census_dataframe_demo')
This will write the squirrel_census_df DataFrame to a Delta table named squirrel_census. The format("delta") clause specifies that the table should be a Delta table.
4) Specify Table Format and Location (Optional)
In addition to writing the DataFrame to a table, you can also specify the format and location of the table:
squirrel_census_df.write.format("delta").option("path", "/user/hive/warehouse/squirrel_census_df_demo_table")...In this example, the option("path", "/…..") clause specifies the location where the table data should be stored.
5) Register Table in Metastore (Optional)
If you want to register the table in the metastore, you can use the saveAsTable method with the table name:
squirrel_census_df.write.format("delta").option("path", "/user/hive/warehouse/squirrel_census_df_demo_table").saveAsTable("squirrel_census_dataframe_demo_table")
Step 8—Create Table Using DeltaTableBuilder API (Scala/Java)
For Scala and Java developers, Databricks provides the DeltaTableBuilder API, which allows you to create tables programmatically. This approach offers more control and flexibility over the table creation process.
Here's the general process for creating a table using the DeltaTableBuilder API:
1) Import Required Classes
First, you need to import the necessary classes from the Delta Lake library:
import io.delta.tables._2) Create a DeltaTableBuilder Object and Define the Table Schema
Next, create a DeltaTableBuilder object and define the table schema by adding columns:
// Create a DeltaTableBuilder object
val builder = DeltaTable.create

// Define the table schema
builder.addColumn("squirrel_id", "STRING")
builder.addColumn("area_name", "STRING")
builder.addColumn("park_name", "STRING")
builder.addColumn("primary_fur_color", "STRING")
builder.addColumn("highlights_in_fur_color", "STRING")
builder.addColumn("color_notes", "STRING")
builder.addColumn("location", "STRING")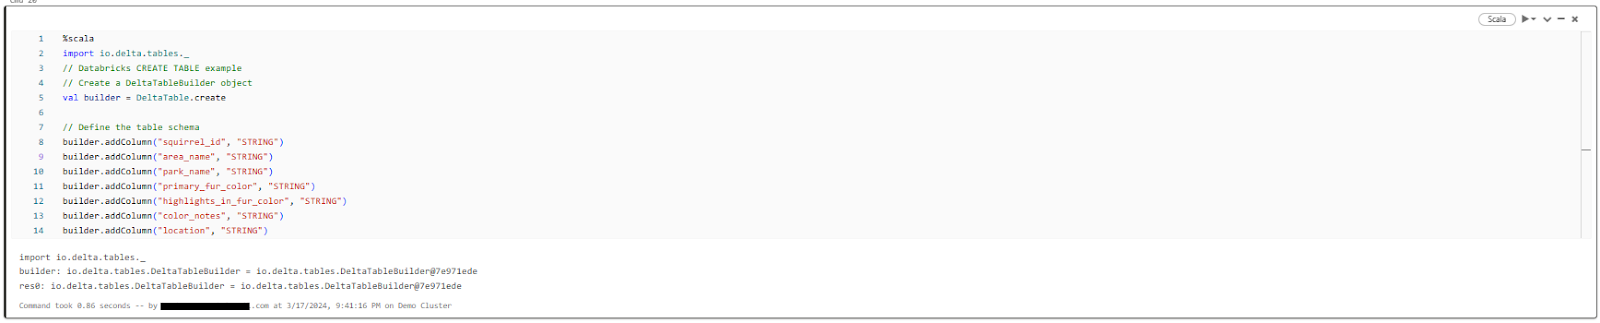
3) Specify the Partitioning Strategy (Optional)
If you want to partition the table based on one or more columns, you can specify the partitioning strategy using the partitionedBy method:
// Partition the table by the primary_fur_color column
builder.partitionedBy("primary_fur_color")
4) Set Table Properties (Optional)
You can set various table properties using the property method:
// Set table properties
builder.property("delta.autoOptimize.optimizeWrite", "true")
builder.property("delta.autoOptimize.autoCompact", "true")5) Specify the Table Location and Create the Delta Table
Finally, specify the location where the table data should be stored and create the Delta table using the location and create methods:
// Specify the table location
builder.location("/user/hive/warehouse/squirrel_demo_dtb_demo")

// Create the Delta table
builder.create()This process creates an empty Delta table named squirrel_census at the specified location, with the defined schema, partitioning strategy, and table properties.
Bonus—Create Table Manually Using Databricks UI
On top of the programmatic approaches, Databricks also provides a user-friendly interface for creating tables manually. It can be particularly useful for ad-hoc table creation or when you need a quick way to explore and visualize your data.
To create a table using the Databricks UI, follow these steps:
1) In the Databricks workspace, navigate to the "Catalog" tab.
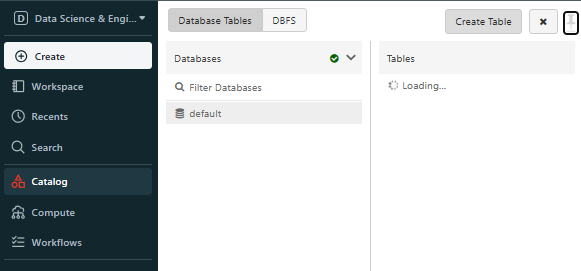
2) Click on the "Create Table" in the sidebar.
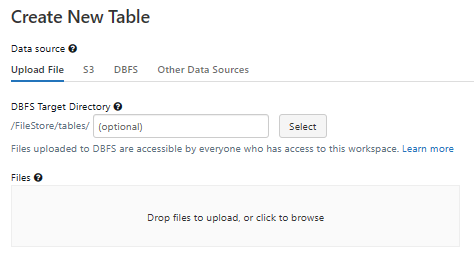
3) Enter a name for your target directory (if you are using DBFS), and then upload files into that directory if you want to create a table based on those files.
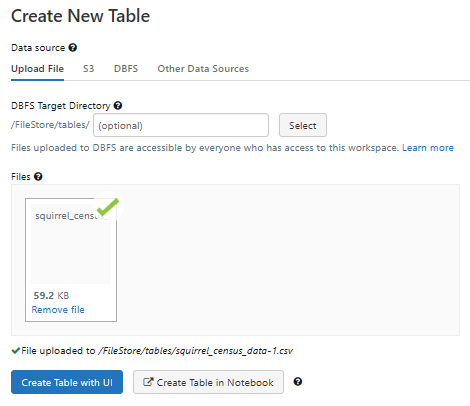
4) Click “Create Table with UI”, then proceed to select the cluster, and finally click on “Preview Table”.
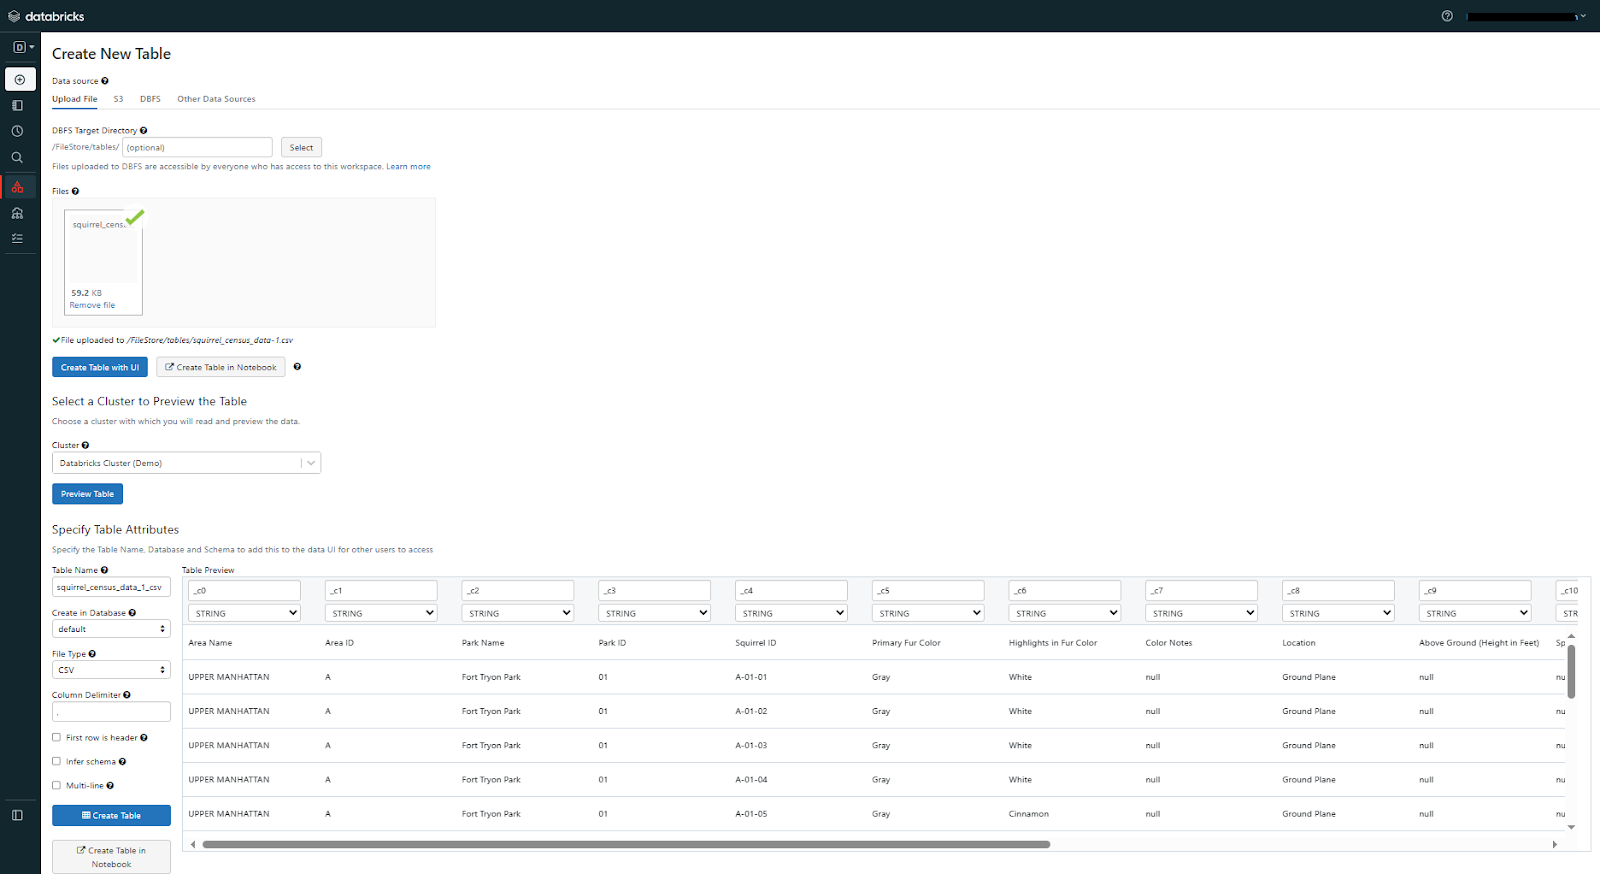
5) You can customize further table properties if needed. Add a table name, specify the file type, and choose the column delimiter. If you want the first row to serve as column titles, check the “Use first row as header” option. Click “Infer Schema” to parse the entire file and determine the schema automatically. Enable the “Multi-line” setting to allow line breaks within table cells.
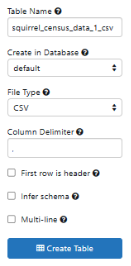
6) Click "Create Table" to create the table based on your specifications.
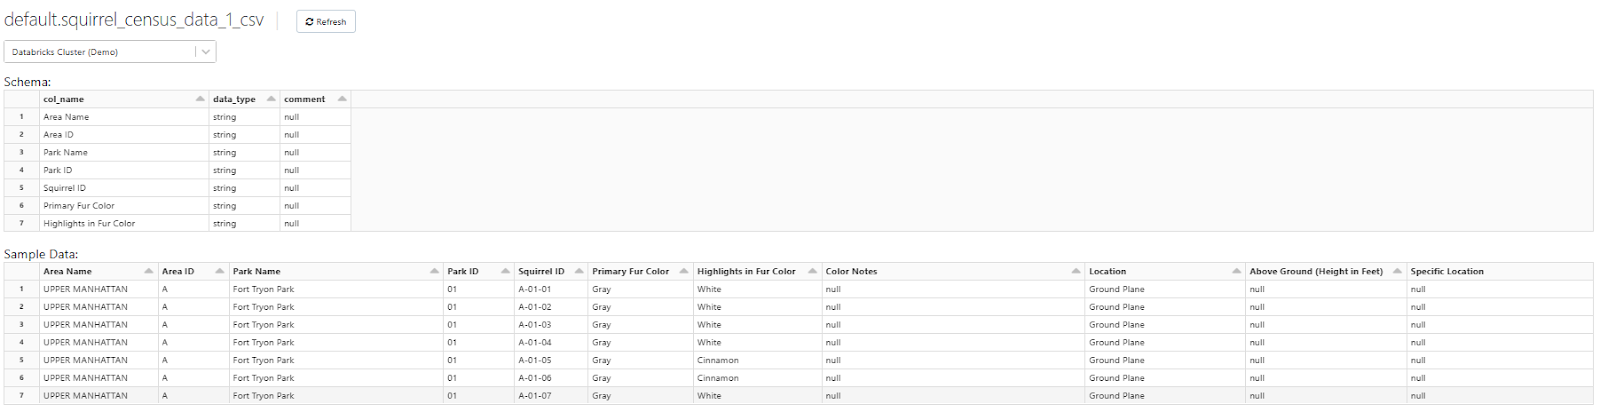
Databricks UI provides a visual interface for creating and managing tables, making it an accessible option for users who prefer a more interactive experience.
Best Practices and Considerations for Creating Tables in Databricks
Setting up tables in Databricks is pretty straightforward. But taking the time to follow best practices and think through different factors can really pay off. It'll help your data operations run smoothly, stay organized and maintainable, and keep everything secure.
Let’s dive in!
1) Choose the appropriate approach based on your use case and requirements
The very first step in creating a table in Databricks is to determine whether a managed or unmanaged (external) table is more suitable for your specific use case and requirements. Managed tables are ideal for situations where Databricks manages both the data and metadata, providing a more streamlined experience for data analysts and other users who primarily work with SQL. Unmanaged tables, on the other hand, are preferred when you need more flexibility in managing the data independently from the metadata, which is often the case for data engineers working with production data.
2) Implement naming conventions
Establishing clear and consistent naming conventions for tables is crucial for maintainability and collaboration within a team or organization. Consider the following practices:
- Use descriptive and meaningful names that reflect the table's content
- Follow a consistent naming pattern (e.g., lowercase, snake_case, or CamelCase)
- Avoid special characters or spaces in table names
- Add prefixes or suffixes to indicate the data source, environment, or other relevant information
3) Partitioning and Bucketing
Partitioning and bucketing are powerful techniques in Databricks that can significantly improve query performance and data organization. Partitioning involves dividing a table into different directories based on values of one or more columns, while bucketing organizes data within each partition into smaller files (buckets) based on a hash function.
Choosing the Right Partitioning Strategy:
- Partition on columns that are frequently used in filter conditions or joins
- Avoid partitioning on columns with high cardinality (many distinct values)
- Consider partitioning on date or timestamp columns for time-based data
- Balance the number of partitions to avoid excessive file fragmentation or too few partitions
Bucketing:
- Bucket on columns that are frequently used in joins or sorted operations
- Buckets should have a reasonable size (e.g., 1GB) to avoid excessive file fragmentation
- Bucketing can be combined with partitioning for optimal performance
4) Choosing the appropriate data types
Selecting the correct data types for your table columns is crucial for ensuring data integrity, efficient storage, and optimal query performance.Databricks supports a wide range of data types, including numeric, string, date/time, and complex types like arrays and structs. Choose data types that accurately represent the nature of your data and minimize storage overhead.
- Use the smallest data type that can accommodate your data (e.g., INT instead of BIGINT for small integers)
- Choose the appropriate precision and scale for decimal values
- Use DATE or TIMESTAMP for date and time values, rather than storing them as strings
- Avoid using string data types for numeric or date/time values, as they can lead to incorrect calculations or comparisons
- Use complex data types (arrays, structs, maps) when dealing with nested or semi-structured data
5) Handling NULL values and Default Values
NULL values are a common occurrence in data, and it's essential to handle them appropriately. Databricks provides various options for dealing with NULL values, such as coalescing, replacing with default values, or filtering them out. Also, you can define default values for columns to ensure consistency and avoid NULL values in certain situations.
6) Setting table properties (TBLPROPERTIES)
Databricks Delta tables support a wide range of table properties (TBLPROPERTIES) that can be used to configure various aspects of table behavior and performance. Some commonly used table properties include:
- delta.autoOptimize.autoCompact: Enables automatic compaction of small files
- delta.autoOptimize.optimizeWrite: Enables write optimization for Delta tables
- delta.appendOnly: Makes the table append-only, preventing updates and deletes
- delta.checkpoint.writeStatsAsJson: Controls how file statistics are written to checkpoints
- delta.dataSkippingIndexes.enabled: Enables data skipping indexes for faster queries
- delta.minReaderVersion and delta.minWriterVersion: Specify the minimum reader and writer versions for compatibility
Carefully review and set appropriate table properties based on your requirements and workloads to optimize performance and storage efficiency.
7) Enabling/disabling specific features (caching, compression)
Databricks provides various features that can be enabled or disabled based on your specific needs. For example, you can enable caching for frequently accessed tables to improve query performance by keeping the data in memory. Also, you can enable compression for tables to reduce storage requirements and improve query performance, particularly for columnar formats like Parquet.
8) Optimizing Delta Table Performance (Compaction, Caching, Z-Ordering)
Delta Lake provides several optimization techniques to enhance the performance of Delta tables, including compaction, caching, and Z-Ordering.
Compaction:
- Compaction merges small files into larger ones, reducing metadata overhead and improving query performance
- Automatic compaction can be enabled using the delta.autoOptimize.autoCompact table property
- Manual compaction can be triggered using the OPTIMIZE command or the Delta Lake API
Caching:
- Caching stores table data or query results in memory for faster access
- Suitable for frequently accessed tables or intermediate results
- Can be enabled using the CACHE TABLE command or the Delta Lake API
Z-Ordering:
- Z-Ordering is a data organization technique that improves query performance for range-based operations
- Suitable for tables with well-defined query patterns or dimension tables
- Can be enabled using the ZORDER clause when creating or optimizing a Delta table
Always regularly monitor and optimize Delta tables based on your workloads and access patterns to maintain optimal performance over time.
9) Security and access control considerations
Data security and access control are crucial aspects to consider when working with sensitive or confidential data in Databricks. Databricks provides several mechanisms to ensure data protection and control access to tables and databases.
Access Control:
- Use Databricks Access Control Lists (ACLs) to manage permissions at the workspace, cluster, or table level
- Use role-based access control (RBAC) to assign specific permissions to users or groups
- Use row-level security and column-level security for granular access control
Data Encryption:
- Databricks supports transparent data encryption for data at rest
- Configure encryption keys and key management systems according to your organization's policies
- Consider encrypting sensitive data columns or entire tables
Auditing and Logging:
- Enable auditing and logging to track access and activities within Databricks
- Review logs regularly to monitor for unauthorized access or suspicious activities
Also, follow best practices for secure data handling, such as limiting access to sensitive data, implementing strict password policies, and regularly reviewing and updating security configurations.
10) Backup and recovery strategies
Implementing robust backup and recovery strategies is essential to protect against data loss or corruption and ensure business continuity. Databricks Delta tables provide built-in mechanisms for backup and recovery, as well as integration with external backup solutions.
Delta Lake Backup and Recovery:
- Delta Lake maintains a transaction log that records all changes to the table
- Use the DESCRIBE HISTORY command or the Delta Lake API to view the transaction log
- Use time travel capabilities to restore a Delta table to a specific version or timestamp
External Backup Solutions:
- Integrate with cloud storage backup services or on-premises backup solutions
- Regularly back up Delta table data and metadata to a secure location
- Test and validate backup and recovery processes periodically
Disaster Recovery:
- Develop + document disaster recovery plans for critical Delta tables
- Implement failover mechanisms and redundancy for mission-critical workloads
- Regularly test and update disaster recovery plans to ensure their effectiveness
Always try to develop and test backup and recovery procedures regularly to ensure you can recover your data in case of accidents, errors, or disasters.
If you follow these best practices and considerations, you can create efficient, maintainable, and secure tables in Databricks, enabling reliable and high-performance data operations.
Conclusion
Databricks offers a wide array of table creation methods to suit your unique needs. From simple Databricks CREATE TABLE commands to advanced techniques and the powerful DataFrame API, you have the flexibility to create and manage tables with ease. And with Databricks' seamless integration of Delta Lake, you can unlock the full potential of ACID transactions, schema enforcement, and automatic optimizations, ensuring data integrity and high performance at scale.
In this article, we have covered:
- What are Databricks Tables?
- Step-By-Step Guide to Create Table in Databricks
- Best Practices and Considerations for Creating Tables in Databricks
…and so much more!
FAQs
What are the main data objects in Databricks?
Main data objects in Databricks are Catalog, Database, Table, View, and Function.
What is a Databricks table?
Databricks table is a structured collection of data organized into rows and columns, stored as a directory of files on cloud object storage, with metadata registered in the metastore.
What are the two primary types of tables in Databricks?
The two primary types of tables in Databricks are managed tables and unmanaged (external) tables.
What is the difference between managed and unmanaged tables in Databricks?
Managed tables are fully controlled and managed by Databricks, with data stored in the Databricks File System (DBFS). Unmanaged (external) tables have their data stored in an external location, such as an object store or distributed file system, which you manage.
What is the default storage provider for tables created in Databricks?
Delta Lake is the default storage provider for tables created in Databricks, making all tables Delta tables by default.
Can I create tables from different data sources in Databricks?
Yes, Databricks supports creating tables from various data sources, including CSV, Parquet, JSON, databases, and more. You can use the Databricks CREATE TABLE command or DataFrame APIs to create tables from these data sources.
How can you create a table using the simple Databricks CREATE TABLE command?
You can use the CREATE TABLE statement followed by the table name, column definitions, and optional clauses like USING delta, LOCATION, and TBLPROPERTIES.
What are the advantages of using Delta tables in Databricks?
Delta tables offer several advantages, including ACID transactions for data integrity, time travel capabilities for data versioning and rollbacks, scalable metadata handling, and performance optimizations like compaction and data skipping.
Can I modify the schema of an existing table in Databricks?
Yes, Delta tables in Databricks support schema evolution, allowing you to add, remove, or modify columns without needing to recreate the table. But, for non-Delta tables, schema modifications may require recreating the table.
What are the different methods to create tables in Databricks?
Methods to create tables in Databricks include Databricks CREATE TABLE command, DataFrame API, DeltaTableBuilder API (for Scala/Java), and Databricks UI.
How can I optimize the performance of my Databricks tables?
To optimize table performance, consider partitioning and bucketing strategies, choosing appropriate data types, enabling compression, and leveraging Delta table features like compaction, caching, and data skipping.
What is the Databricks CREATE TABLE ... AS SELECT (CTAS) command?
Databricks CREATE TABLE ... AS SELECT command allows you to create a new table by querying data from an existing table or view, often used for creating subsets or transformations of data.
What is the Databricks CREATE TABLE ... USING command?
Databricks CREATE TABLE ... USING command allows you to create a new table based on a specific file format and location, and optionally load data into the table from a query or another data source.
What is the Databricks CREATE TABLE ... LIKE command?
Databricks CREATE TABLE ... LIKE command allows you to create a new table with the same schema and properties as an existing table.
What is the Databricks CREATE TABLE ... CLONE command?
Databricks CREATE TABLE ... CLONE command allows you to create a new Delta Lake table by cloning an existing Delta, Parquet, or Iceberg table at a specific version, either as a shallow or deep clone.
What security measures can I implement for my Databricks tables?
Databricks provides various security features, such as access control lists (ACLs), data encryption, and auditing. You can control access to tables and data based on user roles and permissions, encrypt sensitive data at rest and in transit, and audit table operations using the Delta Lake Audit Log.
How can I backup and restore my Databricks tables?
For managed tables, Databricks provides built-in backup and restore capabilities. Unmanaged tables require manual backup processes, such as copying the data to an external storage location or using third-party backup tools.
Can I create tables in Databricks without using SQL commands?
Yes, Databricks supports programmatic table creation using various APIs and languages, such as the DataFrame API (Python, Scala, R), the DeltaTableBuilder API (Scala, Java), and SQL commands.