


Databricks—a unified data analytics platform—provides an environment for data teams to collaborate on tasks like data engineering, data science, machine learning, and analytics workloads. It is powered by Apache Spark—a fast and scalable distributed computing framework—capable of handling large-scale data processing and massive ML workloads. At the very core of the Databricks platform is the concept of Databricks workspaces—a web-based interface that organizes and provides access to all of your Databricks assets, such as clusters, notebooks, libraries, data, models, experiments, queries, jobs, dashboards, and a whole lot more features. It allows data teams to develop workflows collaboratively without switching between different tools.
In this article, we will cover everything you need to know about Databricks workspaces, starting with how to set ‘em up, a step-by-step guide on configuring ‘em, navigating the Databricks workspaces interface, and exploring key use cases and benefits.
What Is a Databricks Workspace?
Databricks workspace is a unified environment where you can perform various data-centric tasks, such as writing and executing code, exploring and visualizing data, building and deploying ML models, scheduling and monitoring jobs, creating and sharing dashboards, and setting up and receiving alerts—among other capabilities. In short, it serves as a centralized collaboration space where data teams can easily share data, execute code, and gain insights.
You can create multiple workspaces within a single Databricks account, and each workspace has its own users, groups, permissions, and objects. You can also switch between different workspaces using the workspace switcher. Creating multiple workspaces can help you separate and isolate your projects, environments, teams, and roles
Here are some key attributes of Databricks workspaces:
- Isolated Environment: Each Databricks workspace provides an isolated environment with separate access controls, storage, compute resources, etc.
- Custom Configurations: Databricks workspaces can be configured with custom virtual networks and storage settings as per specific needs.
- Access Controls: Granular access controls are available at the workspace level. Admins can manage users and permissions.
- Resources: Users within a Databricks workspace get allocated storage and compute quotas. Resources can be reserved at the workspace level.
- Multi-Cloud Support: Databricks workspaces can be created across AWS, Azure, or GCP, or on-premises environments.
So in essence, a Databricks workspace acts as a single, unified environment managed by Databricks that provides all the necessary tools and resources for data teams to collaborate on analytics, from data preparation to modeling to deployment.
Is Databricks workspace free?
Databricks workspaces aren't entirely free, but there are a couple of options that might be suitable for you depending on your needs:
- Databricks Community Edition: This edition is a completely free, lightweight version of the platform, specifically designed for individual users and open-source projects. It offers limited resources and features compared to the paid versions, but it's a great way to learn and experiment with Databricks.
- Free Trial: Databricks offers a 14-day free trial of their full platform on your choice of cloud provider (AWS, Azure, or GCP). This gives you access to all the features and resources you'd get with a paid plan, allowing you to evaluate it thoroughly before fully committing.
If you need more resources or features than what's available in the free options, you'll need to subscribe to a paid plan. Databricks offers a variety of pricing options depending on your specific needs and usage.
Check out this article to learn more about Databricks Pricing Model.
Prerequisites for Setting Up Your Databricks Workspace
Now that we understand how Databricks and Databricks workspaces are priced, let's review the key prerequisites and considerations for deploying your own Databricks workspace. We will use AWS as the cloud provider for this article, but the process remains the same for GCP and Azure, except for some minor differences in the names and details of the cloud resources.
The prerequisites for setting up your Databricks workspace are:
- Databricks Account: You need a Databricks account in which the workspace will be created. You can sign up for a free trial for 14 days or choose a pricing plan that suits your needs. Accounts can be created from here.
- Cloud Provider Account: You need an AWS, Azure, or GCP account based on the chosen cloud. For AWS, you need to have an AWS account with sufficient permissions to create and access the AWS resources that Databricks will use for your workspace, such as IAM roles, S3 buckets, EC2 instances, VPCs, etc.
- Cloud Provider Region: Identify the specific cloud region/data center to deploy Databricks workspace resources.
- Storage Configuration: A storage configuration is necessary for your workspace, specifying the blob storage or bucket (in our case, it is S3) where Databricks will store your data and objects. You can use the default storage configuration provided by Databricks or create your own custom storage configuration.
- Credential configuration: For your Databricks workspace, a credential configuration is required, specifying the IAM role that Databricks will use to access your AWS resources. You can use the default credential configuration provided by Databricks or create your own custom credential configuration. Also, you need a PrivateLink endpoint if you want to secure your network traffic between Databricks and AWS.
- VPC and network resources if using custom VPC: For your Databricks workspace, you need a VPC and network resources that define the network environment where Databricks will deploy your clusters and other resources. You can use the default VPC provided by Databricks or create your own custom VPC. If you are using a custom VPC, you also need a security group, a subnet, an internet gateway, and a route table.
Once these prerequisites are fulfilled, we can move ahead with creating the Databricks workspace.
What Key Databricks Workspace Objects Does Databricks Provide?
Databricks workspace organizes a variety of objects that you can use to perform different data-related tasks. These include Notebooks for writing and executing code; Data for uploading external files and adding data; Models for building and deploying machine learning models; Jobs for scheduling and monitoring tasks; Dashboards for creating and sharing visualizations; Alerts for setting up and receiving notifications—and much more, which we will explore in this section.
Now let's explore each of these Databricks workspace objects and features included in Databricks workspaces:
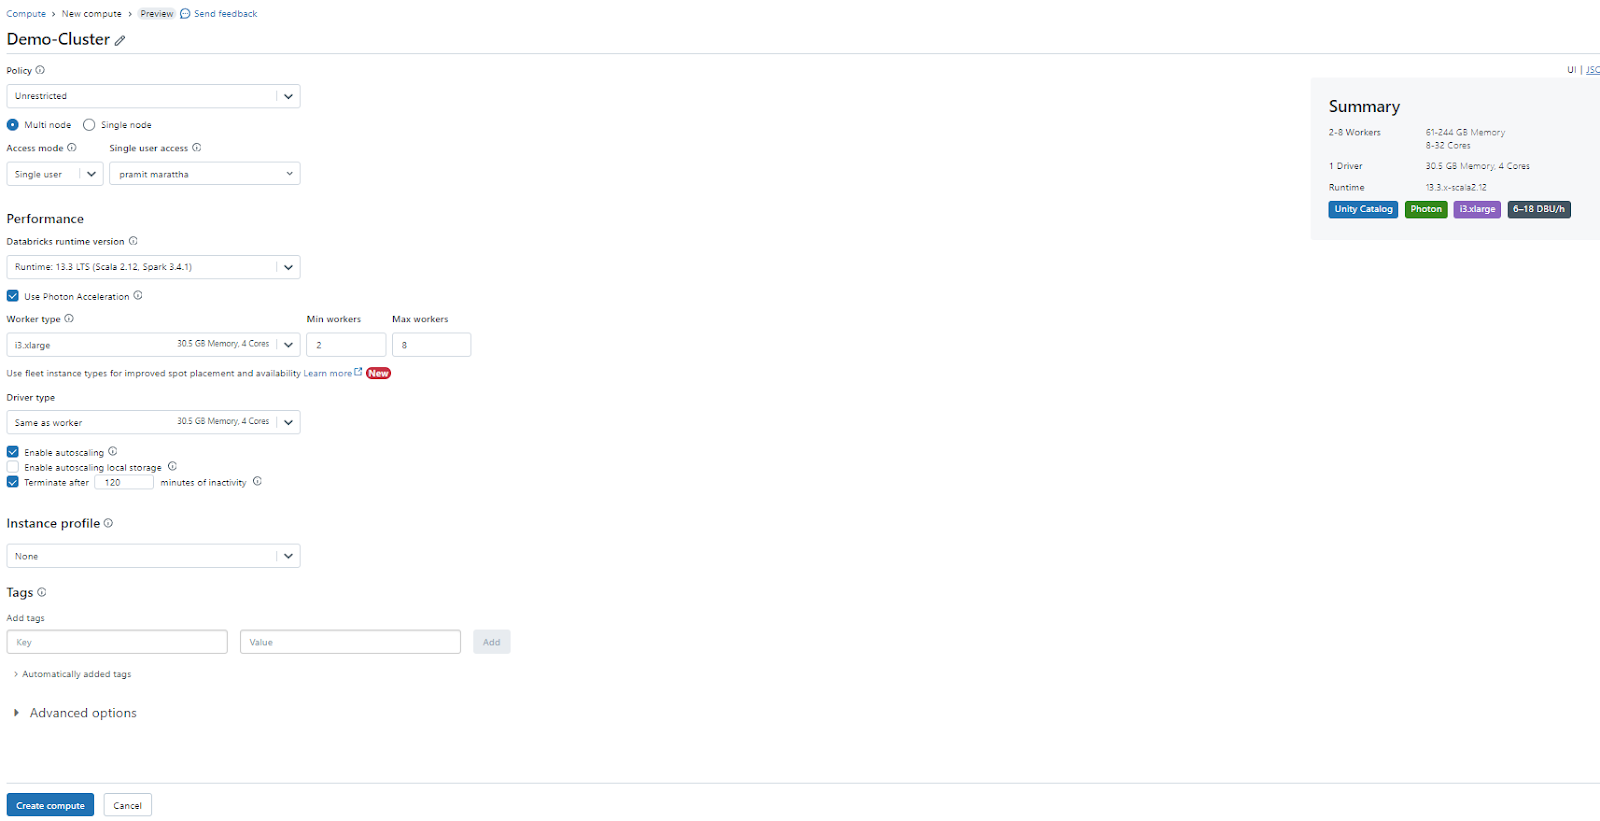
- Clusters: Clusters are the core of Databricks workspace, as they provide the compute power and resources for running your code and tasks. Databricks automates the configuration, management, and scaling of Apache Spark clusters. You can create and manage clusters from the Compute category in the sidebar, and you can attach clusters to your notebooks, libraries, jobs, and models.
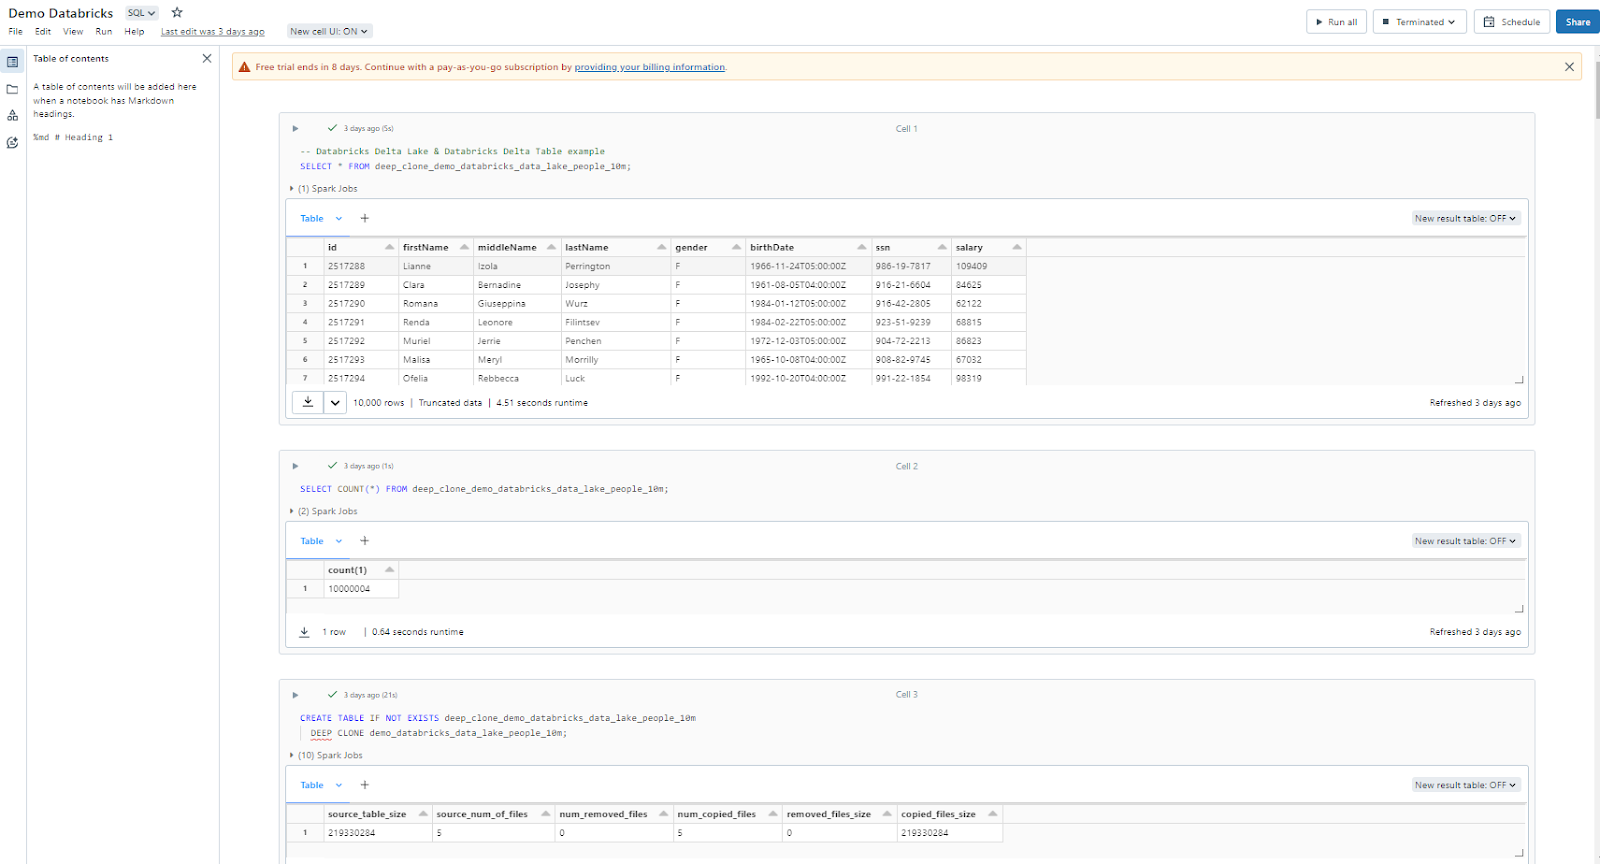
- Notebooks: Notebooks provide a web-based interface made up of cells that can run code in programming languages like Scala, Python, R, and SQL. The notebooks also support Markdown. Databricks workspace utilizes the notebooks to execute most tasks. It can be easily shared and imported among users, using a variety of formats.
- Libraries: Libraries are packages or modules that extend the functionality of your code and provide additional features and tools. Libraries can be written in Python, Java, Scala, and R. You can upload Java, Scala, and Python libraries and point to external packages in PyPI, Maven, and CRAN repositories.
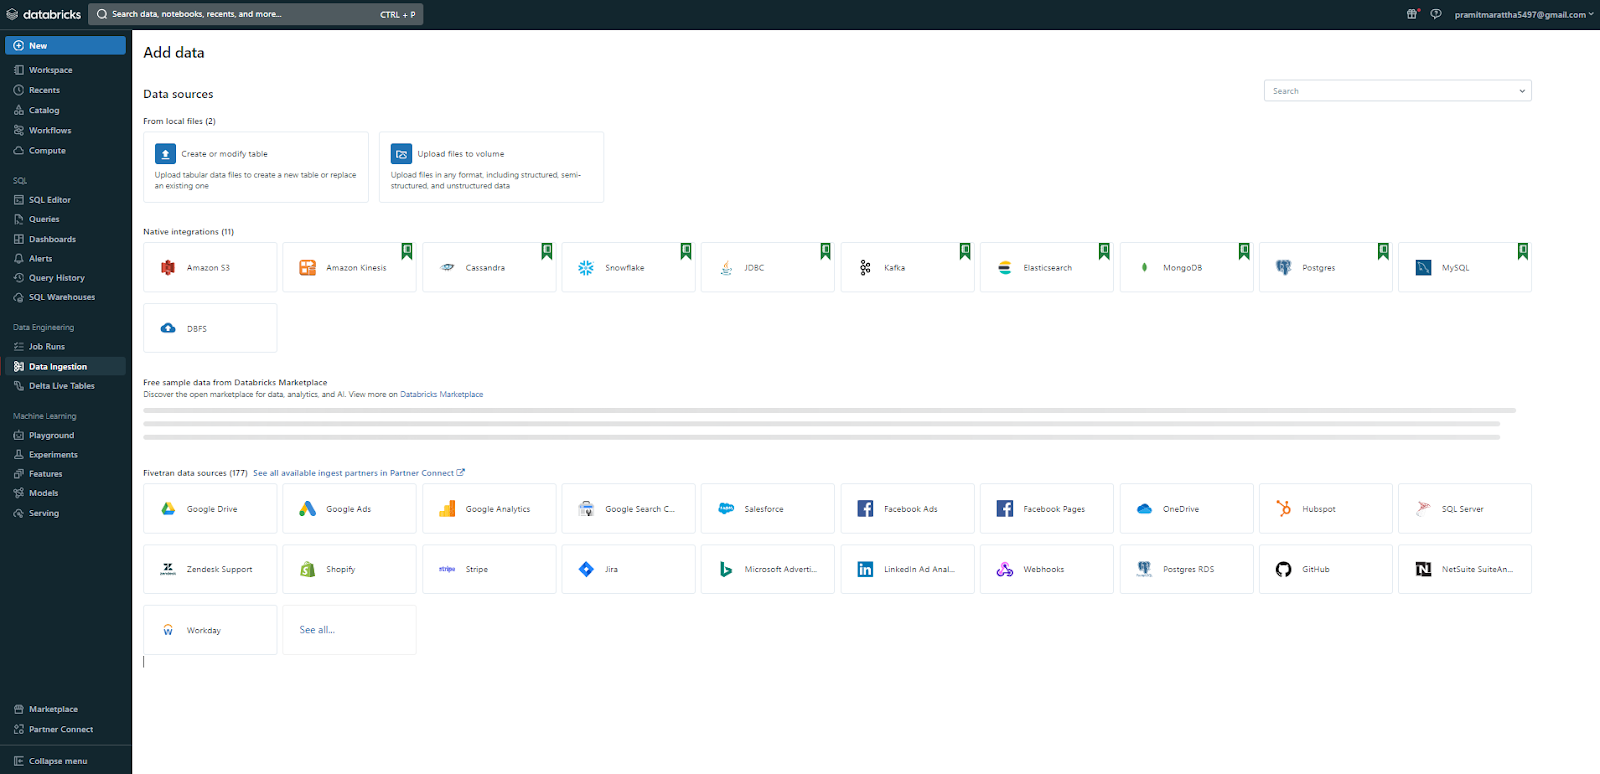
- Data: Databricks allows importing data into a distributed file system that is mounted to the Databricks workspace. The data can then be accessed from Databricks notebooks and clusters. Databricks also supports reading data from many Apache Spark-compatible data sources. You can browse and manage data sources from the Data category in the sidebar, and you can read and write data sources in your notebooks using Spark APIs or SQL commands.
- Files: Files object in Databricks is currently in public preview. Files can include notebooks, JARs, Python scripts, markdown, log files, text files, CSV files, etc., and they can be stored in your workspace or in your storage configuration. You can browse and manage files from the Files tab in the Data category, and you can import and export files in your notebooks using the %fs magic command or the dbutils.fs module.
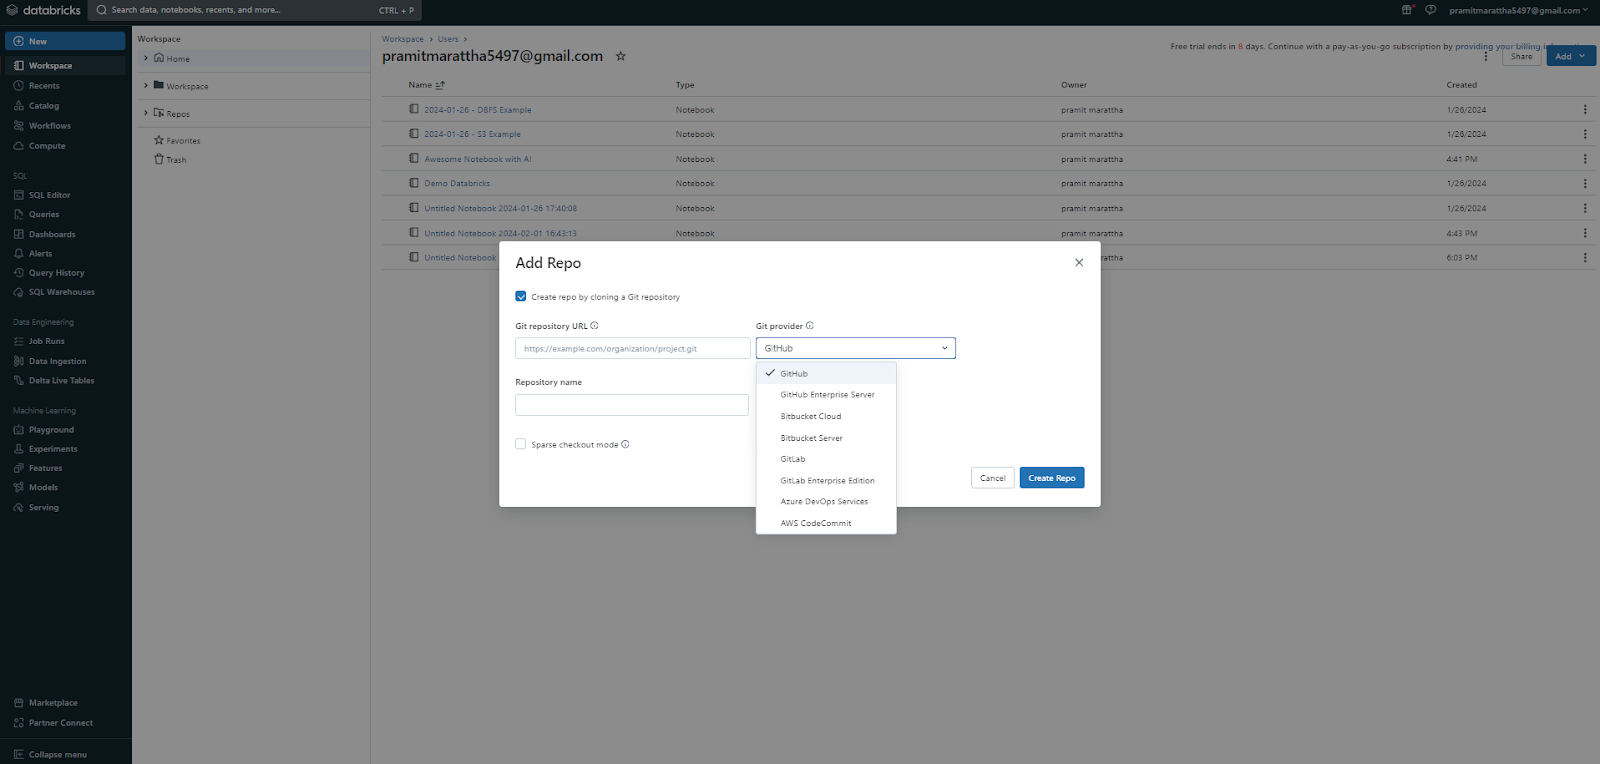
- Repos: Databricks repos are folders that synchronize their contents to a remote Git repository. Repos allow you to version control your notebooks and projects using Git, and you can sync your changes with your remote Git providers, such as GitHub, Bitbucket, GitLab, Azure DevOps Services, AWS CodeCommit, etc. You can browse and manage repos from the Repos tab in the Workspace category, and you can clone, pull, push, and commit changes in your repos using the %sh magic command or the dbutils.repos module.
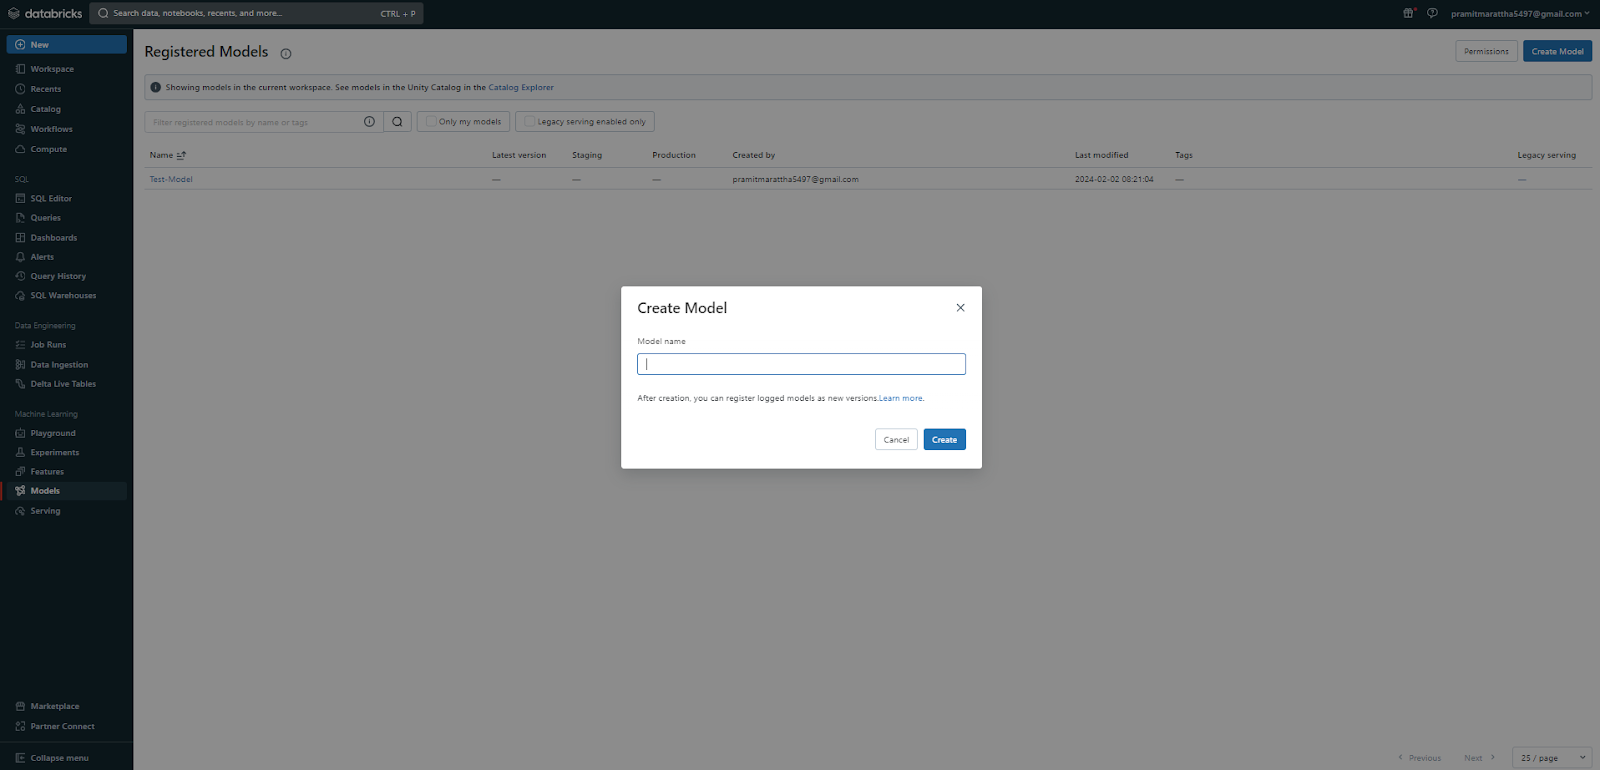
- Models: Models are the collection of machine learning models that you can build, register, and deploy in Databricks workspace. Models can be trained and tested in your notebooks using various frameworks and libraries, such as TensorFlow, PyTorch, Scikit-learn, etc., and they can be logged and tracked in your experiments using MLflow. You can browse and manage models from the Models tab in the Workspace category, and you can register and serve models using the model registry and the model serving feature.
- Experiments: Experiments are the collection of ML experiments that you can track, compare, and optimize in Databricks workspace. Experiments allow you to log and monitor various metrics and parameters of your models, such as accuracy, loss, learning rate, etc., and they can be visualized and analyzed using MLflow.

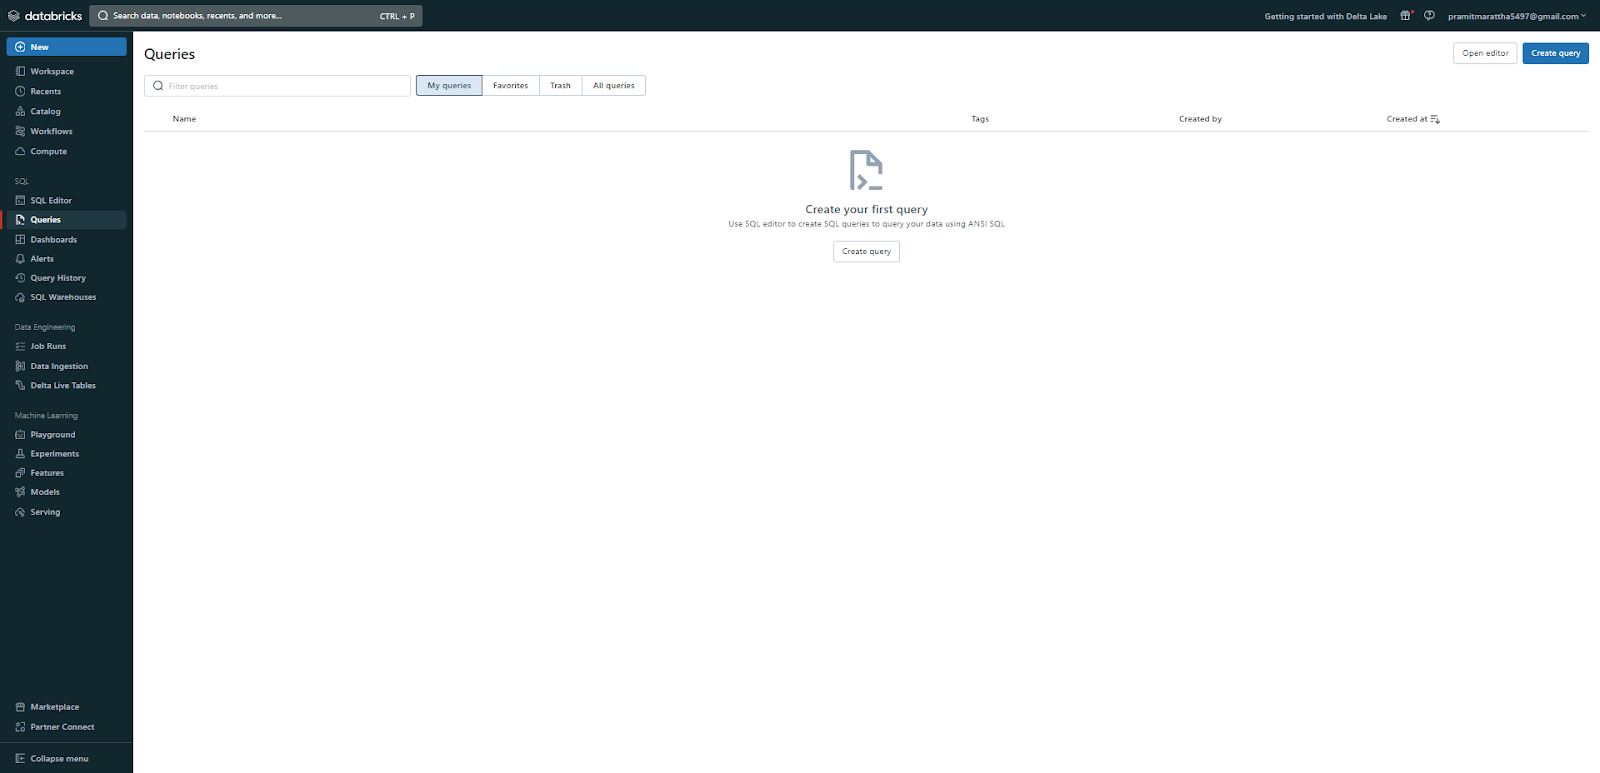
- Queries: Queries are simply SQL queries that you can write and execute on your data sources in the Databricks workspace. Queries allow you to perform various operations and transformations on your data, such as filtering, aggregating, joining, etc., and they can be visualized and analyzed using the SQL editor or the SQL Analytics product. You can browse and manage queries from the Queries tab in the Workspace category.
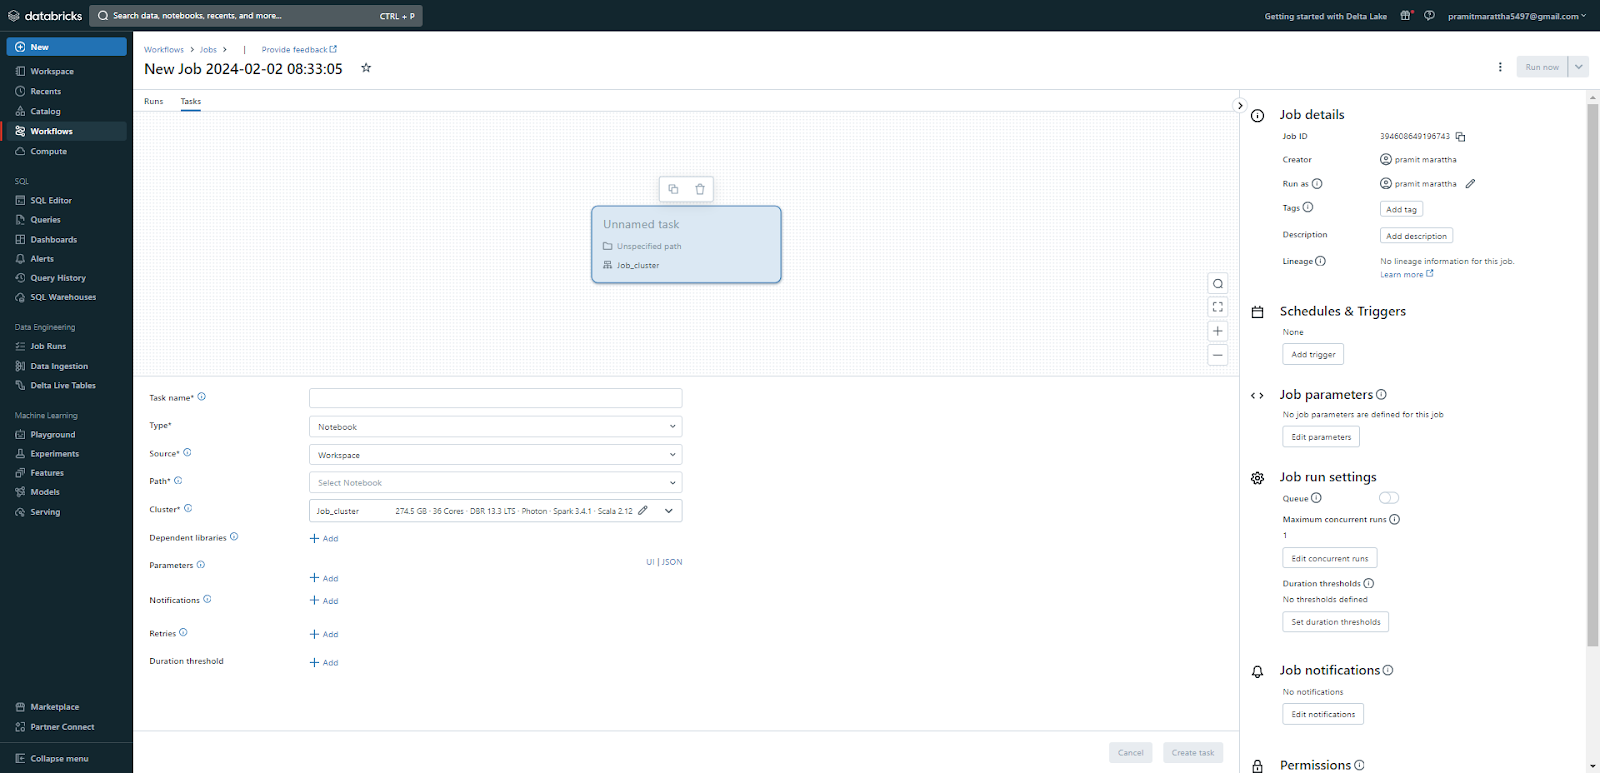
- Jobs: Jobs allow you to run your code and tasks on a regular or on-demand basis, and they can be configured and managed using the job scheduler and the job UI. You can browse and manage jobs from the Jobs category in the sidebar.
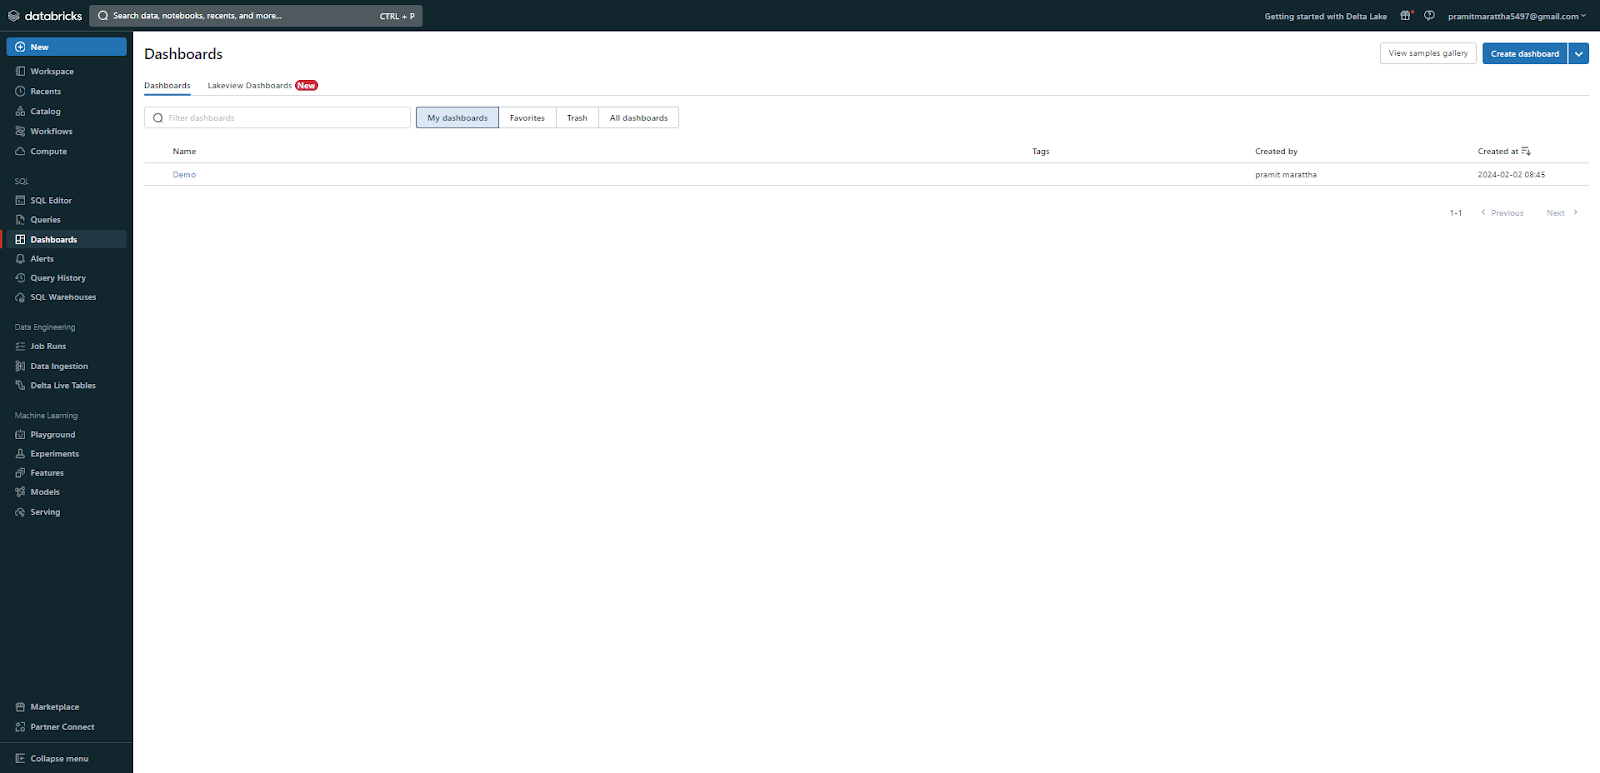
- Dashboards and visualizations: Dashboards allow you to present and communicate your data insights and results, and they can be created and customized using various tools and libraries. In short, Dashboards are presentations of query visualizations and commentary. In short, dashboards are presentations of query visualizations and commentary.
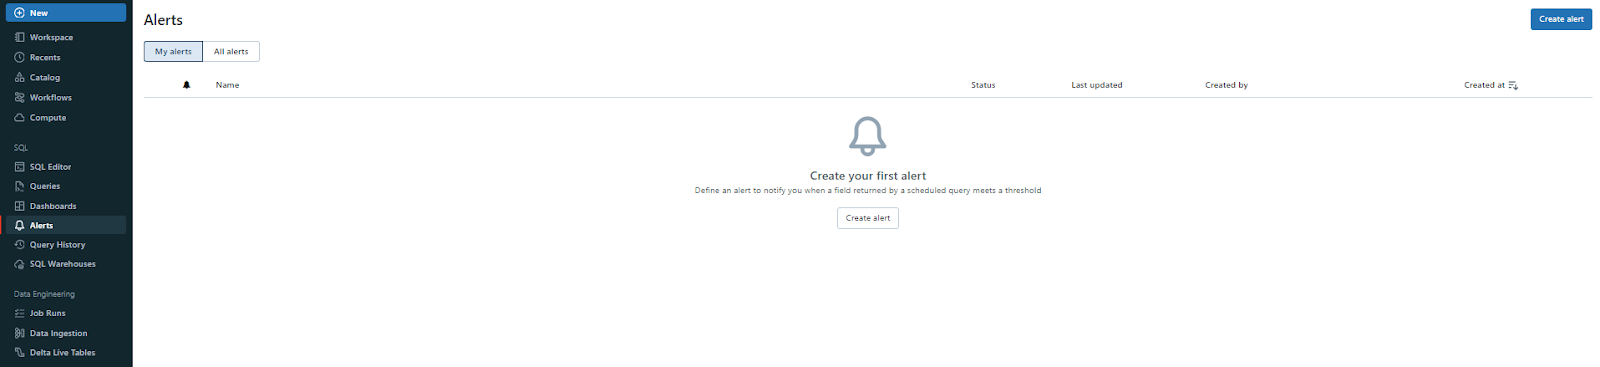
- Alerts: Alerts allow you to monitor and react to various metrics or conditions from your queries and dashboards, such as thresholds, trends, anomalies, etc., and they can be delivered to various channels, such as email, Slack, PagerDuty, etc. You can browse and manage alerts from the Alerts tab in the Workspace category, and you can create and configure alerts using the alert settings or the %alert magic command.
These are the key Databricks workspace objects that Databricks provides. Now, in the next section, we will go through a step-by-step guide to creating a Databricks workspace.
Step-By-Step Guide to Create a Databricks Workspace With Quickstart
Now that we are familiar with Databricks workspaces, let's walk through setting one up on AWS using the Quick Start option. This is the easiest, most automated approach to deploying a Databricks workspace:
Step 1—Launch AWS Quickstart From Databricks Console
Sign in to your Databricks account and go to the Workspaces page.
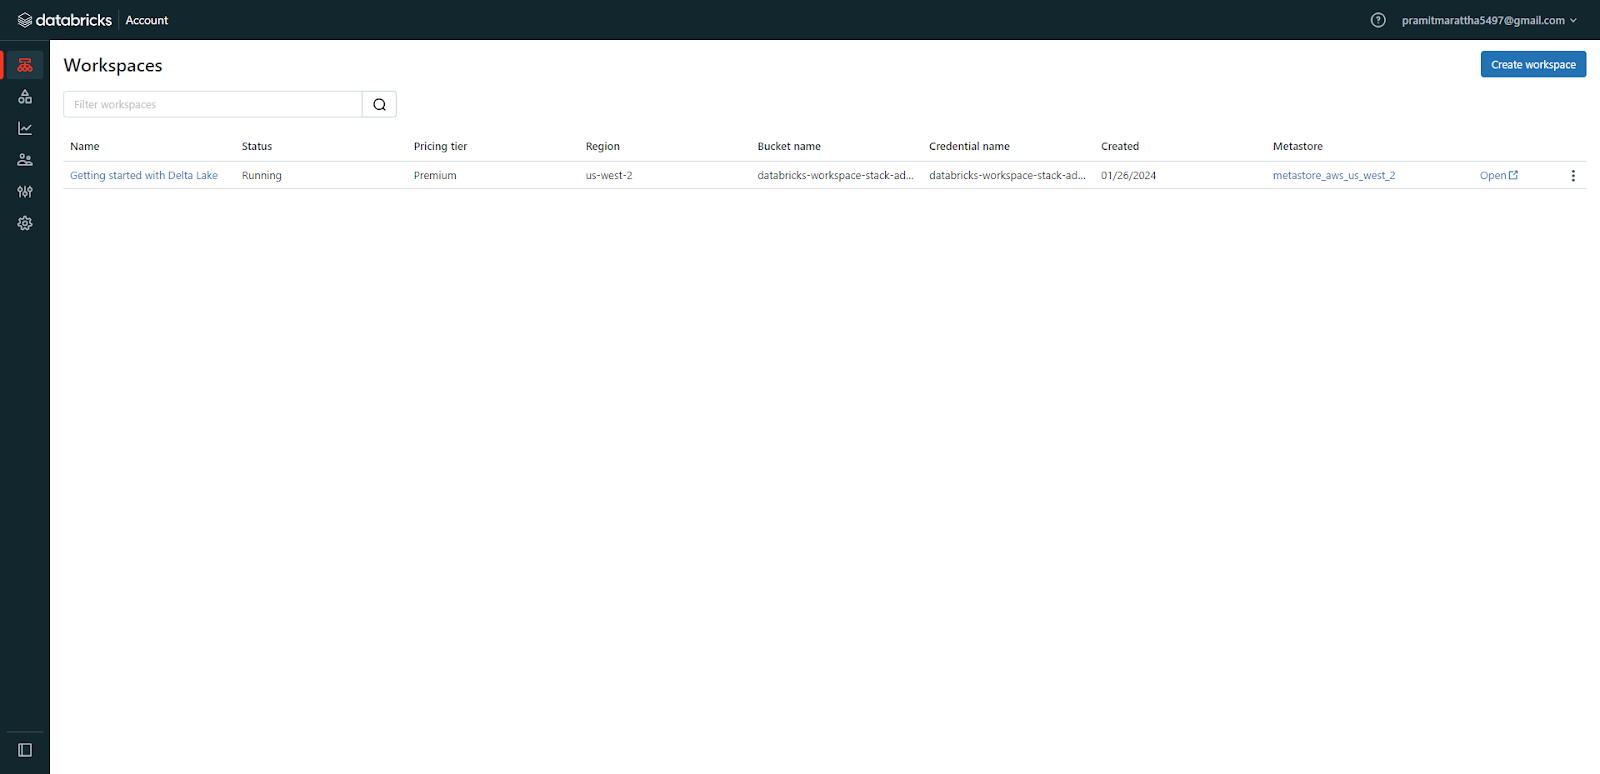
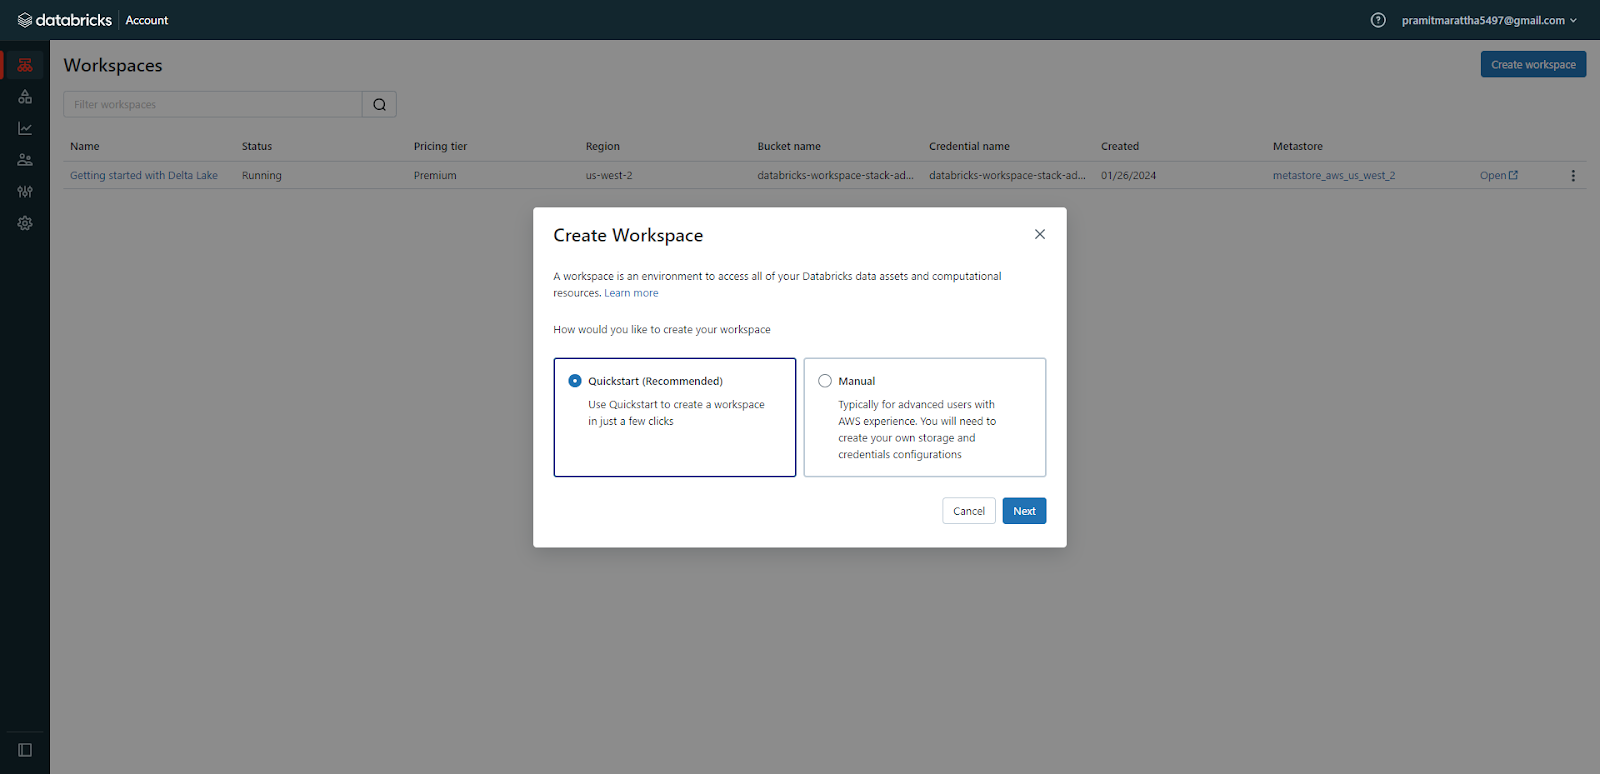
Click on "Create Workspace" and select the "Quickstart (recommended)" deployment option.
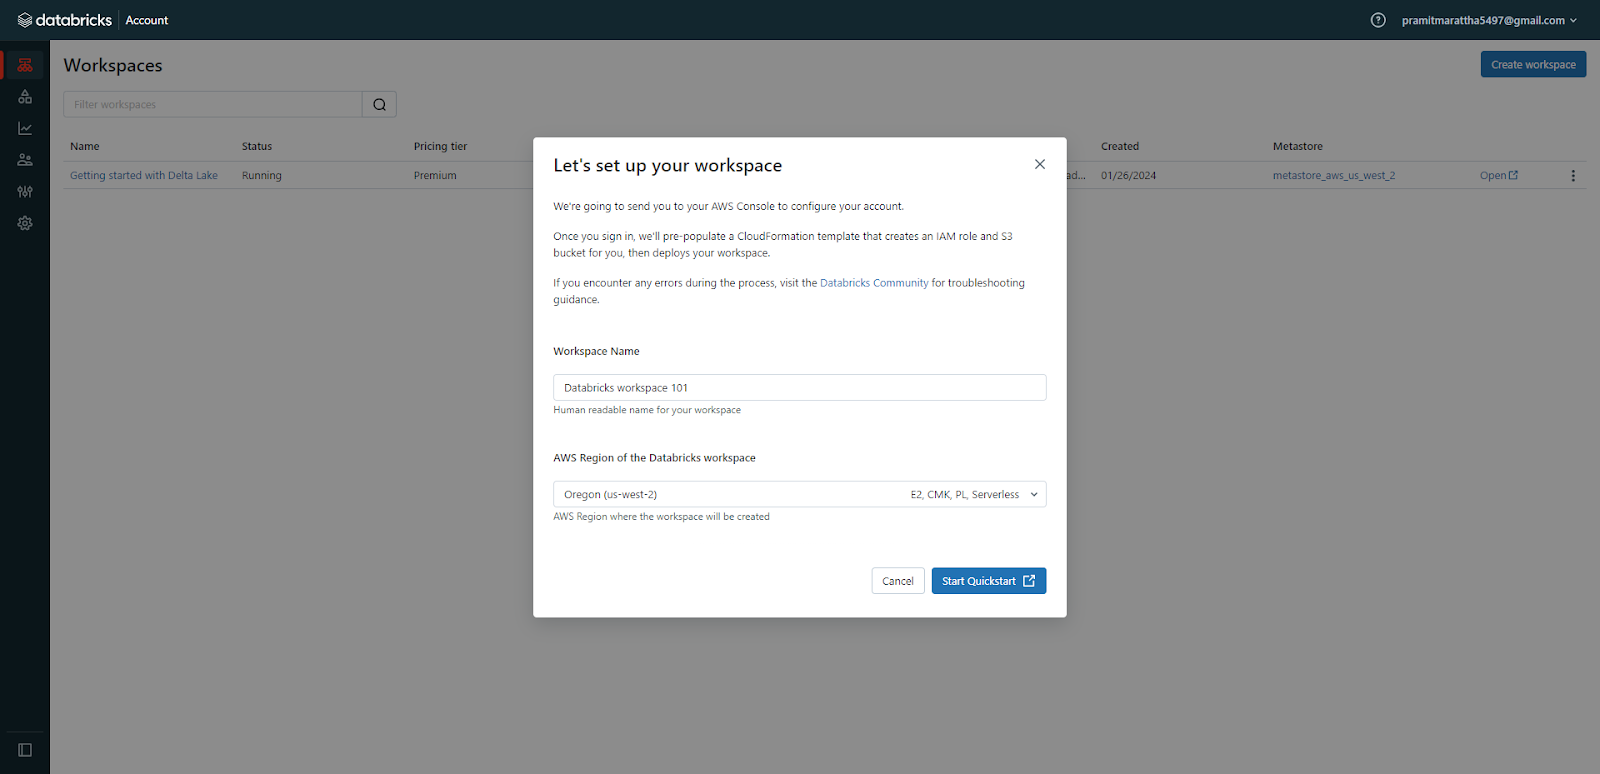
Enter a name for your workspace and select the AWS region.
Step 2—Fill out the AWS Quickstart Form
Enter your Databricks account name/password credentials.
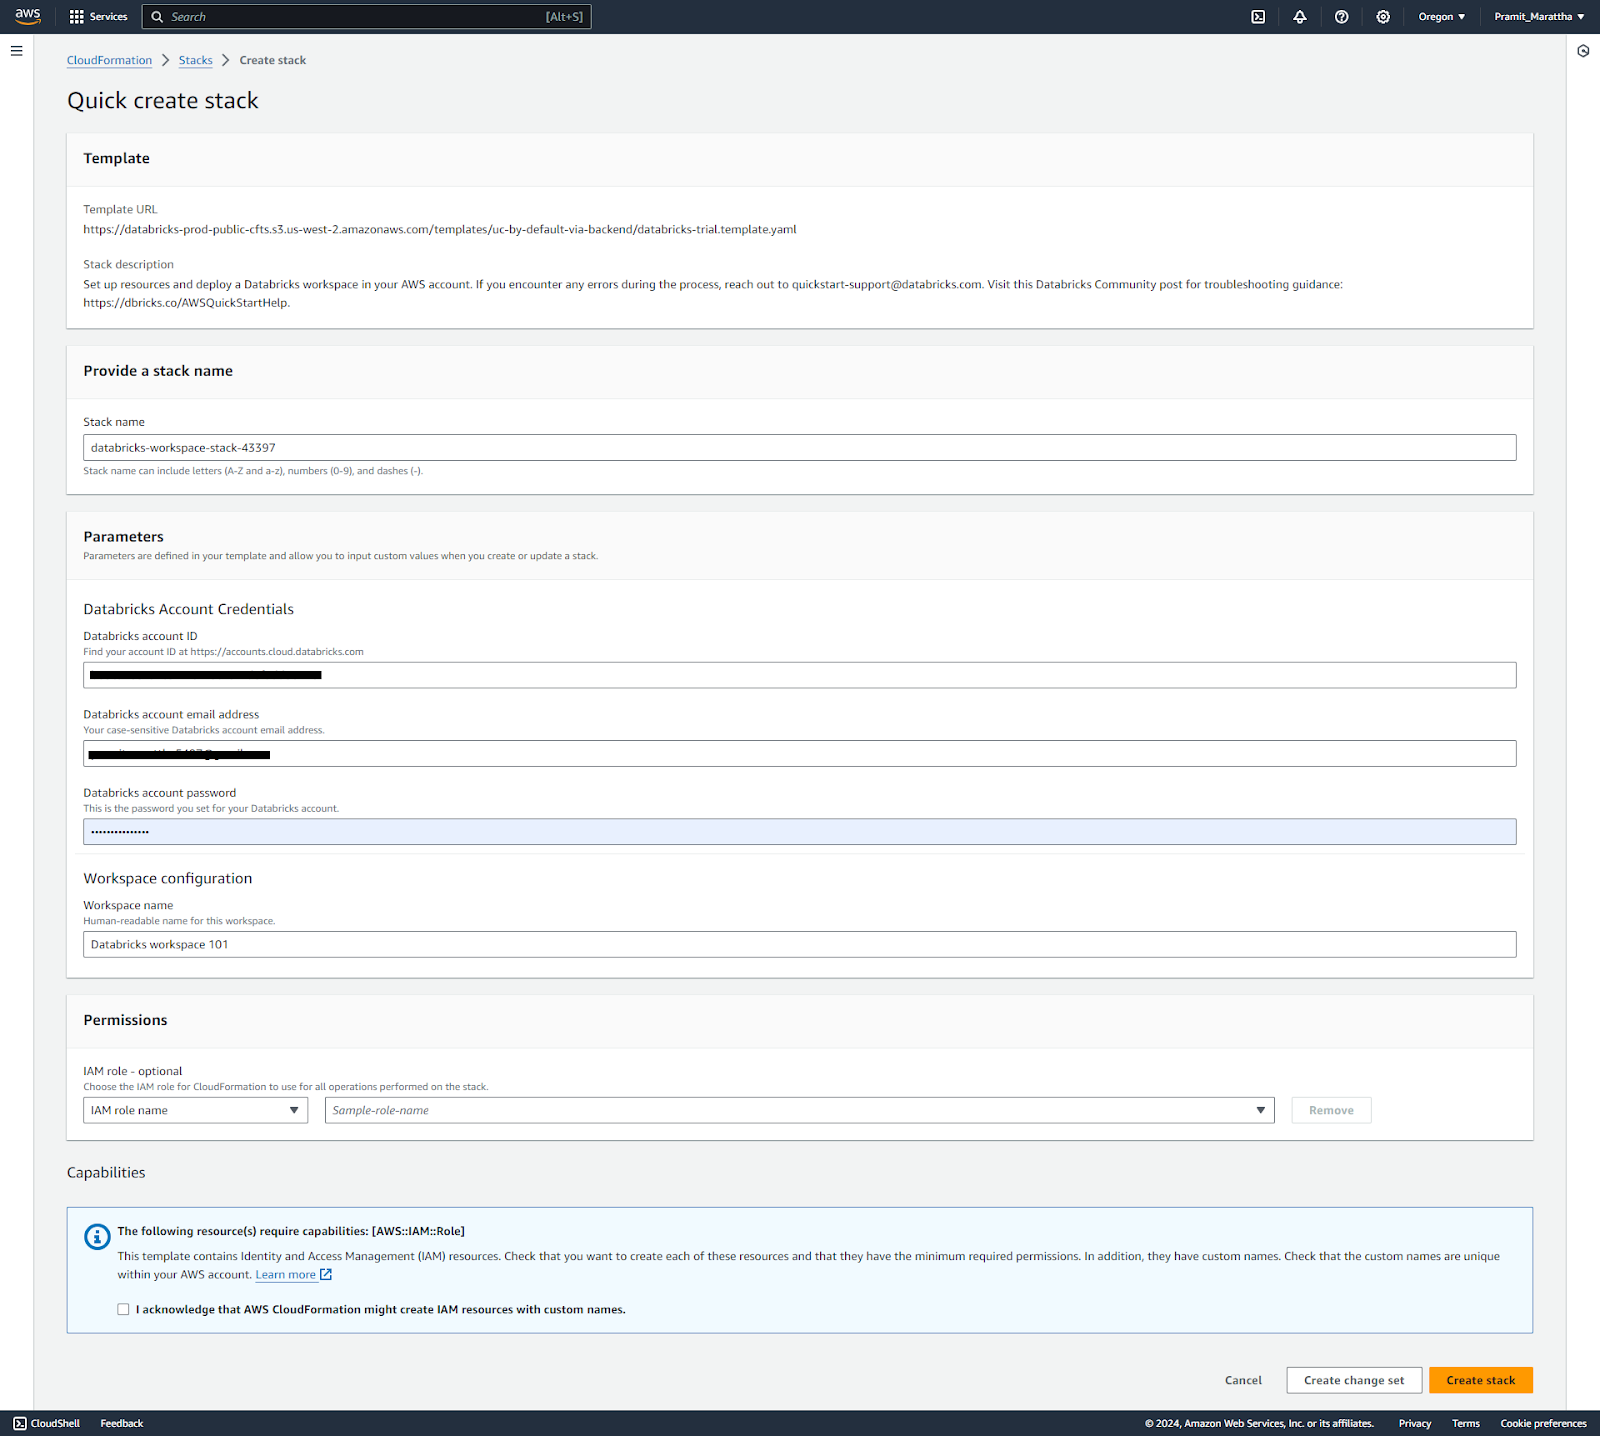
Acknowledge the IAM permissions that will be used.

Review the pre populated names for various AWS resources that will be created. You can customize names if desired.
Step 3—Deploy AWS Cloudformation Stack
Click on "Create Stack" to deploy the CloudFormation template. This will automatically provision all the required AWS resources.
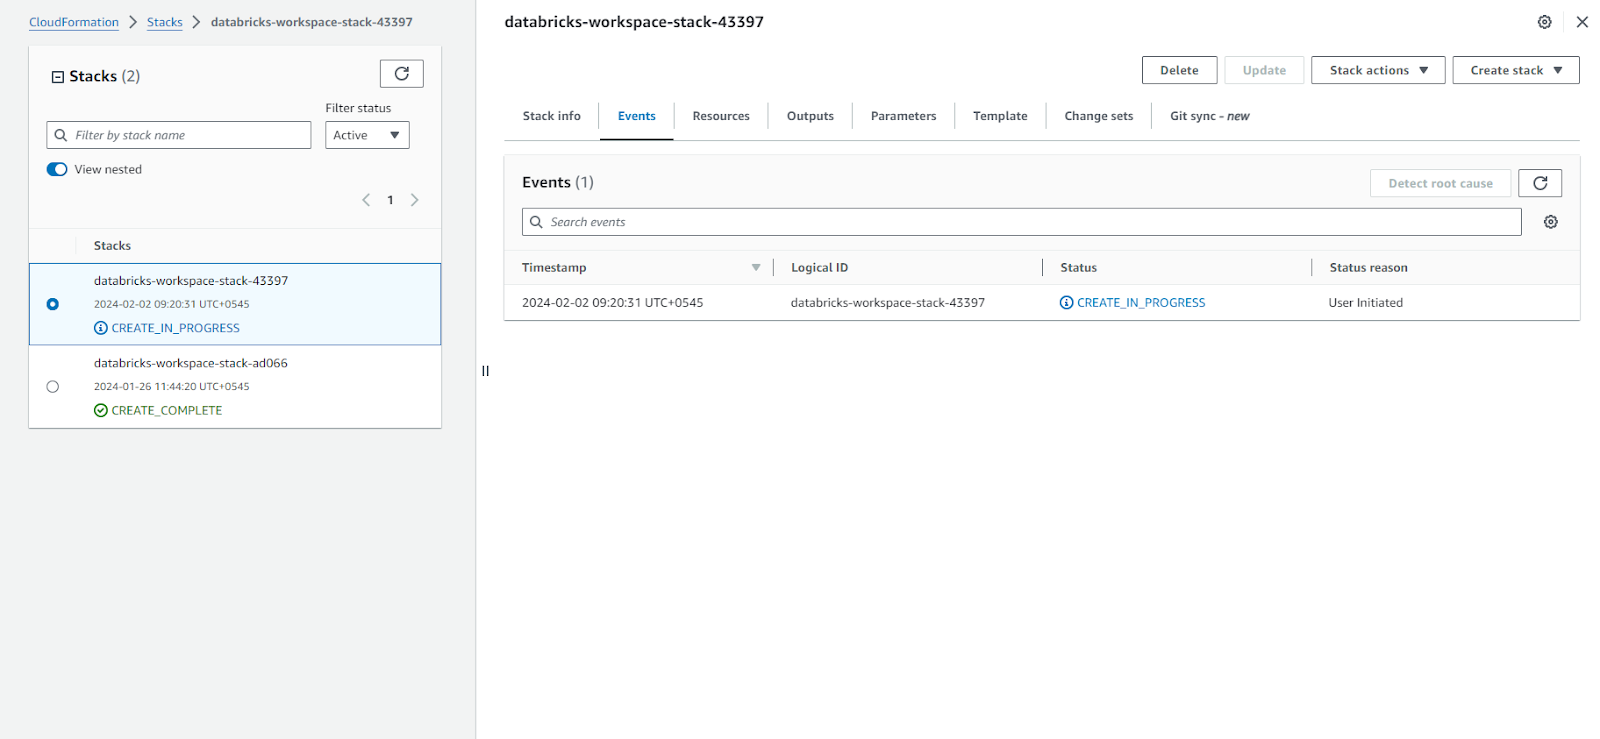
Monitor the deployment status on the "databricks-workspace-stack-...." page.
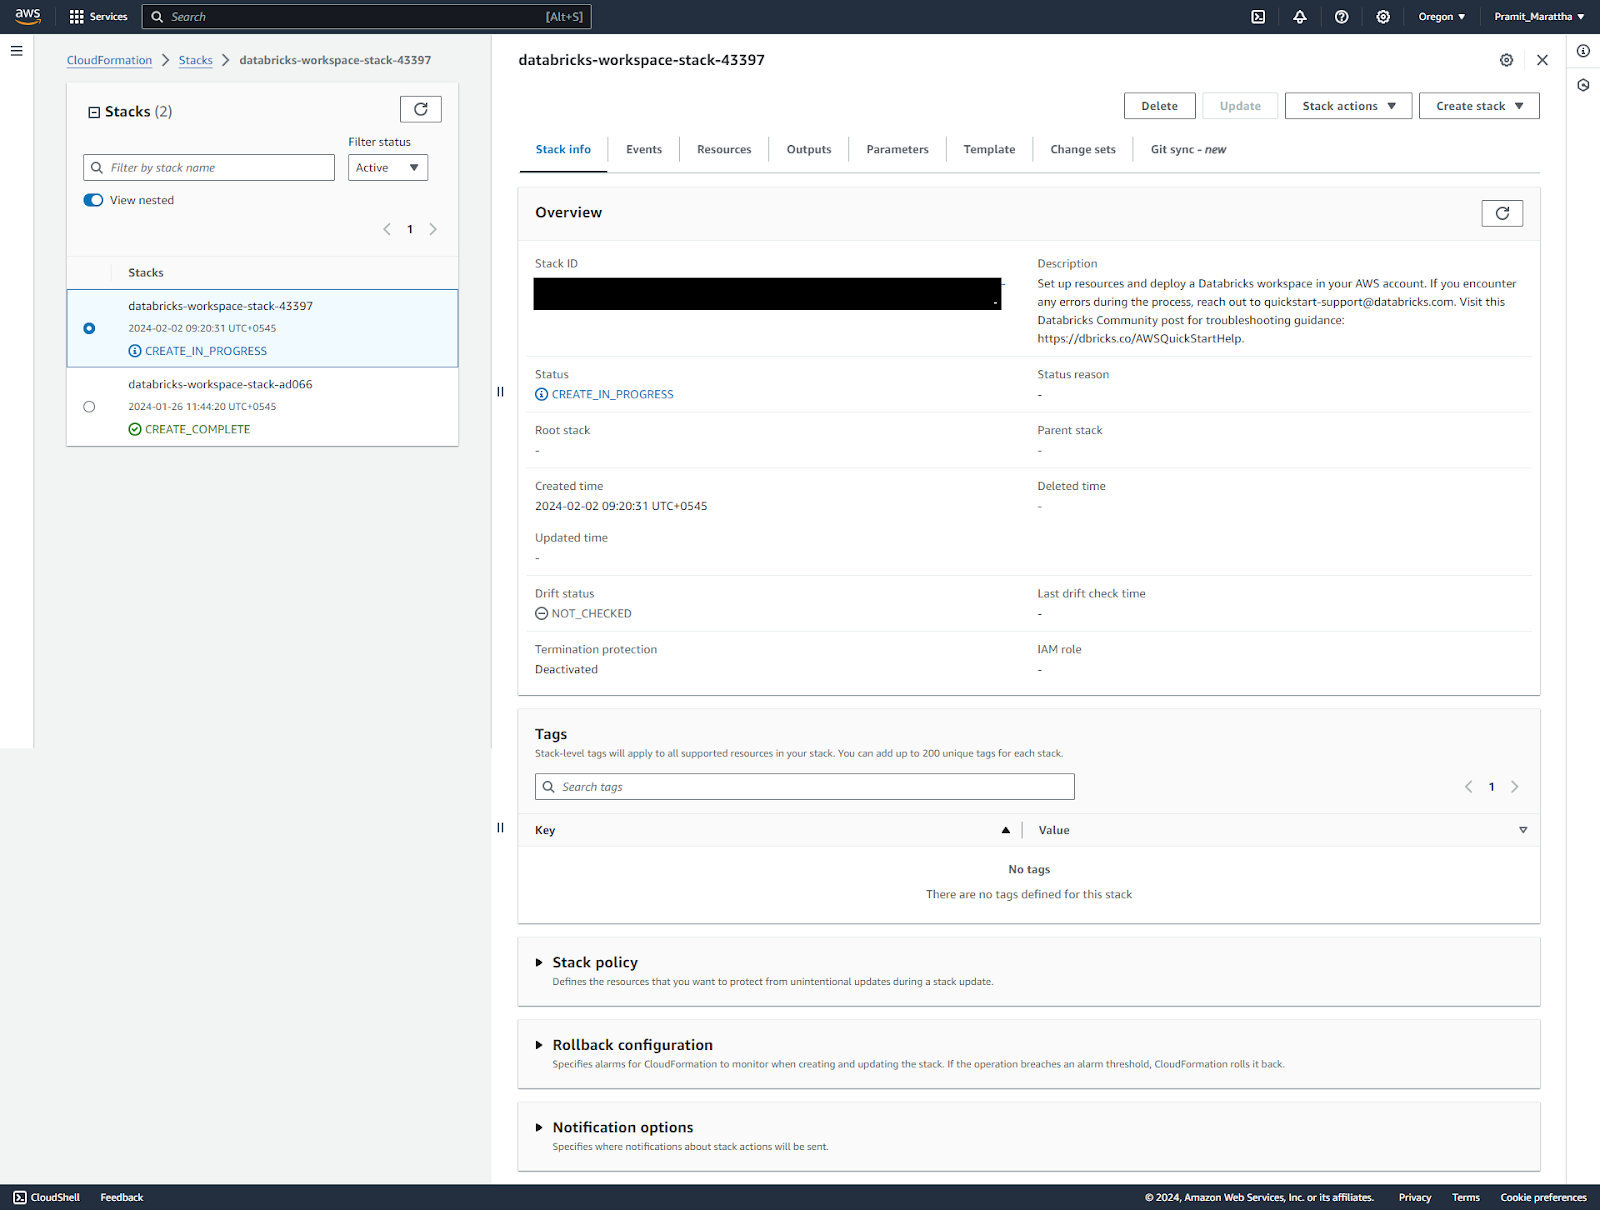
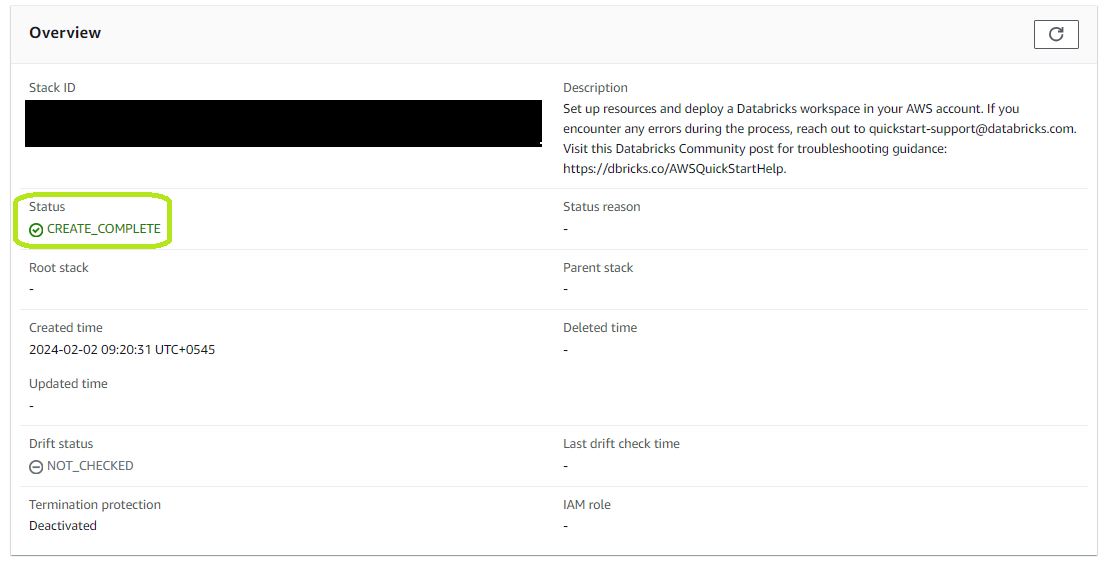
It may take 5-10 minutes for all resources to be created. Monitor until the status changes to "CREATE_COMPLETE".
Step 4—Access Newly Created Databricks Workspace
Return to the Databricks workspaces console and open the newly created workspace.
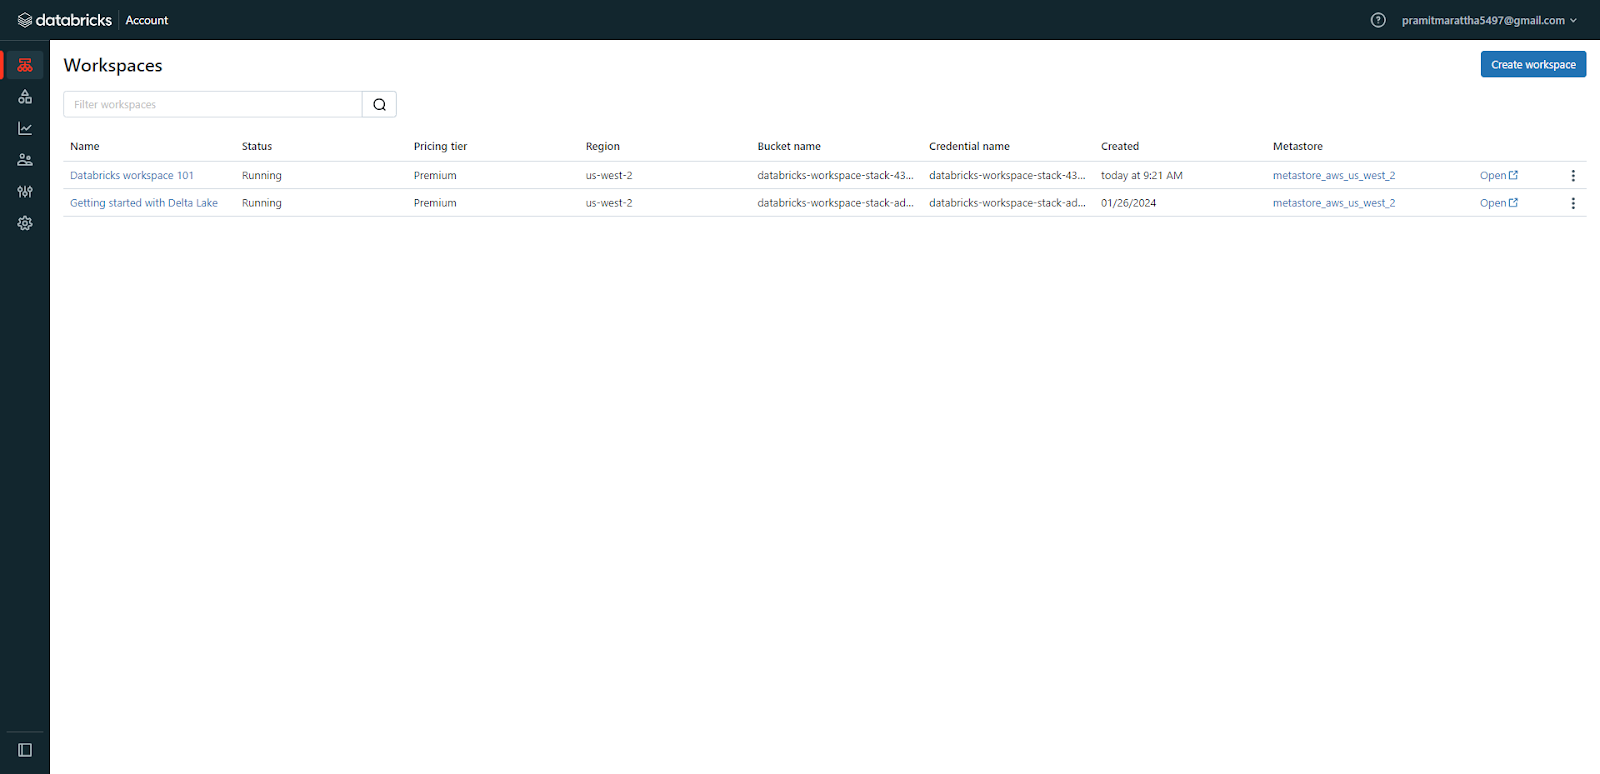
Click on the newly created Databricks workspace to launch and start using it.
Step 5—Configure Databricks Workspace
Upon first opening your workspace, select your primary use case and click "Finish" to complete the basic configuration. You can further customize access, security, compute, and storage settings as needed.
As you can see, by using AWS Quick Start, you can get a fully configured Databricks workspace up and running in your AWS account within minutes! Now, in the next section, we will show you how to create a Databricks workspace manually, which gives you more control and flexibility over the workspace creation process.
Step-By-Step Guide to Create a Databricks Workspace Manually
The Manual option is another way to create a Databricks workspace. It allows you to configure the workspace details and options yourself, such as the storage configuration, the credential configuration, the VPC, the PrivateLink, the encryption keys, etc. Here is a step-by-step walkthrough:
Step 1—Launch Workspace Creation in Databricks Console
To start the workspace creation process, you need to open the Databricks console and click on the “Create Workspace” button. This will take you to a page where you can choose between the Quickstart and Manual options. Select the “Manual” option and click “Next” to proceed.

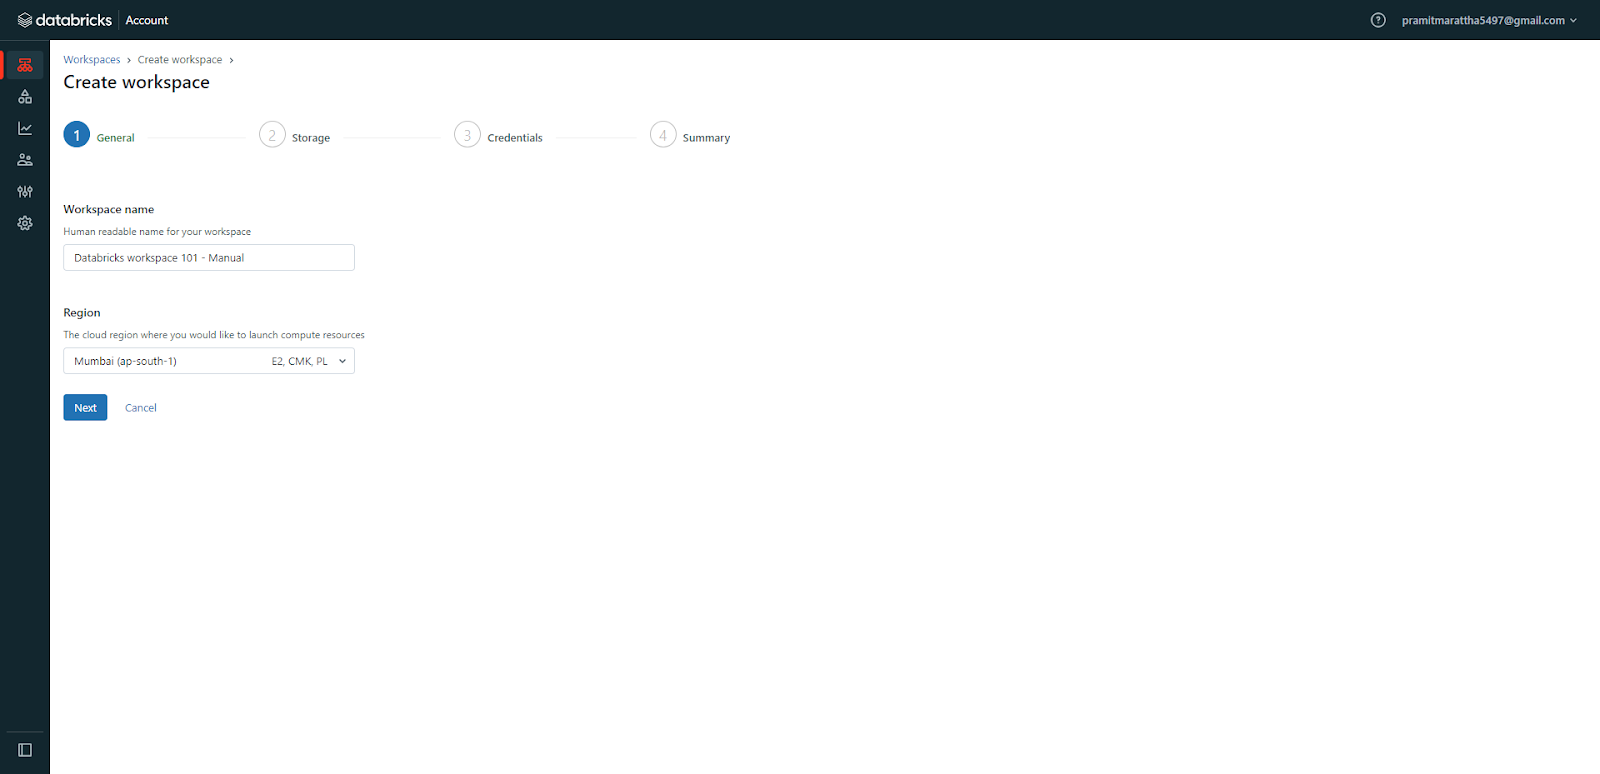
Step 2—Configure Workspace Details
Enter Databricks workspace name and select the AWS region.
Choose a storage configuration, like an existing S3 bucket or create a new one.
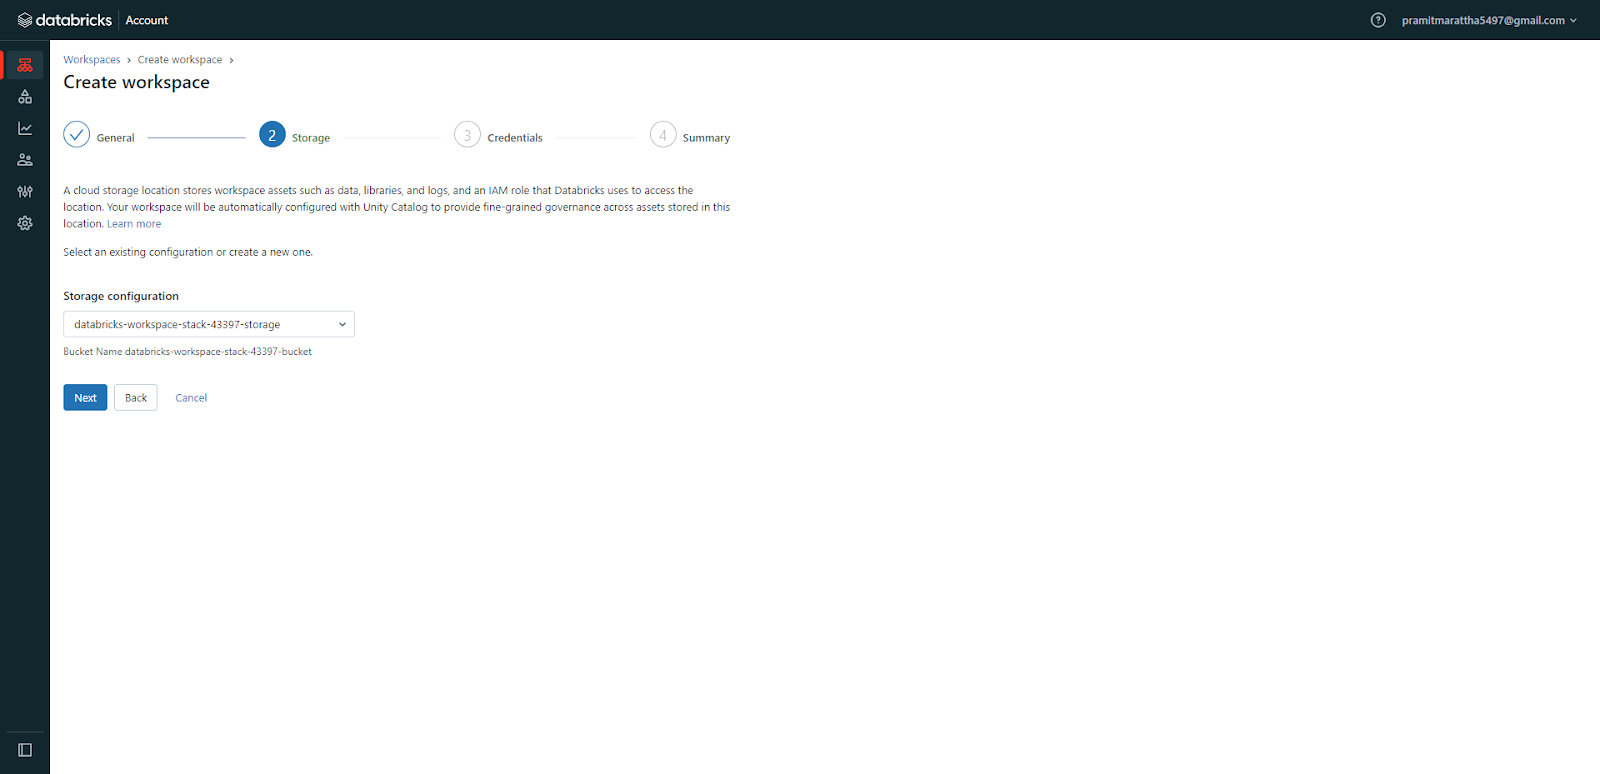
Configure credentials for database access, if any. Select/create VPCs, subnets, and security groups as needed. Customize configurations for encryption, private endpoints, etc.
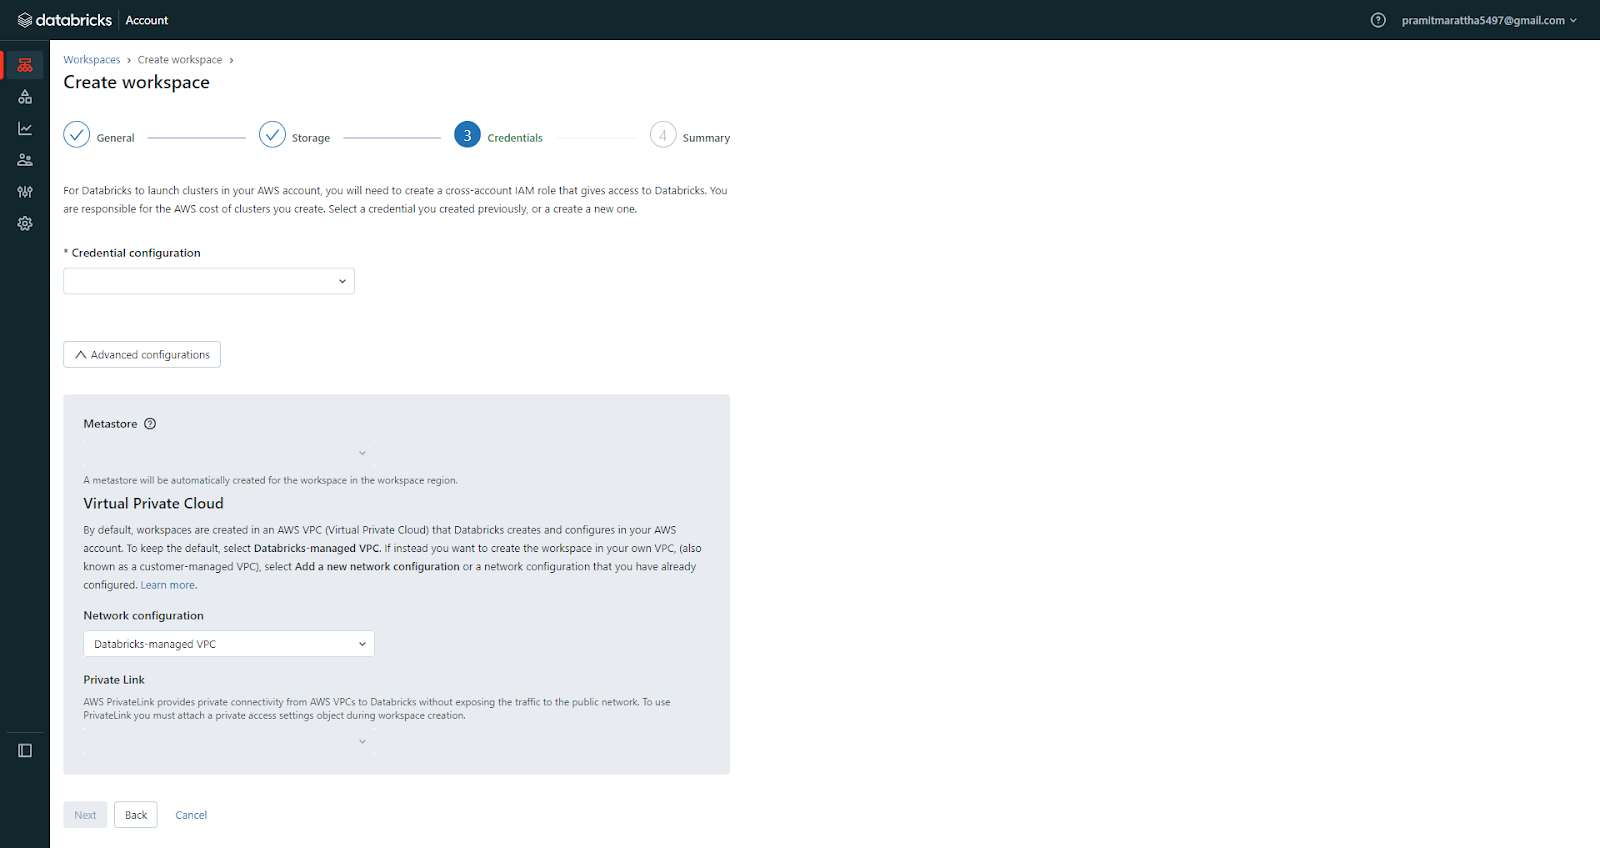
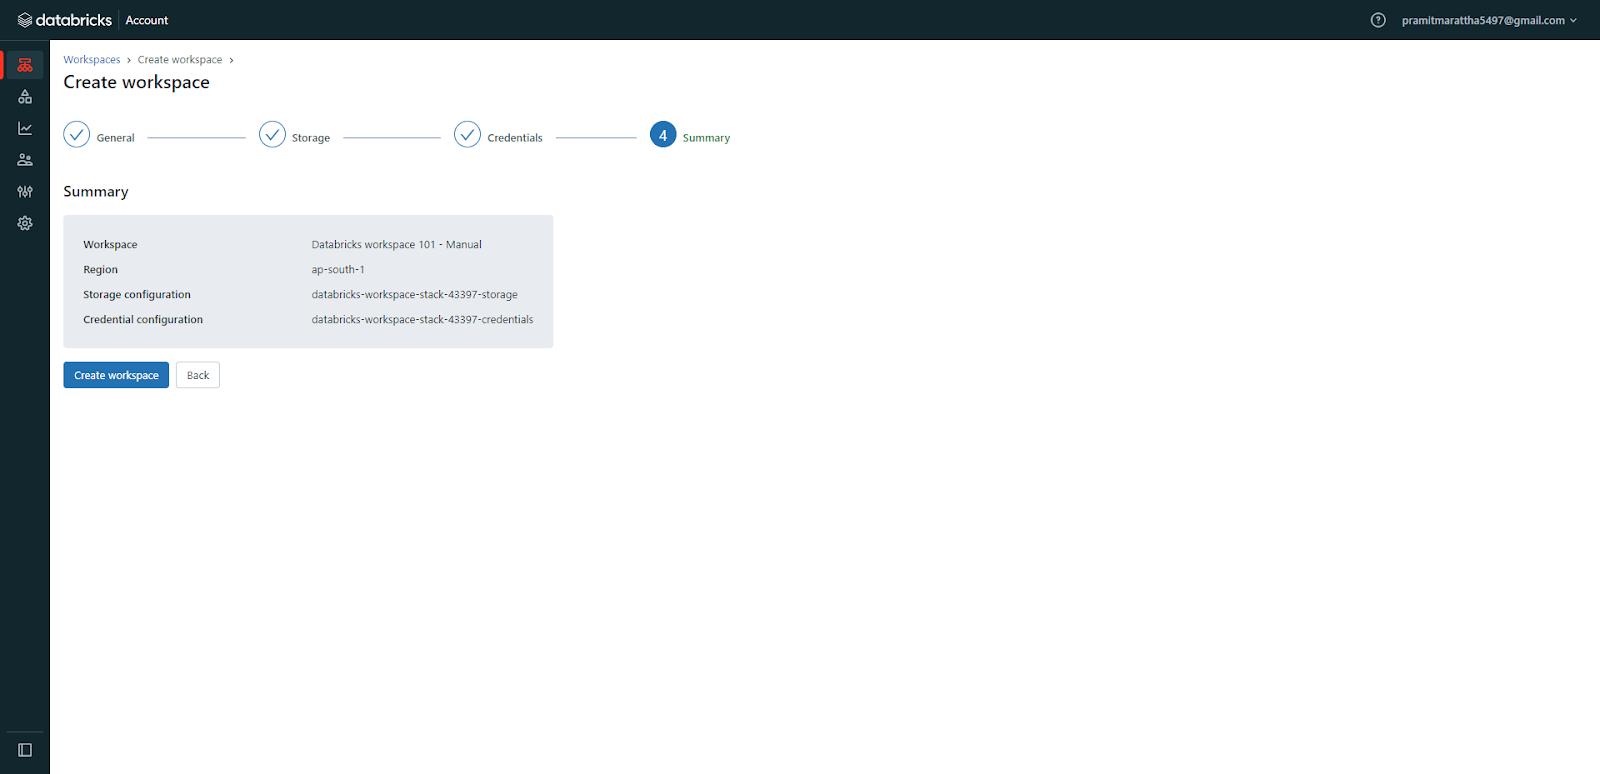
Step 3—Review and Create Databricks Workspace
Carefully review all configurations entered in the previous step, and then click "Create Workspace" to start the provisioning process. You will see a confirmation message and a link to the AWS CloudFormation console, where you can monitor the deployment status of your workspace.
Step 4—Monitor Workspace Status
After submitting, check the workspace status on the Databricks Workspaces page in the console. It will show the status as:
- Provisioning: In progress. Wait a few minutes and refresh the page.
- Running: Successful workspace deployment.
- Failed: Failed deployment.
- Banned: Contact your Databricks account team.
- Canceling: In the process of cancellation.
If you see "Failed" status, click the workspace to see detailed logs and troubleshoot errors.
Step 5—Access Deployed Databricks Workspace
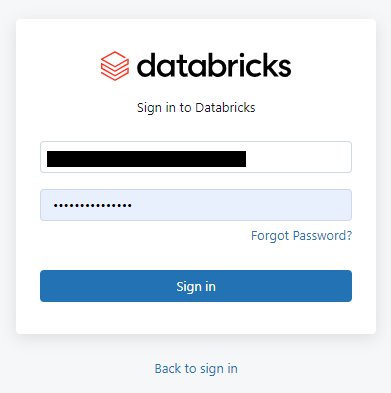
Once the stack is created, you can open your workspace and log in to it using your Databricks account email and password.
Boom! You have successfully created a Databricks workspace manually. You can now start using your Databricks workspace for your data projects. Next, we will show you how to navigate the Databricks workspace UI.
Step-By-Step Guide to Navigating the Databricks Workspace UI
Now that a workspace is set up, let's explore how to navigate the Databricks workspace interface and how to use each of these components.
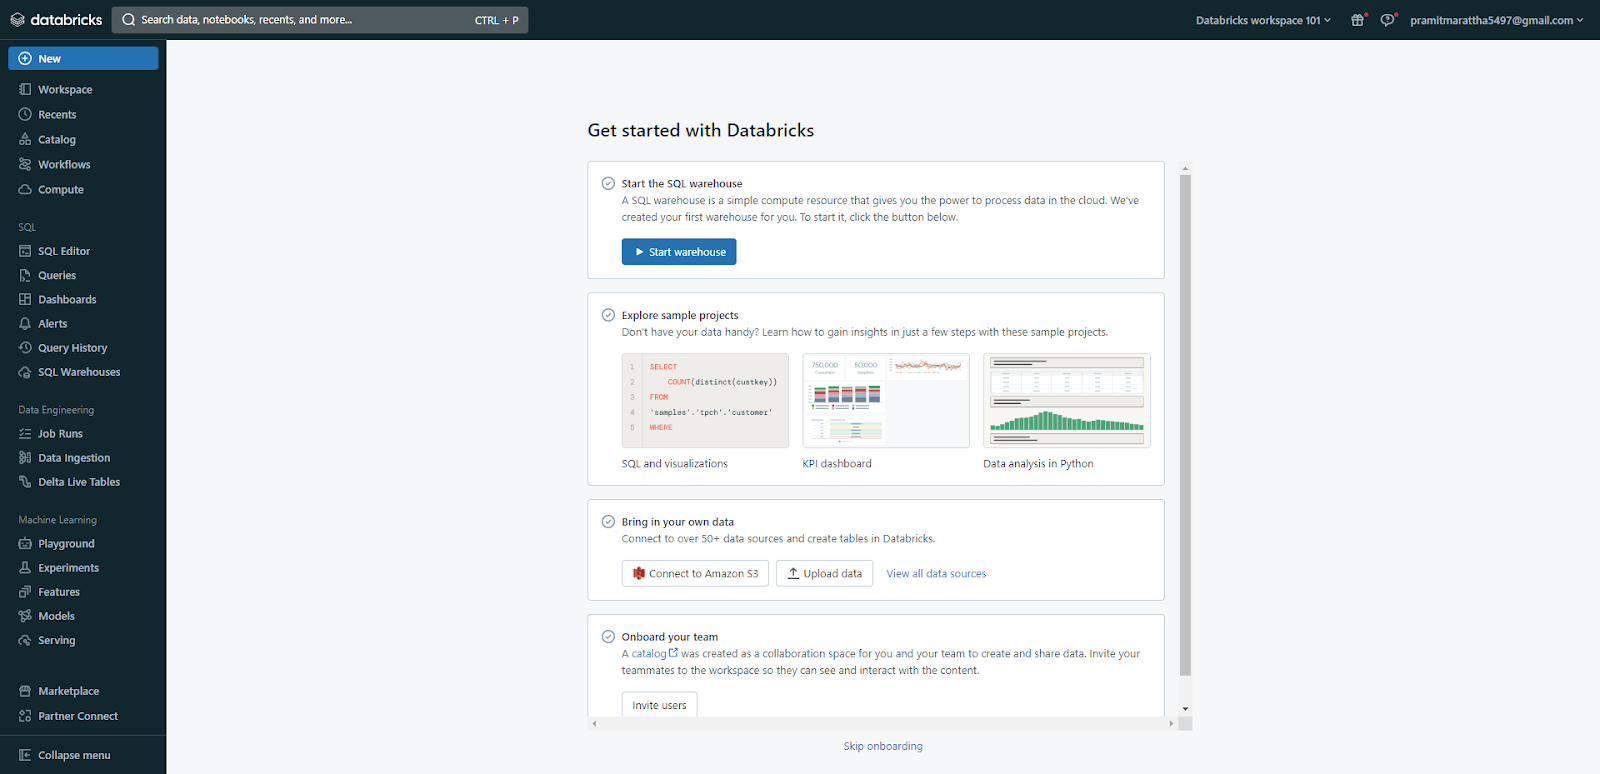
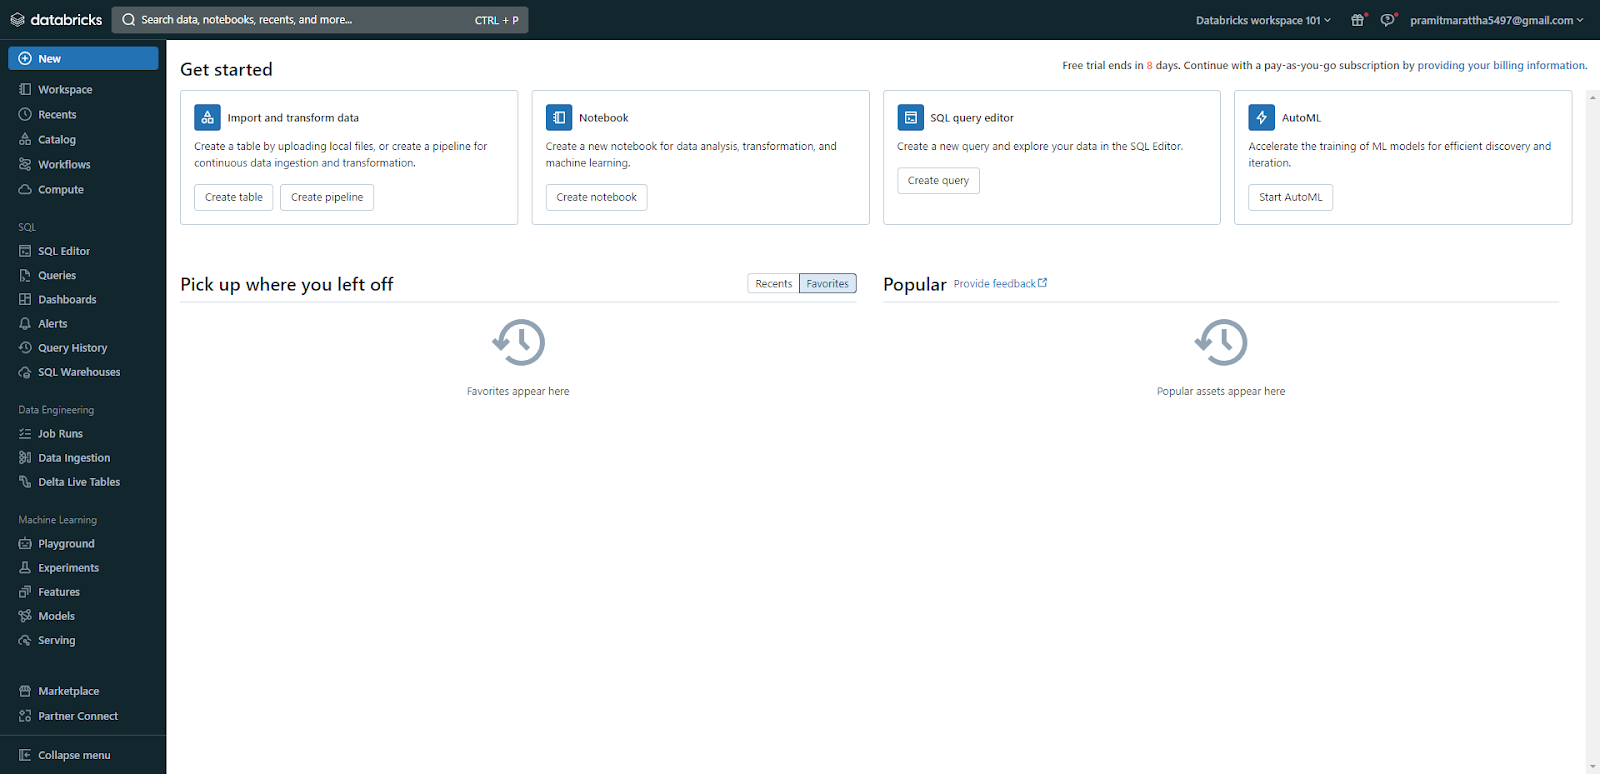
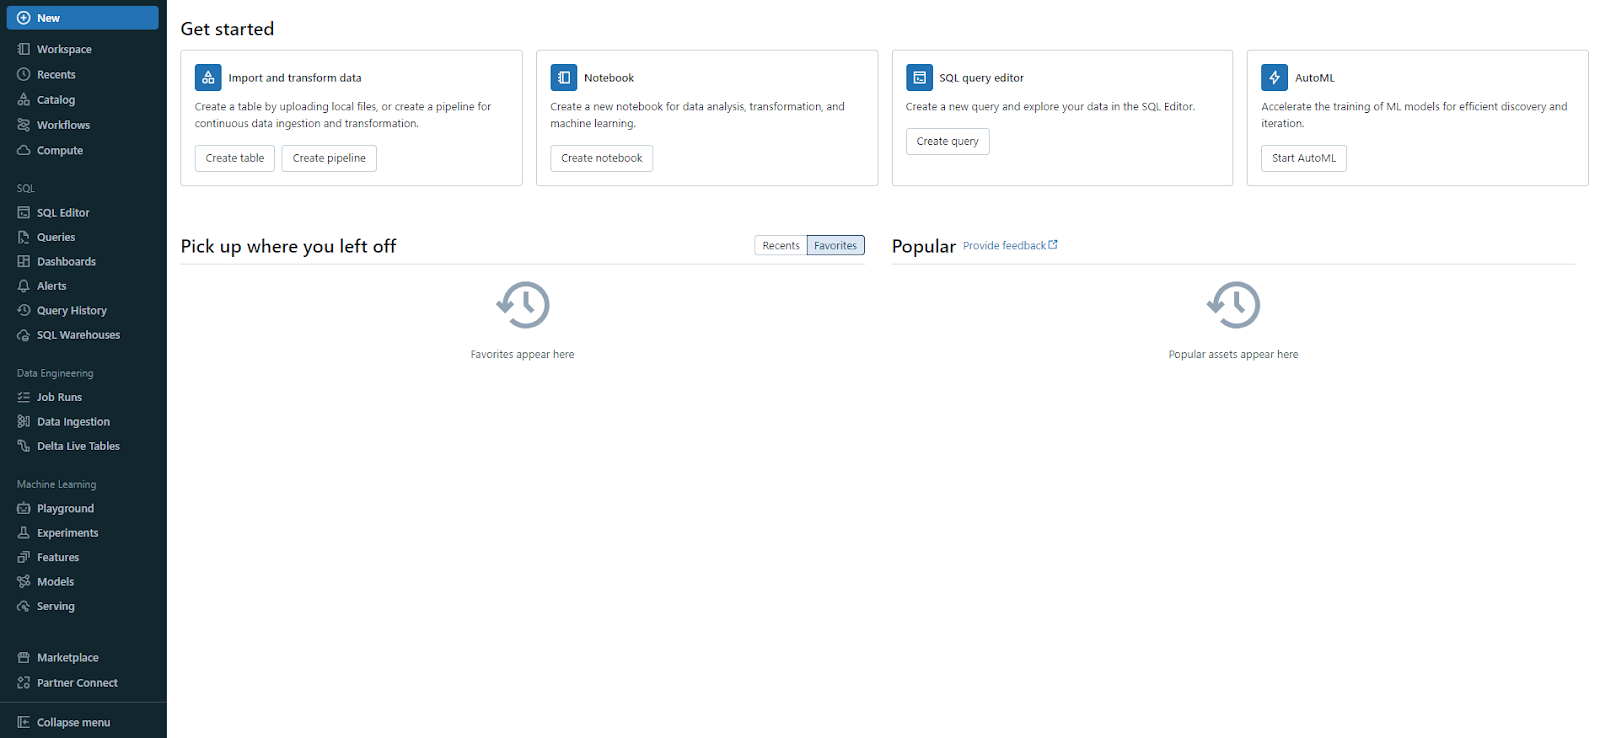
Step 1—Exploring the Homepage
Homepage is the first page you see when you log in to your Databricks workspace. It offers a quick overview of your workspace and its objects, along with shortcuts to help you get started. In the “Get Started” section, you can find links to useful resources like documentation and tutorials. Also, there are sections for “Pick up where you left off(Recents)” and “Popular”, where you can view the most recently accessed and popular objects.

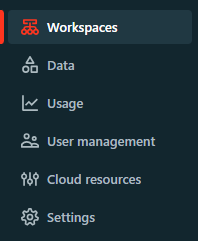
Step 2—Using the Sidebar
The sidebar is the vertical menu on the left side of the UI, which allows you to navigate between different categories and access specific products and features of your Databricks workspace.
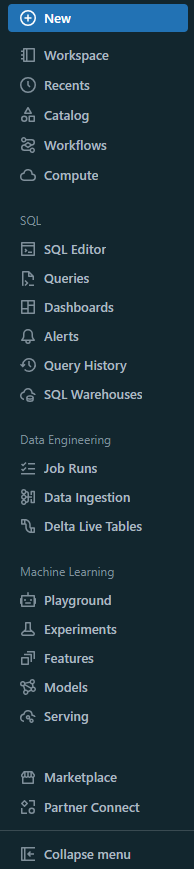
You can use it to switch between the workspace, recent, catalog, workflows, and compute categories, each containing different types of objects. Also, you can access specific products and features, like:
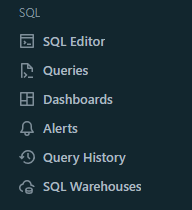
SQL
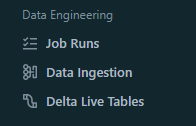
Data Engineering
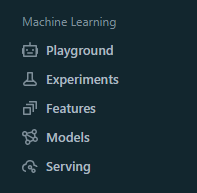
Machine Learning
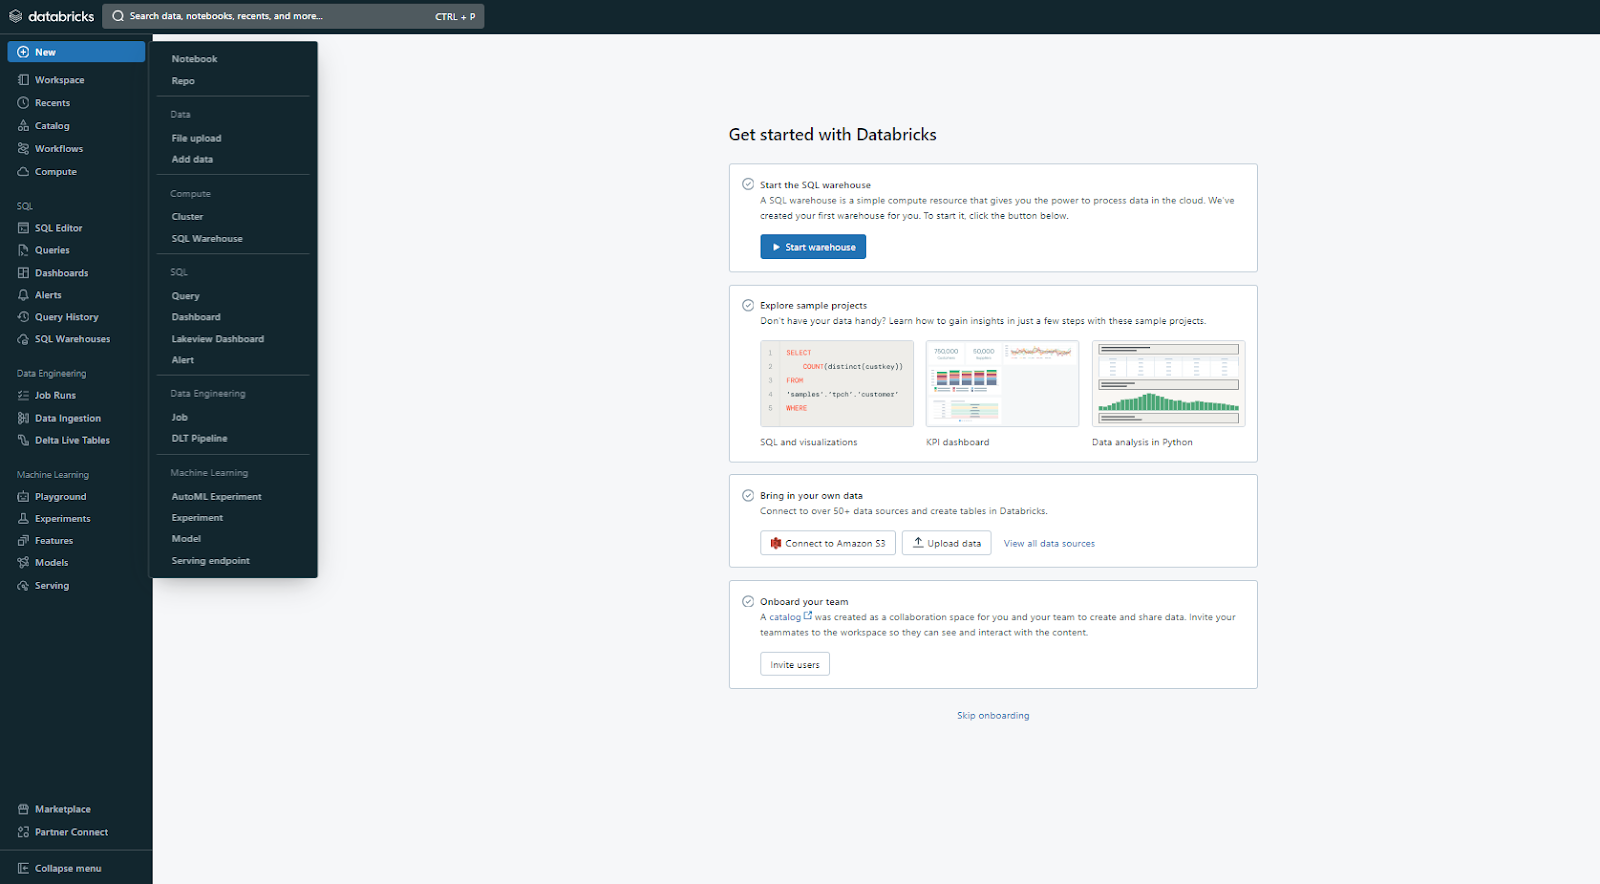
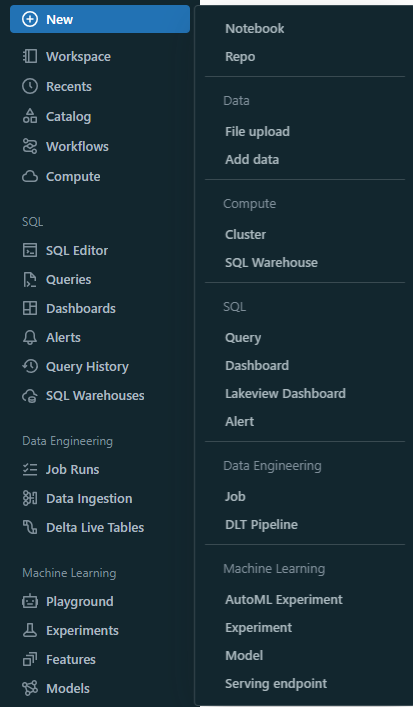
On top of that, you can also create new objects such as notebooks, queries, repos, dashboards, alerts, jobs, experiments, models, and serving endpoints by clicking on the “+New” button at the top of the sidebar. It also allows you to launch compute resources like clusters, SQL warehouses, and ML endpoints. Also, you can upload CSV or TSV files to Delta Lake through the "Create or modify table from file upload" option or load data from other sources via the add data UI.
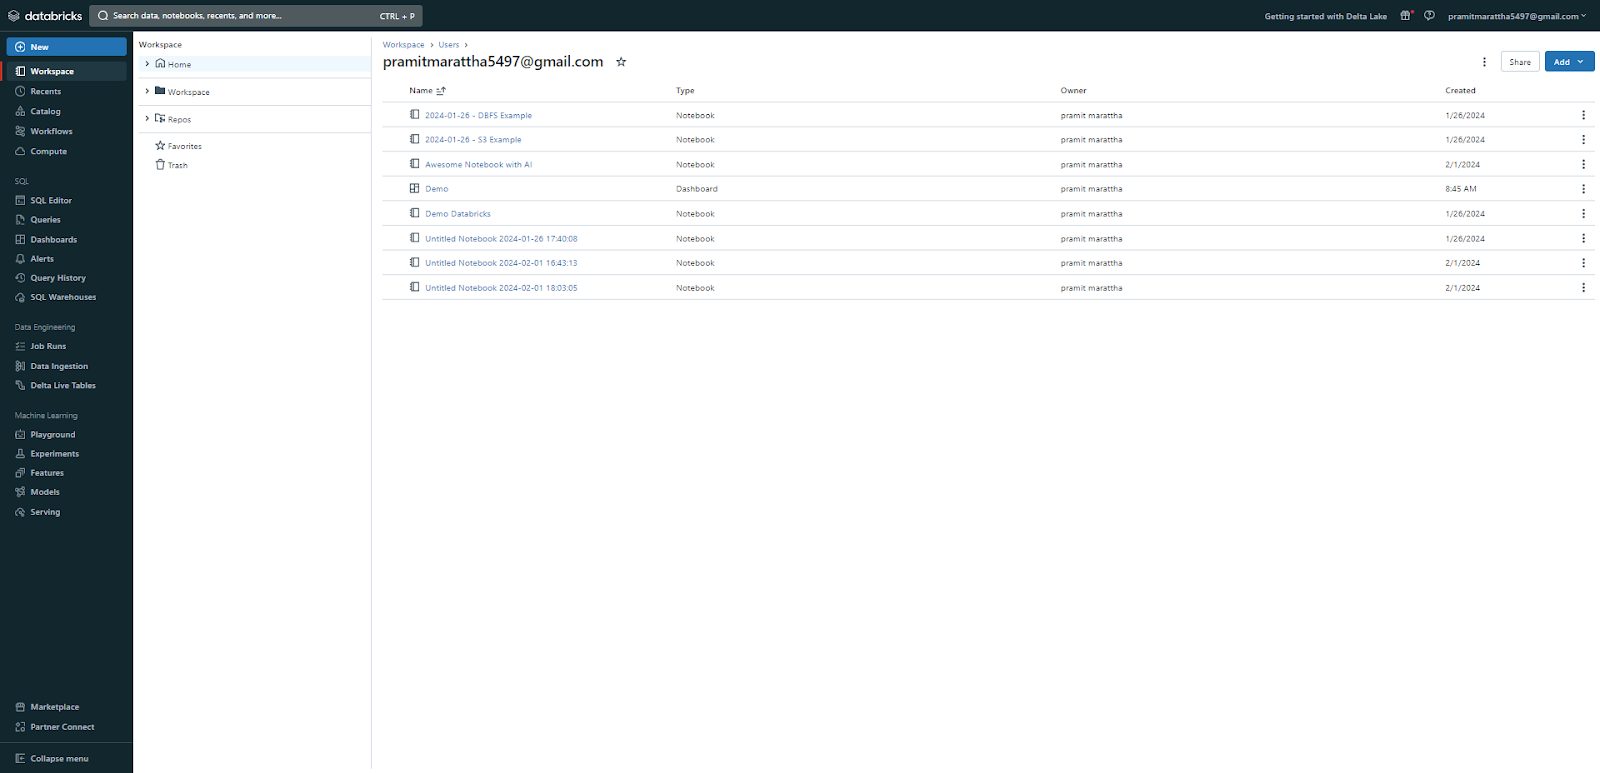
Step 3—Browsing Files and Objects
Use the "Workspace" browser to explore files across Workspace and Repos. You can create, edit, delete, rename, move, copy, import, export, and share these files and folders, by right-clicking on them and choosing the appropriate option from the context menu.
Repos tab shows you the Git repositories that are integrated with your Databricks workspace. You can clone, pull, push, and commit changes to these repositories, by right-clicking on them and choosing the appropriate option from the context menu.

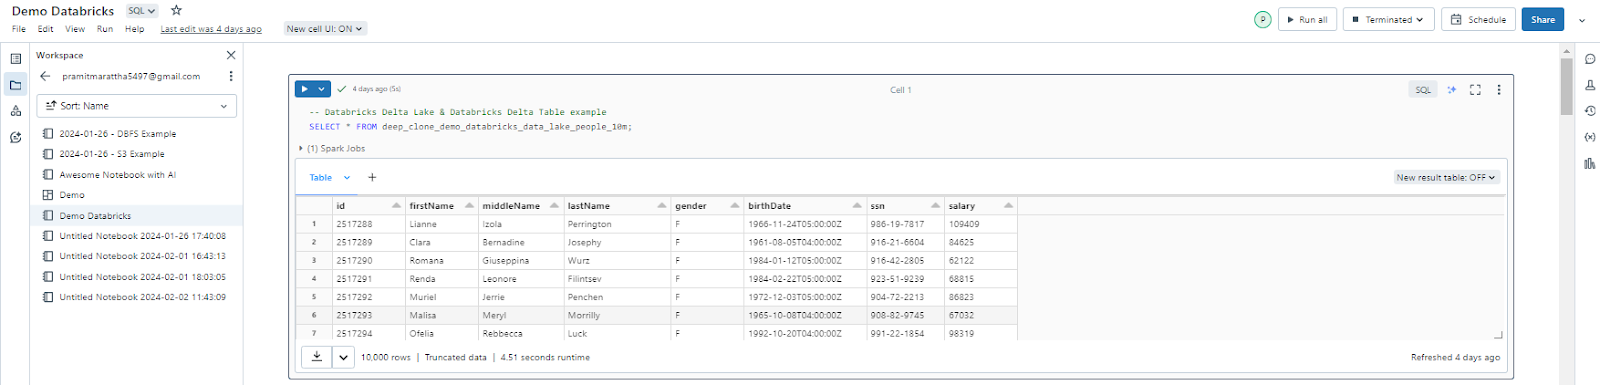
You can browse files and objects from within your notebooks by using the contextual browser. It allows you to view details, preview content, and open the file or object in a new tab.
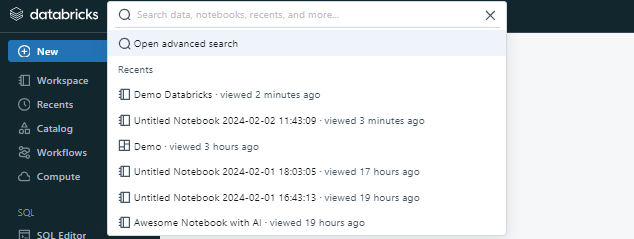
Step 4—Searching Across the Databricks Workspace
Search bar is the horizontal bar on the top of the UI, which allows you to search for any object in your Databricks workspace, such as notebooks, data sources, clusters, models, experiments, queries, jobs, dashboards, alerts, etc. You can use the search bar to find objects by their name, type, tag, owner, or content by typing in the keywords or using the filters.
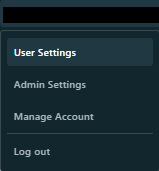
Step 5—Accessing User/Admin Settings
Admin/User settings menu is the drop-down menu that appears when you click on your user icon on the top right corner of the UI. It allows you to access and modify your user preferences and settings, such as the theme, the language, the time zone, the password, the email, the notifications, etc.

Step 6—Switching Between Databricks Workspaces
Databricks allows you to easily switch between multiple workspaces within the same account if you have access to more than one. To change your active workspace, first, click on the “Manage account” shown in the top navigation bar of the Databricks UI. This will redirect you to Databricks Workspaces. Next, click on the “Workspace” section and simply select the workspace you want to navigate, and it will automatically switch over to that workspace.
If you familiarize yourself with navigating the Databricks workspace interface, you can easily manage your Databricks resources efficiently.
What Are the Key Use Cases and Benefits of Databricks Workspace?
Finally, we have reached the end of the article. By now, you should know how to create a Databricks workspace and how to navigate through it. Now, let's understand some of the benefits and use cases of the Databricks workspace.
Some of the most common use cases enabled by Databricks workspaces are:
- Data Engineering: Databricks Workspaces provide essential tools and features for performing data engineering tasks. You can bring in data from different places, build scalable ETL pipelines, and transform large datasets. This capability allows the processing and preparation of high-quality, analytics-ready data at scale, all seamlessly within the Databricks workspace without the need to leave the platform.
- Data Science: Databricks workspace allows data scientists to easily explore, visualize, and prepare data for modeling with Spark SQL and DataFrames. They can build machine learning workflows with libraries like MLlib and Keras to create, train, evaluate, and tune models on large datasets. These models can then be registered in the MLflow Model Registry and deployed for inference.
- Business Intelligence (BI): Users can create cool dashboards and apps with Databricks workspaces. This helps them get useful insights from different data sources. It also works well with BI tools, giving you more options to use and all inside the Databricks workspace.
- Reporting: Using Databricks workspace, users can create notebooks, queries, and dashboards that generate up-to-date reports, visualizations, and alerts programmatically.
Beyond these use cases, some key benefits of using Databricks workspaces are:
- Productivity: Databricks workspaces bring various tools into a single interface, allowing data teams to develop workflows collaboratively without switching between different third-party products.
- Collaboration: Databricks workspaces facilitate seamless sharing of notebooks, code, datasets, and other analytics assets among teams. Multiple users can simultaneously work on the same resources using features such as version control and notebooks that support collaborative coding.
- Cloud-native platform: As a cloud-native platform, Databricks workspaces automatically scale up and down based on workload demands. Data teams are relieved of the burden of provisioning or managing infrastructure, allowing them to focus solely on their analytics development.
- Single unified platform: Databricks provides a unified platform for data teams to perform all kinds of data-centric tasks using the same interface and resources. This eliminates tool sprawl and enables seamless transitions between workflow stages.
- Flexible deployment: Databricks workspaces can be deployed on all major cloud platforms—AWS, Azure,and GCP—providing deployment flexibility to organizations based on their existing cloud investments and policies.
Conclusion
Databricks workspaces provide a centralized and collaborative environment for data teams to execute end-to-end data workflows. Databricks workspace provides a full range of capabilities required for end-to-end data pipelines—from ingestion to exploration, processing to visualization, machine learning to lifecycle management.
In this article, we have covered:
- What Is a Databricks Workspace?
- Prerequisites for Setting Up Your Databricks Workspace
- What Key Databricks Workspace Objects Assets, and Features Does Databricks Provide?
- Step-By-Step Guide to Creating a Databricks Workspace With Quickstart and Manually
- Step-By-Step Guide to Navigating the Databricks Workspace UI
- What Are the Key Use Cases and Benefits of Databricks Workspace?
FAQs
What is a Databricks workspace?
Databricks workspace is a unified environment to access Databricks capabilities like Spark clusters, notebooks, experiments, dashboards, etc. It allows data teams to collaborate.
How many workspaces can I create in Databricks?
You can create multiple workspaces within a single Databricks account to isolate teams, projects, environments, and access controls.
Is the Databricks workspace free to use?
Databricks offers a free Community Edition, but full capabilities require a paid subscription. There is also a 14-day free trial.
What are the prerequisites to creating a Databricks workspace?
Prerequisites include a Databricks account, a cloud provider account (like AWS), storage configuration, credential configuration, VPC setup, etc.
How do I create a Databricks workspace with Quickstart?
Use Quickstart from the Databricks console to automatically provision AWS resources via the CloudFormation template.
What are some key use cases for Databricks workspaces?
The main use cases are data engineering, data science, BI analytics, reporting, and dashboards.
What are the benefits of using Databricks workspaces?
Benefits include increased productivity, collaboration, cloud-native scaling, and a unified platform.
How can I run SQL queries in a Databricks workspace?
Use the SQL editor, SQL warehouse, or %sql magic inside notebooks to write and execute SQL queries.
Can I version control files in a Databricks workspace?
Yes, you can use Repos to sync notebooks, data, and models with Git services like GitHub.
How do I schedule and run jobs in Databricks?
You can use the Jobs UI or REST API to schedule Spark jobs and workflows.
Is it possible to clone a Databricks workspace?
No, you cannot directly clone a workspace. But you can export and import assets.
Can I customize access controls at the Databricks workspace level?
Yes, you can granularly control access to a workspace by adding users and assigning roles like Admin, user, etc.
Can I access the Databricks workspace offline?
No, the Databricks workspace is a web-based interface that requires internet connectivity.