


Snowflake has two table types: internal and external. Internal tables store data within Snowflake. External tables reference data outside Snowflake, like Amazon S3, Azure Blob Storage, or Google Cloud Storage. External tables provide a unique way to access data from files in a Snowflake external stage without actually moving the data into Snowflake.
In this article, we will learn exactly what Snowflake external tables are, how to create them, and how to query data from them in Snowflake. So, before we delve into the practical layer and dive into its in-depth explanation, we should first grasp and understand what external tables really are.
What is a Snowflake External Table?
Snowflake external table is a type of table in Snowflake that is not stored in the Snowflake storage area; but instead is located in an external storage provider such as Amazon AWS S3, Google Cloud Storage—GCP, or Azure Blob Storage. Snowflake external tables allow users to query files stored in the Snowflake external stage like a regular table without moving that data from files to Snowflake tables. Snowflake external tables store the metadata about the data files, but not the data itself. External tables are read-only, so no DML (data manipulation language) operations can be performed on them, but they can be used for query and join operations.
Want to take Chaos Genius for a spin?
It takes less than 5 minutes.

What are the key features of Snowflake external tables?
- Snowflake external tables are not stored in the Snowflake storage area but in external storage providers (AWS, GCP, or Azure).
- Snowflake external tables allow querying files stored in Snowflake external stages like regular tables without moving the data from files to Snowflake tables.
- Snowflake external tables access the files stored in the Snowflake external stage area, such as AWS S3, GCP Bucket, or Azure Blob Storage.
- Snowflake external tables store metadata about the data files.
- Snowflake external tables are read-only so that no DML operations can be performed.
- Snowflake external tables support query and join operations and can be used to create views, security, and materialized views.
Advantages of Snowflake external tables
- Snowflake external tables allow analyzing data without storing it in Snowflake.
- Querying data from Snowflake external tables is possible without moving data from files to Snowflake, saving time and storage space.
- Snowflake external tables provide a way to query multiple files by joining them into a single table.
- Snowflake external tables support query and join operations and can be used to create views, security, and materialized views.
Disadvantages of Snowflake external tables
- Querying data from Snowflake external tables is slower than querying data from internal tables.
- Snowflake external tables are read-only, so DML operations cannot be performed on them.
- Snowflake external tables require a Snowflake external stage to be set up, which can add complexity to the system.
What are the requirements for setting up Snowflake External Tables?
- Access to a Snowflake account and appropriate permissions to create a Snowflake external stage and a Snowflake external table.
- Access to external storage where your data is stored.
- Knowledge of your data format, such as CSV and JSON (or Parquet).
- Creation of a Snowflake external stage that points to the location of your data in the external storage system.
- Basic knowledge of SQL to create and query external tables in Snowflake.
- Definition of the schema of the external table, including the column names, data types, and other table properties.
Difference between Snowflake External Tables and Internal Tables
Here is a table that summarizes the key differences between Snowflake internal tables and Snowflake external tables:
| Feature | Snowflake External Tables | Snowflake Internal Tables |
| Data storage location | Outside of Snowflake | Inside Snowflake |
| Data access method | Accessed via Snowflake external stage | Accessed using standard SQL statements |
| Data storage location | External storage system (e.g., S3, Azure Blob Storage, GCS) | Snowflake's internal storage system |
| Read/Write Operations | Read-only by default, but new data can be loaded using Snowpipe | Support both read and write operations |
| CREATE Statement | CREATE EXTERNAL TABLE | CREATE TABLE |
| Data Loading | Data is accessed directly from the external storage system | Data is accessed from Snowflake's internal storage |
| Data Ownership | Owned and managed by the external storage system | Owned and managed by Snowflake |
| Use cases | Storing data that is frequently accessed or updated | Storing data that is accessed less frequently or not updated |
Steps for Setting up Snowflake External Tables
Step 1—Create a stage
Snowflake Stages are locations where data files are stored to help load data into and unload data out of database tables. Snowflake supports two types of stages for storing data files used for loading and unloading:
1) Internal Stages
Snowflake Internal Stages store data files internally within Snowflake and can be either permanent or temporary.
Snowflake supports the following types of internal stages:
- User stages: User stages are Snowflake stages allocated to each user by default for storing files and cannot be altered or dropped. These are unique to the user, meaning no other user can access the stage. User stages are referenced using @~; e.g., if you use LIST @~ you can list down all the files in a user stage.
- Table stages: Table stages are allocated to each table by default for storing files, and they can only load data into the table it is allocated to. These stages also cannot be altered and dropped. It is referenced using @% . These stages has the same name as the table.
- Named stages: Named Stages are database objects that provide the greatest degree of flexibility for data loading. They overcome the limitations of both User and Table stages, accessible by all the users with appropriate privileges, and data from Named stages can be loaded into multiple tables. You can easily create a named stage using either the web interface or SQL. It is referenced using @.
Check out this official Snowflake guide to learn how to build named stages step-by-step.
2) Snowflake External Stages
Snowflake external stages allow users to specify where data files are stored so that the data in those files can be loaded into a table. Snowflake external stages are recommended when you plan to load data regularly from the same location.
Creating a Snowflake external stage can be done in two ways:
- Using the web interface/SQL
- Configuring a Cloud Storage Integration.
1) Creating Snowflake External Stages using Snowflake Web UI/SQL command
To create a Snowflake external stage using the web interface, follow these steps:
Step 1: Login to Snowflake
Step 2: Head over to Databases
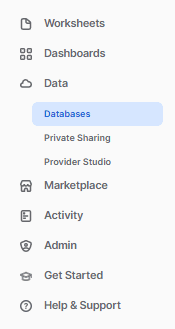
Step 3: Select the Database and Schema in which you want to create an external stage.
Step 5: Go to the Stages tab and click Create; a dropdown will appear.
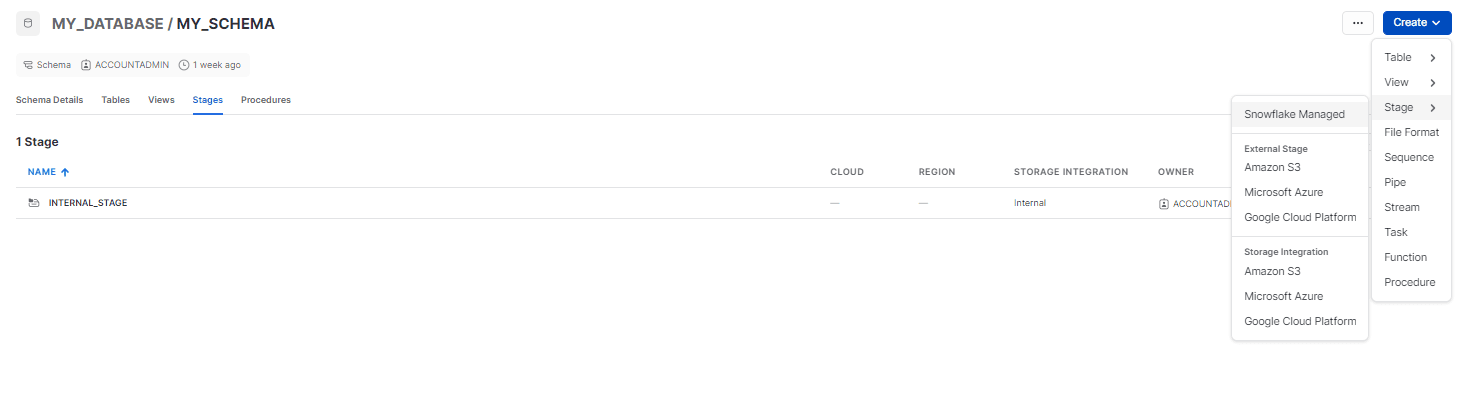
Step 5: Select the external cloud storage provider.
Step 6: Provide the details of the stage name, select the stage in which you want to connect, provide the URL of the location, and provide the secret access keys to connect.
create stage AWS_STAGE
    url = '<aws_url>'
    credentials = (aws_secret_key = '<key>' aws_key_id = '<id>');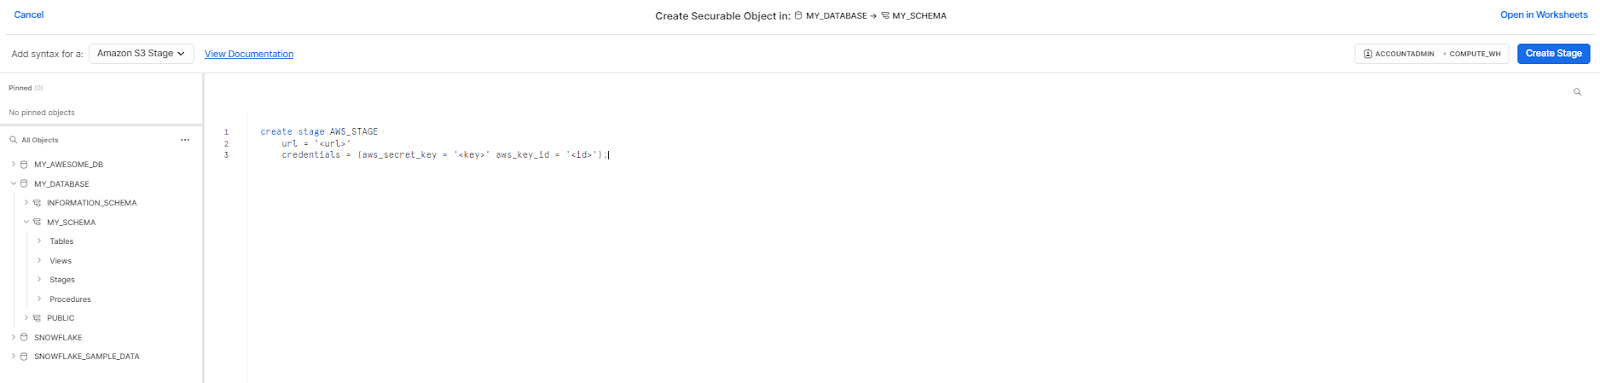
Step 8: Click Create Stage to create an external stage.

2) Creating Snowflake External Stages using Cloud Storage Integration
To create a Snowflake external stage using the cloud storage integration, follow these steps:
Step 1: Login to Snowflake
Step 2: Create a new worksheet and copy and modify the SQL command below. (The command below is only for the AWS S3 bucket; check out the link below for Microsoft Azure and Google Cloud Storage).
CREATE STORAGE INTEGRATION s3_integration
  TYPE = EXTERNAL_STAGE
  STORAGE_PROVIDER = 'S3'
  STORAGE_AWS_ROLE_ARN = 'arn:aws:iam:::role/myrole'
  ENABLED = TRUE
  STORAGE_ALLOWED_LOCATIONS = ('s3://mybucket1/path1/', 's3://mybucket2/path2/');
Snowflake recommends creating an IAM policy for Snowflake to access the S3 bucket. To do this, create an IAM policy and role in AWS, and attach the policy to the role. Then, use the ARN of the IAM role as the value for STORAGE_AWS_ROLE_ARN in the code above. This will generate security credentials for the role, allowing Snowflake to access files in the bucket.
Check out how to:
For Google Cloud Storage and Azure
Step 3: To fetch the Snowflake Service Account, Client Name, or IAM User for your Snowflake Account, type the command below.
DESCRIBE INTEGRATION s3_integration;Step 4: Authorize Snowflake permissions to access the storage locations.
- Authorize IAM User Permission to Access AWS S3 Bucket Objects
- Authorize User Permission to Access Azure Storage location
- Authorize User Permission to Access Google Cloud Object
Step 5: Create the Snowflake external stage
CREATE STAGE my_s3_stage
  STORAGE_INTEGRATION = s3_int
  URL = 's3://mybucket/encrypted_files/'
  FILE_FORMAT = my_csv_format;
For Google Cloud Storage and Azure
Step 2—Upload data to the stage
Once you have a Snowflake external Stage set up, you can upload your data files into the Snowflake external stage's location in your cloud storage bucket. You can use any of the following methods to upload files:
- By using the cloud storage console to upload files manually
- By using a command-line tool, such as AWS CLI, GCP CLI, or Azure CLI to upload files
- By using a third-party tool or ETL platform to automate the file upload process
Once the data files are uploaded to the Snowflake external stage's location, load the data into a Snowflake table using the COPY INTO command in SQL. You can specify the external stage as the source of data using the "FROM" clause of the COPY INTO command.
COPY INTO my_snowflake_table
FROM '@my_external_stage/file_name.csv'
FILE_FORMAT = (TYPE = CSV);
Step 3—Verify data in the Snowflake External Stage:
After you upload your data to the Snowflake external stage, you can verify that it's there by running a SELECT statement. For example, if the external stage is named "my_stage" and contains CSV files, you can run the following query:
SELECT * FROM my_stage;Step 4—Create the External Table
It is now time to create an external table, but first let's open a new SQL worksheet and run the following command to list all the files present in the external location pointed to by Snowflake external stage:
LIST @<your_stage_name>;This above command will verify if your CSV files are present and if they have been uploaded correctly.
Next, create an external table named my_ext_table without specifying column names by running the following command:
CREATE OR REPLACE EXTERNAL TABLE my_ext_table
  WITH LOCATION = @my_stage_name/
  FILE_FORMAT = (TYPE = CSV SKIP_HEADER = 1)
PATTERN='<regex_pattern>';Note: Replace my_ext_table with your desired table name, my_aws_stage with the name of your Snowflake external stage created in step 1, and update the PATTERN parameter to apply the regex pattern string, but for the best performance, try to avoid applying patterns that filter a large number of files.
Step 5—Query the External Table
First, open a new worksheet in the Snowflake worksheet UI and run the following query to retrieve data from the external table. Replace my_ext_table with the name of your external table and @my_aws_stage/ with the location of your Snowflake external stage.
SELECT $1 FROM my_ext_table;The query above will display a single VARIANT column named VALUE that represents a single row in the external file. By default, columns in a CSV file are represented as c1, c2, etc., and so on.
If you want to query the external table without specifying column names, you can do so by typing the following command:
SELECT * FROM my_ext_table;Now, to query individual columns, run the following query. Replace my_ext_table with the name of your external table, and $1:c1, $1:c2, and $1:c3 with the value and column names that you want to query.
SELECT value:c1 AS first_name, value:c2 AS last_name, value:c3 AS age, value:c4 AS gender FROM my_ext_table;This will return the first name, last name, age, and gender columns from the external table.
Save up to 30% on your Snowflake spend in a few minutes!


Conclusion
Snowflake external tables act as a bridge between Snowflake and external data storage, allowing seamless access and efficient data management without physically moving the data. Now that you get it, you can totally use Snowflake external tables to optimize your data processing and analysis tasks. In this article, we explored:
- The distinction between Snowflake's internal and external tables
- A detailed explanation of what external tables are and their unique functionality
- Step-by-step instructions on how to create and query Snowflake external tables.
Snowflake External tables are like a waiter at a restaurant who can describe the dish in detail without bringing it to your table, allowing you to access the information without physically moving.
FAQs
Where are Snowflake external tables stored in?
Snowflake external tables reference data files located in a cloud storage (Amazon S3, Google Cloud Storage, or Microsoft Azure) data lake.
Why use Snowflake external tables?
Snowflake external tables provide an easy way to query data from various external data sources without first loading the data into Snowflake.
What is the difference between Snowpipe and Snowflake external tables?
Snowpipe is used for continuous data load into Snowflake tables, while Snowflake external tables provide immediate access to data without loading it into Snowflake tables.
What is the purpose of Snowflake external tables?
Snowflake external tables allow users to query and access data stored in external locations without moving the data into Snowflake. They provide a way to analyze data without storing it in Snowflake's internal storage, saving time and storage space.
Can Snowflake external tables be cloned?
Individual external named stages can be cloned, but internal named stages cannot be cloned.
What is the difference between Snowflake external tables and internal tables?
The key differences between Snowflake external tables and internal tables are:
- External tables are stored outside of Snowflake, while internal tables are stored inside Snowflake.
- External tables are accessed via Snowflake external stage, while internal tables are accessed using standard SQL statements.
- External tables are read-only by default, but new data can be loaded using Snowpipe. Internal tables support both read and write operations.
- External tables are owned and managed by the external storage system, while internal tables are owned and managed by Snowflake.
What is the difference between iceberg table and Snowflake external table in Snowflake?
Iceberg tables support full DML, fast performance and other Snowflake features while keeping data in external storage. Snowflake External tables provide easy, read-only access for querying and sharing external data.
What is the use of Snowflake external tables?
Snowflake External tables allow querying data stored outside the Snowflake as if it were in a table. They provide access to external data without loading it.
What is the difference between Snowflake Snowpipe and Snowflake external tables?
Snowpipe loads data continuously into Snowflake tables for faster analytics querying. Snowflake External tables provide immediate read access to external data without loading it into Snowflake.


