


Snowflake, renowned for its seamless integration and powerful data handling capabilities, provides a reliable solution for managing large datasets. Importing CSV to Snowflake is a common task for data professionals, analysts, and engineers seeking to leverage its advanced analytics features.
In this article, we will guide you through the process to upload CSV to Snowflake using various methods. Whether you prefer utilizing the Snowflake Web Interface or performing the task without relying on Snowsight by utilizing SnowSQL and querying it directly, we have you covered.
Let's explore the step-by-step process to efficiently import / upload CSV to Snowflake.
Upload CSV to Snowflake—using Snowflake Web Interface
One way to upload CSV to Snowflake is by using the Snowflake Web Interface (Snowsight). Snowsight provides a user-friendly environment that simplifies the entire process of uploading CSV.
Here are the steps to follow:
Loading CSV to Snowflake Using Snowsight
Snowsight, Snowflake's integrated development environment (IDE), offers a convenient way to upload CSV directly from your PC into the Snowflake table. The steps are as follows:
Step 1: Log in to Snowsight.
Step 2: Navigate to the desired database. In the navigation menu, select "Data" and then click on "Databases", which will display a list of available databases.
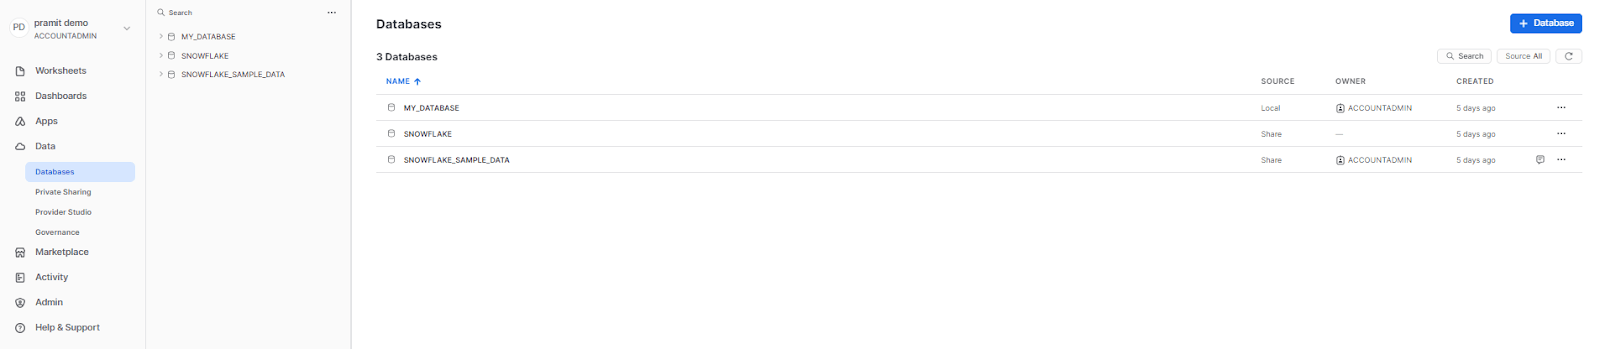
Step 3: Select the desired database and schema from the list to set the context for your data loading process.
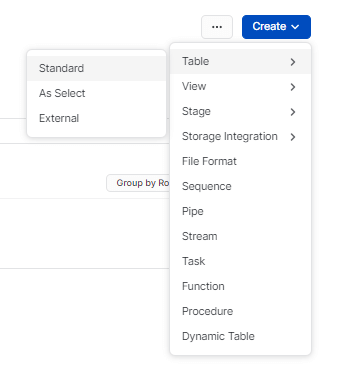
Step 4: Choose the target table or create a new Standard table using the interface.
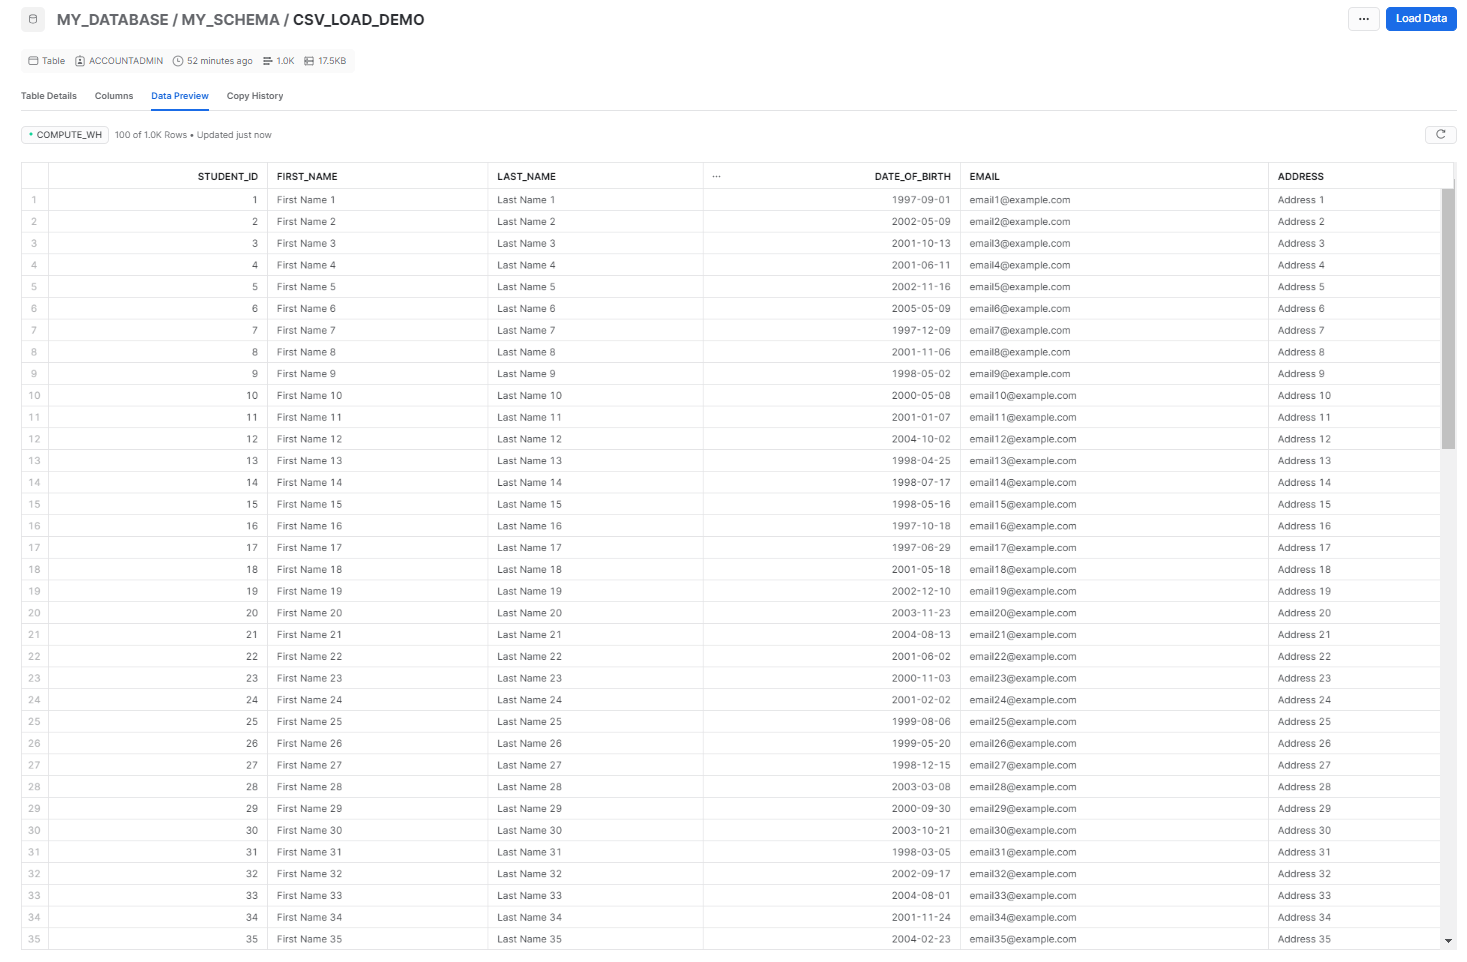
Step 5: You can now write your own query to create a table. For the purpose of this demo, I will provide an example of creating a table for student records. If you would like to follow along, you can simply copy the following query.
create or replace TABLE MY_DATABASE.MY_SCHEMA.CSV_LOAD_DEMO (
  student_id INTEGER,
  first_name VARCHAR(50),
  last_name VARCHAR(50),
  date_of_birth DATE,
  email VARCHAR(100),
  address VARCHAR(200)
);Step 6: Now, select the table where you want to load the data into.

Step 5: Click on "Load Data" to initiate the data loading operation for the selected table.
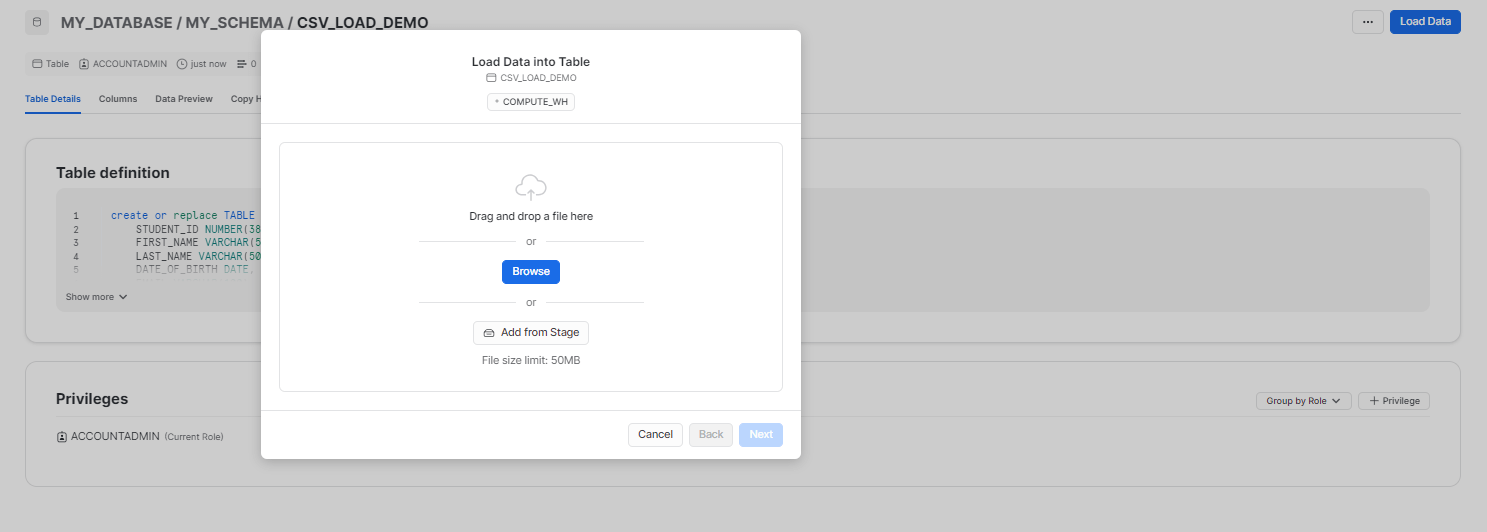
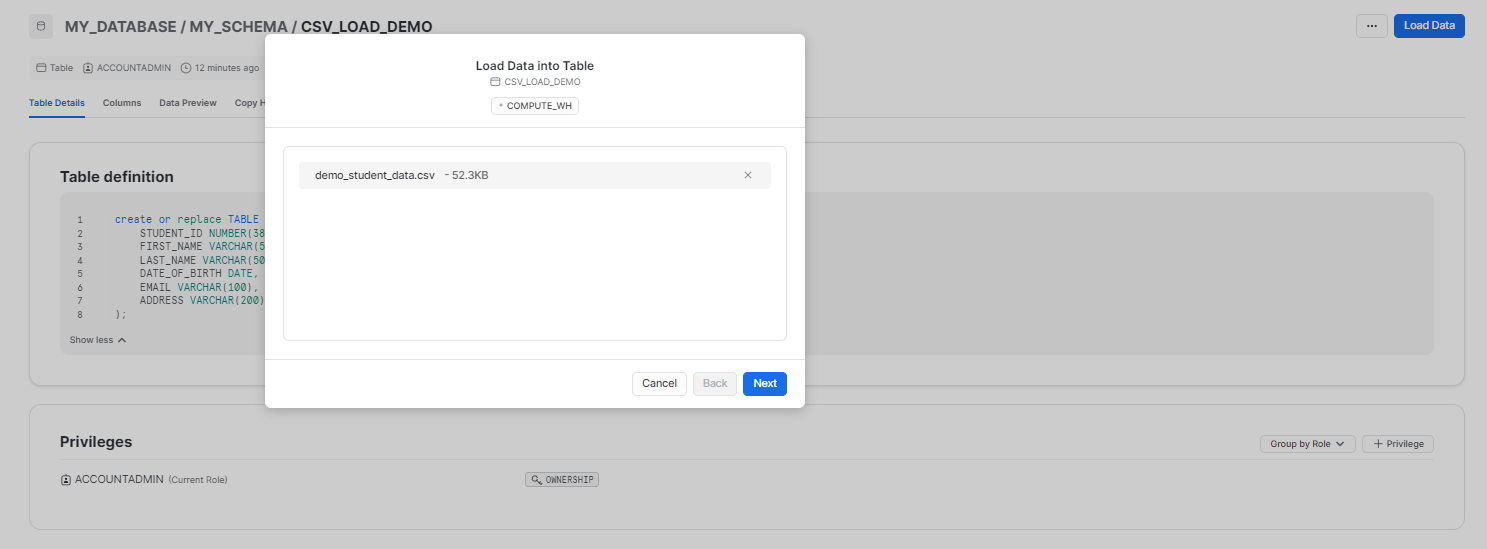
Step 6: In the "Load Data into Table" dialog, choose the "Upload a file" option to indicate that you want to upload structured or semi-structured data files.
Step 7: Upload your data files by either dragging and dropping them into the designated area or by using the file selection dialog.
Step 8: Specify the warehouse (if necessary).
If you haven't set a default warehouse for your user, select a warehouse from the available options to process the data loading operation.
Step 9: Click on the "Next" button to proceed to the next step of the data loading process.
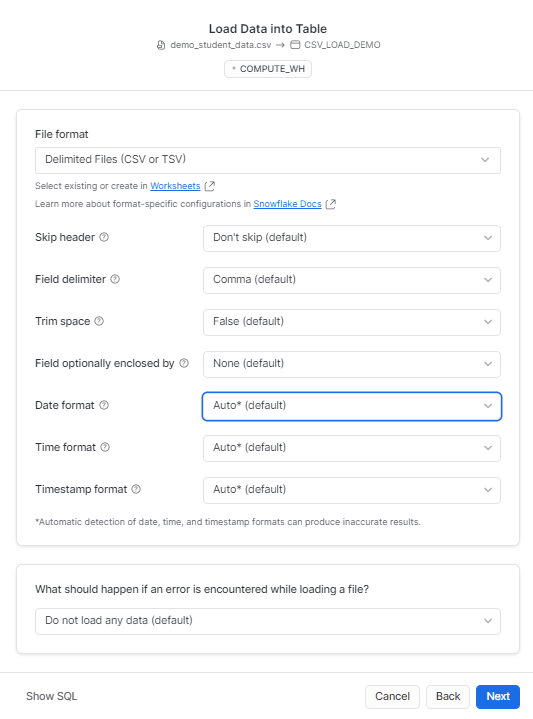
Step 10: Select the appropriate file format for your data. You can either choose a predefined file format from the current database or customize a file type and adjust the relevant settings based on your data.
OR
You can simply type the following SQL query directly into your worksheet
COPY INTO "MY_DATABASE"."MY_SCHEMA"."CSV_LOAD_DEMO"
FROM '@"MY_DATABASE"."MY_SCHEMA"."%CSV_LOAD_DEMO"/__snowflake_temp_import_files__/demo_student_data.csv'
FILE_FORMAT = (
    TYPE=CSV,
    SKIP_HEADER=0,
    FIELD_DELIMITER=',',
    TRIM_SPACE=FALSE,
    FIELD_OPTIONALLY_ENCLOSED_BY=NONE,
    DATE_FORMAT=AUTO,
    TIME_FORMAT=AUTO,
    TIMESTAMP_FORMAT=AUTO
)
ON_ERROR=ABORT_STATEMENT
PURGE=TRUE
Step 11 (optional): Configure error handling.
Specify the desired action if an error occurs during the data loading process. By default, no data is loaded from the file in case of an error.
Step 12: Click on "Next" to move to the next stage of the data loading process.
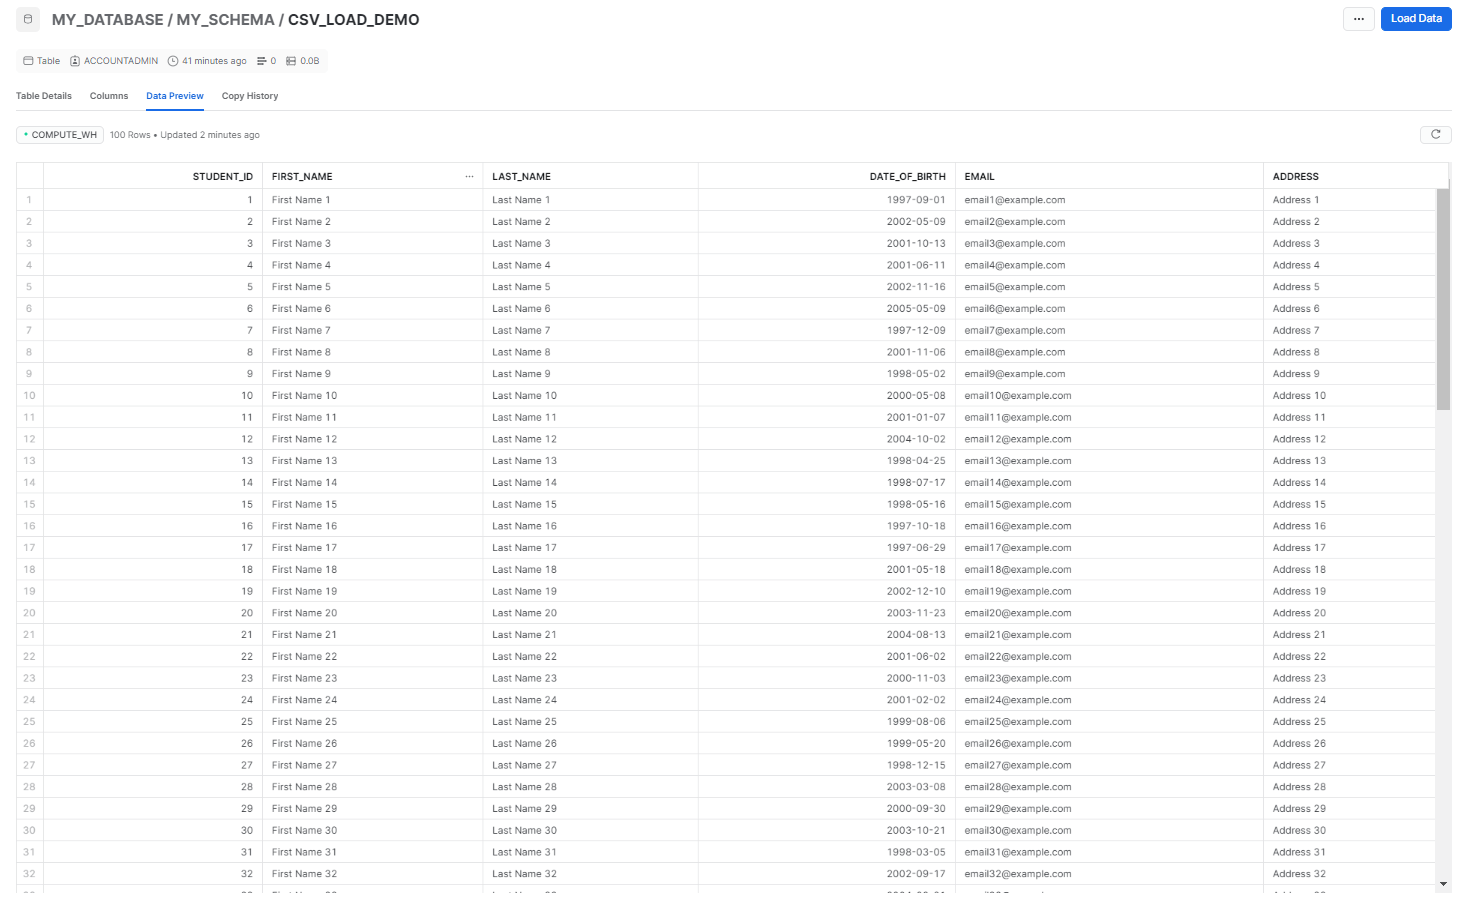
Step 13: Snowsight will start loading your file and display the number of rows successfully inserted into the target table. You can monitor the progress during this stage.
Step 14: Choose further actions.
After the data loading is complete, you have two options:
- To open a worksheet with SQL syntax for querying your table, select "Query Data."
- To close the dialog and finish the data loading process, select "Done".

Step 15: If your file encounters any issues during the loading process, such as mismatched columns, an error message will be displayed. To make necessary adjustments, select "Back" and modify your settings accordingly.
Want to take Chaos Genius for a spin?
It takes less than 5 minutes.

Load CSV from a Snowflake Managed (Internal) stage into a table
Loading CSV data from a Snowflake Managed/Internal stage into a table using the Snowflake web interface (Snowsight) has several advantages. These include a user-friendly graphical interface for data loading, a simplified process for transforming and loading data, and the ability to track the progress of the load.
Here are the steps to follow to upload CSV to Snowflake using stage:
Step 1: Log in to Snowsight.
Step 2: Head over to the navigation menu, select "Data" and then click on "Databases", which will display a list of available databases.

Step 3: Select the desired database and schema from the list to set the context for your data loading process.
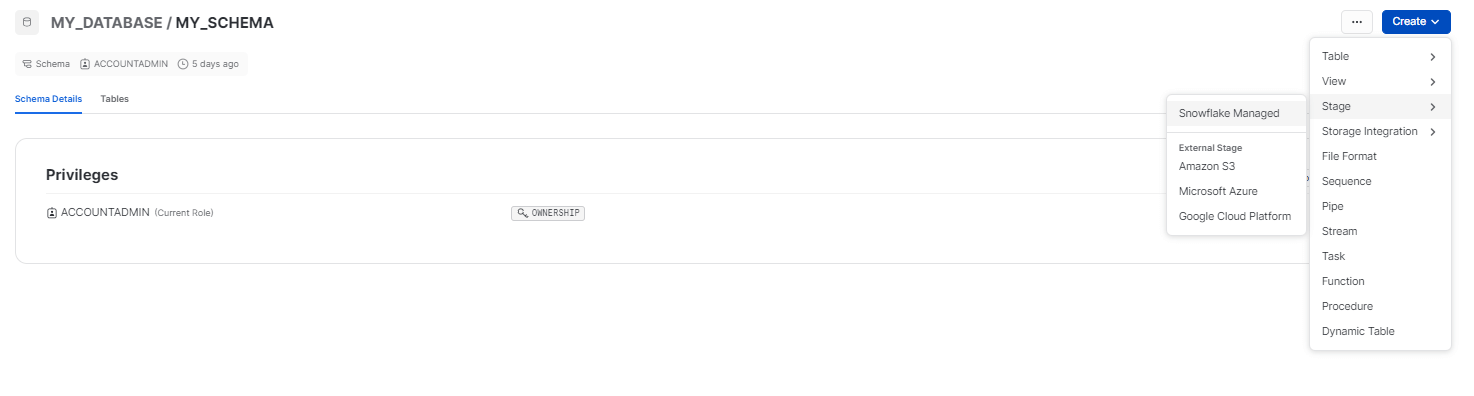
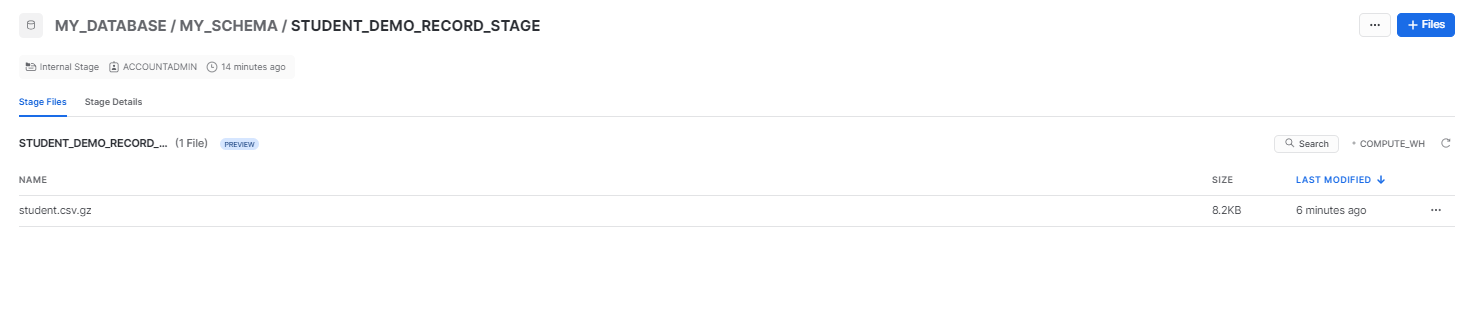
Step 4: Choose the ‘stage’ option and click on “Snowflake Managed” stage.
Step 5: Enter a Stage Name. In the "Stage Name" field, provide a descriptive name for your stage. Choose a name that reflects the purpose or nature of the stage.
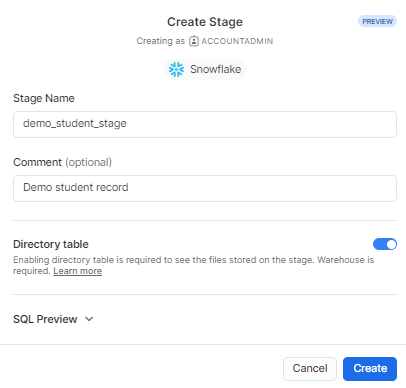
Step 6: Once you have filled in the necessary details for your stage, click the "Create" button to create the Snowflake Managed stage.
Step 7: Choose the CSV file to load into Snowflake stage.
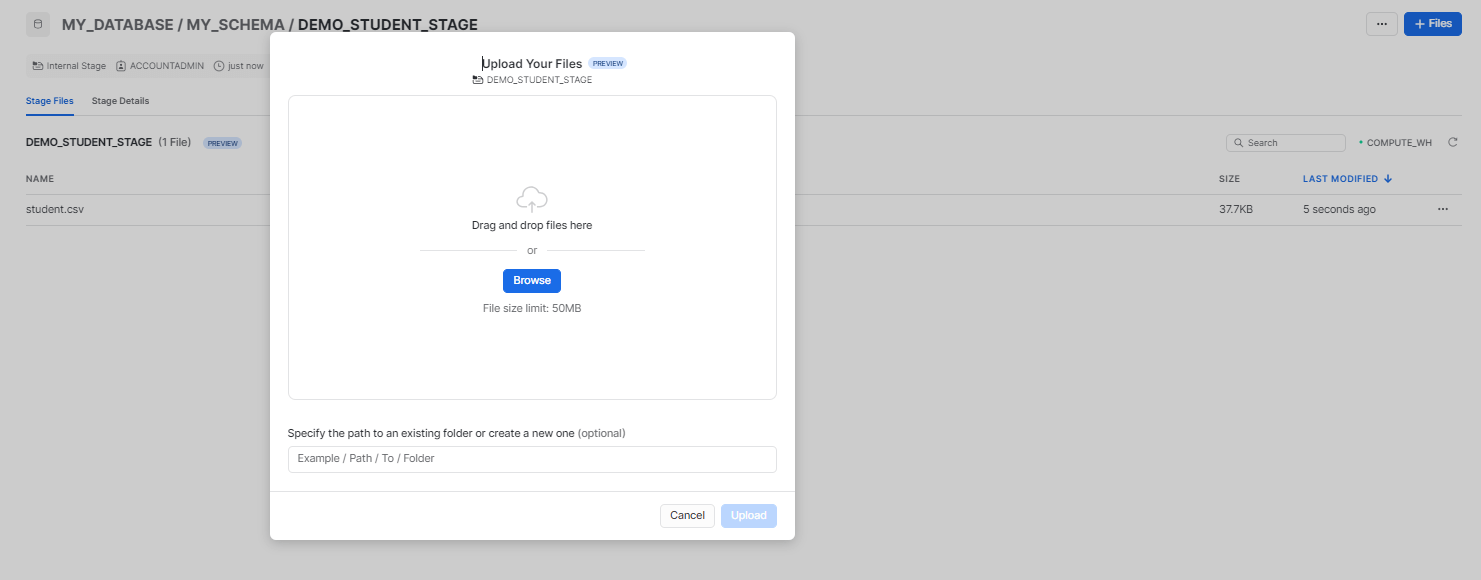
Step 8: Select the dropdown menu associated with the selected file, find and select the "Load into table" option to begin the data loading operation.

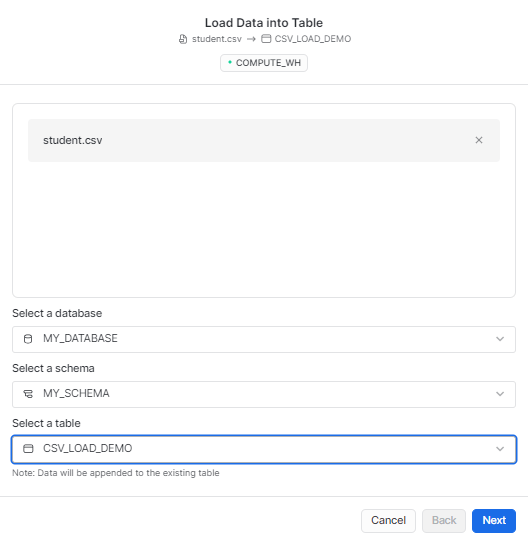
Step 9: A dialog box will appear. In the "Load Data into Table" dialog, choose the desired database, schema, and table where you want to load the selected file.
Alternatively,
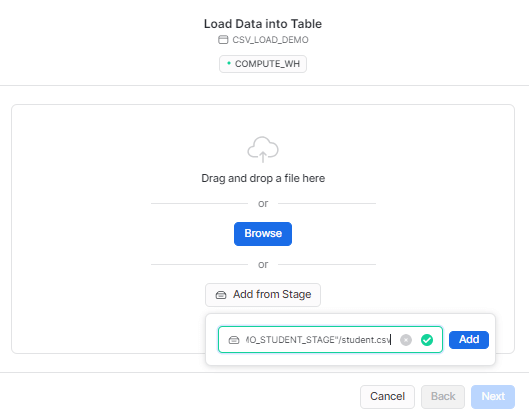
Step 10: Select the dropdown menu associated with the selected file, find and select the "Copy Path" option.

Step 11: After completing the previous steps, return to the actual table where you want to load the data. Click on "Load Data". A dialog box will appear. Instead of selecting "Browse", choose the option "Add from stage". Paste the link of the path you copied earlier into the designated field.
Step 10: Select the appropriate file format for your data. You can either choose a predefined file format from the current database or customize a file type and adjust the relevant settings based on your data.

Step 14: After the data loading is complete, you have two options:
- To open a worksheet with SQL syntax for querying your table, select "Query Data"
- To close the dialog and finish the data loading process, select "Done".
Step-by-Step Guide: How to Load CSV to Snowflake—without Snowsight
System Requirements + Setup
Step 1: Install SnowSQL. Head over to the Snowflake website and download SnowSQL and then follow the installation instructions specific to your operating system.
Step 2: Configure SnowSQL.
Step 3: Now, select the target database and schema.
USE MY_DATABASE.MY_SCHEMA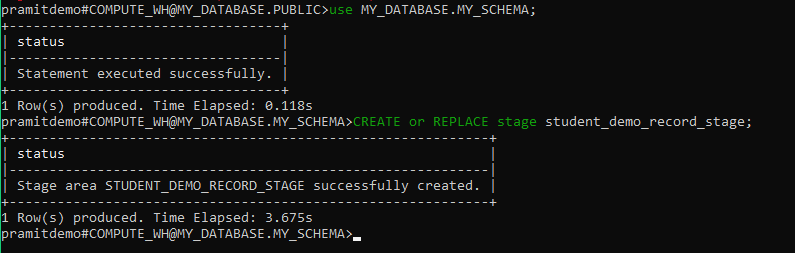
Step 4: Create a FILE FORMAT. Run the following command in SnowSQL to create a file format:
CREATE or REPLACE FILE FORMAT student_csv_format
TYPE = CSV
FIELD_DELIMITER = ','
Creating the Target Table
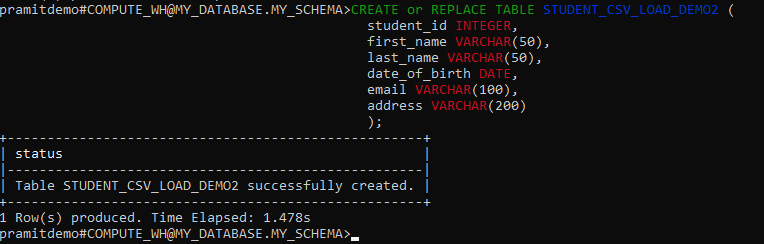
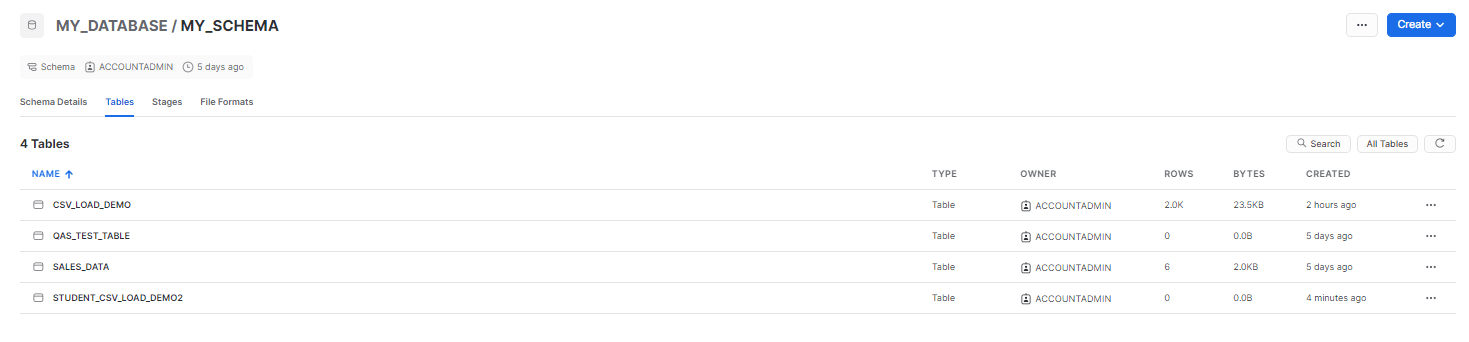
Step 5: Using the CREATE TABLE create a table in Snowflake that matches the structure of your CSV file.
Run the following command in SnowSQL to create the table:
CREATE OR REPLACE TABLE STUDENT_CSV_LOAD_DEMO2 (
    student_id INTEGER,
    first_name VARCHAR(50),
    last_name VARCHAR(50),
    date_of_birth DATE,
    email VARCHAR(100),
    address VARCHAR(200)
);
Loading CSV Data
Step 6: Uploading CSV to Snowflake stage.
- Use the PUT command to upload your CSV file to the stage.
- Run the following command in SnowSQL:
put file://C:\Users\default.LAPTOP-A2VTF9HN\Desktop\CG\csvtest\student.csv @student_demo_record_stage;
Checking the Stage Data
Step 7: Now, verifying if the Snowflake stage is populated with the CSV data to do so Run the following command to check if the Snowflake stage is populated with the data from the file:
SELECT
    col.$1,
    col.$2,
    col.$3,
    col.$4,
    col.$5,
    col.$6
FROM @student_demo_record_stage (file_format => student_csv_format) col;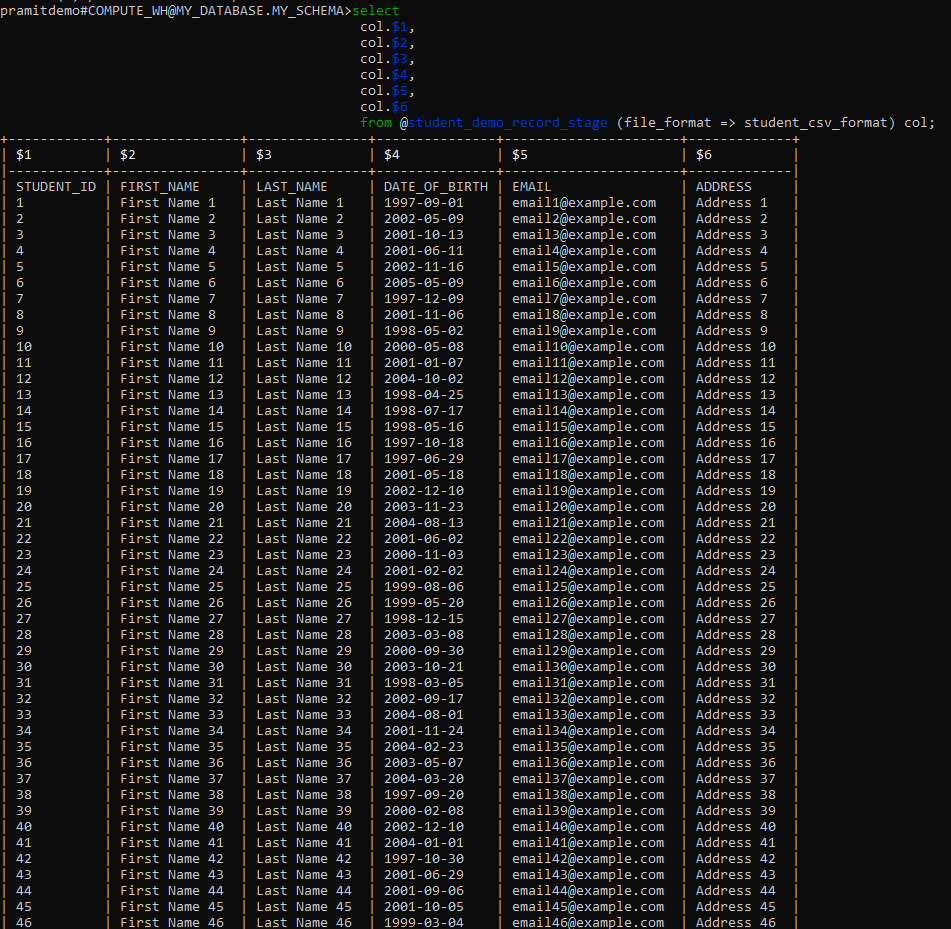
Loading data from the stage into a Snowflake table
Step 8: To load the data from the stage into a Snowflake table you can use the COPY INTO command. Choose the appropriate command based on your requirements:
- To load data as it is organized in the CSV file:
COPY INTO STUDENT_CSV_LOAD_DEMO2 FROM @student_demo_record_stage;- To import only specific columns from the stage:
COPY INTO STUDENT_CSV_LOAD_DEMO2
FROM (
    SELECT
        col."$1",
        col."$2",
        col."$3",
        col."$4",
        col."$5",
        col."$6"
    FROM @student_demo_record_stage (file_format => student_csv_format) col
)
ON_ERROR = 'CONTINUE';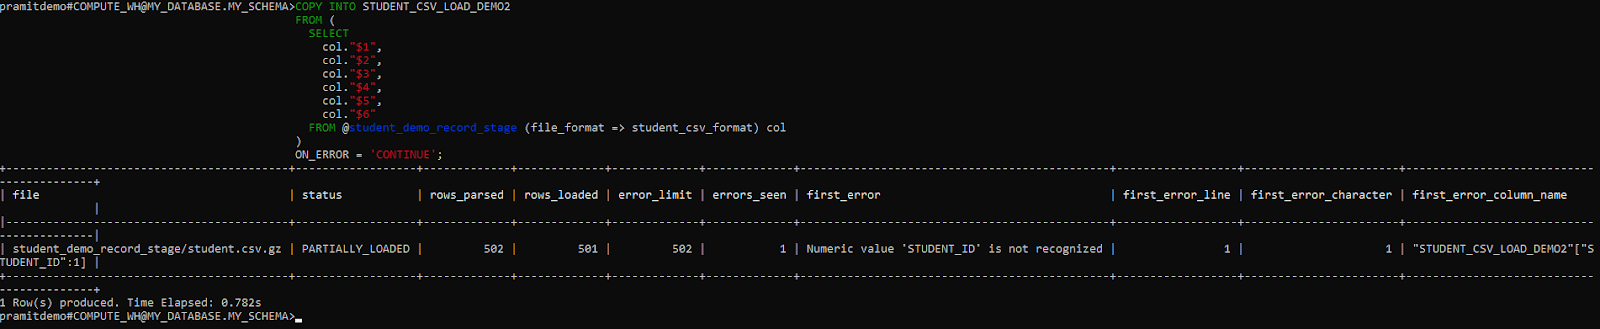
Validating the data
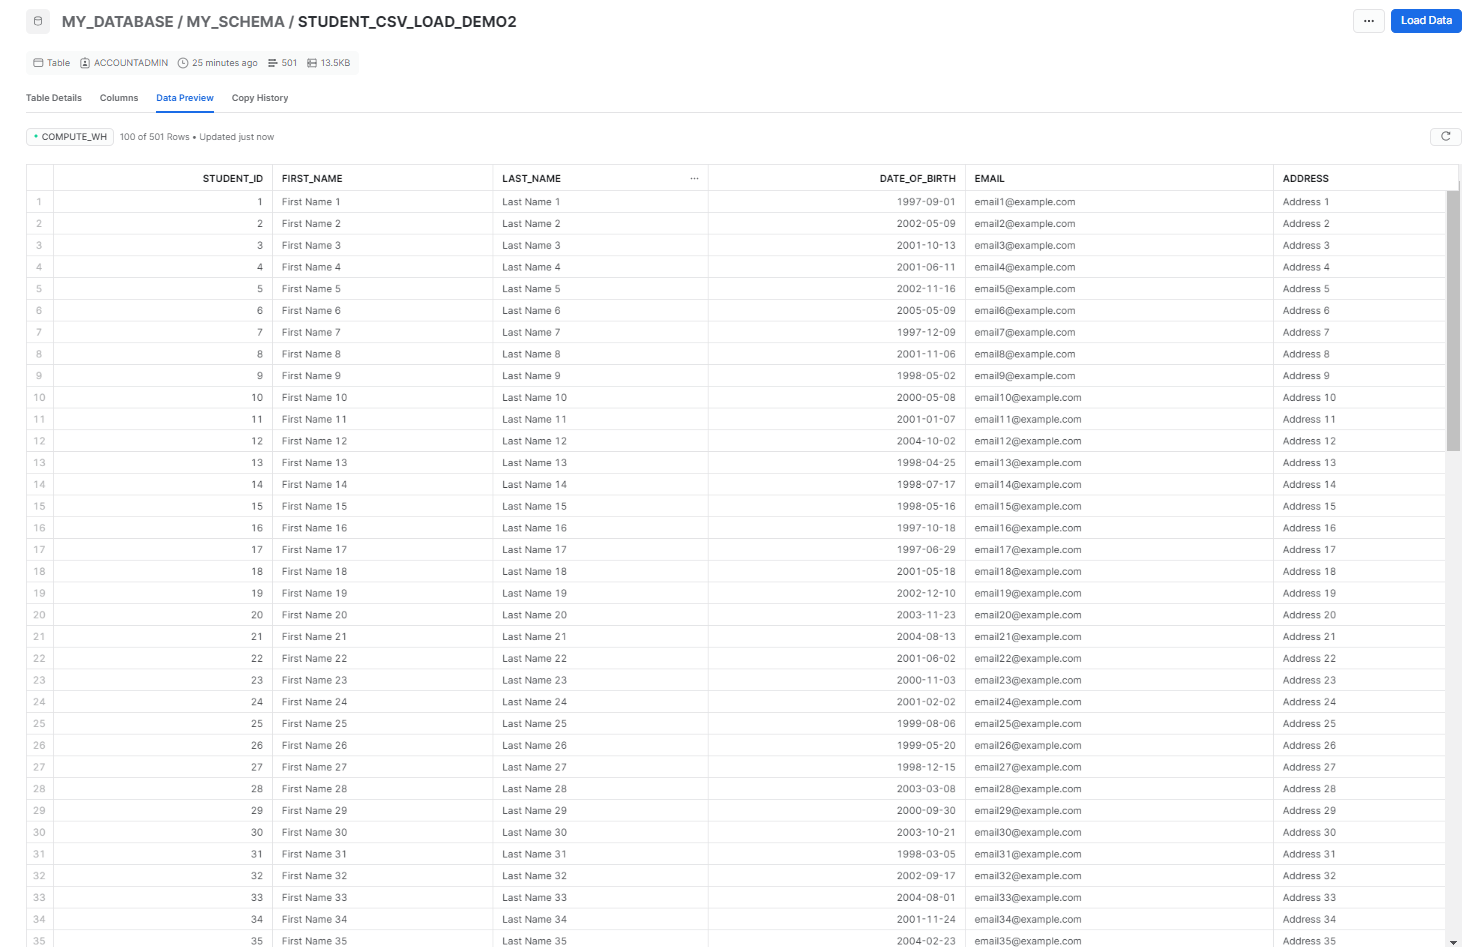
Step 9: Run a SELECT query to check if the Snowflake database table is populated with the data:
SELECT * from STUDENT_CSV_LOAD_DEMO2;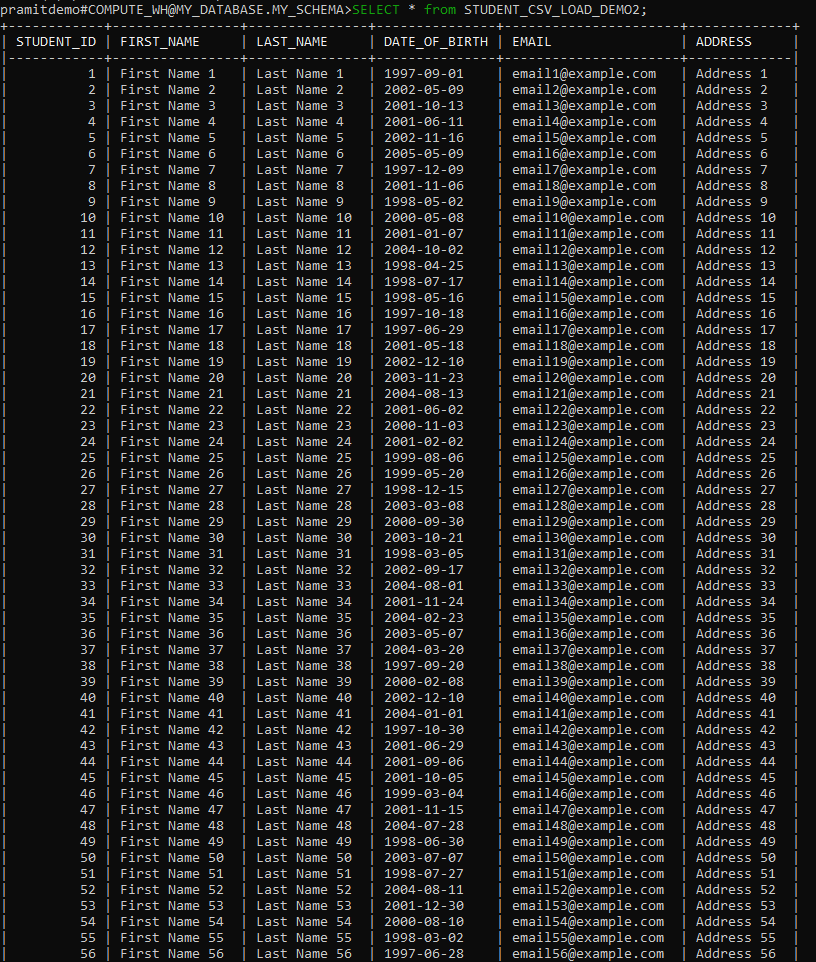
Save up to 30% on your Snowflake spend in a few minutes!


Conclusion
And that's it—your CSV file is now securely stored and ready to be analyzed in Snowflake! So by following these steps carefully, you can easily unlock the potential of your data and open up a whole new world of insights.
This powerful platform makes it easy to unlock the potential of your data and gain valuable insights. Whether you used the visual Web Interface or wrote a script to programmatically load your data, Snowflake's flexible import options enable you to get your data in quickly and easily.
The real fun begins now. You can start querying your data, building dashboards and reports, and turbocharging your analytics. Snowflake gives you the performance, scalability, and tools you need to gain valuable business insights fast. So what are you waiting for? Start exploring your data today!
FAQs
Can I load multiple CSV at once into Snowflake?
Yes, Snowflake allows you to load multiple CSV simultaneously using the appropriate commands or by selecting multiple files in the Snowflake Web Interface.
Are there any file size limitations when loading / uploading CSV to Snowflake?
Snowflake supports loading large CSV , ranging from kilobytes to terabytes in size. The actual limits depend on your Snowflake account configuration and the resources available.
Can I automate the process of importing / uploading CSV to Snowflake?
Yes, you can automate the process by utilizing Snowflake's SnowSQL command-line client or by integrating Snowflake with other ETL (Extract, Transform, Load) or data integration tools.
Does Snowflake provide error handling mechanisms during the CSV import process?
Yes, Snowflake provides detailed error messages and logs to help identify and resolve any issues that may occur during the CSV import process. These error messages assist in troubleshooting and ensuring successful data loading.
Can I import / upload CSV to Snowflake with varying column structures?
Yes, Snowflake accommodates flexible column structures when importing CSV files. You can define the appropriate table structure and map the CSV columns to the corresponding table columns during the loading process.
What are the benefits to upload CSV to Snowflake?
Uploading CSV to Snowflake allows for easy data integration and analysis. Snowflake's cloud-based data warehousing platform can handle large amounts of data and allows for real-time querying and analysis. Additionally, uploading CSV files to Snowflake can save time and resources compared to traditional data warehousing methods.
How can I troubleshoot errors when uploading CSV to Snowflake?Some common errors when uploading CSV to Snowflake include formatting issues, incorrect file encoding, and missing or incorrect headers. To troubleshoot these errors, you can check the file format and encoding, review the headers and data in the file, and use Snowflake's error messages and logs to identify specific issues.
Does Snowflake support CSV?
Yes, Snowflake supports CSV file format for data loading. You can easily upload CSV files to Snowflake using the COPY command or Snowflake's web interface. Snowflake also supports other file formats such as JSON, Avro, Parquet, and more.
Can we load an Excel file in Snowflake?
Yes, you can load Excel files in Snowflake, but you need to first save the Excel file as a CSV file. Snowflake supports loading data from CSV files, which can be easily created from Excel files. Once you have saved the Excel file as a CSV file, you can upload it to Snowflake.


