


SQL remains an essential tool for data professionals due to its unrivaled ability to handle large datasets with precision and efficiency. However, its mastery lies not just in SQL's capabilities, but in the skill of the user. Advanced SQL techniques can greatly enhance data handling and exploration, giving you a competitive edge.
In this article, we will explore 5 such advanced SQL techniques tailored for Snowflake users. We will explore advanced and unique SQL techniques that may be unfamiliar to you. These techniques will not only help you work smarter but also allow you to fully leverage Snowflake's true hidden potential.
5 Advanced and Unique SQL Techniques for Snowflake Users
1). Auto-generating Ordered Sequences in Snowflake
Sequences are a common way to generate unique, sequential numbers. They can be used to allocate primary keys, auto-increment values, or other types of unique identifiers.
Sequences in Snowflake are also used to generate unique numbers with auto-increment functionality based on a defined interval. They guarantee uniqueness across multiple statements and sessions, ensuring that each execution of the sequence produces a distinct value.
Note: Like any other distributed databases, Snowflake sequences are not guaranteed to be gap-free.
To create a sequence in Snowflake, you use the CREATE SEQUENCE statement. The following is an example of how to create a Snowflake sequence:
Step 1—Creating a Database and Basic Sequence
To begin, we need to create a database to house the objects for this sequence generation. Execute the following commands either in Snowflake WebUI or SnowSQL command-line client:
CREATE DATABASE my_awesome_db;
CREATE SEQUENCE my_sequence;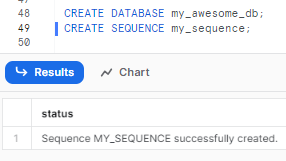
Step 2—Retrieving Sequence Values
Now, let's retrieve a value from the newly created sequence. You can now use the NEXTVAL function with sequence to generate unique numbers.
For example, the following statement will return the next value in the my_sequence sequence:
SELECT my_sequence.NEXTVAL;
Step 3—Incrementing the Sequence
After the sequence has been incremented, running the same SELECT statement again will provide the next value in the sequence.
SELECT my_sequence.NEXTVAL;
This time, the query will return the next value, which should be 2.
To validate that the sequence always returns unique values, even within the same statement, execute the following SQL:
SELECT my_sequence.NEXTVAL, my_sequence.NEXTVAL, my_sequence.NEXTVAL, my_sequence.NEXTVAL, my_sequence.NEXTVAL, my_sequence.NEXTVAL;
Depending on the sequence's current value, each column will display a different value, which demonstrates the uniqueness of the values generated by the sequence.
Step 4—Creating Custom Sequences
Sequences can also be used to populate columns in a table.
Let’s create a custom sequence with custom start and increment values. The following example shows how to create a sequence & table and populate a column with values from a sequence:
CREATE SEQUENCE MY_CUSTOM_SEQUENCE
START WITH 5
INCREMENT BY 5;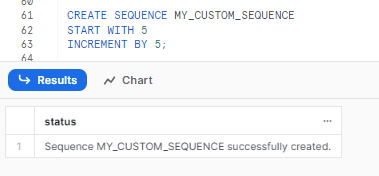
(optional) To test the sequence with the custom start and increment values, execute the following SQL:
SELECT MY_CUSTOM_SEQUENCE.NEXTVAL, MY_CUSTOM_SEQUENCE.NEXTVAL, MY_CUSTOM_SEQUENCE.NEXTVAL, MY_CUSTOM_SEQUENCE.NEXTVAL; The output should confirm that the sequence starts at 5 and increments by 5.
Step 5—Populating Table Columns with Sequences
Sequences can be used to populate incremental values in table columns. Let's create a new table and insert data into one of its columns using a sequence. Execute the following SQL statements:
CREATE TABLE MY_TABLE (
  ID INT,
  NAME STRING
);
Let’s write a command that inserts some rows into the MY_TABLE table. We will populate the ID column using the MY_CUSTOM_SEQUENCE sequence, which ensures that each row receives a unique and incremental identifier. Also, we will fill the NAME column with custom string values. You can either add your own custom strings or use random strings if desired.
INSERT INTO MY_TABLE (ID, NAME)
SELECT MY_CUSTOM_SEQUENCE.NEXTVAL, t.NAME
FROM (VALUES ('Apple'), ('Banana'), ('Cherry'), ('Potato'), ('Mango'), ('Tomato')) AS t(NAME);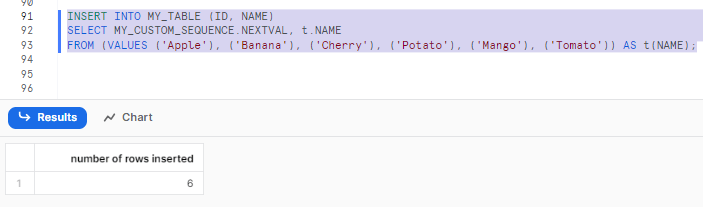
Step 6—Viewing the Populated Table
To view the data inserted into the table, execute the following SQL:
SELECT * FROM MY_TABLE;
As you can see, the output displays the inserted data, with the ID column showing auto-incremented values.
Alternatively
Step 7—Setting Default Values for Table Columns
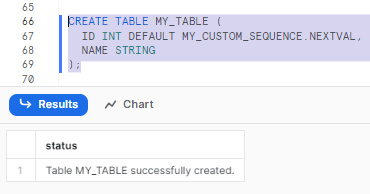
In Snowflake, you can define default values for table columns using sequences during table creation and column definition. Follow these SQL statements to achieve this:
CREATE TABLE MY_TABLE (
  ID INT DEFAULT MY_CUSTOM_SEQUENCE.NEXTVAL,
  NAME STRING
);
Now, let's write a simple command to insert rows into the MY_TABLE table. As the ID column is already populated with the default value from the sequence, manual population is not required. Finally, all we have to do is fill the NAME column with custom string values. You have the flexibility to provide your own custom strings or opt for random strings if preferred.
INSERT INTO MY_TABLE (NAME)
VALUES ('Apple'), ('Banana'), ('Cherry'), ('Poatato'), ('Mango'), ('Tomato') ;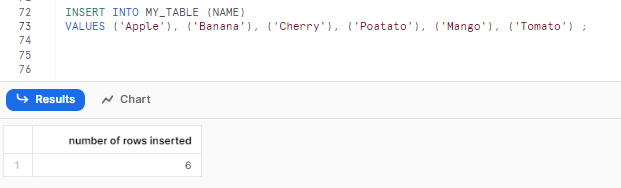
Step 8—Viewing the Populated Table
To view the data inserted into the table, execute the following SQL:
SELECT * FROM MY_TABLE;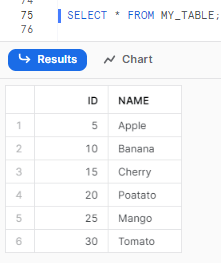
Creating sequences in Snowflake is incredibly easy and efficient. As you can see, you can quickly generate auto-incrementing sequences in Snowflake with minimal effort.
Want to take Chaos Genius for a spin?
It takes less than 5 minutes.

2). Working with Timestamp Data in Snowflake
Snowflake supports two data types for storing timestamp data: DATE and TIMESTAMP. The DATE data type stores only the date portion of a timestamp, while the TIMESTAMP data type stores both the date and time portions.
When working with timestamp data in Snowflake, it is important to understand how time zones are handled. By default, Snowflake uses the time zone of the user's session when interpreting timestamp data. This means that if you insert a timestamp value into a table, the time zone of the session will be used to determine the value of the timestamp.
In this section, we'll go through how to use timestamp snowflake SQL functions to manage files that include timestamp data. We will also discuss how to manage ISO and non-standard formats, as well as how to avoid misunderstandings caused by inconsistent date and time data from a source system or multiple time zones. Also, we'll show you how to use time zones using sessions.
Let's explore practical examples of working with date, time, and timestamp data types, focusing on how Snowflake handles time zones. In real-world scenarios, data is often received in raw text files, which contain date and time data as strings. We will start by converting these string values into date values, as shown in the following steps:
Step 1—Storing Date Values
In Snowflake, date values are stored using the DATE data type. The standard format for dates is "YYYY-MM-DD". To store a date value as a string, we can create a table and use the TO_DATE function to convert the string to a valid formatted date.
Here's an example:
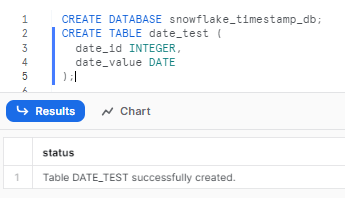
First, let's create a database and a table named date_test with a date_id and date_value column of type DATE.
CREATE DATABASE snowflake_timestamp_db;
CREATE TABLE date_test (
  date_id INTEGER,
  date_value DATE
);
Now, let's insert some value and use the TO_DATE function to convert the string value '2019-12-19' into a valid date format.
INSERT INTO date_test (date_id, date_value)
VALUES (1, TO_DATE('2023-07-11', 'YYYY-MM-DD'));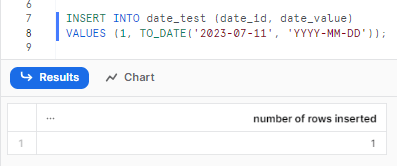
Step 2—Storing Timestamp Values
Snowflake allows storing timestamp values in the DATE data type columns as well. But remember that the time component of the input will be ignored.
Here's an example:
INSERT INTO date_test (date_id, date_value)
VALUES (2, TO_TIMESTAMP('2023.07.11 02:21:10', 'YYYY.MM.DD HH:MI:SS'));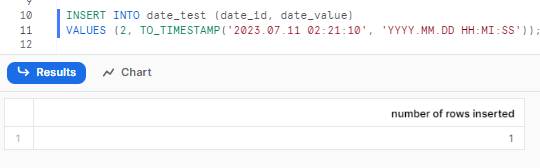
As you can see, a timestamp value is inserted into the date_value column. Although the value includes a time component is ignored.
Step 3—Managing Time Values
Another variation is inserting time values using the TO_DATE function. Snowflake assumes the date component as 1970-01-01 (January 1, 1970), while completely ignoring the time value.
Here's an example:
INSERT INTO date_test (date_id, date_value)
VALUES (3, TO_DATE('02:20:20', 'HH:MI:SS'));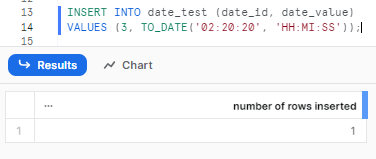
Step 4—Querying the Table
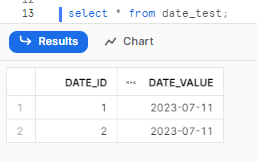
To view the data in the table, you can execute a simple SELECT statement:
select * from date_test;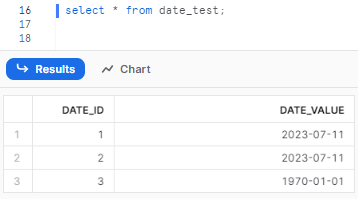
As you can see, DATE data type completely disregards the time component.
Step 5—Managing Timestamps with Time Zones
Creating a Table with a Timestamp Column:
Now, let’s create a new table, TIMESTAMP_TEST, with a TIMESTAMP column to demonstrate how Snowflake manages time zones.
CREATE TABLE TIMESTAMP_TEST (timestamp_id INTEGER, timestamp_value TIMESTAMP);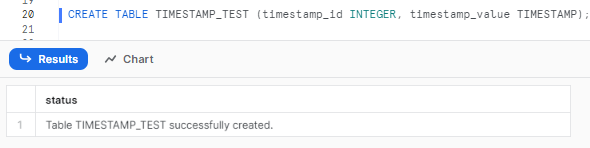
We will explore the session object and how it can be used to manage time zones. The session contains various objects, each with a default value. To view the values of all the time zone-related objects in the session, run the following command.
SHOW PARAMETERS LIKE '%TIMEZONE%' IN SESSION;
Step 6—Modifying Time Zone Parameters
You can change the value of the TIMEZONE parameter using the ALTER SESSION command. The value should be set to a valid timezone string. You can check out the valid values from here.
sssALTER SESSION SET TIMEZONE='Antarctica/Mawson';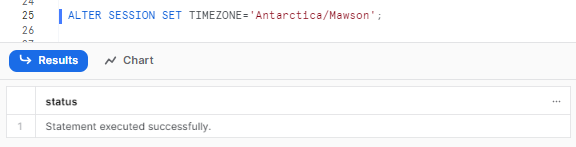
Step 7—Viewing Updated Time Zone Parameters
After modifying the time zone parameter, you can recheck the session parameters to view the updated value:
SHOW PARAMETERS LIKE '%TIMEZONE%' IN SESSION;
See? This query will display the updated value of the time zone parameter.
Step 8—Inserting Timestamp Values
To demonstrate how Snowflake manages time zones, let's insert a timestamp value in our previously created table:
INSERT INTO TIMESTAMP_TEST (timestamp_id, timestamp_value)
VALUES (1, '2023-07-19 22:00:00.000'),
  (2, '2023-07-19 23:00:00.000'),
  (3, '2023-07-20 00:00:00.000'),
  (4, '2023-07-20 01:00:00.000'),
  (5, '2023-07-20 02:00:00.000'),
  (6, '2023-07-20 03:00:00.000'),
  (7, '2023-07-20 04:00:00.000'),
  (8, '2023-07-20 05:00:00.000'),
  (9, '2023-07-20 06:00:00.000'),
  (10, '2023-07-20 07:00:00.000');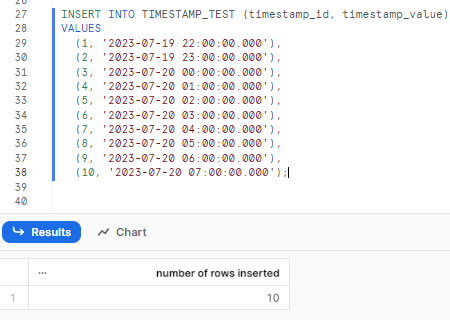
Step 9—Querying the Table with Time Zones
To observe how Snowflake handles time zones, execute a query to retrieve data from the table:
Select * from TIMESTAMP_TEST;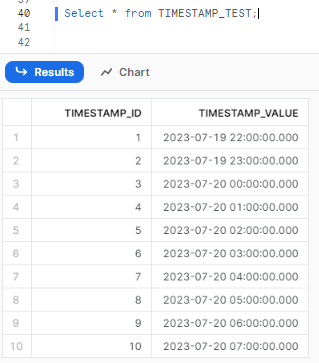
Step 10—Modifying Timestamp_Type_Mapping
Let’s change another session parameter. We can change how Snowflake manages timestamp data by modifying the TIMESTAMP_TYPE_MAPPING parameter. Here's a simple example:
ALTER SESSION SET TIMESTAMP_TYPE_MAPPING = 'TIMESTAMP_TZ';
ALTER SESSION SET TIMEZONE = 'Asia/Thimphu';
CREATE OR REPLACE TABLE timestamp_test_2 (tsp TIMESTAMP);
INSERT INTO timestamp_test_2 VALUES ('2023-07-20 06:00:00.000');
SELECT tsp FROM timestamp_test_2;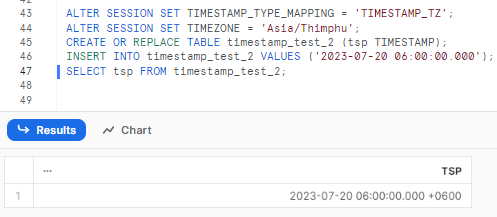
As you can see, the query above modifies the TIMESTAMP_TYPE_MAPPING parameter and sets it to 'TIMESTAMP_TZ' (default value is 'TIMESTAMP_NTZ' ). It then updates the time zone and creates a table timestamp_test_2 with a ts column of type TIMESTAMP. It then inserts a timestamp value and retrieves it through a query.
Learn more about TIMESTAMP_TYPE_MAPPING from here.
When working with timestamp data in Snowflake, it is important to be aware of the following:
- The TIMESTAMP data type can be stored in a DATE column, but the time portion of the timestamp will be ignored.
- The DATE data type can be stored in a TIMESTAMP column
- If a time value is inserted into a date type column, the date column will take the value of 1970-01-01 (January 1, 1970).
- The time zone of a timestamp can be specified when the data is loaded into Snowflake, or it can be set at the session level.
3). Working with Unique Counts
Estimating unique counts for rows in distributed systems is a computationally demanding process. Snowflake uses a distributed algorithm that differs from those used in other warehouses and databases. It is faster but approximate.
In this section, we will explore the different count snowflake sql functions/capabilities. We will start with the typical count and distinct count snowflake sql functions and how different combinations can yield different results. Then, we will explore the HyperLogLog algorithm implementation in Snowflake, which can efficiently approximate count over groups. This is recommended for use cases where accuracy can be traded for speed.
Mainly, we will show you how to use the unique Snowflake SQL functions available in Snowflake, like :
- COUNT(): Returns the number of rows
- COUNT(DISTINCT): Returns the number of distinct values
- APPROX_COUNT_DISTINCT(): Uses the HLL algorithm to quickly approximate the number of distinct values
Step 1—Query Sample Data
First, we will perform a simple SELECT query on the Lineitem table, which is available in the SNOWFLAKE_DEMO_DB database and the TPCH_SF1000 schema. We will query 5000 rows from the dataset.
SELECT *
FROM "SNOWFLAKE_SAMPLE_DATA"."TPCH_SF1000"."LINEITEM"
SAMPLE ROW (5000 ROWS);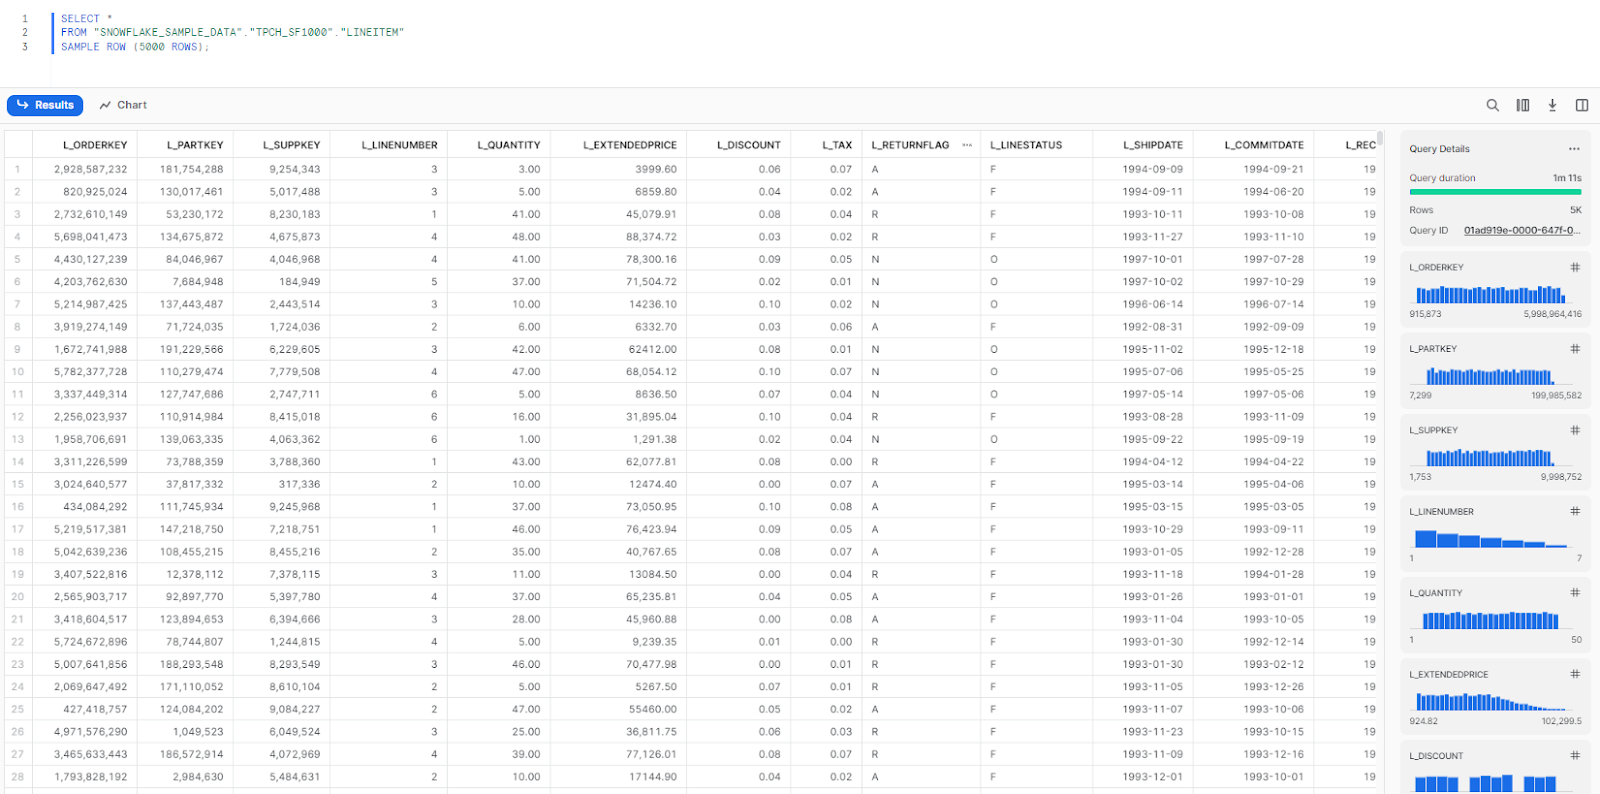
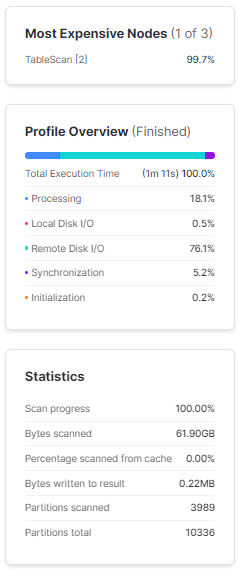
Note that it took 1 minute and 11 seconds for Snowflake to query the 1.5 billion rows in the table. Snowflake has already queried the table, collected metadata, and cached some data, which will assist in subsequent queries.
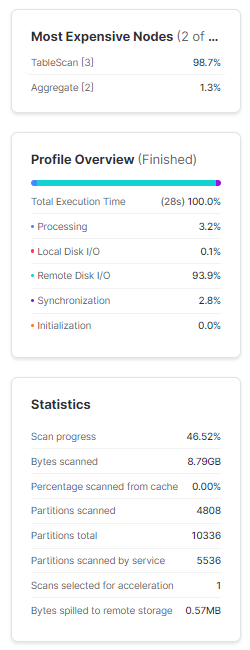
Step 2—Count SUPPKEY Per Shipping Instruction
Next, we will execute a count on the L_SUPPKEY column while applying grouping to L_SHIPINSTRUCT. The analytic that we are trying to calculate here is the popularity of order priority for customers. This does not mean we are looking for an interesting insight as we are dealing with synthetic data here.
SELECT
    L_SHIPINSTRUCT,
    COUNT(L_SUPPKEY)
FROM "SNOWFLAKE_SAMPLE_DATA"."TPCH_SF1000"."LINEITEM"
GROUP BY 1
ORDER BY 1;
We obtain the results in approximately 30 seconds

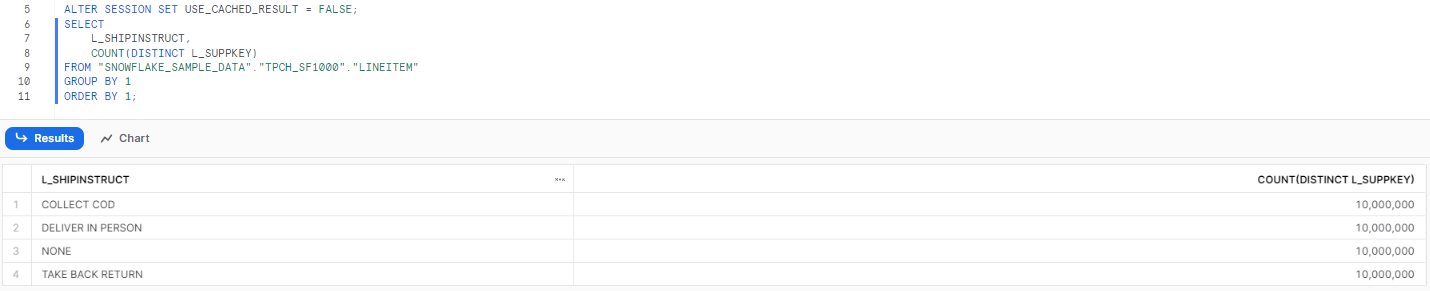
Step 3—Count Distinct SUPPKEY Per Shipping Instruction
Now, let's calculate the same count, but this time with a variation. We will apply the DISTINCT function to the "L_SUPPKEY" column to ensure that customers with repeated orders are counted only once. To prevent Snowflake from utilizing results from its cache, we need to reset it by using "USE_CACHED_RESULT" to "FALSE" in the session.
ALTER SESSION SET USE_CACHED_RESULT = FALSE;
SELECT
    L_SHIPINSTRUCT,
    COUNT(DISTINCT L_SUPPKEY)
FROM "SNOWFLAKE_SAMPLE_DATA"."TPCH_SF1000"."LINEITEM"
GROUP BY 1
ORDER BY 1;
We obtain the results in approximately 4 minutes and 18 seconds

Step 4—Approximate Distinct Count
Now, let's try the same thing, but this time with the APPROX_COUNT_DISTINCT function on the L_SUPPKEY column, rather than with the COUNT(DISTINCT L_SUPPKEY) function we used in previous step.
ALTER SESSION SET USE_CACHED_RESULT = FALSE;
SELECT
    L_SHIPINSTRUCT,
    APPROX_COUNT_DISTINCT(L_SUPPKEY)
FROM "SNOWFLAKE_SAMPLE_DATA"."TPCH_SF1000"."LINEITEM"
GROUP BY 1
ORDER BY 1;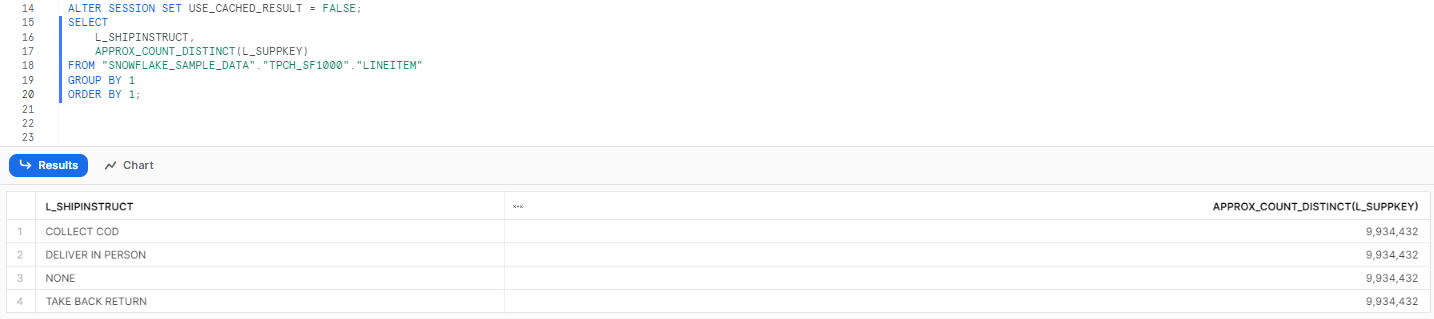
As you can see, the result is similar to the previous step's outcome, but it is not the same. Let's look at the count for the COLLECT COD category of L_SHIPINSTRUCT. The count provided by the approximate method is around 9.93 million, while the result from the exact count was 10 million. This is an error of around 0.65 percent, while at the same time, the query execution time has come down to 21 seconds from almost 5 minutes.
APPROX_COUNT_DISTINCT Snowflake SQL function uses HLL (HyperLogLog). HLL is a probabilistic cardinality estimator that uses a space-efficient data structure to estimate the number of distinct elements in a large dataset. The HyperLogLog algorithm works by first generating a set of uniformly distributed random hashes from the elements in the dataset. The number of leading zeros in each hash is then counted, and the maximum number of leading zeros is used as an estimate of the cardinality of the dataset.
The accuracy of the HyperLogLog estimator depends on the number of random hashes that are generated. The more hashes that are generated, the more accurate the estimate will be. However, the more hashes that are generated, the more memory is required to store the data structure.
The HyperLogLog algorithm is typically accurate to within 2%, which makes it a very efficient way to estimate the cardinality of large datasets. The algorithm is also very scalable, so it can be used to estimate the cardinality of datasets that contain billions of elements.
4). Extracting day, month, year and other calendar components from date data
In this section, we'll look at the various Snowflake SQL functions for extracting specific parts of date data, such as the day, day of the week, week of the year, day name, and important dates in business reporting cycles, such as the last day of the month or the first day of the month. Because time and date are widely employed as dimensions in data warehousing, these features are critical. We will also discuss some issues with configuring the week's start in Snowflake and show how to create a utility calendar table with several date-related columns.
To begin, we will start with a straightforward date generator as part of this guide. The generator function will generate calendar dates for the entire year (365 rows). We will use the generated date field to derive additional fields in the table. Let's start by generating some dates:
Step 1—Generating Calendar Dates
Let’s start by generating some dates using seq4() Snowflake SQL function to generate a sequence of numbers. These numbers will be added to the first date of the year 2023. To generate 365 rows, we can use the following code, which utilizes the GENERATOR() function:
SELECT (TO_DATE('2023-01-01') + SEQ4()) AS gen_calendar_data
FROM TABLE(GENERATOR(ROWCOUNT => 365));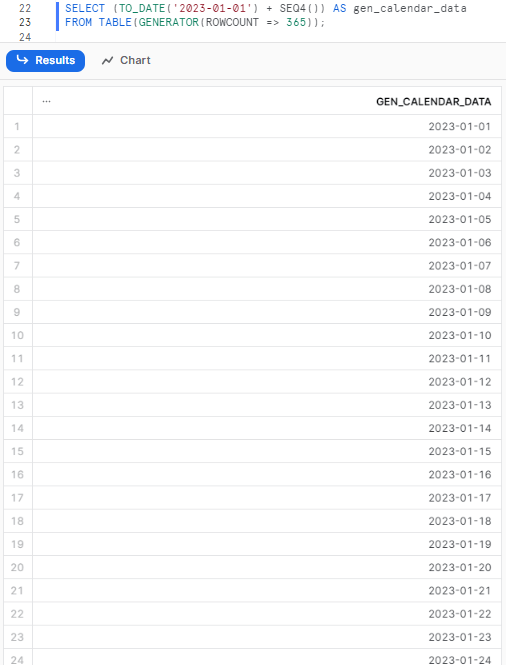
Step 2—Extracting Date Components
Now that we have the foundation set up, we can begin adding Snowflake SQL functions to extract different parts of the date. In this step, we will extract the day, month, and year using the DATE_PART() function:
SELECT
    (TO_DATE('2023-01-01') + SEQ4()) AS gen_calendar_data,
    DATE_PART(day, gen_calendar_data) AS Day_,
    DATE_PART(month, gen_calendar_data) AS Month_,
    DATE_PART(year, gen_calendar_data) AS Year_
FROM TABLE(GENERATOR(ROWCOUNT => 365));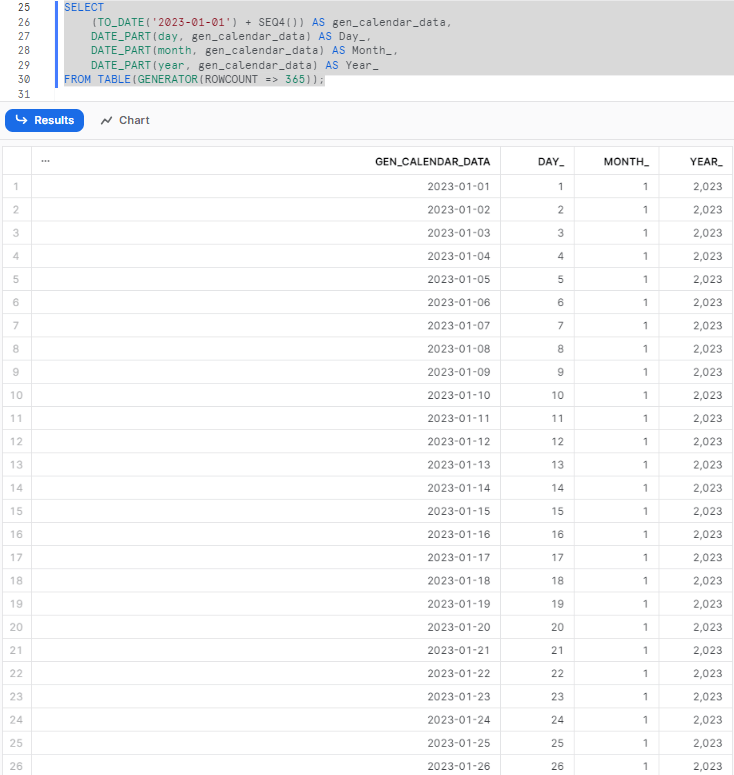
Step 3—Adding First and Last Day of the Month
Now that we have extracted the basic date components, we can enhance it further by adding additional fields. We will include the first and last day of the month for each date in our dataset. Two columns will be added, as demonstrated in the following code:
SELECT
    (TO_DATE('2023-01-01') + SEQ4()) AS gen_calendar_data,
    DATE_PART(day, gen_calendar_data) AS Day_,
    DATE_PART(month, gen_calendar_data) AS Month_,
    DATE_PART(year, gen_calendar_data) AS Year_,
    DATE_TRUNC('month', gen_calendar_data) AS first_day_of_month,
    DATEADD('day', -1, DATEADD('month', 1, DATE_TRUNC('month', gen_calendar_data))) AS last_day_of_month
FROM TABLE(GENERATOR(ROWCOUNT => 365));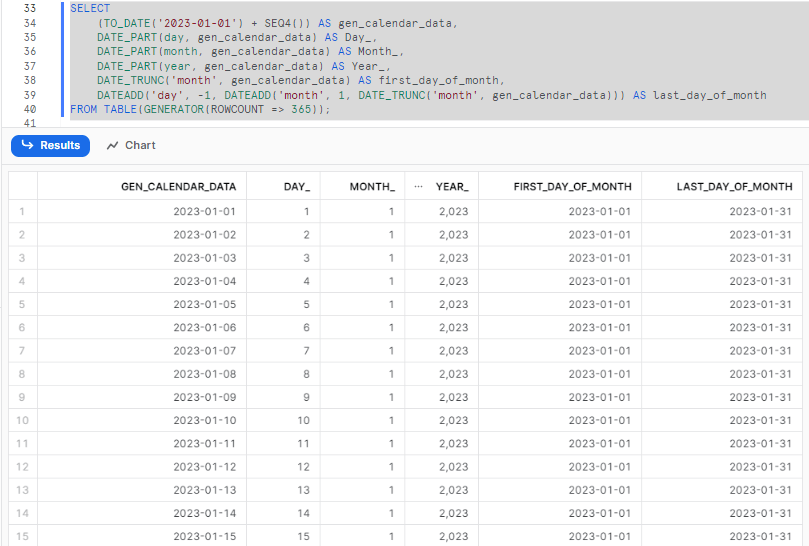
Step 4—Including English Month Names
Moving on, let's add the English names of the months to the existing dataset. We already have the month available in the CAL_MONTH column. We can simply use the DECODE() function to obtain the English names of the months, as shown in the following code:
SELECT
    (TO_DATE('2023-01-01') + SEQ4()) AS gen_calendar_data,
    DATE_PART(day, gen_calendar_data) AS Day_,
    DATE_PART(month, gen_calendar_data) AS Month_,
    DATE_PART(year, gen_calendar_data) AS Year_,
    DATE_TRUNC('month', gen_calendar_data) AS first_day_of_month,
    DATEADD('day', -1, DATEADD('month', 1, DATE_TRUNC('month', gen_calendar_data))) AS last_day_of_month,
        DECODE(Month_,
        1, 'January',
        2, 'February',
        3, 'March',
        4, 'April',
        5, 'May',
        6, 'June',
        7, 'July',
        8, 'August',
        9, 'September',
        10, 'October',
        11, 'November',
        12, 'December') AS month_name
FROM TABLE(GENERATOR(ROWCOUNT => 365));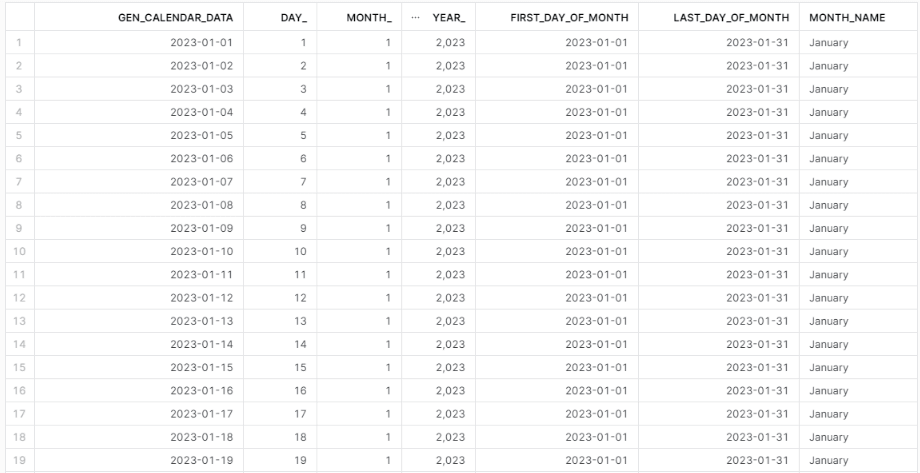
Step 5—Capturing Quarter End Dates
You may take it a step further by including a column in the dataset that captures the end of the quarter for each date. To determine the last day of the month and the last day of the quarter for each date in the table (make use the DATEADD() Snowflake SQL function). The procedure is similar to what we did before.
Simply add the following code snippet to the preceding code.
DATEADD('day', -1, DATEADD('month', 3, DATE_TRUNC('quarter', CAL_DT))) AS cal_qtr_end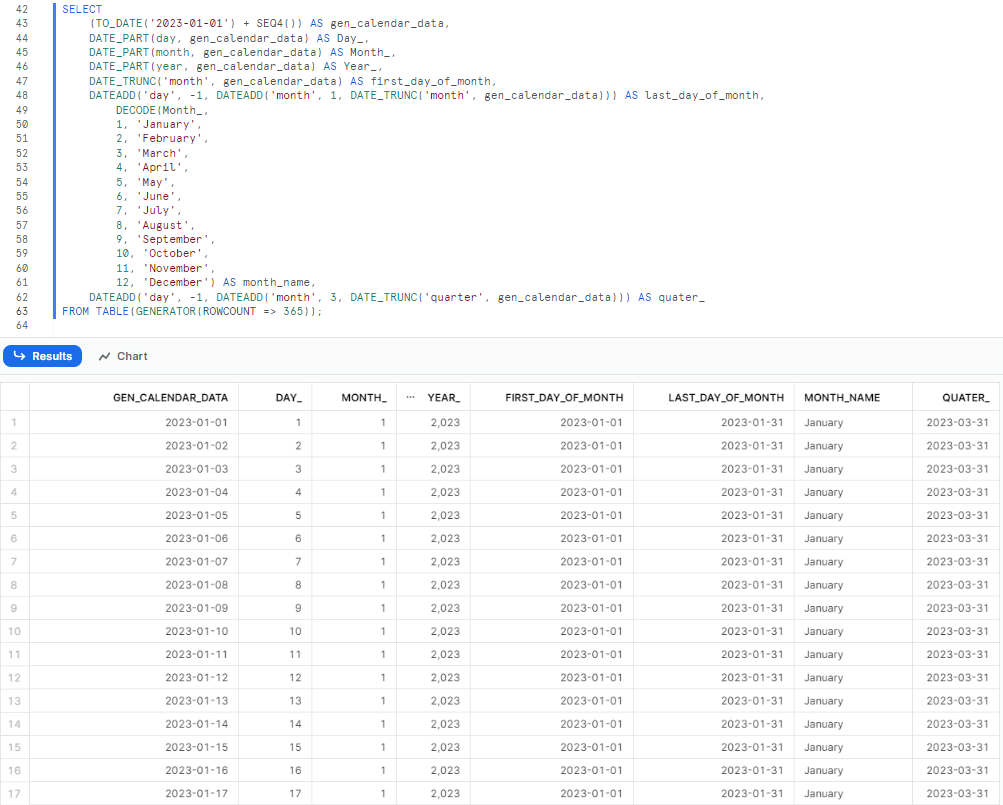
5). Running Ordered Analytics for Marketing Insights and Large Dataset Management
This section will cover Snowflake's capability to perform ordered analytics over subsets of rows, particularly useful in marketing analytics applications where trends are identified using moving averages or cumulative functions. These features are essential for data scientists working with large datasets.
Step 1—Generating Sample Data and Creating a View with Data Generation Logic
To begin, let's generate some sample data. We will create a view that includes the necessary logic to generate the data. The following query generates the base data for implementing the view. We will be using the OrderedAnalytics database for this purpose.
CREATE DATABASE IF NOT EXISTS OrderedAnalytics;
USE OrderedAnalytics ;
Now let's create a view that generates 365 records, where customer_id consists of five unique values (0 to 4) that repeat throughout the records. The deposit_amount column contains values from the sets {100, 200, 300, 400, and 500}. The deposit_date column represents the dates, starting from the current date and going back 365 days.
CREATE OR REPLACE VIEW customer_deposits AS
SELECT
  MOD(SEQ4(), 5) AS customer_id,
  (MOD(UNIFORM(50, 500, RANDOM()), 5) + 1) * 100 AS deposit_amount,
  DATEADD(DAY, -SEQ4(), CURRENT_DATE()) AS deposit_date
FROM TABLE(GENERATOR(ROWCOUNT => 365));

select * from customer_deposits;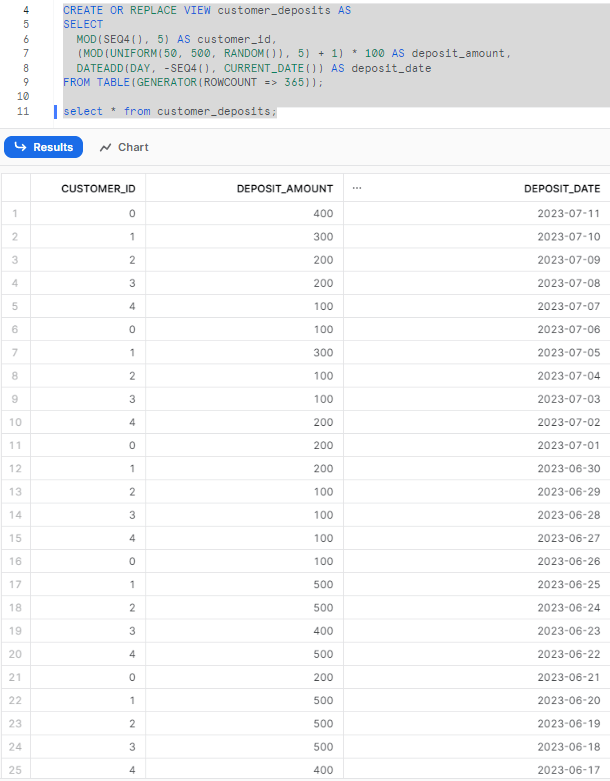
Step 2—Running Window Functions for Deposit Comparison
Now that we have created the view, let's use this dataset to run various window functions available in Snowflake. We will focus on highlighting customers who made a single deposit greater than the cumulative sum of their last two deposits:
SELECT
    customer_id,
    deposit_date,
    deposit_amount,
    deposit_amount > COALESCE(SUM(deposit_amount) OVER (
                        PARTITION BY customer_id
                        ORDER BY deposit_date
                        ROWS BETWEEN 2 PRECEDING AND 1 PRECEDING), 0) AS hi_deposit_alert
FROM customer_deposits
ORDER BY customer_id, deposit_date DESC;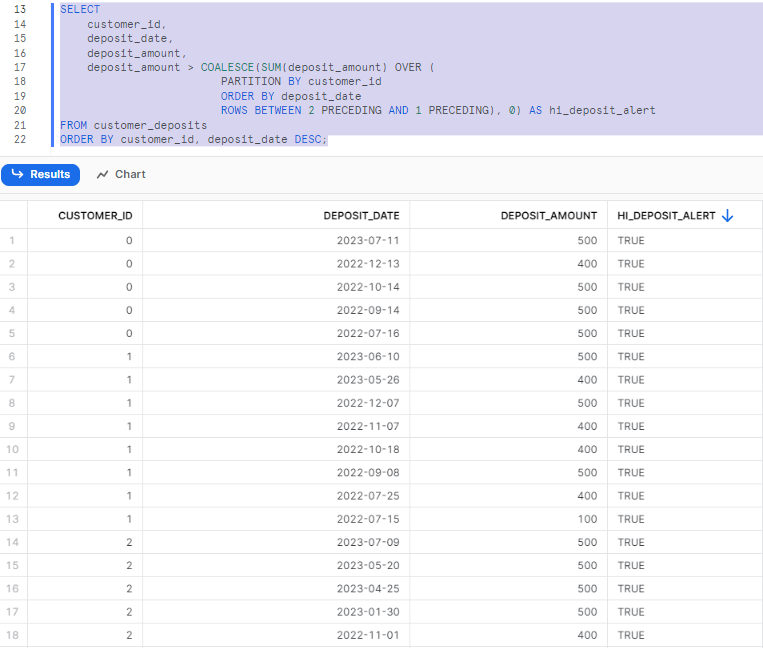
As you can see, this query generates a new column that displays either TRUE or FALSE, depending on whether a customer made a deposit greater than the sum of their last two deposits.
Step 3—Analyzing Deposits with Cumulative Sum
Snowflake provides a range of other functions for window frames, allowing for different configurations. Let's modify the window range and use the average instead of the sum. We will specify a window that includes all deposits made prior to the current row. By calculating the average deposit within that window and comparing it to the current deposit, we can identify higher-than-normal deposits:
SELECT
    customer_id,
    deposit_date,
    deposit_amount,
    COALESCE(AVG(deposit_amount) OVER (
                PARTITION BY customer_id
                ORDER BY deposit_date
                ROWS BETWEEN UNBOUNDED PRECEDING AND 1 PRECEDING), 0) AS past_average_deposit,
    deposit_amount > past_average_deposit AS hi_deposit_alert
FROM customer_deposits
WHERE CUSTOMER_ID = 3
ORDER BY customer_id, deposit_date DESC;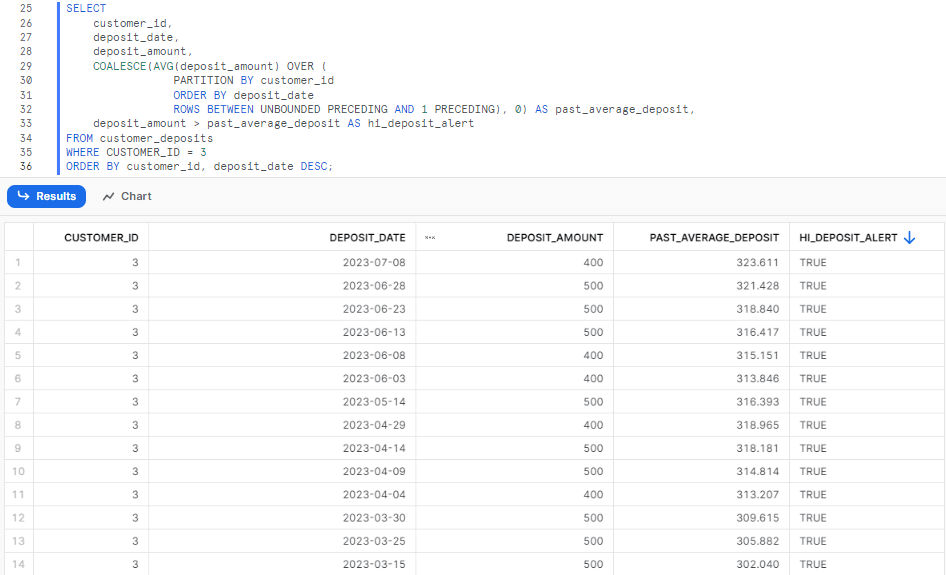
Windowing functions in Snowflake enable aggregation and utilization of information from rows beyond the current row. These functions allow aggregations across related rows, without grouping and reducing the number of output rows.
Save up to 30% on your Snowflake spend in a few minutes!


Conclusion
SQL is like a Swiss army knife for data—it serves as a versatile tool capable of slicing, dicing, querying, joining, aggregating, and transforming data with precision. While grasping the fundamentals of SQL provides a strong foundation, achieving mastery necessitates continuous practice and the acquisition of advanced techniques over time. In the hands of a proficient data professional, SQL enables precise surgery on big datasets to extract actionable insights. Like any craft, mastery of the SQL takes time and practice. The 5 unique and advanced techniques covered in this article, from complex data handling to deep analysis, are additional useful techniques to add to your SQL utility belt. With this full range of advanced and unique SQL capabilities at your fingertips, as a Snowflake user, you can carve out a competitive advantage and elevate your Snowflake SQL skills to the next level.
Just as a Swiss army knife becomes more powerful as more tools are added, so does a data pro wielding advanced SQL techniques.
FAQs
How can I manage timestamp data in Snowflake?
Snowflake provides several functions to manage timestamp data, including DATE(), TIME(), and TIMESTAMP() functions. These can be used to extract or manipulate date and time data.
What is the process for shredding date data in Snowflake?
Shredding date data involves breaking down a date into its constituent parts, such as year, month, day, etc. This can be done using functions like YEAR(), MONTH(), and DAY() in Snowflake.
How does Snowflake handle unique counts?
Snowflake can handle unique counts using the DISTINCT keyword in a COUNT() function. This allows you to count the number of unique values in a column.
How can I manage transactions in Snowflake?
Snowflake supports transaction control statements like BEGIN, COMMIT, and ROLLBACK that allow you to manage transactions.
How can I generate sequences in Snowflake?
Snowflake provides the SEQUENCE object that can be used to generate a sequence of numbers.
What are some advanced SQL techniques for trend analysis in Snowflake?
Techniques like moving averages, linear regression, and time series analysis can be performed in Snowflake using SQL.
Does Snowflake support temporal analytics?
Yes, Snowflake supports temporal analytics through its rich set of date and time functions, allowing for complex time-based calculations and comparisons.
Can I perform data clustering in Snowflake using SQL?
Yes, Snowflake supports clustering keys which can be used to organize data in a table for improved performance.
How can I optimize query performance in Snowflake?
Query performance can be optimized in Snowflake through techniques like partitioning, and clustering.
What are some unique features of Snowflake's SQL?
Snowflake's SQL has several unique features like support for semi-structured data types, data sharing capabilities, and zero-copy cloning.
How does Snowflake handle JSON data using SQL?
Snowflake provides several functions to handle JSON data, allowing you to query and manipulate semi-structured data using SQL.
Can I use SQL to perform data masking in Snowflake?
Yes, Snowflake supports dynamic data masking which can be implemented using SQL.
How can I use SQL to manage user roles and privileges in Snowflake?
Snowflake provides SQL commands to manage user roles and privileges, allowing for fine-grained access control.
Can I use SQL to perform data replication in Snowflake?
Yes, Snowflake supports data replication which can be managed using SQL.
How can I use SQL to manage data retention in Snowflake?
Snowflake provides SQL commands to manage data retention, allowing you to control how long data is stored.
Can I use SQL to perform data deduplication in Snowflake?
Yes, Snowflake provides SQL commands to identify and remove duplicate data.
How can I use SQL to manage data compression in Snowflake?
Snowflake automatically manages data compression, but you can use SQL to control the compression settings.
Can I use SQL to perform data encryption in Snowflake?
Snowflake automatically encrypts all data, but you can use SQL to manage encryption keys and settings.


