


Efficiently loading/unloading data is crucial for any data warehouse. Snowflake COPY INTO command offers precisely that capability in Snowflake—it's a powerful command allowing you to load data from a stage into a table or unload data from a table into a stage. Stages serve as intermediate storage locations and can be either external or internal.
In a previous article, we discussed creating stages in Snowflake. If you need a refresher on setting up stages, make sure to check that out. In this article, we will cover everything you need to know about Snowflake COPY INTO command in detail. We will cover its syntax, provide practical real-world examples, demonstrate how to use it for various scenarios, and explain its application for loading/unloading data—and much more!
What is COPY INTO in Snowflake?
Snowflake COPY INTO is a command that enables loading data from a stage into a table or unloading data from a table into a stage. A stage is a named location where files are stored, either inside Snowflake (internal stage) or outside Snowflake (external stage). External stages can be linked to cloud storage services such as Amazon S3, Google Cloud Storage, or Microsoft Azure.
Snowflake COPY INTO command has many use cases, such as:
- Loading data from various sources and formats into Snowflake tables for analysis and processing
- Unloading data from Snowflake tables into Stages
- Transforming data on the fly before loading/unloading it
- Validating data quality and integrity before loading/unloading it
- Controlling the load behavior and performance using various options and parameters
Snowflake COPY INTO command supports a wide range of file formats, such as:
- CSV (comma-separated values)
- JSON (JavaScript Object Notation)
- AVRO
- ORC (Optimized Row Columnar format)
- PARQUET
- XML (Extensible Markup Language)
Now, in the next section, we will see how to use Snowflake COPY INTO command for different scenarios and examples.
Want to take Chaos Genius for a spin?
It takes less than 5 minutes.

Prerequisite Requirements for Using Snowflake COPY INTO
Before you can use Snowflake COPY INTO command to load/unload data, you need to have the following prerequisites:
- Snowflake account with necessary roles and access: You need to have a valid Snowflake account with the necessary privileges and roles to access the data warehouse and perform the loading/unloading operations.
- Snowflake stage: You need to have a Snowflake stage setup where you can store the files that you want to load or unload. A stage can be either internal or external, depending on whether you want to use Snowflake’s own storage or a cloud storage service. You can learn more about how to set up a Snowflake stage in our previous article here.
- Storage integration: If you want to use an external stage, you need to have a storage integration that defines the connection and authentication details for the cloud storage service. A storage integration is a Snowflake object that allows you to securely access external data sources without exposing your credentials. You can learn more about how to create a storage integration in our previous article here.
Once you have met these prerequisites, you are ready to start using Snowflake COPY INTO command to load or unload data from files in stages.
How Does Snowflake COPY INTO Command Work?
Snowflake COPY INTO command has a straightforward syntax that allows you to specify various options and parameters to customize and optimize the data loading and unloading process. In this section, we will break down the Snowflake COPY INTO syntax and explain its various options/parameters in detail.
Data Loading (COPY INTO <table>)
The syntax for loading data from a stage to a table is:
COPY INTO [namespace.]table_name
  [column_list]
  FROM { 'stage_name' | @stage_name }
  [ file_format_options ]
  [ copy_options ];
Snowflake COPY INTO syntax
The full syntax for loading data from a stage to a table is:
COPY INTO [<namespace>.]<table_name>
     FROM { internalStage | externalStage | externalLocation }
[ FILES = ( '<file_name>' [ , '<file_name>' ] [ , ... ] ) ]
[ PATTERN = '<regex_pattern>' ]
[ FILE_FORMAT = ( { FORMAT_NAME = '[<namespace>.]<file_format_name>' |
                    TYPE = { CSV | JSON | AVRO | ORC | PARQUET | XML } [ formatTypeOptions ] } ) ]
[ copyOptions ]
[ VALIDATION_MODE = RETURN_<n>_ROWS | RETURN_ERRORS | RETURN_ALL_ERRORS ]

--- Data load with transformation
COPY INTO [<namespace>.]<table_name> [ ( <col_name> [ , <col_name> ... ] ) ]
     FROM ( SELECT [<alias>.]$<file_col_num>[.<element>] [ , [<alias>.]$<file_col_num>[.<element>] ... ]
            FROM { internalStage | externalStage } )
[ FILES = ( '<file_name>' [ , '<file_name>' ] [ , ... ] ) ]
[ PATTERN = '<regex_pattern>' ]
[ FILE_FORMAT = ( { FORMAT_NAME = '[<namespace>.]<file_format_name>' |
                    TYPE = { CSV | JSON | AVRO | ORC | PARQUET | XML } [ formatTypeOptions ] } ) ]
[ copyOptions ]
Snowflake COPY INTO syntax
The required parameters are:
- [namespace.]table_name: Name of the target table where the data will be loaded. The namespace is optional and refers to the database and schema where the table resides. If not specified, the current session database and schema are used.
- FROM ...: Source of the data, which can be an internal stage, an external stage, or an external location. The source can be followed by various options and parameters to specify the files, the file format, the copy options, and the validation mode.
For the complete list of other parameters, please refer to the following Snowflake documentation sections:
- Additional cloud provider parameters
- Transformation parameters
- Optional parameters
- Format type options
- Copy options
Data Unloading (COPY INTO <location>)
The syntax for unloading data from a table or a query to a stage is:
COPY INTO { 'stage_name' | @stage_name }
  FROM { [<namespace>.]<table_name> | ( <query> ) }
  [ file_format_options ]
  [ copy_options ];
Snowflake COPY INTO syntax
The full syntax for unloading data from a table or a query to a stage is:
COPY INTO { internalStage | externalStage | externalLocation }
     FROM { [<namespace>.]<table_name> | ( <query> ) }
[ PARTITION BY <expr> ]
[ FILE_FORMAT = ( { FORMAT_NAME = '[<namespace>.]<file_format_name>' |
                    TYPE = { CSV | JSON | PARQUET } [ formatTypeOptions ] } ) ]
[ copyOptions ]
[ VALIDATION_MODE = RETURN_ROWS ]
[ HEADER ]
Snowflake COPY INTO syntax
The required parameters are:
- location: Destination of the data, which can be either a stage name or a path within a stage. The stage can be either internal or external, depending on whether you want to use Snowflake’s own storage or a cloud storage service.
- FROM ...: Source of the data, which can be either a table name or a query. The source can be followed by various options and parameters to specify the file format, the copy options, and the partitioning expression.
For the complete list of other parameters, please refer to the following Snowflake documentation sections:
Now, let's move on to the next section, where we'll explore how to use the Snowflake COPY INTO command for various scenarios and step-by-step examples.
Loading/unloading Data from External stages to tables (and vice versa)—using Snowflake COPY INTO
In this part, we will see how to use Snowflake COPY INTO command to load data from external stages to Snowflake tables—and vice versa. Snowflake supports the following cloud storage services for external stages:
External stages define the path to these external cloud repositories where files can be loaded/unloaded.
How to Load Data From External Stages to Snowflake Tables?
To load data from external stages into Snowflake tables, you first need to create an external stage. Check out this article for a step-by-step guide on creating an external stage from scratch. The guide covers the creation of external stages using all three cloud services supported by Snowflake:
- Creating Snowflake stages for Amazon S3
- Creating Snowflake stages for GCS
- Creating Snowflake stages for Azure
After creating external stages in Snowflake, you can proceed with the steps outlined below. In this step-by-step example, we will demonstrate loading data from the S3 stage to the Snowflake stages. The steps remain the same for all stages created using GCS and Azure.
Step 1—List All the Stages in Your Database and Schema
First, to list all the stages in your database and schema, you can execute the following query:
SHOW STAGES;
Step 2—Upload the Sample CSV File to the S3 Bucket
Second, upload the file to the S3 bucket (In our case, it's located at:
s3://<my-bucket>/sampledata/Step 3—Select All the Data That You Have Loaded Into That Particular Stage
Select all the data that you have loaded into that particular stage, you can execute the following query:
SELECT $... FROM @DEMO_S3_EXTERNAL_STAGE/<your-demo-data>.csv;In our case:
SELECT $1, $2 FROM @DEMO_S3_EXTERNAL_STAGE/sampledata.csv;
Download the sample data from here.
Step 4—Creating a customer_table Table
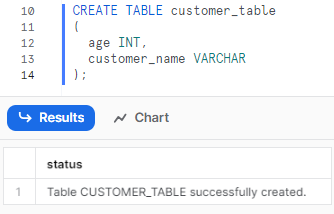
Create a table object that defines the schema and the columns for the data to be loaded. For example:
CREATE TABLE customer_table(
  age INT,
  customer_name VARCHAR
);
Step 5—Using Snowflake Copy Into Command to Load Data
Use Snowflake COPY INTO command to load the data from the CSV file in the stage to the table. For example:
COPY INTO customer_table
FROM @DEMO_S3_EXTERNAL_STAGE/sampledata.csv
ON_ERROR = CONTINUE;
Step 6—Verify the Data Loading Process and Check the Results
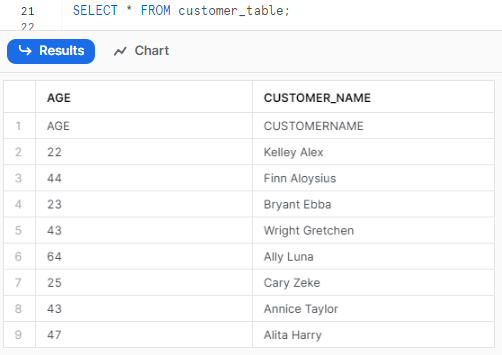
Finally, you can select the table to verify whether the data from the stage has been successfully copied to the table. To check this, execute the following query:
-- Check the number of rows loaded
SELECT COUNT(*) FROM customer_table;

-- Check the data loaded
SELECT * FROM customer_table;
Snowflake COPY INTO example
You can use similar steps to load data from other cloud storage services, such as Google Cloud Storage or Microsoft Azure, by using the appropriate prefixes, credentials, and encryption parameters.
How to Unload Data From Snowflake Tables to External Stages?
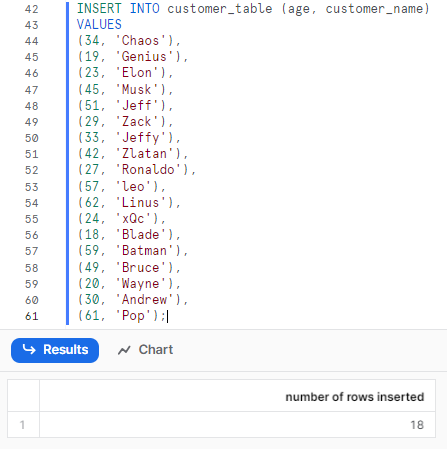
Now that we've loaded data into Snowflake tables from the Snowflake external stage, it's time to explore unloading data from Snowflake to an external stage. To do that, let's take another step. Let's insert additional dummy data into that specific table and then unload the data from that table to the Snowflake external stage.
INSERT INTO customer_table (age, customer_name)
VALUES
(34, 'Chaos'),
(19, 'Genius'),
(23, 'Elon'),
(45, 'Musk'),
(51, 'Jeff'),
(29, 'Zack'),
(33, 'Jeffy'),
(42, 'Zlatan'),
(27, 'Ronaldo'),
(57, 'leo'),
(62, 'Linus'),
(24, 'xQc'),
(18, 'Blade'),
(59, 'Batman'),
(49, 'Bruce'),
(20, 'Wayne'),
(30, 'Andrew'),
(61, 'Pop');
Snowflake COPY INTO example
Step 1—Verify the Data Loaded to the Table
First, let's check and verify whether there is data in our customer_table.
SELECT * FROM customer_table;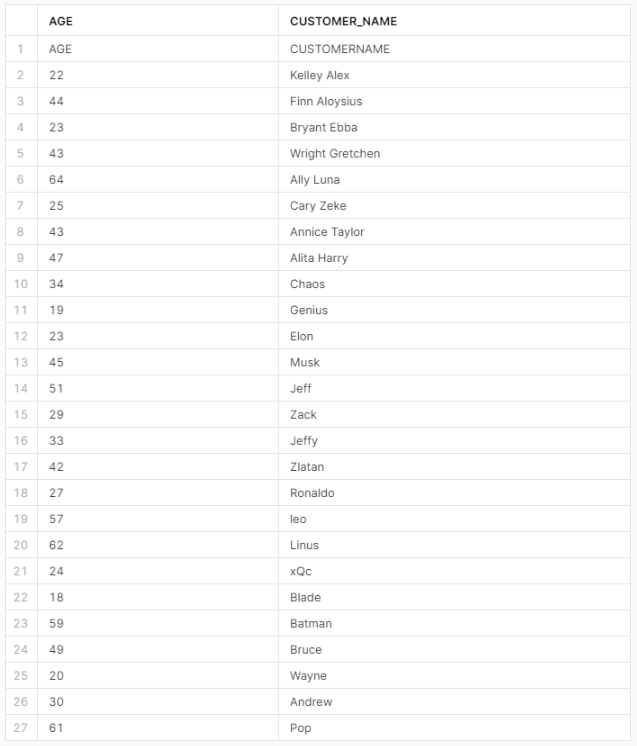
Step 2—Using Snowflake Copy Into Command to Unload Data
Use the Snowflake COPY INTO command to unload the data from the table to the stage. For example:
COPY INTO @DEMO_S3_EXTERNAL_STAGE/sampledata.csv
FROM customer_table
OVERWRITE = TRUE;
If you don't use “OVERWRITE = TRUE”, you will encounter this error:

Step 3—Verify the Data Unloading Process and Check the Results
Finally, you can select the table to verify whether the data from the table has been successfully copied to the stage. To check this, execute the following query:
SELECT COUNT(*) FROM @my_s3_stage;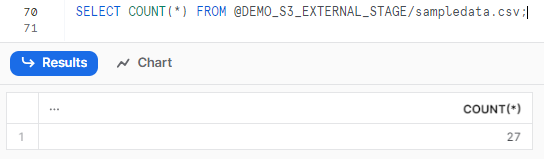
SELECT $1, $2 FROM @DEMO_S3_EXTERNAL_STAGE/sampledata.csv;
Loading/Unloading Data From Internal Stages to Tables (and vice versa)—using Snowflake COPY INTO
Now, let's proceed to the next section of this article where we'll explore using the Snowflake COPY INTO command to load data from internal stages into Snowflake tables—and vice versa. There are three types of internal stages in Snowflake:
- User stages can only be accessed by the associated user account
- Table stages can only be used with the linked table
- Named stages are user-defined and can be accessed by multiple users/tables
How to Load Data From Internal Stages to Snowflake Tables?
To load data from Snowflake internal stages into Snowflake tables, you'll need to create an internal stage first. Internal stages are stages that are stored inside Snowflake, and can be either be:
After creating internal stages, you can proceed with the steps outlined below. In this step-by-step guide, we will demonstrate loading data from Snowflake internal stage.
Step 1—List All the Stages in Your Database and Schema
First, to list all the stages in your database and schema, you can execute the following query:
SHOW STAGES;
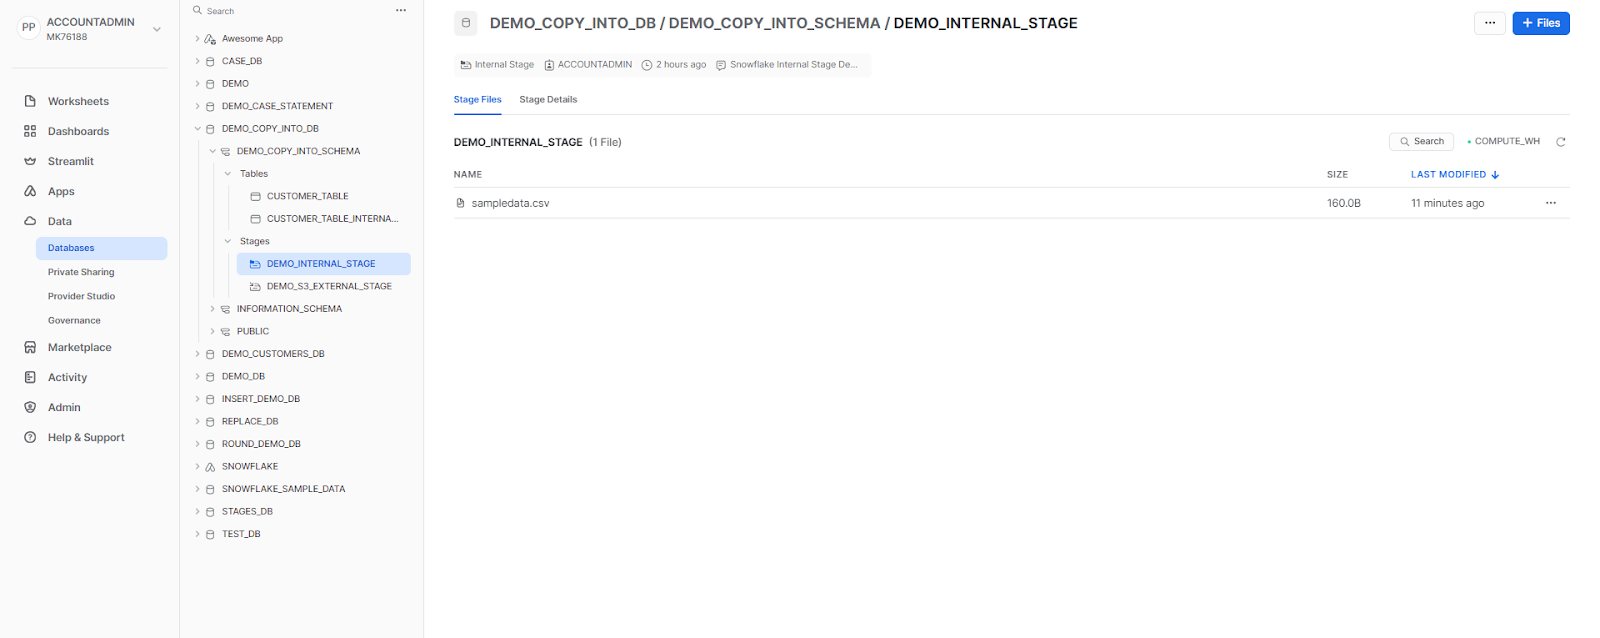
Step 2—Upload the Sample CSV File to Internal Stage
Secondly, upload the file to the Snowflake internal stage using Snowsight.
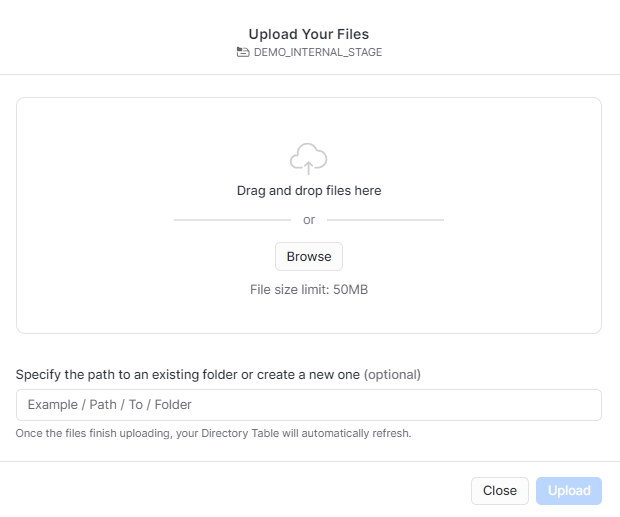
Alternatively,
If you're using SnowSQL, you can use the PUT command to upload the CSV file to the internal stage. For more info on this process, refer to this article.
Step 3—Select All the Data That You Have Loaded Into That Particular Stage
Select all the data that you have loaded into that particular stage, you can execute the following query:
SELECT $... FROM @DEMO_INTERNAL_STAGE/<your-demo-data>.csv;In our case:
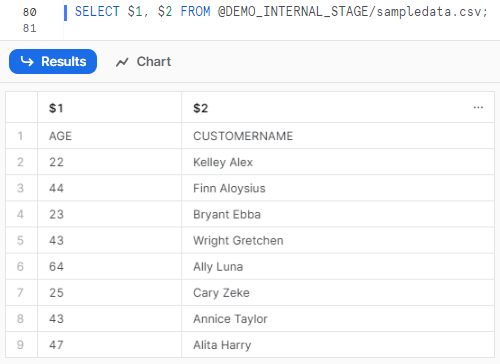
Download the sample data from here.
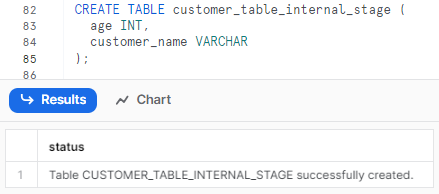
Step 4—Creating a CUSTOMER_TABLE_INTERNAL_STAGE Table
Create a table object that defines the schema and the columns for the data to be loaded. For example:
CREATE TABLE CUSTOMER_TABLE_INTERNAL_STAGE(
  age INT,
  customer_name VARCHAR
);
Step 5—Using Snowflake Copy Into Command to Load Data into Internal Stage
Use Snowflake COPY INTO command to load the data from the CSV file in the stage to the table. For example:
COPY INTO customer_table_internal_stage
FROM @DEMO_INTERNAL_STAGE/sampledata.csv
ON_ERROR = CONTINUE;
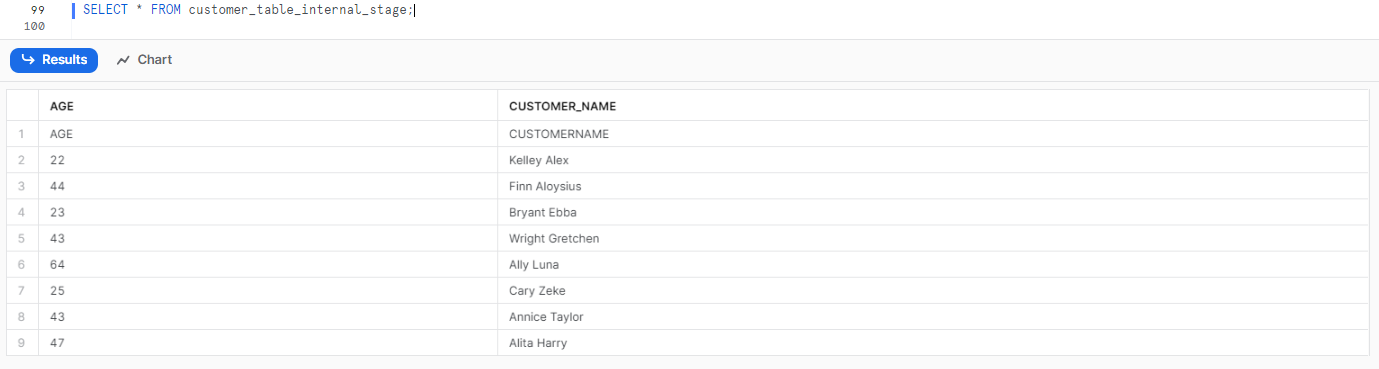
Step 6—Verify the Data Loading Process and Check the Results
Finally, you can select the table to verify whether the data from the stage has been successfully copied to the table. To check this, execute the following query:
-- Check the number of rows loaded
SELECT COUNT(*) FROM customer_table_internal_stage;

-- Check the data loaded
SELECT * FROM customer_table_internal_stage;
Snowflake COPY INTO example
How Do You COPY INTO Validation in Snowflake?
Snowflake COPY INTO command provides a validation mode that allows you to check the quality and integrity of the data before loading/unloading it. The validation mode can be specified using the VALIDATION_MODE parameter, which can have one of the following values:
While loading:
- RETURN_<n>_ROWS: Returns the first <n> rows.
- RETURN_ERRORS: Returns all rows that contain errors, along with the error message which is extremely useful for identifying and fixing the data quality issues.
- RETURN_ALL_ERRORS: Returns all rows that contain errors or warnings, along with the error or warning message which is extremely useful for getting a comprehensive report of the data loading/unloading issues.
While unloading:
- RETURN_ROWS: Returns the results of the query in the SQL statement instead of unloading the results to the specified cloud storage location.
The validation mode can be used with both data loading and data unloading commands. For example:
COPY INTO customer_table_internal_stage
FROM @DEMO_INTERNAL_STAGE/sampledata.csv
ON_ERROR = CONTINUE
VALIDATION_MODE='RETURN_5_ROWS';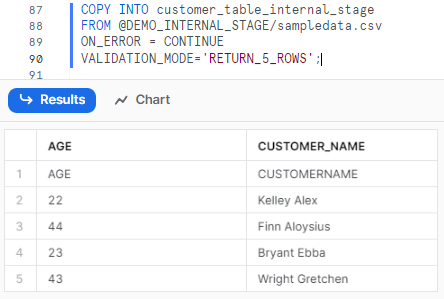
What Is the Difference Between Snowflake COPY INTO and PUT In Snowflake?
Snowflake COPY INTO and PUT commands are both used for data loading and unloading, but they have some differences in their syntax, functionality, and usage. Here is a table that summarizes the main differences between ‘em:
| Snowflake COPY INTO | Snowflake PUT |
| Snowflake COPY INTO command loads data from files in stages to tables, or unloads data from tables or queries to files in stages | Snowflake PUT command uploads files from local machine to internal stages |
| Requires a table object and a stage object as the source or the destination of the data | Requires a file path and a stage name as the source or the destination of the data |
| Supports both internal and external stages | Supports only internal stages |
| Supports various file formats, such as CSV, JSON, Avro, Parquet, ORC, and XML | Supports any file format, but does not parse or validate the file content |
| Supports various options and parameters to customize and optimize the data loading/unloading process, such as file format, copy options, validation mode, and partitioning expression | Supports only a few options and parameters to customize and optimize the file upload or download process. |
| Returns the number of rows loaded or unloaded, and the number of files loaded or unloaded | Returns the number of files uploaded or downloaded, and the file size |
Here are some examples of when to use each command:
- Use Snowflake COPY INTO when you want to load data from files in stages to tables, or unload data from tables or queries to files in stages, using a simple and expressive syntax. For example:
COPY INTO <table>
FROM @my_stage/my_file.csv;

-- Unloading data from a table to a stage
COPY INTO @my_stage/my_file.csv
FROM <table>;
Snowflake COPY INTO example
- Use PUT when you want to upload files from your local machine to internal stages, or download files from internal stages to your local machine, using a fast and secure method. For example:
-- Upload a file from local to a stage
PUT file:///Users/my_user/my_file.csv @my_stage;

-- Download a file from a stage to local
GET @my_stage/my_file.csv file:///Users/my_user/;
Snowflake COPY INTO example
How to Unload Data From Snowflake Tables to Internal Stages?
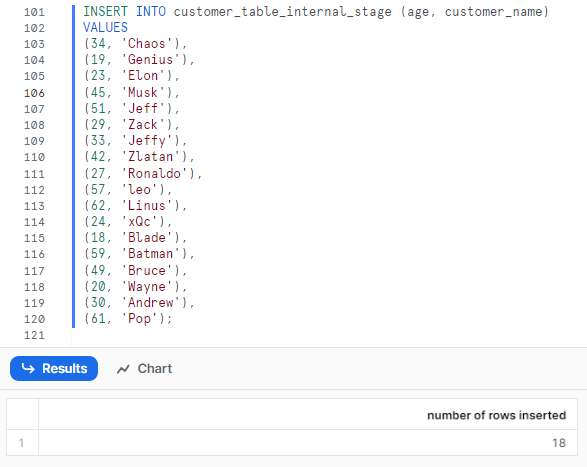
Now that we've loaded data into Snowflake tables from the internal stage, it's time to explore unloading data from Snowflake to an internal stage. To do that, let's take another step. Let's again insert additional dummy data into that specific table and then unload the data from that table to the Snowflake internal stage.
INSERT INTO customer_table_internal_stage (age, customer_name)
VALUES
(34, 'Chaos'),
(19, 'Genius'),
(23, 'Elon'),
(45, 'Musk'),
(51, 'Jeff'),
(29, 'Zack'),
(33, 'Jeffy'),
(42, 'Zlatan'),
(27, 'Ronaldo'),
(57, 'leo'),
(62, 'Linus'),
(24, 'xQc'),
(18, 'Blade'),
(59, 'Batman'),
(49, 'Bruce'),
(20, 'Wayne'),
(30, 'Andrew'),
(61, 'Pop');
Snowflake COPY INTO example
Step 1—Verify the Data Loaded to the Table
First, let's check and verify whether there is data in our customer_table.
SELECT * FROM customer_table_internal_stage ;
Step 2—Using Snowflake Copy Into Command to Unload Data
Use the Snowflake COPY INTO command to unload the data from the table to the stage. For example:
COPY INTO @DEMO_S3_EXTERNAL_STAGE/sampledata.csv
FROM customer_table
OVERWRITE = TRUE;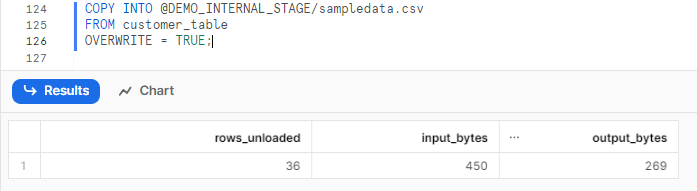
If you don't use “OVERWRITE = TRUE”, you will encounter this error:

Step 3—Verify the Data Unloading Process and Check the Results
Finally, you can select the table to verify whether the data from the table has been successfully copied to the stage. To check this, execute the following query:
SELECT COUNT(*) FROM @my_s3_stage;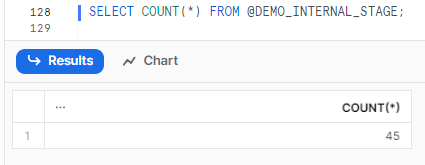
SELECT $1, $2 FROM @DEMO_INTERNAL_STAGE/sampledata.csv;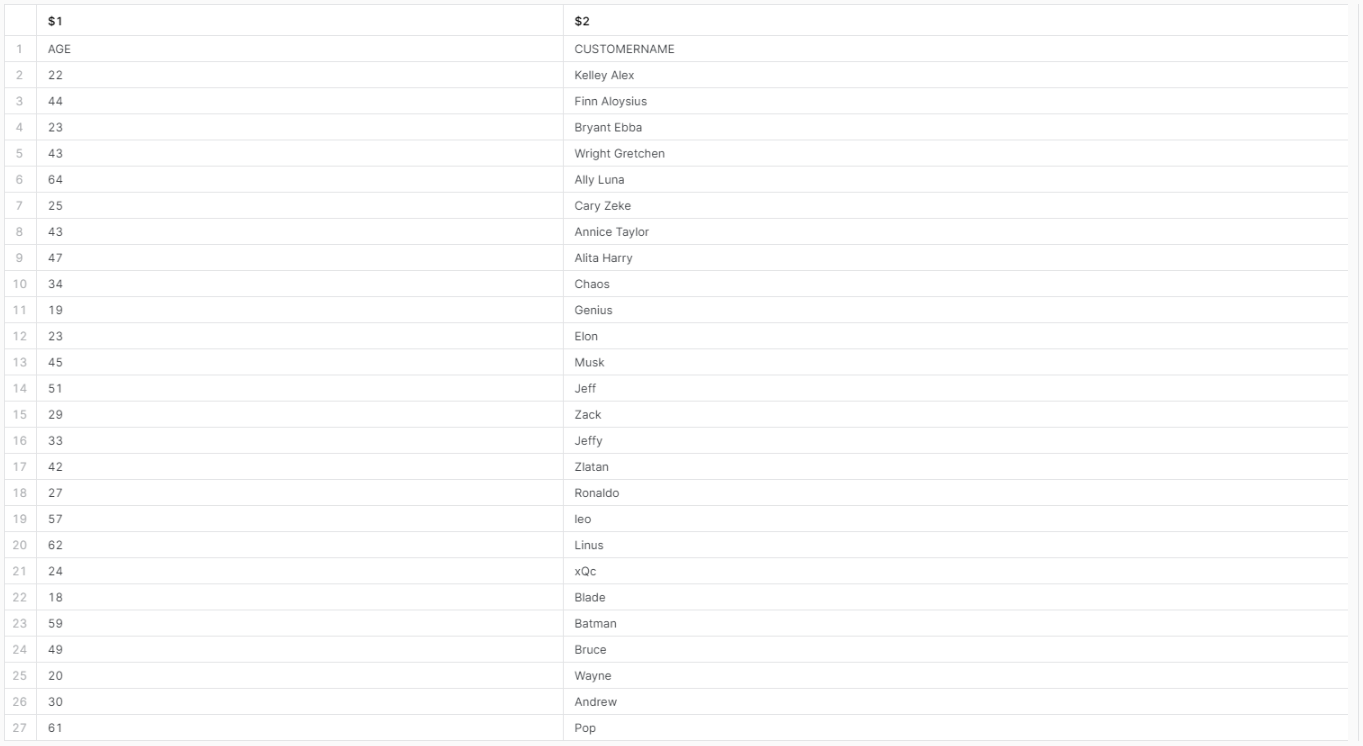
How Do I Copy a File From Snowflake to Local?
To copy a file from Snowflake to your local machine, you'll need to use the GET command. This command within Snowflake enables you to download files from an internal stage in Snowflake to your local machine. The GET command can be utilized either in the SnowSQL command-line client. For more detailed instructions on using the GET command, refer to this article.
The syntax for the GET command is:
GET <stage_name>/<file_name> <local_path>;The parameters are:
- <stage_name>: Name of the internal stage where the file is stored. The stage can be either a user stage or a table stage.
- <file_name>: Name of the file to be downloaded. The file name can include a wildcard character (*) to match multiple files.
- <local_path>: Path on your local machine where the file will be downloaded. The local path can be either an absolute path or a relative path.
The GET command also supports some options and parameters to customize and optimize the file download process, such as overwrite, auto-compress, and parallel.
Alternatively,
You can directly use Snowsight to download your staged file into local directory. To do so, follow the steps below:
Step 1—Navigate to the db and schema where you have created Snowflake internal named stage.
Step 2—Select the stage where you have uploaded the files.
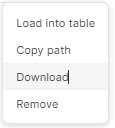
Step 3—Click on the meatball menu option located at the far right-hand corner of that specific staged file.
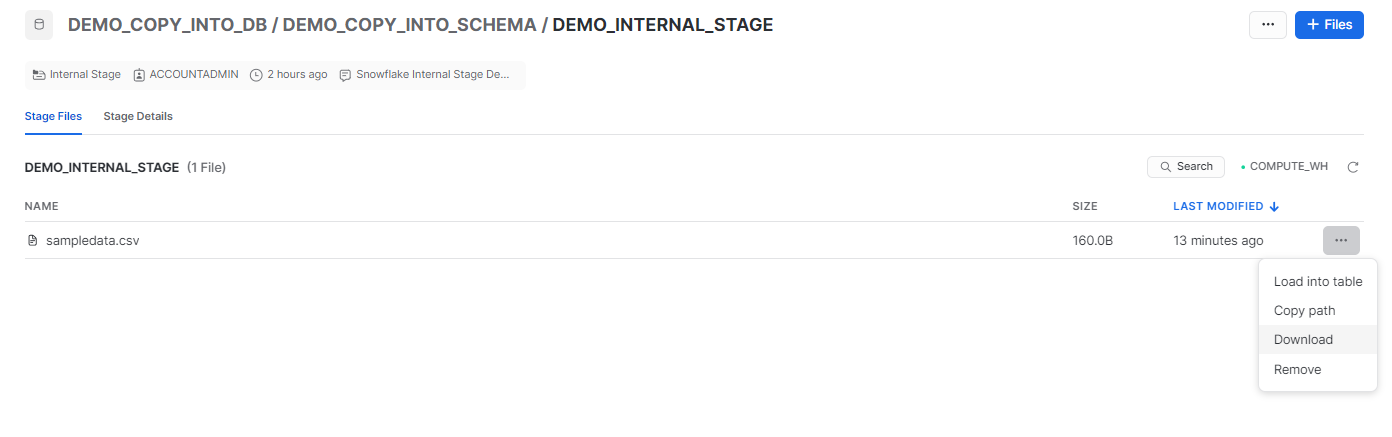
Step 4—Click on “Download”.
What Is the Difference Between Snowflake COPY INTO and Snowpipe In Snowflake?
Snowflake COPY INTO command and Snowpipe are used for data loading, but they have differences in their functionality and usage. Here is a table that summarizes the main differences between ‘em:
| Snowflake COPY INTO | Snowpipe |
| Snowflake COPY INTO command loads data from files in stages to tables, or unloads data from tables or queries to files in stages | Snowpipe is a serverless service offered by Snowflake, designed to facilitate rapid and automated data ingestion from sources like S3, Google Cloud Storage, and Azure Blob Storage into Snowflake tables. |
| Using Snowflake COPY INTO command, you execute a command that specifies both the source data location and the target table. Snowflake then performs a bulk data load, transferring all the data from the source into the table in a single operation. | Using Snowflake Snowpipe, you establish a pipeline that defines the source data location, target table, and loading frequency. Snowflake autonomously monitors the source location for new data, incrementally loading new files as they appear. |
| Useful for periodic bulk loads. Gives you precise control over when data is loaded. | Useful for continuous, near real-time trickle loading throughout the day as new data arrives + Automates ongoing incremental data loads. |
| Requires executing a SQL command to load data. | Continuous automated loading once the pipeline is configured. |
Controlling Load Behavior and Performance Using Various Options
Snowflake COPY INTO command provides a number of options and parameters that allow you to control the load behavior and performance. These options and parameters can help you to handle errors and warnings, limit the file size, purge the files, return the failed rows, match the columns by name, enforce the length, truncate the columns, force the load—and load the uncertain files.
Now, in this section, we will explain each of these options and parameters in detail and show you how to use ‘em.
ON_ERROR
ON_ERROR option specifies the action to take when an error occurs during the data loading/unloading process. The action can be one of the following values:
- ABORT_STATEMENT: Aborts the entire data loading/unloading statement and rolls back any changes made by the statement. This is the default action.
- CONTINUE: Continues the data loading/unloading process and skips the file or row that caused the error.
- SKIP_FILE: Continues the data loading/unloading process and skips the entire file that caused the error.
- SKIP_FILE_<n>_ROWS: Continues the data loading/unloading process and skips the file that caused the error after loading/unloading the first <n> rows of the file.
For example, to load data from a stage to a table and continue the process even if there are errors, you can use the following command:
COPY INTO <table>
FROM @stage_name
ON_ERROR = CONTINUE;
Snowflake COPY INTO load behavior and performance
SIZE_LIMIT
Number (> 0) that specifies the maximum size (in bytes) of data to be loaded for a given COPY statement. When the threshold is exceeded, the COPY operation discontinues loading files. The default value is 0, which means no limit.
For example, to load data from a stage to a table and limit the file size to 10 MB, you can use the following command:
COPY INTO <table>
FROM @stage_name
SIZE_LIMIT = 10485760;
Snowflake COPY INTO load behavior and performance
PURGE
PURGE option specifies whether to delete the files from the stage after loading them. It is useful for cleaning up the stage and saving storage space. The option can be either TRUE or FALSE. If TRUE, the data loading/unloading process will delete the files from the stage after loading/unloading them. If FALSE, the data loading/unloading process will leave the files in the stage after loading/unloading them.
For example, to load data from a stage to a table and purge the files from the stage, you can use the following command:
COPY INTO <table>
FROM @stage_name
PURGE = TRUE;
Snowflake COPY INTO load behavior and performance
RETURN_FAILED_ONLY
RETURN_FAILED_ONLY option specifies whether to return only files that have failed to load in the statement result. The option can be either TRUE or FALSE. If TRUE, the data loading process will return only the rows that failed to load or unload, along with the error message. If FALSE, the data loading process will return all the rows, along with the error message if any.
For example, to load data from a stage to a table and return only the failed rows, you can use the following command:
COPY INTO <table>
FROM @stage_name
RETURN_FAILED_ONLY = TRUE;
Snowflake COPY INTO load behavior and performance
MATCH_BY_COLUMN_NAME
MATCH_BY_COLUMN_NAME option specifies whether to load semi-structured data into columns in the target table that match corresponding columns represented in the data. The option can be either CASE_SENSITIVE or CASE_INSENSITIVE.
ENFORCE_LENGTH
ENFORCE_LENGTH option specifies whether to truncate text strings that exceed the target column length. The option can be either TRUE or FALSE. If TRUE, the COPY statement produces an error if a loaded string exceeds the target column length. If FALSE, strings are automatically truncated to the target column length.
For example, to load data from a stage to a table and enforce the length of the string or binary columns, you can use the following command:
COPY INTO my_table
FROM @my_stage
ENFORCE_LENGTH = TRUE;
Snowflake COPY INTO load behavior and performance
TRUNCATECOLUMNS
TRUNCATECOLUMNS option specifies whether to truncate text strings that exceed the target column length. If TRUE, strings are automatically truncated to the target column length. If FALSE, the COPY statement produces an error if a loaded string exceeds the target column length.
For example, to load data from a stage to a table and truncate the data to fit the target column size, you can use the following command:
COPY INTO my_table
FROM @my_stage
TRUNCATECOLUMNS = TRUE;
Snowflake COPY INTO load behavior and performance
FORCE
FORCE option specifies to load all files, regardless of whether they’ve been loaded previously and have not changed since they were loaded. The option can be either TRUE or FALSE. If TRUE, the data loading process will load the same file multiple times, regardless of whether it has been loaded or unloaded before. If FALSE, the data loading process will skip the file if it has been loaded or unloaded before.
Suppose you want to load data from a stage to a table and ensure that the loading process handles the same file multiple times. In such a scenario, you can utilize the following command:
COPY INTO my_table
FROM @my_stage
FORCE = TRUE;
Snowflake COPY INTO load behavior and performance
LOAD_UNCERTAIN_FILES
LOAD_UNCERTAIN_FILES option specifies whether to load the files that have uncertain file formats. This option is useful for loading files that have ambiguous or unknown file formats, such as files without extensions or files with mixed formats. The option can be either TRUE or FALSE. If TRUE, the data loading process will load the files that have uncertain file formats, and try to infer the file format from the file content. If FALSE, the data loading process will skip the files that have uncertain file formats, and issue a warning.
For example, to load data from a stage to a table and load the files that have uncertain file formats, you can use the following command:
COPY INTO my_table
FROM @my_stage
LOAD_UNCERTAIN_FILES = TRUE;
Snowflake COPY INTO load behavior and performance
How to Use TRUNCATE TABLE to Delete Old Data Before Loading New Data?
Sometimes, you may want to delete the old data in the target table before loading the new data from the stage, which helps you to avoid duplicate or outdated data, and keep the table clean and up-to-date.
To do this, you can use the TRUNCATE TABLE command, which deletes all the data in the table without affecting the table schema or metadata. You can use the TRUNCATE TABLE command before the COPY INTO command to delete the old data before loading the new data. For example:
-- Delete the old data
TRUNCATE TABLE <table>;

-- Load the new data from the stage to the table
COPY INTO my_table
FROM @my_stage;
Snowflake COPY INTO load behavior and performance
For more in-depth guide on loading + unloading data into Snowflake, check out this full video playlist from Data Engineering Simplified.
Save up to 30% on your Snowflake spend in a few minutes!


Conclusion
And that’s a wrap! Snowflake COPY INTO command is a powerful and flexible command that allows you to load data from files in stages to tables, or unload data from tables or queries to files in stages, using a simple and straightforward syntax. This command can help you to access, transform, and analyze data from various sources and formats, and optimize the data loading/unloading process.
In this article, we have covered:
- What is COPY INTO in Snowflake?
- Prerequisite Requirements for Using Snowflake COPY INTO
- How Does Snowflake COPY INTO Command Work?
- How to Load Data From External Stages to Snowflake Tables?
- How to Unload Data From Snowflake Tables to External Stages?
- How to Load Data From Internal Stages to Snowflake Tables?
- How Do You COPY INTO Validation in Snowflake?
- How to Unload Data From Snowflake Tables to Internal Stages?
- How Do I Copy a File From Snowflake to Local?
- Controlling Load Behavior and Performance Using Various Options
…and so much more!
Snowflake COPY INTO command is like a bridge that connects the data in the stages and the tables. The bridge can be built and customized in different ways, depending on the source and the destination of the data, and the options and the parameters that you choose.
FAQs
What is Snowflake COPY INTO command used for?
Snowflake COPY INTO command is used to load data from stages into tables or unload data from tables into stages. It enables efficient data ingestion in Snowflake.
What are the different types of stages supported by Snowflake COPY INTO?
Snowflake COPY INTO supports both external stages like S3, Azure, GCS and internal stages like user stages, table stages, and named stages.
What file formats does Snowflake COPY INTO command support?
Snowflake COPY INTO supports loading data from CSV, JSON, Avro, Parquet, ORC and other file formats.
Does Snowflake COPY INTO command handle compression formats?
Yes, COPY INTO can load compressed files like GZIP and Snappy compressed files automatically.
How does Snowflake COPY INTO command validate data during loads?
Snowflake COPY INTO provides a VALIDATION_MODE parameter to validate data before load. It can return errors, warnings, or just sample rows during validation.
Can Snowflake COPY INTO command transform data during loads?
Yes, Snowflake COPY INTO provides options to run transformations on the data using SQL before loading it into the target table.
How does Snowflake COPY INTO command optimize load performance?
Snowflake COPY INTO uses multi-threaded parallel loads to maximize throughput. Load performance can be tuned using parameters like MAX_FILE_SIZE.
Does Snowflake COPY INTO command purge files after loading?
Yes, the PURGE copy option can be used to delete files from the stage after loading them.
How does Snowflake COPY INTO command handle errors during loads?
The ON_ERROR parameter controls error handling. Load can be aborted, or continued or files can be skipped on errors.
How can I download a file from a Snowflake stage?
You can make use of the GET command to download files from a Snowflake internal stage to local.
Can Snowflake COPY INTO be used for incremental data loads?
Yes, by using the FORCE copy option to reload files, COPY INTO can handle incremental loads.
Does Snowflake COPY INTO command work across different Snowflake accounts/regions?
No, Snowflake COPY INTO works only within the same Snowflake account and region. It cannot load data across accounts or regions.
Can Snowflake COPY INTO command load semi-structured data like XML?
Yes, Snowflake COPY INTO supports loading XML data using the XML file format option.
How does authentication work with external stages in COPY INTO?
Snowflake COPY INTO uses the credentials configured in the storage integration to authenticate and access external stages.
Does Snowflake COPY INTO command load data in parallel?
Yes, Snowflake COPY INTO uses multi-threading for parallel loads to maximize throughput.
Can Snowflake COPY INTO command load whole folders from a stage at once?
No, Snowflake COPY INTO loads individual files. To load a whole folder, use wildcards or the multiple files option.
Does Snowflake COPY INTO command validate schemas during loads?
No, Snowflake COPY INTO does not validate the schema. Use constraints on the table instead to enforce schema validation.
Can Snowflake COPY INTO command calls be made idempotent?
Yes, by using the FORCE copy option, COPY INTO calls can be made idempotent to handle re-runs.


