Loading data into tables is one of the most common tasks you'll perform in Snowflake. To insert data into a table, you can use the Snowflake INSERT INTO command, which gives you the power to insert one or more rows of data into a table simply by specifying the target table, column values, and source of the data. It also allows you to update existing table data by adding additional rows. If needed, you can even replace or overwrite existing table rows entirely with new data.
In this article, we will cover everything you need to know about using the Snowflake INSERT INTO command, including syntax, practical examples, use cases, and performance considerations—and so much more!
What Is Snowflake INSERT INTO Command?
Before diving deep into the specifics of Snowflake INSERT INTO command, it's helpful to grasp the basic concept of Snowflake tables. Snowflake tables are organized into rows (representing records) and columns (representing attributes or properties of a record). Tables are defined at the schema level and used for data storage. To create a table, use the Snowflake CREATE TABLE statement specifying the table name, column names, and data types.
Once a table is created, you can start loading data into it using the Snowflake INSERT INTO command. The core purpose of the INSERT INTO command is to populate table rows with new data. It allows you to take data from various sources and efficiently insert it into Snowflake tables.
The syntax of Snowflake INSERT INTO is straightforward:
INSERT INTO table_name (column1, column2)
VALUES (value1, value2);
As you can see, this will insert one row with the specified column values into the target table. You can insert multiple rows and perform more complex INSERT operations, as you will see in the examples below.
Save up to 30% on your Snowflake spend in a few minutes!


How do you INSERT data in Snowflake Table—Using Snowflake INSERT INTO?
Let's look at the full syntax and parameters supported for the Snowflake INSERT INTO command:
Here is the full syntax breakdown of Snowflake INSERT INTO command:
INSERT [ OVERWRITE ] INTO <target_table> [ ( <target_col_name> [ , ... ] ) ] { VALUES ( { <value> | DEFAULT | NULL } [ , ... ] ) [ , ( ... ) ] | <query> }The key parameters of Snowflake INSERT INTO command are:
- <target_table>: It is the name of the table where you want to insert the data. You can optionally specify the DB and Schema name as well, such as db_name.schema_name.table_name.
- <target_col>: It is the list of columns in the target table that you want to insert the data into. You can omit this parameter if you want to insert data into all the columns of the table, or if the order and number of columns in the source match the order and number of columns in the target table.
- VALUES ( <value_list> ): It specifies one or more values to insert into the corresponding columns in the target table. In a VALUES clause, you can specify literal values, expressions, DEFAULT to use column defaults, or NULL for null values. Each value must be separated by a comma. You can insert multiple rows by specifying additional comma-separated value sets in the clause.
- <query>: It specifies a full SQL query statement that returns values to be inserted into the corresponding columns of the target table. This allows you to efficiently insert rows selected from one or more source tables.
- OVERWRITE: This optional clause specifies that the target table should be truncated before inserting the new values. It replaces all existing table data entirely with the rows being inserted. OVERWRITE option provides a easy way to reset a table without additional delete logic. Specifying OVERWRITE does not affect access control privileges on the table. Also, INSERT OVERWRITE statements can process within the current transaction scope avoiding an explicit commit like a TRUNCATE would.
To provide a basic idea of how to use Snowflake INSERT INTO command in Snowflake, let's consider a simple example. Suppose we have a table called students with the following columns and data:

Now, we want to insert a new row of data into this table. To do so, we can use Snowflake INSERT INTO command as follows:
INSERT INTO students (student_id, first_name, last_name, grade, major)
VALUES (4, 'Larry', 'Page', 10, 'Economics');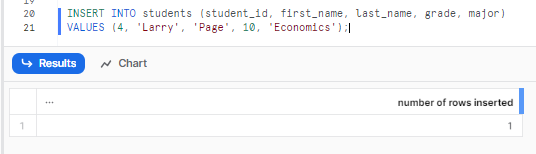
This will insert a new row into the students table with the specified student_id, first_name, last_name, grade, and major values. As you can see, the Snowflake INSERT INTO command is a simple and effective way to load data into a Snowflake table.
How to Verify Data Insertion in Snowflake: 3 Methods
After you use the Snowflake INSERT INTO command to load data into a Snowflake table, you might want to verify that the data is being inserted correctly and accurately. There are a few ways to do this, depending on your needs and preferences.
Method 1: Verify Data Using SELECT Statement
The simplest and most common way to check if data is being inserted into a table is to use the SELECT statement to query the table and view the data. SELECT statement allows you to retrieve data from one or more tables, based on various criteria and options. You can use the SELECT statement to view the entire table, or a subset of the table, such as specific columns, rows, or values.
For instance, to review the data inserted in the previous example, we can easily use a SELECT statement by selecting all to view all the data in the table and verify whether the data was inserted or not. To do this, simply execute the query statement mentioned below:
SELECT * FROM students;
As you can see, this will return all the data from the students table, and we can see that the new row of data is inserted correctly.
We can also use the SELECT statement to view only the newly inserted data, by using a condition or a filter. For example, we can use the WHERE clause to specify that we only want to see the data where the student major is “Economics”:
SELECT * FROM students WHERE major = 'Economics';
The SELECT statement is a powerful and flexible way to check if data is being inserted into a table, as it allows you to view the data in various ways and formats. You can use different clauses, functions, and operators to customize your query and get the data you need.
Method 2: Track INSERT Operations Using QUERY_HISTORY and ACCOUNT_USAGE Views
Another way to check if data is being inserted into a table is to use the Query History view or the Account Usage views to track the queries that were executed on the table. These features allow you to see who inserted data into the table, when they did it, how long it took, and other details.
You can also see details on all INSERT operations using the Snowflake QUERY_HISTORY and ACCOUNT_USAGE views.
For example:
SELECT * FROM snowflake.account_usage.query_history WHERE query_text LIKE 'INSERT INTO%' ORDER BY start_time DESC;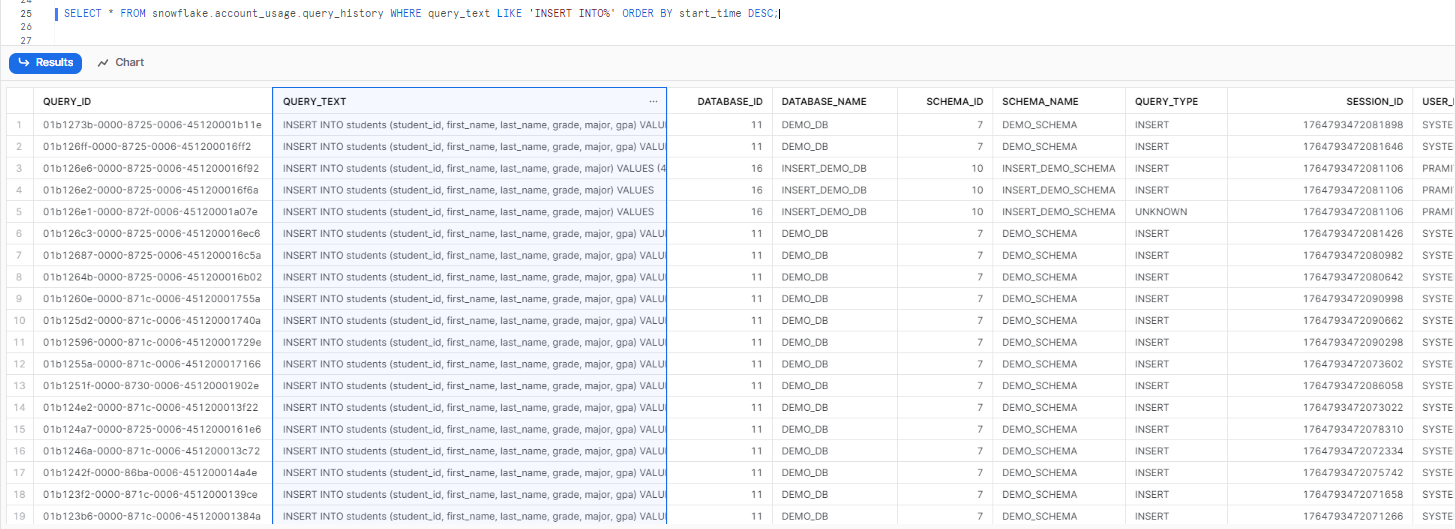
As you can see, the output will show you the details of the Snowflake INSERT INTO statements, when they ran, and various other details, such as the query ID, the user who issued the query, the role that was active, the warehouse that was used, the start and end time, execution status–and so much more! The ACCOUNT_USAGE view provides metrics on all DML operations like INSERT that can be useful for monitoring and optimization.
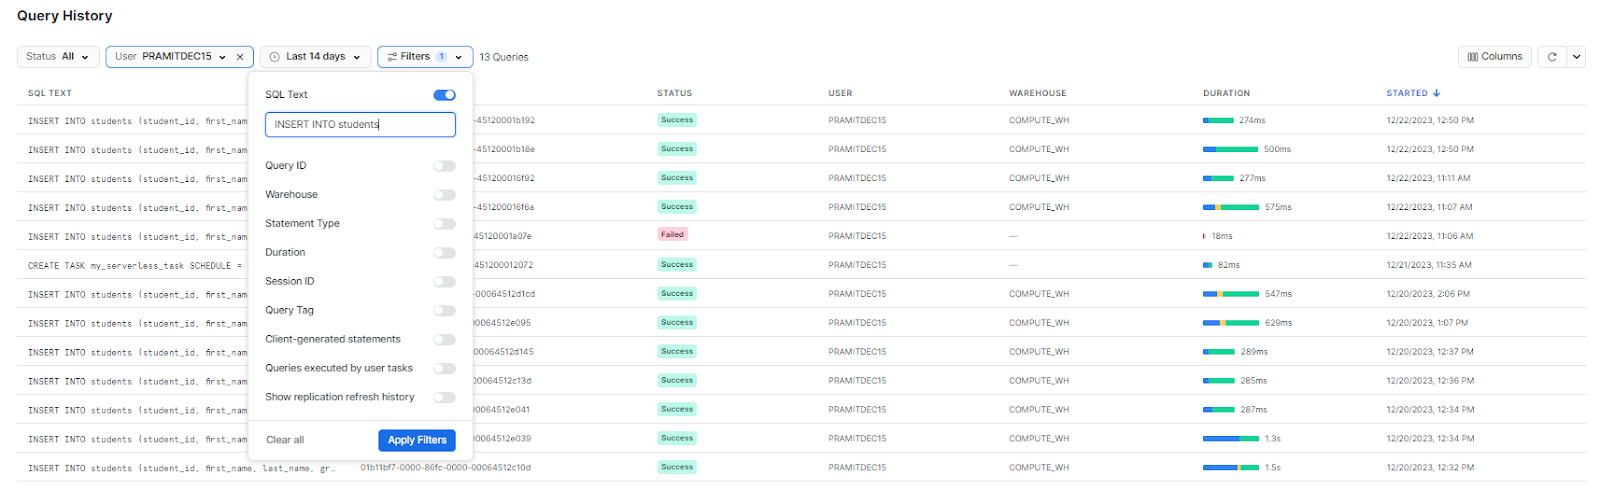
Method 3: Monitor INSERT Operations in Snowsight UI
There is another alternative method—using Snowsight. So to access the entire detailed info of the query, head over to your Activity menu and click on Query History. Select the Filter dropdown option and enable SQL. Then, type the query text you want to search. For instance, if you're searching for the Snowflake INSERT INTO students query, simply type that and apply the filter. You should then be able to see the complete details, including the status of the query and the user who executed it.
Snowflake INSERT INTO Examples: Step-by-Step Tutorials
Now let’s look at some practical examples of how to use Snowflake INSERT INTO command in Snowflake with different scenarios and options. We will use a demo database called demo_customers_db and a demo schema called demo_customers_schema for these examples. You can create these objects by using the following commands:
CREATE DATABASE demo_customers_db;
USE DATABASE demo_customers_db;
CREATE SCHEMA demo_customers_schema;
USE SCHEMA demo_customers_schema;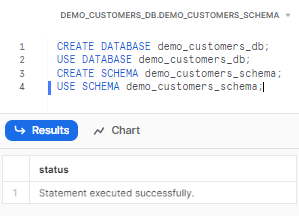
We will also create and use some sample tables for these examples. You can create these tables by using the following commands:
-- Creating customers table with four columns: id, name, email, and phone
CREATE TABLE customers (
  id INT,
  name VARCHAR,
  email VARCHAR,
  phone VARCHAR
);

-- Creating orders table with four columns: id, customer_id, product, and amount
CREATE TABLE orders (
  id INT,
  customer_id INT,
  product VARCHAR,
  amount DECIMAL(10,2)
);

-- Creating products table with three columns: id, name, and price
CREATE TABLE products (
  id INT,
  name VARCHAR,
  price DECIMAL(10,2)
);

-- Creating json_data with two columns: id and data
CREATE TABLE json_data (
  id INT,
  data VARIANT
);
Now, let’s see some examples of how to use the Snowflake INSERT INTO command.
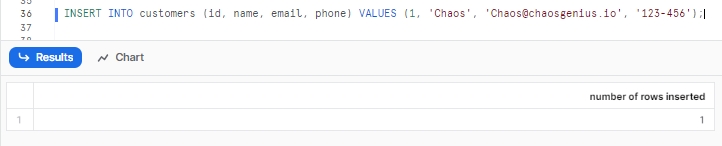
Example 1: Insert Data Into Single Row
The simplest way to use Snowflake INSERT INTO command is to insert a single row of data into a table. You can do this by using the VALUES clause and specifying the values for each column. For example, suppose we want to insert one row of data into the customers table, you can execute the following command:
INSERT INTO customers (id, name, email, phone) VALUES (1, 'Chaos', '[email protected]', '123-456');As you can see, this will insert the new row of data into the customers table.
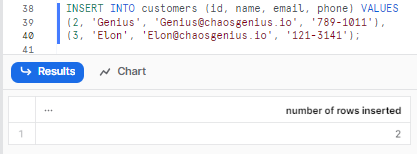
Example 2: Insert Data Into Multiple Rows with Single INSERT Statement
Now, to insert multiple rows of data into a table, you can utilize the VALUES clause and specify multiple value lists separated by commas. For instance, if you wish to insert two new rows of data into the customers table, you can execute the following command:
INSERT INTO customers (id, name, email, phone) VALUES
(2, 'Genius', '[email protected]', '789-1011'),
(3, 'Elon', '[email protected]', '121-3141');
As you can see, this will insert the two new rows of data into the customers table.
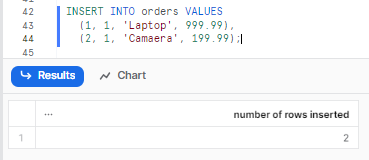
INSERT INTO orders VALUES
  (1, 1, 'Laptop', 999.99),
  (2, 1, 'Camaera', 199.99);
As you can see, this will insert the two new rows of data into the orders table.
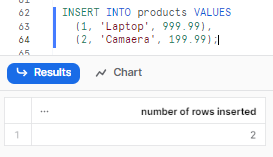
INSERT INTO products VALUES
  (1, 'Laptop', 999.99),
  (2, 'Camaera', 199.99);
As you can see, this will insert the two new rows of data into the products table.
Example 3: Insert Data Using Subqueries and CTEs (Common Table Expressions)
Another way to use Snowflake INSERT INTO command is to insert data from a subquery or a common table expression (CTE) into a table. A subquery is a query that is nested inside another query, and a CTE is a temporary named result set that can be referenced within another query. You can use subqueries and CTEs to insert data from complex or derived sources, such as joins, aggregations, or transformations.
Lets create a customers table and use subquery to insert data. We can use Snowflake INSERT INTO command as follows:
➤ Using Subquery:
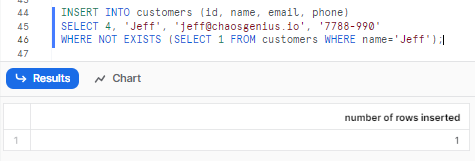
For instance, let’s insert data into the customers table using a subquery to prevent duplicates:
INSERT INTO customers (id, name, email, phone)
SELECT 4, 'Jeff', '[email protected]', '7788-990'
WHERE NOT EXISTS (SELECT 1 FROM customers WHERE name='Jeff');
As you can see, this will insert the data using Subqueries into the customers table.
➤ Using CTEs:
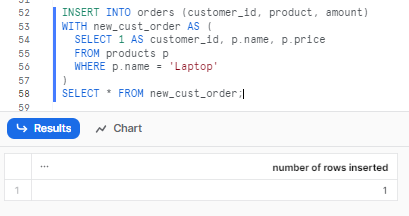
Here’s an example of inserting data into the orders table using a CTE:
INSERT INTO orders (customer_id, product, amount)
WITH new_cust_order AS (
  SELECT 1 AS customer_id, p.name, p.price
  FROM products p
  WHERE p.name = 'Laptop'
)
SELECT * FROM new_cust_order;
As you can see, this will insert the data from the CTE into the orders table.
Using subqueries and CTEs for data insertion is a powerful and flexible way to load data into a Snowflake table, as it allows you to insert data from complex or derived sources.
Example 4: Insert JSON Data into Snowflake VARIANT Column
Another way to use Snowflake INSERT INTO command is to insert multiple rows of data for JSON data into a table. JSON is a popular data format that can store nested and hierarchical data, such as arrays and objects. Snowflake supports JSON data as a native data type, called VARIANT, which can store any JSON value. You can use Snowflake INSERT INTO command to insert JSON data into a VARIANT column, by using the PARSE_JSON (function to convert the JSON string into a VARIANT value).
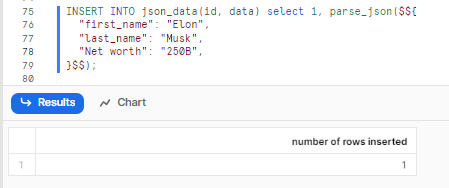
For example, suppose we want to insert one new row of data into the json_data table, which we created earlier, with the following JSON values:
{
  "first_name": "Elon",
  "last_name": "Musk",
  "Net worth": "250B",
}
Now, we can use Snowflake INSERT INTO command as follows:
INSERT INTO json_data(id, data) select 1, parse_json($${
  "first_name": "Elon",
  "last_name": "Musk",
  "Net worth": "250B",
}$$);
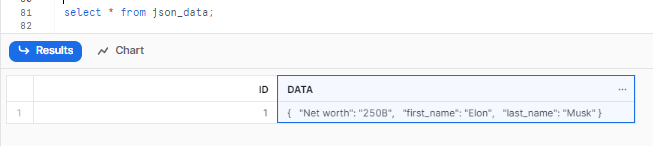
As you can see, this will insert the one new rows of data into the json_data table, and the table will look like this:
Example 5: Replace Existing Table Data Using INSERT OVERWRITE
Now, let's insert data into a table using the OVERWRITE option. The OVERWRITE option allows you to truncate the existing data in the table and replace it entirely with the new data. This can be useful when you want to refresh the table with the latest full dataset or when you want to avoid duplicates or conflicts by starting fresh. To use the OVERWRITE option, you need to specify OVERWRITE as an optional parameter in the Snowflake INSERT INTO command.
For example,
Here is our initial table data:

Let’s suppose you want to overwrite the existing data with new data, you can execute the following query:
INSERT OVERWRITE INTO customers VALUES (1, 'Chaos', '[email protected]', '123-456'); 
Example 6: Insert Data into Specific Columns (Partial Column Insert)
Now, let's use the Snowflake INSERT INTO command to insert data into multiple columns of a table. You can achieve this by specifying the column names and their corresponding values within the INSERT INTO command. For instance, if you intend to insert data into the products table while specifically targeting the name and price columns, leaving the id column empty or null, you can execute the following Snowflake INSERT INTO command:
INSERT INTO products (name, price) VALUES
('Mouse', 69.00),
('Keyboard', 420.00),
('Monitor', 500.00);
As you can see, this will insert the data into the name and price columns of the products table, and the id column will be null, and the table will look like this:

Example 7: Insert Data into Temporary Tables in Snowflake
Snowflake temporary table is a table that exists only for the duration of the session, and is automatically dropped when the session ends. You can use temp tables to store intermediate or temporary results or to perform complex or iterative operations. To create a temporary table, you need to use the TEMPORARY keyword in the CREATE TABLE statement. To insert data into a temporary table, you can use the INSERT INTO command as usual.
For example, suppose you want to create a temporary table called temp_orders that stores the orders that have an amount greater than 10, and then insert data into this table from the orders table. We can use the INSERT INTO command as follows, but first let’s create a temporary table, to do so:
CREATE TEMPORARY TABLE temp_orders (
  id INT,
  customer_id INT,
  product VARCHAR,
  amount DECIMAL(10,2)
);
Now, let’s insert it.
INSERT INTO temp_orders (id, customer_id, product, amount)
SELECT id, customer_id, product, amount
FROM orders
WHERE amount > 10;
As you can see, this will create a temporary table called temp_orders and insert the data from the orders table where the amount is greater than 10 into the temp_orders table, and the table will look like this:

Example 8: Insert Special Characters and Escape Sequences in Snowflake
There are several instances in Snowflake where you may need to deal with special characters, such as inserting or editing data containing special characters. These unique characters could be single quotes, double quotes, or other characters that have special meaning in SQL or within Snowflake's data loading processes.
To insert special characters in Snowflake, you can use escape characters or string concatenation. Here are a few examples:
Using Escape Characters:
Snowflake allows you to escape single or double quotes within string literals using the escape symbol \. This enables you to incorporate these special characters in your data.
Example:
-- Insert string w/ single quote
INSERT INTO your_table_nam (col1) VALUES ('This string contains a single quote: \'');

-- Insert string w/ double quote
INSERT INTO my_table (col1) VALUES ('This string contains a double quote: \"');
Using String Concatenation:
Another approach is to use string concatenation to build your string with special characters.
Example:
-- Insert string w/ single quote
INSERT INTO my_table (col1) VALUES ('' || 'This string contains a single quote: ' || '''');

-- Insert string w/ double quote
INSERT INTO my_table (col1) VALUES ('' || 'This string contains a double quote: ' || '"');
Using the REPLACE Function:
If you have a string with both single quotes and double quotes, you can use the REPLACE function to substitute one type of quote with the other before inserting the data.
Example:
INSERT INTO my_table (col1)
VALUES (REPLACE('This string contains both "double" and ''single'' quotes', '"', ''''''));
Here we replace all double quotes (") with two single quotes (''), which is the way to represent a single quote as a string literal.
Using CHR() Function for Specific ASCII/Unicode Characters:
You can use the CHR() function to insert characters based on their ASCII or Unicode decimal value. For example, CHR(39) is a single quote, and CHR(10) is a newline character.
Example:
INSERT INTO my_table (col1) VALUES ('This string contains a single quote: ' || CHR(39));Advanced INSERT INTO Features: Defaults, Identity, and Sequences
Columns in Snowflake tables have few predefined behaviors when data is inserted (like automatic number generation, Sequences and default values). To load data in a predictable way, you need to know how INSERT INTO works with these features.
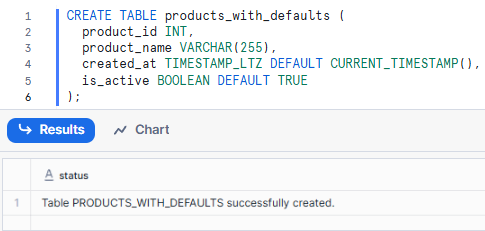
a) Defining DEFAULT Expressions in Table Creation
Columns can be defined with a DEFAULT expression during table creation. When you insert a row, if a column with a default value is either omitted from the INSERT statement's column list or explicitly specified with the DEFAULT keyword, Snowflake will automatically populate that column with its predefined default value.
Example:
CREATE TABLE products_with_defaults (
  product_id INT,
  product_name VARCHAR(255),
  created_at TIMESTAMP_LTZ DEFAULT CURRENT_TIMESTAMP(),
  is_active BOOLEAN DEFAULT TRUE
);
INSERT Behavior with Default Values:
INSERT INTO products_with_defaults (product_id, product_name)
VALUES (101, 'New Gadget');
Explicit DEFAULT Keyword in INSERT Statement
INSERT INTO products_with_defaults (product_id, product_name, is_active)
VALUES (102, 'Another Widget', DEFAULT);
Overriding Default Values During INSERT
INSERT INTO products_with_defaults (product_id, product_name, is_active)
VALUES (103, 'Inactive Item', FALSE);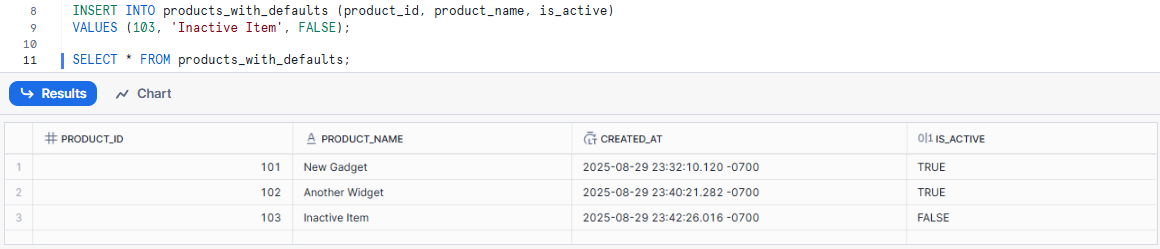
b) Using IDENTITY Columns for Auto-Incrementing Primary Keys
Snowflake supports IDENTITY columns, which automatically generate unique, sequential numbers for each new row. This is commonly used for primary keys. Behind the scenes, IDENTITY columns are implemented using sequences.
Creating Tables with IDENTITY Columns:
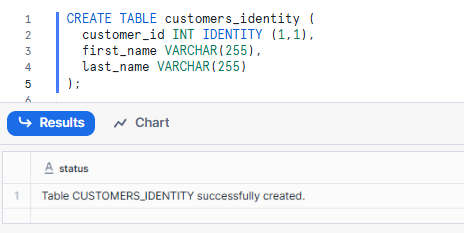
CREATE TABLE customers_identity (
  customer_id INT IDENTITY (1,1), -- Starts at 1, increments by 1
  first_name VARCHAR(255),
  last_name VARCHAR(255)
);
When inserting into a table with an IDENTITY column, you typically omit the IDENTITY column from the INSERT statement, and Snowflake generates its value automatically:
INSERT INTO customers_identity (first_name, last_name)
VALUES ('Alice', 'Smith');
INSERT INTO customers_identity (first_name, last_name)
VALUES ('Bob', 'Johnson');
You can also explicitly provide a value for an IDENTITY column, but this is generally discouraged as it can lead to gaps or conflicts with the automatically generated sequence, and requires the INSERT privilege on the table.
c) Using Snowflake SEQUENCE Objects for Custom Number Generation
If you want even more explicit control over number generation, or for scenarios where you need to apply the same sequence across multiple tables or columns, Snowflake allows you to define and use SEQUENCE objects. A SEQUENCE generates unique numbers across sessions and statements, including concurrent statements, making them ideal for generating primary keys or any unique identifier.
Creating and Configuring Snowflake Sequences:
CREATE SEQUENCE order_id_seq START WITH 100 INCREMENT BY 1;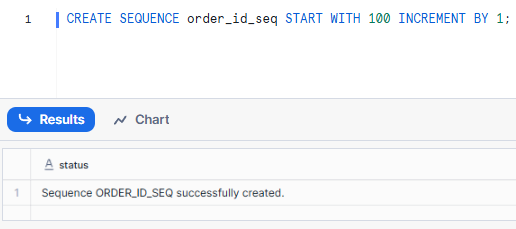
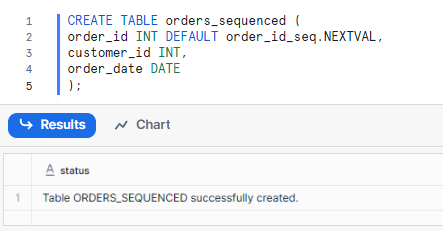
Using Sequences as DEFAULT Values in Tables:
CREATE TABLE orders_sequenced (
order_id INT DEFAULT order_id_seq.NEXTVAL,
customer_id INT,
order_date DATE
);
INSERT INTO orders_sequenced (customer_id, order_date)
VALUES (1, CURRENT_DATE());
Retrieving Next Sequence Value with NEXTVAL
You can also explicitly get the next value from a sequence in a SELECT statement:
INSERT INTO orders_sequenced (order_id, customer_id, order_date)
SELECT order_id_seq.NEXTVAL, 2, CURRENT_DATE();

SELECT * FROM orders_sequenced;
It's important to note that Snowflake sequences do not guarantee contiguous numbers without gaps, especially in high-concurrency environments, as values might be reserved but not used.
Common Use Cases for Snowflake INSERT INTO Command
Snowflake INSERT INTO command is incredibly versatile—it can serve a wide variety of use cases for loading data into Snowflake. Let's explore some of the most common ways Snowflake INSERT INTO gets used.
Use Case 1: Initial Table Population with Literal Values
One of the simplest but most common uses of Snowflake INSERT INTO is to initially populate tables with data from explicitly specified values or literals.
Use Case 2: Incremental Data Updates and Refreshes
Another use case of Snowflake INSERT INTO command is to update the existing data in a table with new or modified data, which can be extremely useful when you want to refresh or modify the data in a table, or when you want to handle duplicates or conflicts in the data. You can use the Snowflake INSERT INTO command with the OVERWRITE option to delete the existing data in the table and replace it with the new data.
Use Case 3: Incremental Data Loading Patterns
Another use case of Snowflake INSERT INTO command is to perform incremental data loads into a table. Incremental data loads involve loading only new or changed data into a table, rather than the entire data set. This can optimize performance and efficiency, or avoid loading duplicate/redundant data. You can use Snowflake INSERT INTO with a query that filters out existing data and selects only new or changed data from the source.
Some Examples:
- Daily inserts of new customer signups exported from a CRM system
- Hourly inserts of the latest sales orders
- Daily inserts of any profile updates from a social media site's API
Performance Optimization: Best Practices for Snowflake INSERT INTO
Whenever you are inserting data into the Snowflake table, you'll want to optimize the process to maximize throughput and minimize load times.
Here are some key best practices to maximize the efficiency when inserting data into Snowflake:
Optimization 1: Use Multi-Row INSERT Statements for Better Performance
When possible, use a single INSERT statement with multiple VALUE sets to insert multiple rows at once. This is much faster than separate single-row INSERTs as it reduces the number of network round trips and cuts down on transaction overhead. Multi-row inserts allow inserting thousands of rows in one shot very efficiently.
Optimization 2: Use Snowpipe for High-Volume Data Loading
For loading higher volumes of data (lets say over 500K rows), use Snowpipe to auto-ingest from cloud storage. Snowpipe handles inserting new files as they arrive in cloud platforms like. This hands-off approach removes the need for manual INSERTs and provides continuous, scalable loading.
Optimization 3: Minimize Column Selection in SELECT-Based Inserts
Avoid inserting excess columns you don't need. Insert only the required columns to reduce the data volume being processed and transferred, which can improve speed.
How INSERT INTO Impacts Snowflake Costs?
Understanding Compute Costs for INSERT Operations:
- Snowflake charges compute credits based on virtual warehouse size and runtime, billed per second with a 60-second minimum charge on each warehouse start or resume.
- Each INSERT INTO executes on a warehouse. If the warehouse is suspended, starting it incurs the full 60-second minimum, even for quick inserts.
- Frequent small inserts causing repeated warehouse resumes waste credits due to repeated minimum charges.
- Larger warehouses use more credits per second but execute complex or large inserts faster, often reducing total credit usage for a given workload by completing it quicker.
- Batching multiple rows in one INSERT statement reduces warehouse start/resume events and overall compute cost.
- Test warehouse size against workload for optimal credit usage.
Storage Costs: Data Volume, Time Travel, and Fail-Safe
- Each INSERT adds data to Snowflake’s managed storage, billed per terabyte/month.
- Time Travel retains historical data versions for the configured retention period (
DATA_RETENTION_TIME_IN_DAYS), increasing storage consumption. - Fail-safe retains data for 7 days beyond Time Travel retention.
- High rates of insert/update/delete increase storage use due to historical versioning.
- Minimizing retention time reduces storage costs but limits data recovery capabilities.
Cloud Services Layer Costs for INSERT Operations
- Cloud Services handle metadata, query compilation, transaction management, and security, consuming credits proportional to query complexity.
- Up to 10% of daily compute credits for Cloud Services are included without extra charge.
- Complex INSERT INTO statements with large subqueries or multi-row values can exceed the free Cloud Services allowance, potentially increasing cost.
Special Case: Cost Considerations for INSERT OVERWRITE Operations
INSERT OVERWRITE operations perform an atomic TRUNCATE followed by an INSERT. This means:
- Compute costs accrue for both the internal truncate operation and the subsequent insert.
- The TRUNCATE step removes the old data from the table. However, since INSERT OVERWRITE is an atomic DML transaction, the old data remains accessible via Time Travel, allowing for easy recovery or inspection of the state before the overwrite. This differs significantly from a standalone TRUNCATE TABLE DDL statement, which typically performs an implicit commit and makes the truncated data immediately unavailable through Time Travel for that table.
- This operation effectively replaces the entire table's content, which can reduce long-term storage and retention costs by eliminating older, unnecessary historical versions more quickly than individual DELETE statements.
Snowflake INSERT INTO vs Snowpipe: Comparison and Use Cases
Here is a comprehensive comparison between Snowflake INSERT INTO and Snowpipe to help you choose the right data loading method for your use case:
| Snowflake INSERT INTO | Snowpipe |
INSERT INTO executes as a synchronous SQL DML statement within a user session or stored procedure, requiring an active warehouse and explicit execution. |
Snowpipe is an asynchronous, serverless data ingestion service that automatically loads data from files in cloud storage as they arrive, using Snowflake-managed compute resources. |
INSERT INTO requires a user-managed virtual warehouse (X-Small to 6X-Large), for which you must provision, size, and pay for compute credits based on runtime. |
Snowpipe uses Snowflake's serverless compute layer, requiring no virtual warehouse. Compute is managed automatically and charged per 1,000 files loaded. |
The execution model for INSERT INTO is on-demand and manual, running only when explicitly called via a SQL statement. Each INSERT is a discrete transaction. |
The execution model for Snowpipe is event-driven and continuous, automatically triggered when new files appear in a cloud storage stage without manual intervention. |
INSERT INTO can source data from literal VALUES clauses, SELECT queries from existing tables, subqueries, and CTEs, but it does not load directly from external files. |
Snowpipe exclusively loads data from staged files in cloud storage (internal or external stages) and supports formats like CSV, JSON, Parquet, and others. |
With INSERT INTO, every statement is a fully discrete transaction that can be explicitly committed or rolled back using transaction blocks. |
Snowpipe manages transactions automatically by loading each file in a separate micro-batch, ensuring exactly-once semantics per file. |
The latency of INSERT INTO depends on warehouse size and query complexity, with immediate execution once the warehouse is active. |
Snowpipe has a typical latency of 1-2 minutes from file arrival to data availability, as it is designed for near-real-time continuous loading, not instant ingestion. |
Performance for INSERT INTO scales linearly with warehouse size. Multi-row INSERT statements are significantly faster than single-row inserts, making it ideal for batch operations. |
Snowpipe's performance scales automatically based on file volume and size, and it is optimized for high-frequency ingestion of small-to-medium files in parallel. |
INSERT INTO is optimal for small to medium data volumes (up to 500K rows), ad-hoc insertions, or occasional batch loads where immediate control is needed. |
Snowpipe is optimal for continuous, high-volume data ingestion (millions of rows daily) from 100+ files per day or streaming data pipelines. |
The cost model for INSERT INTO is based on per-second warehouse runtime with a 60-second minimum charge each time a warehouse starts or resumes. |
The Snowpipe cost model is based on a charge per 1,000 files loaded, which is more cost-effective for high-frequency, small file loads than repeatedly starting a warehouse. |
Automating INSERT INTO requires external orchestration tools like Airflow, dbt, or custom scripts to schedule and execute operations. |
Snowpipe is fully automated once configured. It detects new files automatically without needing any external orchestration, offering a "set-it-and-forget-it" operation. |
INSERT INTO halts execution immediately upon error and returns a message to the session, requiring manual error handling logic. Failed transactions are rolled back. |
Snowpipe handles errors automatically by logging detailed information about failed files without stopping the entire pipeline, allowing files to be retried later. |
Data loaded via INSERT INTO is immediately available for Time Travel queries within the table's defined retention period (0-90 days). |
Data loaded via Snowpipe is also fully supported by Time Travel, and historical data versions are preserved identically to data loaded with INSERT INTO. |
INSERT INTO requires explicit schema matching; if the target table schema changes, the INSERT statement must be manually updated. |
Snowpipe also requires schema matching via file format definitions. It supports column reordering, but schema changes require updating the pipe definition. |
INSERT INTO is not inherently idempotent. Running the same statement multiple times will create duplicate rows unless you build explicit duplicate-checking logic. |
Snowpipe is inherently idempotent for file loading. It tracks file metadata to ensure each file is processed exactly once, preventing duplicates. |
The INSERT INTO command is a "push" model, where an application or user actively pushes data into Snowflake tables via SQL execution. |
Snowpipe operates on a "pull" model, where it automatically pulls data from cloud storage stages when new files arrive. |
INSERT INTO does not have a staging requirement, as it works directly with in-memory data, literal values, or query results from existing tables. |
Snowpipe has a mandatory staging requirement, where all data must first be uploaded to a Snowflake stage before it can be loaded. |
INSERT INTO is excellent for historical data backfills, allowing full control over batch size, timing, and resource allocation using a properly sized warehouse. |
Snowpipe is inefficient for large, one-time historical backfills. For this purpose, it is better to use the COPY INTO command with a large warehouse. |
Want to take Chaos Genius for a spin?
It takes less than 5 minutes.

Conclusion
And that’s a wrap! Snowflake INSERT INTO command is the foundation for efficiently loading data in Snowflake tables. It lets you add one or more rows of information into a table simply by specifying the target table, column values, and source of the data. Plus, it's not just about adding new stuff; you can also update what's already in the table by adding more rows. And if necessary, you can completely swap out the old table rows with all-new data.
In this article, we covered:
- How do you use the insert command in a snowflake?
- How do you insert data in snowflake table—using snowflake insert into?
- How can I check if data is being inserted into a table?
- Practical examples of using snowflake insert into command
- How to insert data into single row?
- How to insert data into multiple rows?
- How to use subqueries and ctes for complex data insertion?
- How do you insert JSON into Snowflake?
- How to insert data into multiple rows?
- How do you delete existing data and replace it with new data?
- How to insert data into temporary table?
- How do I insert a special character in Snowflake?
- Use cases of snowflake insert into command
- Performance considerations of snowflake insert into command
Frequently Asked Questions (FAQs)
How do you insert data into a table in Snowflake?
You can insert data into a Snowflake table using the INSERT INTO command, specifying the target table, columns, and value sets or query to insert from.
What is the basic syntax of Snowflake INSERT INTO?
The basic syntax is:
INSERT INTO table_name (column1, column2) VALUES (value1, value2);What is the insert function in Snowflake?
The INSERT INTO command is used in Snowflake to insert new rows of data into an existing table.
How do you insert multiple rows in Snowflake?
Use multiple VALUE sets separated by commas:
INSERT INTO table_name VALUES
(val1, val2),
(val3, val4);
Can you insert data into specific columns in Snowflake?
Yes, specify the column names in the INSERT statement:
INSERT INTO table_name (col1, col3)
VALUES (val1, val3);
How do you insert data from another table in Snowflake?
You can use SELECT query:
INSERT INTO table2
SELECT * FROM table1;
How do you insert JSON into a Snowflake?
Use PARSE_JSON to convert to VARIANT:
INSERT INTO json_table (doc)
VALUES (PARSE_JSON('{key:value}'));
What is the OVERWRITE option in Snowflake INSERT INTO?
OVERWRITE replaces the existing table data with the newly inserted rows.
How do I insert a special character in Snowflake?
To insert a special character like a single quote into a Snowflake string literal, you can either:
- Use two single quotes '' to represent one single quote
- Use Snowflake Field Optinally Enclosed By Parameter
- Use the $$ string literal quoter syntax $$this'll work$$
- Use string functions like REPLACE or REGEXP_REPLACE() to remove/replace the special characters as needed in a SELECT or additional transformation step.
What is $$ in Snowflake?
$$ acts as an alternative quoter in Snowflake, allowing you to have single quotes inside string literals without escaping.
How do I add a new line character in Snowflake?
To insert a newline \n character in a Snowflake string, you can use the CHR(10) function or the $$ quoter with the literal \n inside.
Can you update data by inserting in Snowflake?
No native upsert, but you can MERGE or use INSERT and UPDATE.
What happens when inserting a row that violates constraints?
The statement fails and no rows are inserted.
Is it possible to insert Semi-structured data in Snowflake?
Yes. Use a VARIANT column to insert JSON, XML, arrays, etc.
Can you insert data directly from files into Snowflake?
Yes, use COPY INTO <table> or the Snowpipe auto-ingest feature.
How to check if an insert worked in Snowflake?
Query the table data to check rows inserted or use query history.
Is there a row limit for Snowflake INSERT INTO?
No set limit, you can insert millions or billions of rows.
Can you insert into multiple tables with one Snowflake INSERT INTO statement?
No, each INSERT statement can only be inserted into one table.
What permissions do you need to INSERT data in Snowflake?
The INSERT privilege on the table, or ownership of the table.
Is the INSERT INTO syntax different for temporary tables in Snowflake?
No, the INSERT INTO syntax is identical for temporary and permanent tables.
How can Snowsight help verify INSERT operations?
In Snowsight, you can filter the Query History to see details on INSERT queries.