


Snowflake provides a robust REST API that allows you to programmatically access and manage your Snowflake data. Using the Snowflake API, you can build applications and workflows to query data, load data, create resources—and more—all via API calls. But working with APIs can be tedious without the right tools. That's where Hoppscotch comes in. Hoppscotch is an open source API development ecosystem that makes it easy to build, test and share APIs. It provides a GUI for creating and editing requests, as well as a variety of features for debugging and analyzing responses.
In this article, we'll explore how Hoppscotch's slick GUI and automation features can help you tap into the power of Snowflake API. We will delve into the intricacies of executing a SQL statement with the Snowflake API and creating and automating an entire Snowflake API workflow in Hoppscotch.
Let's dive in and unlock the versatility of robust Snowflake API ❄️ with Hoppscotch 🛸 !
Prerequisites for Snowflake + Hoppscotch integration (❄️+ 🛸)
The prerequisites for integrating Snowflake and Hoppscotch are as follows:
- Snowflake Account: You need to have a Snowflake account with an accessible warehouse, database, schema, and role, which means you should have the necessary permissions to access and manage these resources in Snowflake.
- SnowSQL Installation: SnowSQL, a command-line client for Snowflake, needs to be installed on your system. To install SnowSQL, visit the Snowflake website and download the appropriate version for your operating system. Follow the installation instructions specific to your system, and then proceed to configure SnowSQL.
- Key-Pair Authentication: A working key-pair authentication is required. This is a method of authentication that uses a pair of keys, one private and one public, for secure communication.
- Hoppscotch Account: You have the option to sign up for a free account; although it is not mandatory, as it can be used without the need for doing so. Hoppscotch is a popular open source API client that allows you to build, test, and document APIs for absolutely free.
After setting up these prerequisites, you will be able to configure Hoppscotch and Snowflake API, perform simple queries, use Hoppscotch to fetch/store data, and create/automate an entire Snowflake API workflow.
Getting Started with Snowflake API in Hoppscotch
To begin our journey of integrating the Snowflake API with Hoppscotch, let's take a moment to familiarize ourselves with Hoppscotch. Once we have a clear understanding, we can proceed to log in to Hoppscotch, configure the workspace, create a collection, and tailor it to suit our specific requirements.
Let's get started!!
What is Hoppscotch?
Hoppscotch, a fully open source API development ecosystem, is the brainchild of Liyas Thomas and a team of dedicated open source contributors. This innovative tool lets users test APIs directly from their browser, eliminating the need to juggle multiple applications.
But Hoppscotch is more than just a convenience tool. It's a feature-packed powerhouse that offers custom themes, WebSocket communication, GraphQL testing, user authentications, API request history, proxy, API documentation, API collections—and so much more!
Hoppscotch also integrates seamlessly with GitHub and Google accounts, allowing users to save and sync their history, collections, and environment. Its compatibility extends to a wide range of browsers and devices, and it can even be installed as a Progressive Web App (PWA).
Now that we have a clear understanding of what Hoppscotch is, let's begin the step-by-step process to log in, create a workspace, and establish a collection within the platform.
Setting up Hoppscotch + Configuring Workspace/Collection
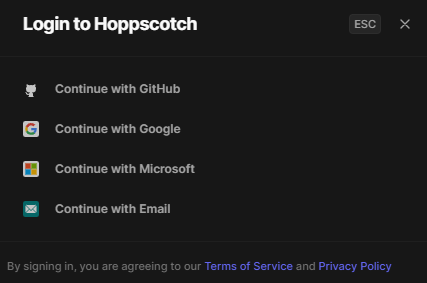
Step 1: Head over to hoppscotch.io. You can use Hoppscotch without an account, but you'll need one to save workspaces. To create an account, click "Signup" and follow the registration process. If you already have an account, simply login. Otherwise, feel free to start using Hoppscotch without logging in.
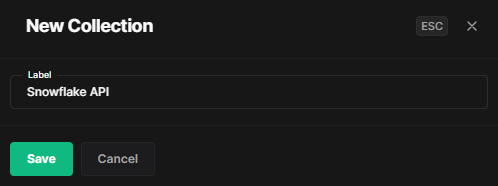
Step 2: Once logged in, your next task is to create a Collection. For this guide, we'll be creating a Collection named “Snowflake API” within Hoppscotch. This is a straightforward process, all you have to do is click on “Create Collection” button and enter the desired name.
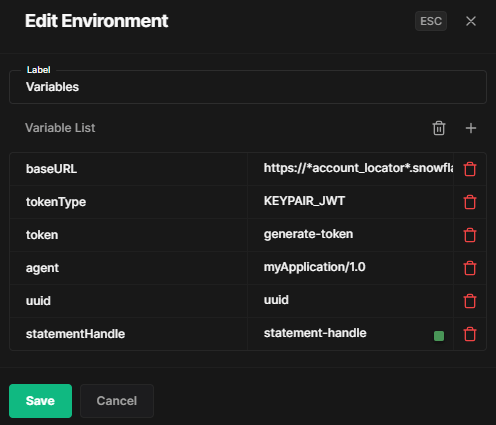
Step 3: The next step involves editing the environment within Hoppscotch. This can be done in two ways: you can either import an existing environment or manually input the variables and their corresponding values. This is crucial as it sets up the parameters for your workspace.
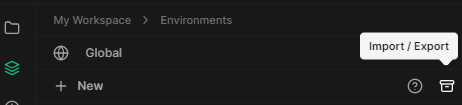
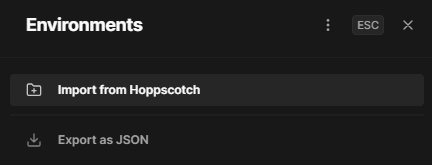
Step 4: If you choose to import the list of variables, click on that box menu on the right-hand side of the interface. Clicking on this will open up the import options.
Step 5: The following step involves creating a JSON file with the necessary variables. Copy the code provided below and save it as a JSON file. Be sure to name the file appropriately for easy identification.
[
  {
    "name": "Collection Variables",
    "variables": [
      {
        "key": "baseUrl",
        "value": "https://*acc_locator*.snowflakecomputing.com/api/v2"
      },
      {
        "key": "tokenType",
        "value": "KEYPAIR_JWT"
      },
      {
        "key": "token",
        "value": "generate-token"
      },
      {
        "key": "agent",
        "value": "myApplication/1.0"
      },
      {
        "key": "uuid",
        "value": "uuid"
      },
      {
        "key": "statementHandle",
        "value": "statement-handle"
      }
    ]
  }
]- baseUrl: This is the base URL fpr the Snowflake API. The *acc_locator* should be replaced with the account locator for your specific Snowflake account.
- tokenType: This should be set to KEYPAIR_JWT to indicate you are using a keypair for authentication.
- token: This will contain the actual JWT token used to authenticate requests.
- Agent: This is a name and a version for the application making the request
- Uuid: This is the unique identifier for the application/user making the request.
- statementHandle: This is an identifier returned by Snowflake when a SQL statement is executed. It can be used to get the status/result of the statement.
Step 6: With your JSON file ready, return to Hoppscotch and click on 'Import'. Navigate to the location of your saved JSON file and select it for import. This will populate your environment with the variables from the file.
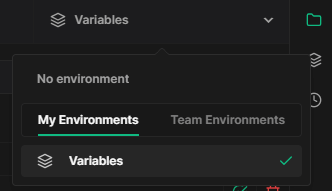
Step 7: Now, you'll need to select the environment you've just created. To do this, click on the 'Environment' option located at the top of the interface and select the environment you've just populated.
Boom! you've successfully set up your Hoppscotch workspace. You're now ready to proceed with Snowflake API configuration.
Understanding the Snowflake API
Now, let's delve into understanding the Snowflake API. The very first step in this process involves updating the baseURL environment variable. This can be found under the Variables tab within your Snowflake API settings. You'll need to replace the existing value with your unique Snowflake account locator. This account locator serves as a unique identifier for your Snowflake account.
The URL should be formatted as follows:
https://<account***********locator>.snowflakecomputing.comNote: The account locator might include additional segments for your region and cloud provider.
Snowflake API is primarily composed of the /api/v2/statements/ resource, which provides several endpoints. Let's explore these endpoints in more detail:
1) /api/v2/statements
This endpoint is used to submit a SQL statement for execution. You can send a POST request to /api/v2/statements.
Request Syntax:
POST /api/v2/statements
(request body)
For a more comprehensive understanding of the POST /api/v2/statements endpoint, refer to this Snowflake API documentation.
2) /api/v2/statements/{{statementHandle}}
This endpoint is designed to check the status of a statement's execution. The {{statementHandle}} is a placeholder for the unique identifier of the SQL statement that you have submitted for execution. To check the status, send a GET request to /api/v2/statements/{statementHandle}. If the statement has been executed successfully, the body of the response will include a ResultSet object containing the requested data.
Request Syntax:
GET /api/v2/statements/{statementHandle}For a more in-depth understanding the GET /api/v2/statements/{statementHandle} endpoint, refer to this Snowflake API documentation.
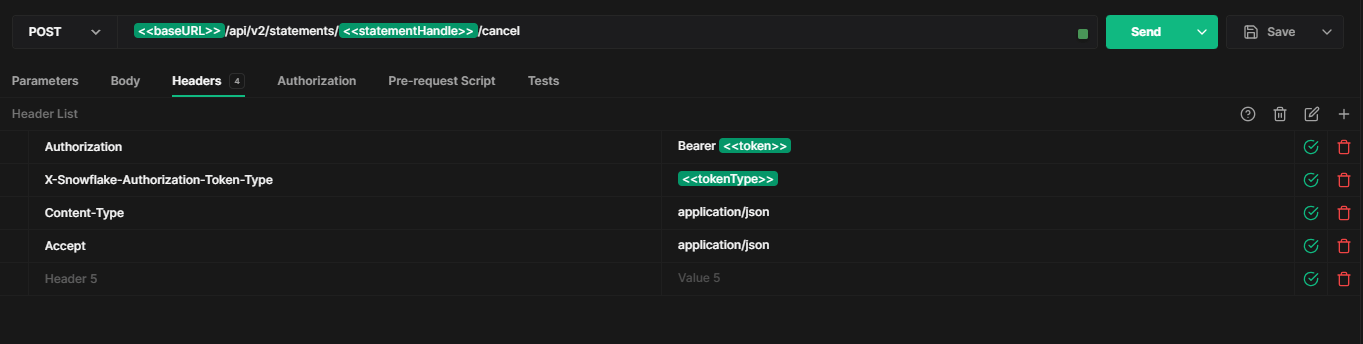
3) /api/v2/statements/{{statementHandle}}/cancel
This endpoint is used to cancel the execution of a statement. Again, {{statementHandle}} is a placeholder for the unique identifier of the SQL statement. By using this endpoint, you can submit SQL statements to your Snowflake account, check their status, and cancel them if necessary, all programmatically through the API.
Request Syntax:
POST /api/v2/statements/{statementHandle}/cancelFor a more comprehensive understanding of the POST /api/v2/statements/{statementHandle}/cancel endpoint, refer to this Snowflake API documentation.
Step by Step guide to Authorizing Snowflake API Requests
Authorizing Snowflake API is extremely crucial to ensure that only authorized users can access and manipulate data. There are two methods of authorization: OAuth and JWT key pair authorization. You can choose the method that best suits your needs but in this article we will focus on JWT key pair authorization.
Using JWT key pair authorization
Before we delve into the process, make sure that you have successfully set up key pair authentication with Snowflake.
Step 1: Open a terminal window and generate a private key. Please make sure that OpenSSL is installed on your system before proceeding.
Step 2: Now, you have the option to generate either an encrypted or an unencrypted version of the private key.
To generate an unencrypted version of the private key, use the following command:
openssl genrsa 2048 | openssl pkcs8 -topk8 -inform PEM -out snowflake_rsa_key.p8 -nocryptIf you prefer to generate an encrypted version of the private key, use the following command (which omits “-nocrypt”):
openssl genrsa 2048 | openssl pkcs8 -topk8 -v2 des3 -inform PEM -out snowflake_rsa_key.p8
Both commands generate a private key in PEM format.
-----BEGIN ENCRYPTED PRIVATE KEY-----
MIIE6TAbBgkqhkiG9w0BBQMwDgQILYPyCppzOwECAggABIIEyLiGSpeeGSe3xHP1
....
....
....
....
....
-----END ENCRYPTED PRIVATE KEY-----
Step 3: Next, generate the public key by referencing the private key from the command line. The command assumes the private key is encrypted and contained in the file named snowflake_rsa_key.p8.
openssl rsa -in snowflake_rsa_key.p8 -pubout -out someflake_rsa_key.pub
This command generates the public key in PEM format.
-----BEGIN PUBLIC KEY-----
MIIBIjANBgkqhkiG9w0BAQEFAAOCAQ8AMIIBCgKCAQEAy+Fw2qv4Roud3l6tj
....
....
....
-----END PUBLIC KEY-----
Step 4: Once you have the public key, execute an ALTER USER command to assign the public key to a Snowflake user.
ALTER USER pramitdemo SET RSA_PUBLIC_KEY='M.......................';
Step 5: To verify the User’s Public Key Fingerprint, execute a DESCRIBE USER command.
DESCRIBE USER pramitdemo;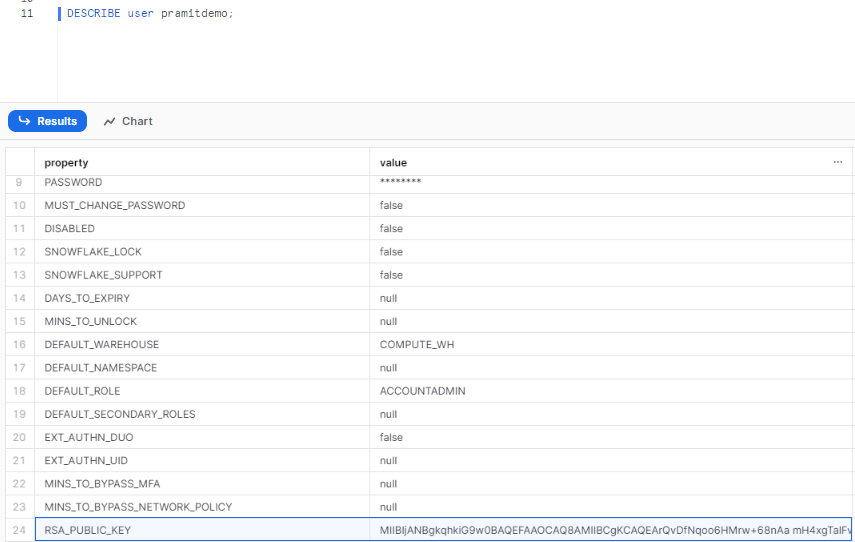
Step 6: Once Key Pair Authentication for your Snowflake account is set, a JWT token should be generated. This JWT token is a time-limited token that has been signed with your key. Snowflake will recognize that you authorized this token to be used to authenticate as you.
Here is the command to generate aJWT token using SnowSQL.
snowsql --generate-jwt -a kqmjdsh-vh19618 -u pramitdemo --private-key-path snowflake_rsa_key.p8sss
Using OAuth authorization
If you prefer to use OAuth for authentication, follow these steps:
Step 1: Set up OAuth for authentication. Refer to the Introduction to OAuth for details on how to set up OAuth and get an OAuth token.
Step 2: Use SnowSQL to verify that you can use the generated OAuth token to connect to Snowflake. The commands for Linux/MacOS and Windows are as follows:
For Linux/MacOS:
snowsql -aaccount_identifier> -u <user> --authenticator=oauth --token<oauth_token>For Windows:
snowsql -a <account_identifier> -u <user> --authenticator=oauth --token<oauth_token>In your Hoppscotch app, set the following headers in each API request:
- Authorization: Bearer oauth_token, where oauth_token is the generated OAuth token.
- X-Snowflake-Authorization-Token-Type: OAUTH
- Snowflake-Account: account_locator (required if you are using OAuth with a URL that specifies the account name in an organization)
Note: You can choose to omit the X-Snowflake-Authorization-Token-Type header. If this header is not present, Snowflake assumes that the token in the Authorization header is an OAuth token.
Executing SQL Statements with the Snowflake API
Now, we've reached the most important part of the article, so let's go back to Hoppscotch.
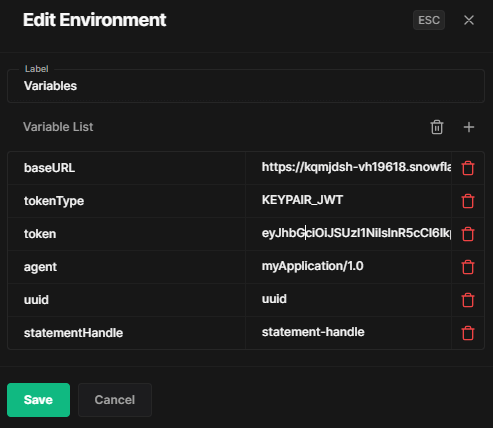
Step 1: We'll start by updating the environment variable token in Hoppscotch with the generated token for authentication.
The generated JWT (JSON Web Token) will be included in the header of each API request for authentication.
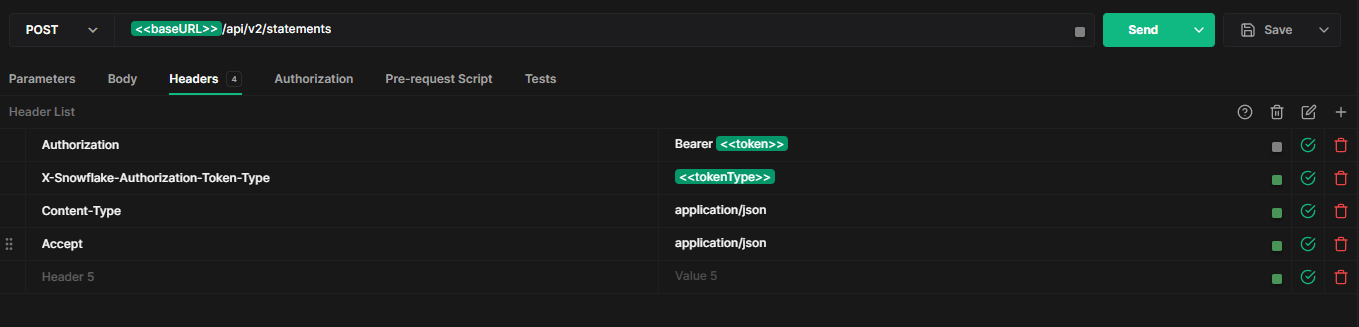
The header consists of 4 key elements:
- Authorization: This field stores the generated JWT token to authenticate the request. For example:
Authorization: Bearer <<token>>- X-Snowflake-Authorization-Token-Type: This field defines the type of authentication being used. For JWT authentication, the value should be KEYPAIR_JWT. For example:
X-Snowflake-Authorization-Token-Type: <<tokenType>>- Content-Type: This field specifies the format of the data being sent in the request or response body. For example:
Content-Type: application/json- Accept: This field Specifies the preferred content type or format of the response from the server. For example:
Accept: application/jsonSo a full header may look like:
Now that we have authenticated our instance and created the header for our requests, let's use it to fetch data.
Step 2: To retrieve the desired data from Snowflake, we need to submit a request to execute a SQL command. We'll combine our request header with a body containing the SQL command and submit it to the /api/v2/statements endpoint. This will allow us to fetch the necessary information from the Snowflake sample data.
The following headers need be set in each API request that you send within your application code:
Here's an example of how the header should look like:
Authorization: Bearer <<token>>
X-Snowflake-Authorization-Token-Type: <<tokenType>>
Content-Type: application/json
Accept: application/json
And, here is how your request body should look like:

{
"statement": "select C_NAME, C_MKTSEGMENT from snowflake_sample_data.tpch_sf1.customer",
"timeout": 30,
"database": "snowflake_sample_data",
"schema": "tpch_sf1",
"warehouse": "MY_WH",
"role": "ACCOUNTADMIN"
}
The request body includes the following fields with their respective functionalities in executing an SQL command:
- Statement: This field contains the SQL command to be executed.
- Timeout (optional): This field specifies the maximum number of seconds the query can run before being automatically canceled. It is optional. If not specified, it defaults to STATEMENT_TIMEOUT_IN_SECONDS which is 2 days.
- Database, schema, warehouse (optional): These fields specify the execution context for the command. It is optional. If omitted, default values will be used.
- Role (optional): This field determines the role to be used for running the query.
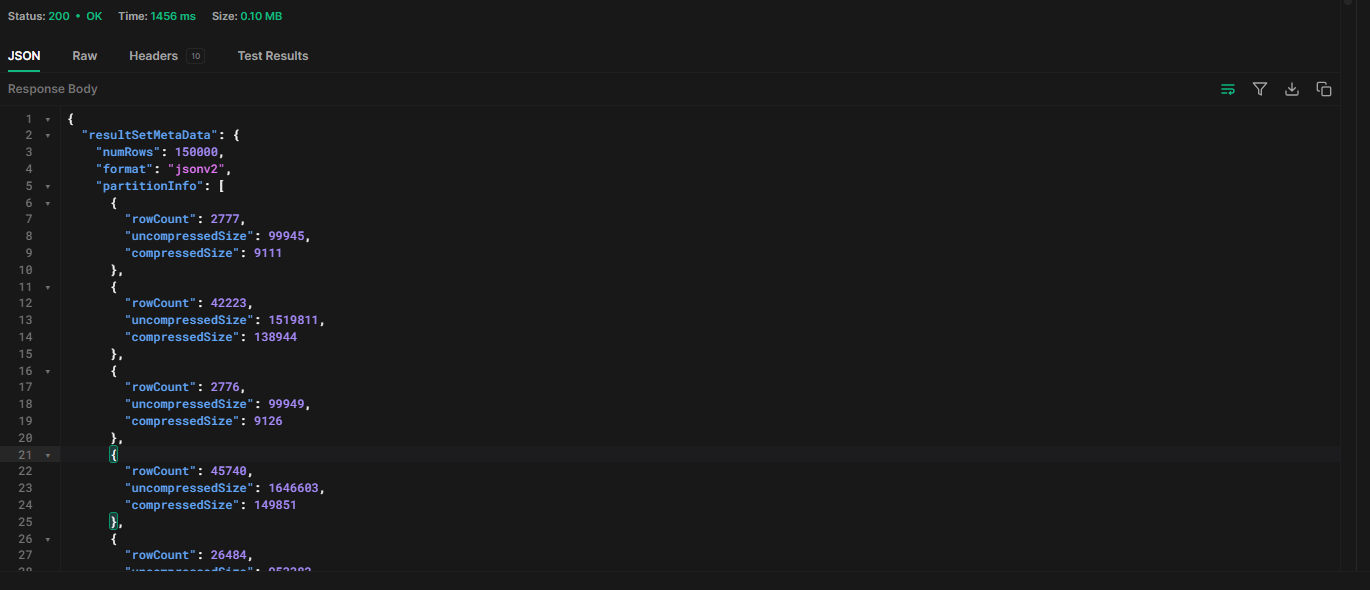
If the SQL statement submitted through the API request is successfully executed, Snowflake returns an HTTP response code of 200 and returns the rows in a JSON array object. The response may include metadata about the result set.

Here is the response of the Snowflake API request we submitted earlier.
{
  "resultSetMetaData": {
    "numRows": 150000,
    "format": "jsonv2",
    "partitionInfo": [
      {
        "rowCount": 2777,
        "uncompressedSize": 99945,
        "compressedSize": 9111
      },
          ........
          ........
          ........
          ........
      {
        "rowCount": 27223,
        "uncompressedSize": 980021,
        "compressedSize": 88732
      }
    ],
    "rowType": [
      {
        "name": "C_NAME",
        "database": "SNOWFLAKE_SAMPLE_DATA",
        "schema": "TPCH_SF1",
        "table": "CUSTOMER",
        "precision": null,
        "collation": null,
        "type": "text",
        "scale": null,
        "byteLength": 100,
        "nullable": false,
        "length": 25
      },
      {
        "name": "C_MKTSEGMENT",
        "database": "SNOWFLAKE_SAMPLE_DATA",
        "schema": "TPCH_SF1",
        "table": "CUSTOMER",
        "precision": null,
        "collation": null,
        "type": "text",
        "scale": null,
        "byteLength": 40,
        "nullable": true,
        "length": 10
      }
    ]
  },
  "data": [
    [
      "Customer#000000001",
      "BUILDING"
    ],
    [
      "Customer#000000002",
      "AUTOMOBILE"
    ],
          ........
          ........
  ],
  "code": "090001",
  "statementStatusUrl": "/api/v2/statements/01ad6582-0000-6241-0005-23fe0005a0b2?requestId=228295ad-373d-48a8-a191-a87e39dc1dfb",
  "requestId": "228295ad-373d-48a8-a191-a87e39dc1dfb",
  "sqlState": "00000",
  "statementHandle": "01ad6582-0000-6241-0005-23fe0005a0b2",
  "message": "Statement executed successfully.",
  "createdOn": 1688455829146
}
As you can see in the above response, Upon submitting a successful POST request, the QueryStatus object is returned at the end of the response. This object contains the necessary metadata to retrieve the data once the query is completed.
The key fields in the response are:
- code : Contains the status code indicating the statement was submitted successfully
- statementStatusUrl : The URL endpoint to query for the statement status
- requestId : Unique ID for the request
- sqlState : SQL state indicating no errors
- statementHandle : Unique identifier to use when checking status
- message : Confirmation the statement was submitted
- createdOn : Timestamp of when the request was processed
Checking the Status of Statement Execution
Upon submitting a SQL statement for execution, if the execution is still in progress or an asynchronous query has been submitted, Snowflake responds with a 202 response code. In these scenarios, a GET request should be sent to the /api/v2/statements/ endpoint, with the {{statementHandle}} included as a path parameter in the URL.
The statementHandle serves as a unique identifier for a statement submitted for execution, and it can be found in the QueryStatus object of the initial POST request.
To check the execution status, use the following Snowflake SQL REST API request:
GET <<baseURL>>/api/v2/statements/<<statementHandle>>
--- Same as the previous request
Using the statementHandle obtained from the QueryStatus in the initial POST request, you can submit the GET request to retrieve the first partition of data. Before making the GET request, add the statementHandle value to your environment in Hoppscotch as a variable:
Step 1: Click on the "Environment" tab in Hoppscotch.
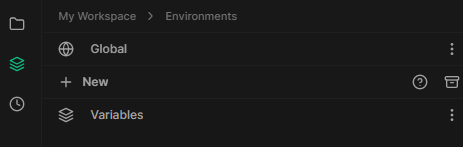
Step 2: Select the “Variables” that you want to update
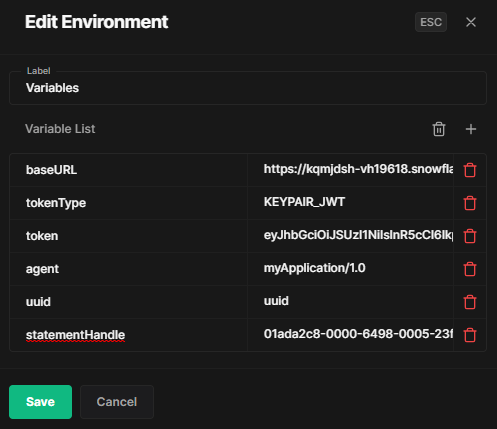
Step 3: Paste the statementHandle value from the POST response as the variable value.
Step 4: Click "Save" to update the variable.
If the SQL command was successfully executed, a ResultSet object will be returned. This ResultSet contains metadata about the returned data as well as the first partition of data.
The returned object can be broken down into three primary areas:
- resultSetMetaData: Metadata about the returned data.
- rowType: Contains metadata about the returned data, including column names, data types, and lengths.
- partitionInfo: Additional data partitions required to fetch the complete dataset.
- data: Holds the first partition of data returned by the query, with all values represented as strings, regardless of data type.
Canceling Statement Execution
Finally, to cancel the execution of a statement, send a POST request to the /api/v2/statements/ endpoint and append the {{statementHandle}} to the end of the URL path followed by cancel as a path parameter.
The Snowflake API request to cancel the execution of a SQL statement is as follows.
POST request to <<baseURL>>/api/v2/statements/<<statementHandle>>/cancel
--- Same as the previous request
So by carefully following these steps and utilizing the Snowflake API, you can effectively execute SQL statements, retrieve data, and manage statement execution within your Snowflake instance.
To access the Hoppscotch workspace, you can check out the following gist: Hoppscotch Workspace Gist.
To use it, simply copy the JSON content, save it as a JSON file, and import it into the Hoppscotch collection.
Conclusion
Snowflake provides a robust REST API that allows you to programmatically access and manage your Snowflake data. Using the Snowflake API, you can build applications and workflows to query data, load data, create resources—and more—all via API calls. Hoppscotch is an open source API development ecosystem that makes it easy to build, test, and share APIs. It provides a GUI for creating and editing requests, as well as a variety of tools for debugging and analyzing responses.
And that's it! In this article, we have explored the usage of the API tool like Hoppscotch to interact with Snowflake REST API. We have delved into the details of executing SQL statements through the API and constructing a Snowflake API workflow. To summarize, we authenticated our connection to Snowflake, ran SQL commands via API POST requests, added variables to improve usability, fetched and checked the current status of Statement execution, and even learned a way to cancel that statement execution.
Accessing Snowflake data via API calls is like building a superhighway to your data. With the right on-ramps and off-ramps in the form of API endpoints, you have an efficient roadway to transport data to and from your applications. Using the Snowflake API as the channel, and tools like Hoppscotch as the construction crew, you can architect an automated data superhighway.
FAQs
What is Hoppscotch?
Hoppscotch is an open source API development ecosystem that allows developers to create, test, and manage APIs.
Is Hoppscotch compatible with Snowflake API?
Yes, Hoppscotch is designed to work with any API, including Snowflake's.
How can I test Snowflake API using Hoppscotch?
You can test Snowflake API by sending requests from Hoppscotch and analyzing the responses.
Can I manage Snowflake API with Hoppscotch?
Yes, Hoppscotch allows you to manage APIs, including creating, updating, and deleting requests.
Is it necessary to have coding skills to use Hoppscotch with Snowflake API?
Yes, basic understanding of APIs and how they work, but Hoppscotch's user-friendly interface makes it easy for non-developers to use as well.
How secure is it to use Hoppscotch with Snowflake API?
Hoppscotch prioritizes user security and does not store any data from your API requests. However, always ensure to follow best practices for API security.
Is there any cost associated with using Hoppscotch for Snowflake API?
Hoppscotch is a free, open source tool. However, costs may be associated with the use of Snowflake's services.
Can the Snowflake SQL API run any SQL statement?
No, there are limitations in the types of statements that can be executed through the API. For example, `GET` and `PUT` statements, Python stored procedures are not supported.
Are there additional costs associated with using the API compared to running the SQL directly?’
It depends. The Snowflake API uses the cloud services layer to fetch results. Cloud services credits are only charged if it exceeds 10% of the WH credits usage.
Can the Snowflake API perform operations other than running SQL commands?
As of the writing of this article, officially the API can only run SQL commands. However, similar APIs are used by the SnowSight dashboard to show query history, query profiles, usage data. etc. These APIs are not documented and should not be relied on.


