You might already be familiar with AWS EMR, but just in case: it's a managed cluster platform that makes it easier to run big data frameworks (such as Apache Spark, Apache Hadoop, Hive, Presto, Flink and more). It provides three alternatives for deployment: EMR on EC2, EMR on EKS, and EMR Serverless. Of these, EMR Serverless is most likely the least complicated of the options. It automatically takes care of provisioning, scaling, and shutting down your compute resources as needed. That is a significant difference from EMR on EC2 or EMR on EKS, where you are responsible for controlling an entire cluster of instances. EMR Serverless manages the infrastructure for you, allowing you to focus solely on your big data workloads.
In this article, we'll deep dive into what EMR Serverless is, why you'd use it over a traditional EMR cluster, and then walk through step by step how to create an EMR Serverless application via the AWS Console and run a simple Spark job.
What is AWS EMR Serverless?
AWS EMR Serverless was launched at AWS re:Invent 2021 and was made available to everyone in June 2022. AWS EMR Serverless is a deployment option for EMR that provides a serverless runtime environment for big data frameworks like Apache Spark and Hive. In plain terms, EMR Serverless is essentially EMR without the servers. Instead of launching an AWS EC2-based cluster, you create an EMR Serverless application. AWS then manages container instances for you.
Introducing EMR Serverless | Amazon Web Services
EMR Serverless provides a serverless runtime environment for Apache Spark, Hive, Tez, and you don’t have to configure, optimize, secure, or operate clusters to run applications. When you submit a job to an EMR Serverless application, AWS figures out the resources needed, provisions them, runs your job, and then releases the resources when the job finishes. (This avoids the usual over- or under-provisioning headaches).
EMR Serverless uses AWS EMR release versions (6.6.0 and above), and you pick the release and framework (such as Spark) when you create the application. Each application runs inside an AWS-managed VPC (so it’s isolated), and you define IAM permissions for who can submit jobs to it. Internally, EMR Serverless breaks a Spark job into tasks, pulls the necessary container images, and spins up “workers” automatically. It will add or remove executors as needed during the job stages, so you don’t have to guess at cluster size. If your workloads need very fast startup, EMR Serverless even supports pre-initialized capacity, which means you can keep a driver and some executors warm and ready.
The latest version of EMR Serverless that you can use as of July 2025 is version 7.9.0, and it supports Apache Spark 3.5.5, Apache Hive 3.1.3 and Apache Tez 0.10.2. (Note: Future version availability is subject to change).
In short, EMR Serverless is EMR reimagined for serverless. As of now it supports only three open source frameworks (Spark, Hive, and Tez) with AWS managing all the infrastructure under the hood.
Why Use AWS EMR Serverless?
You might wonder, why not just stick with a regular EMR cluster or AWS Glue? The answer is about simplicity and cost savings. AWS EMR Serverless gives you the same EMR Spark capabilities, minus the hassle of managing a cluster.
In practice, that means:
🔮 No cluster management — You don’t have to choose instance types or cluster size. You just pick the Spark version and submit your job. AWS handles everything (nodes, OS updates, frameworks, and auto-scaling) for you.
🔮 Faster startup — Spinning up a full AWS EMR cluster can take several minutes. With AWS EMR Serverless (especially if you use pre-initialized capacity), jobs start much faster – often within a couple minutes.
🔮 Automatic scaling — AWS EMR Serverless auto-scales your application automatically. You don’t have to guess how many cores or workers (executors) you need or set up auto-scaling rules. AWS does it for you dynamically based on the workload.
🔮 Only pay for what you use — Since you pay only for what you use, you avoid paying for idle cluster time. AWS EMR Serverless bills you by the second for the vCPU, memory, and storage resources your job actually consumes. Idle time costs nothing.
🔮 Multi-AZ resilience — AWS EMR Serverless is a regional service that can run tasks across Availability Zones. That means a job won’t fail if one AZ has an issue. Standard EMR clusters run in a single AZ by default, so EMR Serverless is inherently more resilient.
🔮 Easy AWS integration — You can easily log to CloudWatch, read/write S3, use IAM roles, and connect to tools like Step Functions or Airflow. AWS EMR Serverless works with the same ecosystem as other AWS analytics services. It even supports EMR notebooks and AWS EMR Studio for interactive analysis.
All in all, AWS EMR Serverless is an excellent choice when you want to process big data without all the cluster management headaches. It's a good fit for ad-hoc analytics or ETL jobs, especially if you're working with Spark or Hive and prefer not to deal with managing servers.
Why Use AWS EMR Serverless Over Traditional EMR Clusters?
Here’s a quick side-by-side look at how EMR Serverless differs from a traditional EMR on AWS EC2 cluster.
EMR Serverless vs EMR
| EMR (on EC2 Clusters) | 🔮 | AWS EMR Serverless |
| You launch a cluster (set number and type of AWS EC2 instances) and manage it (start/stop). | Deployment | Create an application; AWS provisions and manages the compute (no user-managed nodes). |
| Full control: choose instance type (m5, c5, Graviton, etc.), use Spot/Reserved Instances, configure EBS volumes, etc. | Control over instances | No instance-level control. You choose architecture (x86 or ARM) and resource specs for containers (vCPU/RAM). |
| Can be 10–20+ minutes or more to spin up a new cluster (slow for ad-hoc) | Startup time | Faster startup (especially with pre-initialized capacity). Jobs can begin running within minutes. (EMR Serverless can be ~4× faster to start) |
| Manual or EMR-managed autoscaling policies (requires setup). | Auto-scaling | Built-in auto-scaling by workload stage. No guesswork – EMR Serverless adjusts workers as needed. |
| Granular at instance level (adds/removes whole EC2 nodes). | Scaling granularity | Granular at container/task level (adds/removes Spark executors/tasks). |
| Pay for the cluster (EC2 + EMR + storage) per second (with 1-min min); idle nodes still cost you. | Cost model | Pay only for vCPU, memory, storage used by running tasks (per-second, 1-min min). |
| You pay for EC2/EMR even if idle | Idle cost | No charge when no jobs are running (workers shut down) |
| Cluster runs in one AZ (though you can specify multiple subnets). | Multi-AZ resilience | Regional service: can run tasks in any AZ in region – tolerant to AZ failures. |
| Spark, Hive, Hadoop, Presto, Flink (EMR is very flexible). | Frameworks supported | As of now, only Spark and Hive engines. No Presto/Tez support currently (focus on Spark). |
| You can configure Glue Data Catalog or Hive metastore, or use AWS Lake Formation. | Data catalog / discovery | No built-in data crawler or catalog – just run Spark queries on data in S3. (You can still use AWS Glue tables as a metastore). |
| You can bootstrap custom software or libraries on nodes (via bootstrap scripts, custom AMIs, adding libraries). | Cluster customization | Limited to container images; you cannot run init scripts on workers. For dependencies, package them in your application or use EMR custom images. |
| EMR Notebooks (Sparkmagic), Zeppelin, or AWS EMR Studio can attach to the cluster. | Integration with notebooks | AWS EMR Studio can attach to a serverless application and give access to Spark UI and logs. |
| Use AWS IAM roles on EC2 instances; configure security groups. | AWS IAM and security | Uses AWS IAM runtime roles for job access. By default AWS EMR Serverless app runs in a secure AWS-managed VPC. |
| Cluster is single-tenant (one environment) | Multi-tenancy | One app can receive multiple concurrent jobs (with queues) |
| AWS EMR Studio or SSH on cluster; also AWS CLI/SDK | Development interface | AWS EMR Studio console, AWS CLI/SDK, APIs (upcoming JDBC/ODBC) |
TL;DR: EMR Serverless removes almost all of the cluster complexity. You no longer have to pick instance types, estimate the number of nodes, or set up autoscaling policies. Instead, you create an EMR Serverless application with Spark, Hive, or Tez, and submit jobs to it. AWS automatically handles failover (across AZs), scaling, and housekeeping. On the other hand, an EMR cluster gives more control (you choose everything) but also demands more operational work and can cost more if nodes sit idle.
Step-by-Step Tutorial: Creating an EMR Serverless Application
Now let’s do the practical walkthrough. We’ll create an EMR Serverless app via the AWS Console and run a tiny Spark job that computes squares of numbers.
Prerequisites:
- AWS account with Admin or equivalent permissions (you’ll need rights to EMR, S3, IAM, etc.).
- You need an AWS EMR Studio in the region where you’ll use Serverless. If you don’t already have one, the console can create it for you in the next step.
- AWS S3 bucket for your code and data. We’ll create one or use an existing one. In this bucket we’ll upload the PySpark script.
- A new IAM runtime role that EMR Serverless jobs will assume. This role needs a trust policy for emr-serverless.amazonaws.com and permissions to read/write the S3 bucket (and any other resources your job needs).
We won’t use the AWS CLI in this guide (we stick to the Console), but you can do these steps in CLI if preferred.
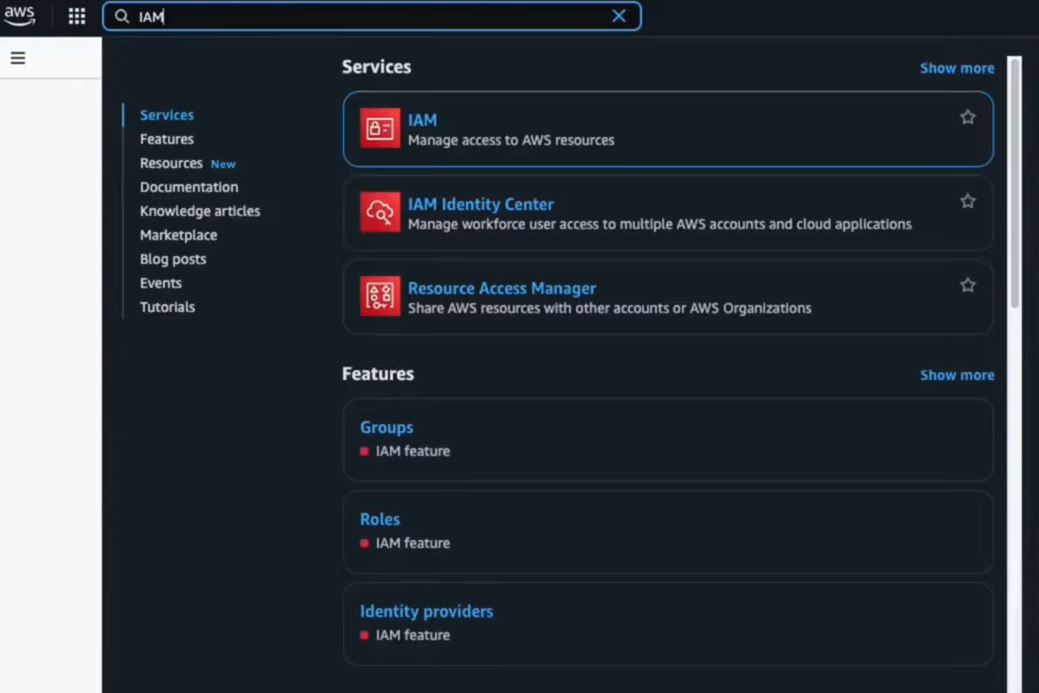
Step 1—Access the AWS EMR Console
Sign in to the AWS Management Console. In the top search bar, type EMR and open the AWS EMR console.
Step 2—Create or Select an AWS EMR Studio
AWS EMR Serverless applications are managed from AWS EMR Studio. If you already have an AWS EMR Studio (in the same AWS region), you can use it. Otherwise:
➤ On the EMR Serverless page, click Get started (if it’s your first app) or Create Studio. This will launch the AWS EMR Studio creation wizard.
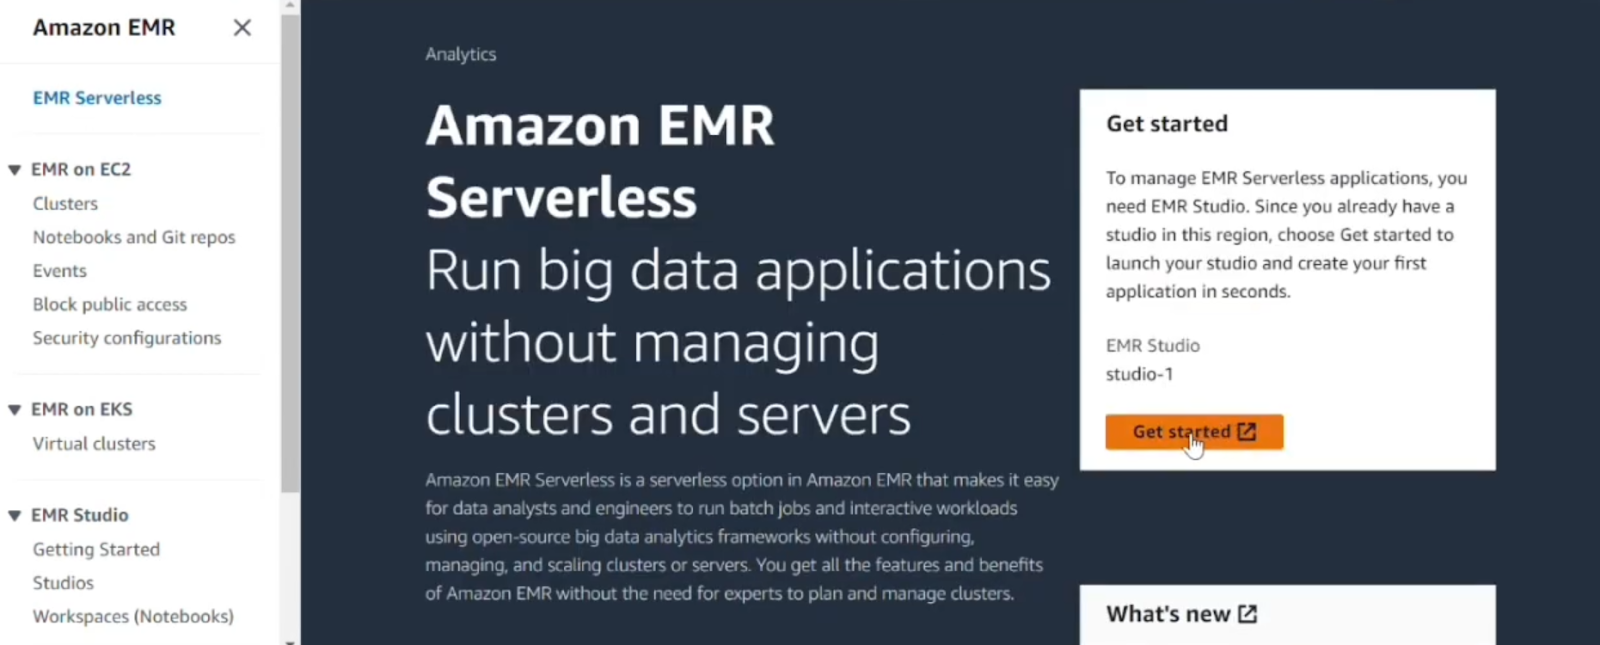
➤ Give the AWS EMR Studio a name and complete any required fields. AWS EMR Serverless applications run under an AWS EMR Studio. AWS can create the Studio and necessary IAM service role for you. See the EMR user guide if you want specifics, but the console will guide you.
➤ Once the AWS EMR Studio is ready, go back to the EMR Serverless page. You should see your new Studio listed under “Manage applications” or similar. Select your Studio. EMR will redirect you to the Studio UI.
(If you already have an AWS EMR Studio, just select it and click “Manage applications” to proceed to the applications list).
Step 3—Create and Configure S3 Bucket for Scripts and Data
Open the AWS S3 service in a new tab in AWS Console. Create a new bucket (give it a unique name) or choose an existing one for this tutorial. We’ll upload our code and later our output here.
In the AWS S3 console, navigate into your S3 bucket (or create my-emr-serverless-demo-bucket for example). Create a folder called scripts/ (optional, but tidy). Then upload/create a file square.py with the following contents and upload it into scripts/.
Below is a very simple PySpark script (square.py). It takes a range of integers, computes each number’s square, and writes the result to an output S3 folder. You can create this file locally and then upload it to your S3 bucket.
# square.py

from pyspark.sql import SparkSession
spark = SparkSession.builder.appName("SquareNumbers").getOrCreate()

nums = spark.range(1, 11).toDF("number")
# Compute their squares
squares = nums.selectExpr("number", "number * number as square")
# Write results as text to S3 (one line per row)
squares.rdd.map(lambda row: f"{row['number']},{row['square']}") \
    .saveAsTextFile("s3://<bucket-name>/output/")
(Replace <bucket-name> in the script with your actual AWS S3 bucket name, or we can pass it as an argument later).
Save and upload it to:
s3://[your-bucket]/scripts/square.py(In more advanced use, you could use command-line or Studio UI to upload, but here we did it via the S3 console).
Step 4—Configure IAM Role for EMR Serverless Job Execution
EMR Serverless jobs use an IAM role (the “job runtime role”) that they assume to access AWS resources at runtime. We need a role that EMR Serverless can use.
Go to the IAM console.
In “Roles”, click Create role.

Choose Custom trust policy and enter a trust policy allowing emr-serverless.amazonaws.com to assume the role. For example:
{
  "Version": "2012-10-17",
  "Statement": [{
    "Effect": "Allow",
    "Principal": {"Service": "emr-serverless.amazonaws.com"},
    "Action": "sts:AssumeRole"
  }]
}
Select Next to navigate to the Add permissions page, then choose Create policy.
Attach permissions to read your bucket and write to your bucket. For simplicity, attach a policy like:
 "Version": "2012-10-17",
  "Statement": [
    {
      "Sid": "ReadCodeBucket",
      "Effect": "Allow",
      "Action": ["s3:GetObject", "s3:ListBucket"],
      "Resource": ["arn:aws:s3:::my-emr-serverless-demo-bucket",
                   "arn:aws:s3:::my-emr-serverless-demo-bucket/*"]
    },
    {
      "Sid": "WriteOutputBucket",
      "Effect": "Allow",
      "Action": ["s3:PutObject", "s3:DeleteObject"],
      "Resource": ["arn:aws:s3:::my-emr-serverless-demo-bucket/output/*"]
    }
  ]
}
(Adjust bucket ARNs to your bucket name and output prefix). Name this role EMRServerlessRuntimeRole (or similar) and create it.
This role will let the Spark job read the script and data from S3, and write output back to S3. For many jobs, only S3 access is needed, but if you plan to read from other services, include those permissions too.
Step 5—Create EMR Serverless Application
Back in EMR Studio (or the EMR console on the Serverless page), click Create application (or Get started if first use).

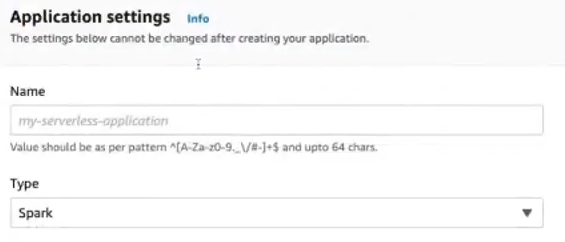
You’ll see a form. Enter a name for your application (e.g. MySparkApp). Choose Spark (since we’re running a Spark job).
Pick the EMR release you want. Choose the latest available for the newest Spark features, or pick a version that matches your needs. For example:
| EMR Serverless Version | Spark Version |
|---|---|
| 7.9.0 | 3.5.5 |
| 7.8.0 | 3.5.4 |
| 7.7.0 | 3.5.3 |
| 7.6.0 | 3.5.3 |
| 7.5.0 | 3.5.2 |
| 7.4.0 | 3.5.2 |
| 7.3.0 | 3.5.1 |
| 7.2.0 | 3.5.1 |
| 7.1.0 | 3.5.0 |
| 7.0.0 | 3.5.0 |
| 6.15.0 | 3.4.1 |
| 6.14.0 | 3.4.1 |
| 6.13.0 | 3.4.1 |
| 6.12.0 | 3.4.0 |
| 6.11.0 | 3.3.2 |
| 6.10.0 | 3.3.1 |
| 6.9.0 | 3.3.0 |
| 6.8.0 | 3.3.0 |
| 6.7.0 | 3.2.1 |
| 6.6.0 | 3.2.0 |
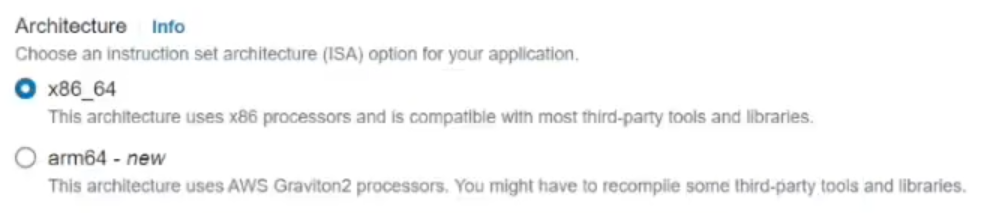
Next, select the Architecture: x86_64 (Intel/AMD) or arm64 (AWS Graviton). x86_64 is the default; arm64 can be slightly cheaper. For this simple example, stick with x86_64.
You can choose Default or Custom. The default option gives 1 driver + 1 executor and minimal config.
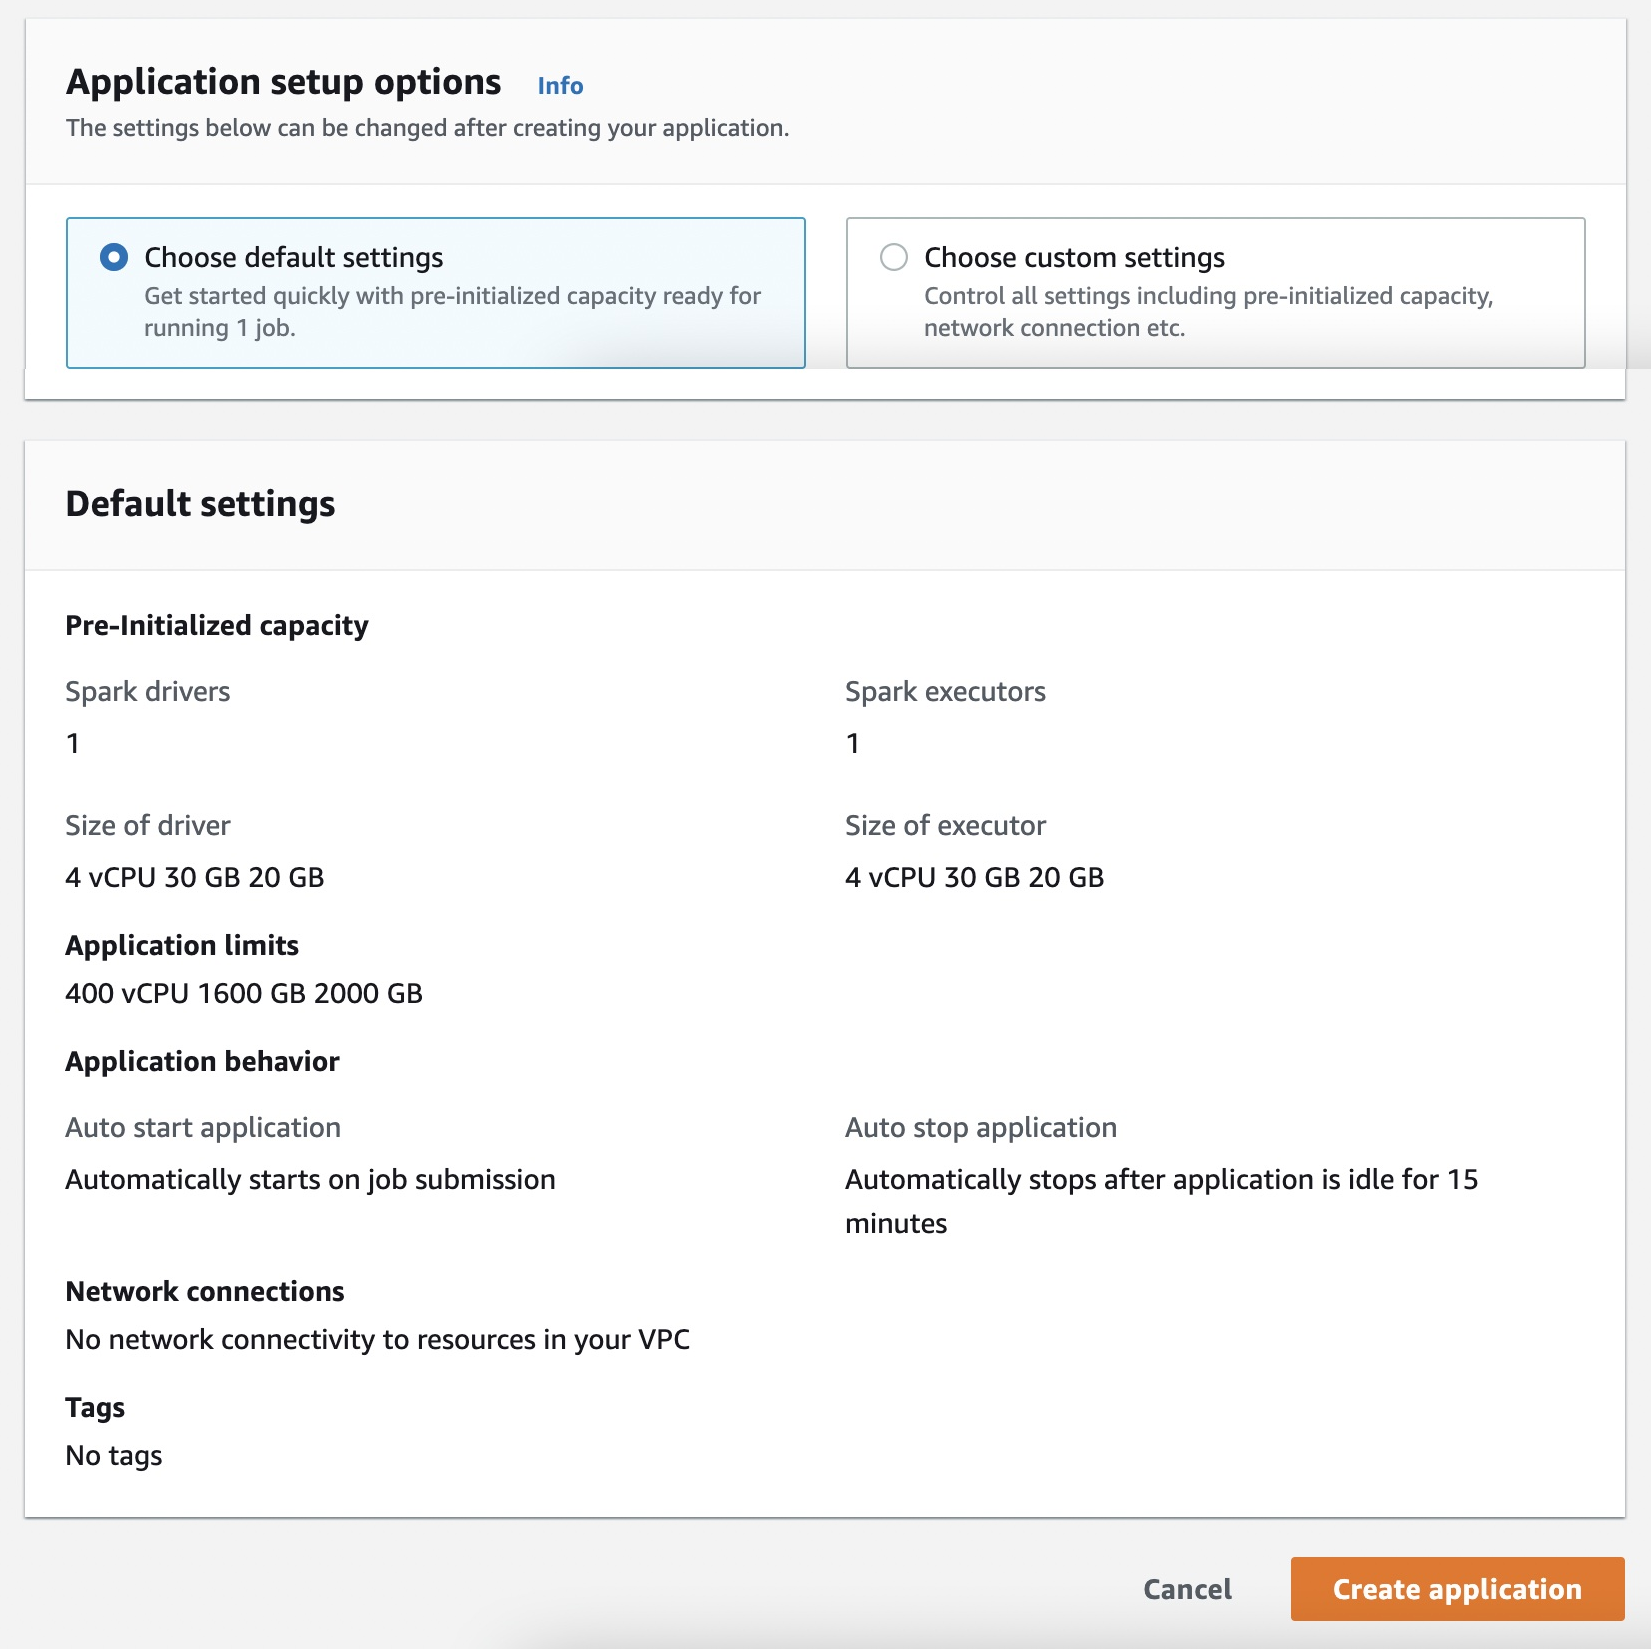
For this guide we will set up our own small capacity, so select Custom settings.

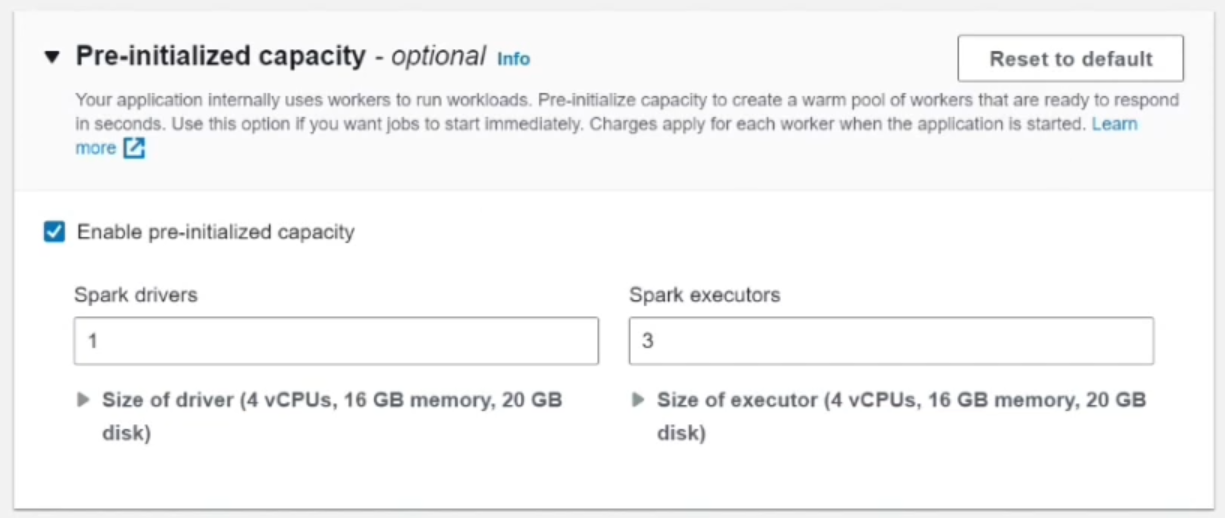
Next, configure Pre-initialized capacity. This lets you specify how many driver and executor containers to keep “warm”. Under Spark settings, set the driver to 1 vCPU and executors to 3 vCPUs total (e.g. 3 executors each 1 vCPU). This means when the app starts, it will keep those ready. (You don’t have to set this; using default will still run the job, but with default capacity).
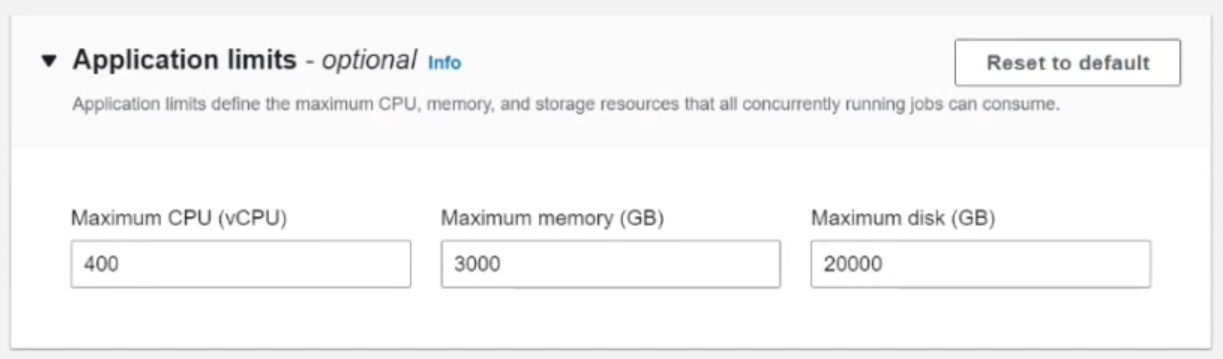
Leave Application limits at their defaults unless you need specific resource quotas. By default, the app can scale up to 4 vCPUs.
Under Application behavior, leave auto-start and auto-stop at their defaults. By default, the app stops after 15 minutes of idle time.
For Network, typically leave as default (no custom VPC). EMR Serverless can operate without you configuring a VPC. If you need the app to access private resources, you could configure AWS VPC here.
Optionally, tag the application for tracking (for example, env=dev).
In summary:
- Name your application.
- Pick Spark and your EMR version.
- Select x86_64.
- Choose Custom settings.
- Set driver = 1 vCPU and executors = 3 vCPU.
- Click Create application.
The EMR Studio will begin creating the application. In a minute or two it will change status to Started. You can watch the status indicator in the Studio or return later.
Step 6—Submit Spark Job to EMR Serverless Application
Once the application is started, you’re ready to run your Spark job. In EMR Studio, click on your application’s name to go to its details page. There should be a Submit job button or tab.
Fill in the job details. Give a name for the job run (SquareJob1). Select the IAM role you created earlier (EMRServerlessRuntimeRole). This is the role the job will assume to access S3. Enter the S3 URI of your PySpark script. For example:
s3://my-emr-serverless-demo-bucket/scripts/square.py(Replace with your actual bucket name and path).
In Script arguments, you can pass the input and output paths here if needed. Our square.py script hard-coded the output path, but suppose we modify square.py to take arguments:
we could set args like [s3://my-emr-serverless-demo-bucket/input, s3://my-emr-serverless-demo-bucket/output].
For simplicity, leave it blank or use the S3 path in the script.
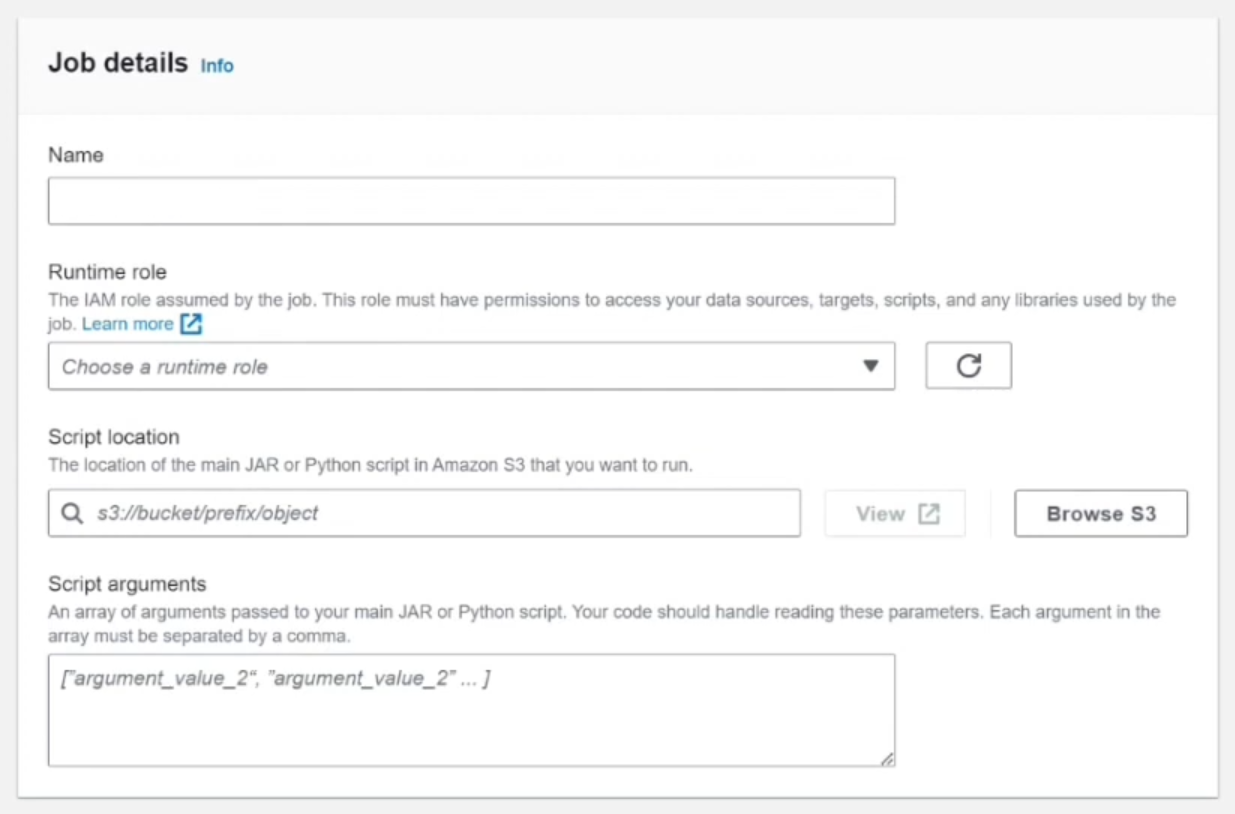
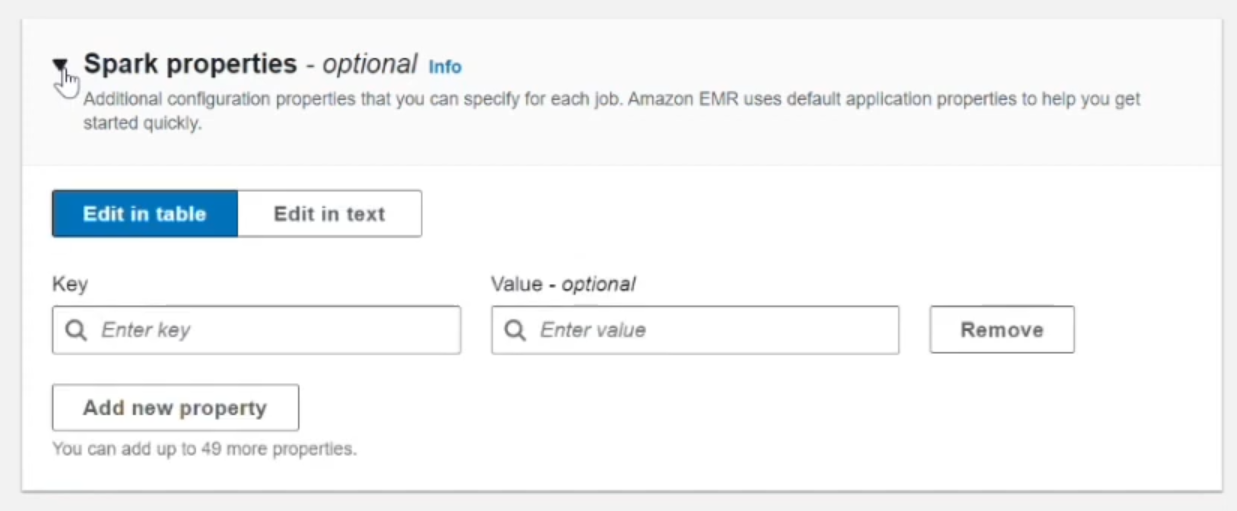
We don’t need to override anything complex for this simple job. So, you can leave Spark properties empty or add things like executor cores. For this demo, defaults are fine.
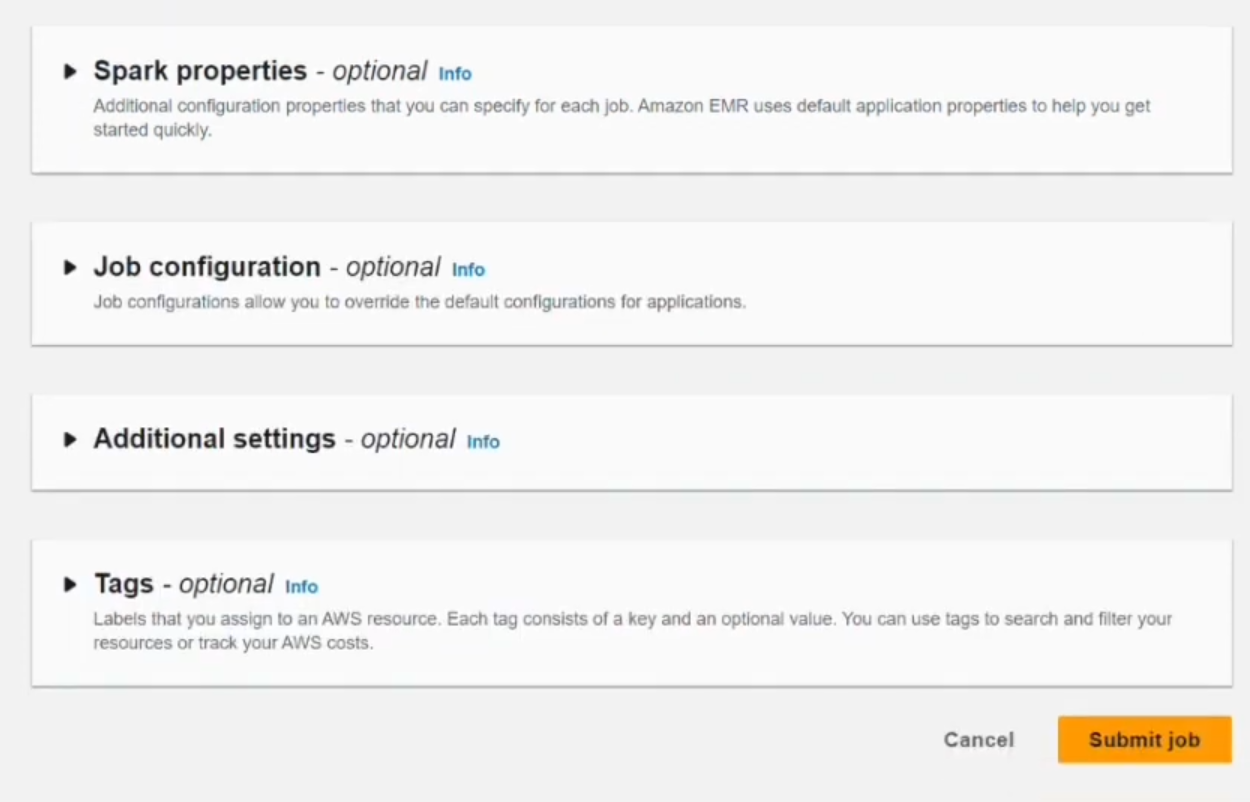
Review your entries and click Submit job.
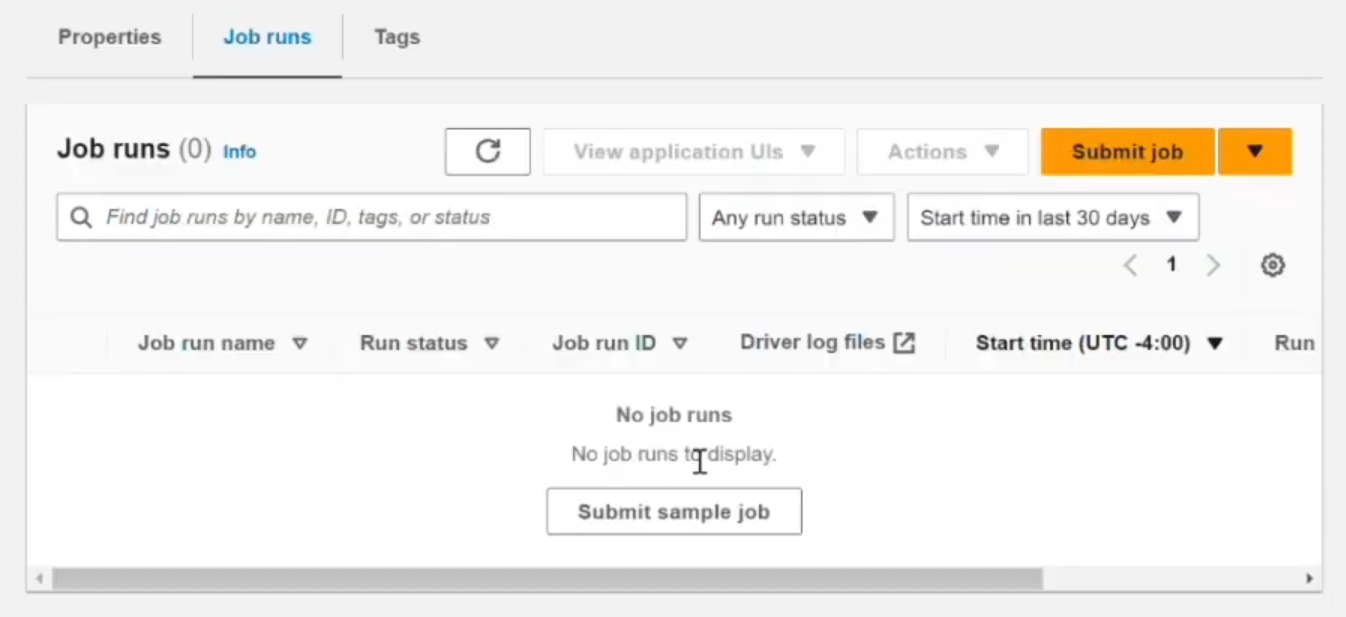
You should see your new job appear in the Job runs list. It will show status Pending, then Running.
(After submission you see the job run with Running status in the Job runs tab).
Step 7—Monitor Spark Job Execution and Status
Refresh the Job runs tab in EMR Studio. You’ll see the status progress: Pending => Running => Success. This may only take a minute or two for our tiny job.
- Pending: EMR Serverless is allocating resources.
- Running: Your Spark job is executing.
- Success: Job finished successfully.
If there are any errors, they would show in the job logs or status. For a simple script this should all go smoothly.
Step 8—Verify Output Data in S3
Once the job is marked Success, it should have written output to S3 (as our script did). Go to the S3 console and check the bucket. You should see an output folder (as given in the script) with part files (text). For example, open the part-00000 file – it should contain lines like:
1, 1
2, 4
3, 9
4, 16
5, 25
6, 36
7, 49
8, 64
9, 81
10, 100
These are our squared numbers.
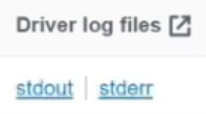
Alternatively, in EMR Studio you can look at the Logs for the job run. There is a View logs option. Under stdout or stderr logs, you might see the application driver logs or any printouts. But since our script was written to S3, checking the bucket is easiest.
Step 9—Access Spark UI for Job Analysis
AWS EMR Serverless provides a built-in Spark UI for completed jobs. In EMR Studio, go to the Job runs list and click on your completed job run. There should be an option View application UIs or Spark UI (depending on the interface version).
Click Spark UI. You will see the familiar Apache Spark web UI for that job run: the event timeline, stages, storage, and logs (Driver and Executors). Under Executors you can see if your executors ran and memory usage. Under SQL or Jobs you’d see the SQL query or job metadata. This can be useful for debugging or tuning.
Step 10—Clean Up AWS Resources
When done with testing, clean up resources to avoid extra costs:
Delete the EMR Serverless application. In EMR Studio or the EMR Console “Applications” page, find your application and choose Delete application. This stops the app and releases any warm resources (if using pre-init).
Remove S3 data. Delete the sample scripts and output files from your S3 bucket if you no longer need them.
Delete the IAM role. If you created a special IAM role (like EMRServerlessRuntimeRole), you can delete it or remove its policies.
AWS EMR Serverless apps auto-stop when idle by default, but deleting the application is cleaner.
AWS EMR Serverless Pricing Model and Cost Calculation (2025)
EMR Serverless has no upfront cost – you only pay for what you consume. Pricing is based on the aggregate vCPU, memory, and ephemeral storage (disk) used by your application’s workers, measured per second (with a 1-minute minimum charge per worker).
Example: US East (N. Virginia) region => EMR charge is roughly $0.052624 per vCPU‑hour (for x86_64) and $0.0057785 per GB‑hour of memory. That means one vCPU running for one hour costs about $0.052624. So if a job uses 2 vCPUs and 8 GB memory for 2 minutes, you’d pay about $0.00351 for CPU time (2 × 0.052624 × 2/60) plus about $0.00154 for memory (8 × 0.0057785 × 2/60). Amazon also rounds up each worker’s runtime to the nearest second (but charges at least one minute total).
Storage: Each worker includes 20 GB of ephemeral storage for free. If you configure more than 20 GB per worker, you pay for the excess. For example, shuffle-optimized storage (extra SSD storage) is billed for the full amount (including the first 20 GB). In practice, small Spark jobs often use the default storage, so you likely won’t pay extra for storage unless you heavily spill to disk.
Example: A very small job might use 1 vCPU and 2 GB for a few minutes. At $0.0101/vCPU-hr and $0.001111/GB-hr, that’s only a few thousandths of a dollar. In contrast, a long cluster with unused capacity can cost dollars per hour even when idle.
Other costs: As always, you pay standard AWS rates for other services. For instance, any S3 I/O, data transfer, or CloudWatch logs used by your job will incur their usual charges. (EMR Serverless itself does not add extra per-job “API” costs beyond the compute/memory charges).
For in-depth pricing details, see the EMR Serverless pricing page.
Choosing between AWS Glue and EMR Serverless: Feature and Use Case Comparison
AWS Glue and EMR Serverless can both run Spark jobs, but their focus and features differ. Here’s a quick comparison between EMR Serverless vs Glue:
EMR Serverless vs Glue
| EMR Serverless | 🔮 | AWS Glue (Serverless ETL) |
| On-demand Spark/Hive computing. Good for analytics, ad-hoc queries, and migrating cluster jobs. | Purpose | Serverless ETL service. Designed for building data pipelines, cleaning, and transformation. |
| Spark (and Hive on Tez). Runs standard open-source Spark/Hive at AWS-optimized speed | Framework | Spark-based ETL (Python/Scala). Under the hood it uses Spark (Glue 3.0+) but with a Glue-specific framework. |
| Automatic, fine-grained. Adds/removes workers as needed at each job stage. | Scaling | Fixed at job start. You must specify DPUs or workers ahead of time (for Glue 1.0 use MaxCapacity, for Glue 2.0 specify worker type/count). No auto-scaling during job. |
| Submit jobs via EMR Studio/CLI/API. Can integrate with Step Functions or Airflow for orchestration. | Jobs & Triggers | Glue has jobs, workflows, and a flexible scheduler/trigger system, including Glue Workflows and triggers. |
| Use EMR Studio notebooks, EMR CLI/SDK, and normal Spark tools. | Development | Use Glue Studio (visual ETL), or notebooks (Glue interactive sessions) and auto-generated ETL code (Spark). |
| Pay for vCPU, memory, storage by second (no infra costs). | Pricing | Pay for DPUs (Data Processing Units) by the second for ETL jobs; separate charges for crawlers, catalog. |
| You can bring in any Spark libraries or JARs (via custom images or S3 jars). | Libraries & Extensibility | Glue has some restrictions but supports many Glue-provided libraries; can pip-install within limitations. |
| Running Spark applications you're already familiar with, with fine control over configs. | Common Use Case | Building and running data pipelines/ETL with minimal config, leveraging Glue Data Catalog and integration. |
TL;DR: Use EMR Serverless when you have existing Spark jobs or need flexibility. Use AWS Glue when you want an opinionated ETL pipeline with data cataloging and code-generation.
Conclusion
And that’s a wrap! AWS EMR Serverless makes it easy to run Spark workloads without dealing with cluster management. Just create a serverless application, fire off your Spark jobs, and leave the heavy lifting to AWS. This can save you time and cut costs, especially for jobs that run in bursts or only occasionally. Next time you're crunching data with Spark, consider spinning up a serverless application – it could be a significant time-saver and money-saver.
In this article, we covered:
- What EMR Serverless is
- Difference between EMR and Serverless EMR
- Step-by-step guide to creating an AWS EMR Serverless application to run a Spark job
- AWS EMR Serverless pricing breakdown
- Difference between EMR Serverless and Glue (EMR Serverless vs Glue)
… and so much more!
Frequently Asked Questions (FAQs)
What is an EMR Serverless application?
An EMR Serverless application is a logical EMR environment you create for running Spark (or Hive) jobs. It’s tied to a specific EMR release and runtime. You give it a name and configuration. Once created, you can submit jobs to that application. All jobs under the same app share its pre-initialized capacity and settings.
How does EMR Serverless differ from EMR on AWS EC2 clusters?
EMR on AWS EC2 uses user-managed clusters (you pick instance types, counts, bootstrap actions, etc.). With EMR Serverless, AWS manages the cluster for you. Serverless auto-scales by job, has faster startup, and you pay per usage. In contrast, EMR clusters offer more control.
Do I need a AWS VPC or can EMR Serverless run outside one?
EMR Serverless runs in AWS-managed infrastructure, but effectively uses a secure AWS VPC under the hood. As a user, you don’t have to supply a VPC unless your jobs need to access resources in your own AWS VPC subnets (you can optionally configure that). By default, EMR Serverless works without you creating or managing a VPC.
Does EMR Serverless auto-scale?
Yes. You define minimum/maximum workers and their vCPU/RAM in the job/application config, and EMR Serverless automatically adds/removes workers as needed at each stage of your job. You do not manually scale the application – it’s dynamic by design.
How does EMR Serverless read and write data?
Typically via AWSS3. In each job run you specify S3 URIs for input and output. EMR Serverless has built-in connectors to S3, so it treats S3 like your HDFS. You just give S3 paths in your Spark code. Under the hood, data moves between S3 and the Serverless containers. (You could also connect to other AWS data sources if needed, but S3 is most common).
What IAM permissions does EMR Serverless need?
For the application itself, the creator needs EMR permissions. For the job runtime, the IAM role (we created earlier) must have permissions to any data sources/sinks used – e.g. read from your code bucket and write to your output bucket. Also, the EMR service needs to assume that role, so its trust policy should allow the emr-serverless.amazonaws.com service principal. In short: one role to create/manage apps, and one runtime role that jobs assume for AWS access (S3, etc.).
Can I use EMR Studio with EMR Serverless?
Yes. EMR Studio is the web UI where you create and manage EMR Serverless applications. You submit jobs and view Spark UIs right from Studio. If you start Serverless for the first time, AWS may create a default EMR Studio for you. You can then access the Serverless app from the Studio console.
Can I submit multiple Spark jobs concurrently on EMR Serverless?
Yes. An application can process multiple job runs at the same time, each as separate tasks. EMR Serverless handles them concurrently and isolates resources. Each job run can even use a different runtime role if you want separate permissions. Just submit jobs one after another (or via an orchestrator) and watch them run in parallel.
Can I integrate EMR Serverless into CI/CD pipelines?
Absolutely. EMR Serverless has full CLI and SDK support. You can use AWS CLI commands (aws emr-serverless create-application, start-job-run, etc.) or SDK (Boto3, etc.) to automate everything.
Does EMR Serverless support other engines (Hive, Presto)?
Currently EMR Serverless only supports Spark and Hive runtime engines.
Can I use EMR Serverless via CLI or SDK?
Yes. AWS provides aws emr-serverless commands in the AWS CLI and API/SDK calls.