You’re likely familiar with AWS EMR if you manage massive datasets and need fast insights. It is Amazon’s scalable big‑data processing platform, designed to simplify deployment of big‑data frameworks such as Apache Spark, Apache Hadoop, Hive, Presto, Flink, and others at scale. But how do you make use of this powerhouse more accessible to your data team? AWS EMR Studio fills that gap. It is a cloud‑based IDE built on fully managed Jupyter notebooks. You can write code in Python, R, Scala, or Spark SQL and run it on EMR clusters. Plus, it also includes built‑in collaboration tools like Git, debugging tools like Spark UI, and more.
In this article, we'll explain why AWS EMR Studio makes interactive analysis much better. Then, we'll walk you through a detailed, step-by-step guide to setting it up, from the network bits to launching your very first workspace.
AWS EMR Explained: Foundation for EMR Studio
Before we dive into AWS EMR Studio, let's briefly cover its foundation: AWS EMR.
AWS EMR (AWS Elastic MapReduce) is the industry-leading cloud-based managed big data processing platform offered by Amazon Web Services (AWS). EMR is designed to simplify and streamline big data processing in the cloud, handing you the power to crunch massive volumes of data quickly and easily.
AWS EMR was first launched in 2009 as a managed service to simplify big data processing, focusing initially on Hadoop-based workloads. Over the years, EMR has grown to support many data processing frameworks and uses beyond just Hadoop.
It now supports rapid, scalable analysis and processing of vast datasets using popular open source data processing frameworks like Apache Hadoop, Apache Spark, Apache Hive, Presto and more.

The main goal of AWS EMR is to give organizations a straightforward way to run big data applications without the hassle of managing the underlying infrastructure.
Key AWS EMR Features You Need to Know
Here are some key EMR features:
Feature 1: Easy provisioning — Launch a cluster in minutes without manual setup or tuning. AWS manages the infrastructure so you can focus on data processing.
Feature 2: Elastic scaling — Add or remove nodes automatically. EMR Managed Scaling adjusts capacity to meet your workload demands, improving utilization and saving money.
Feature 3: Cluster reconfiguration — Change configuration of Hadoop, Spark, Hive, etc. on a running cluster without a restart.
Feature 4: Multiple instance options — Mix On-Demand and Spot instances (even run Spot in separate instance groups) to balance cost and availability.
Feature 5: Flexible frameworks — Run many big data frameworks and applications (Hadoop, Spark, HBase, Presto, Hive, Flink, etc.) out of the box.
Feature 6: AWS integration — Connect with AWS S3 for storage, DynamoDB, Kinesis, Amazon RDS, Redshift, AWS Glue, and more for end-to-end data pipelines.
Feature 7: Security & compliance — Integrates with IAM for identity-based access, VPC for networking, CloudTrail for audits, CloudWatch for logs/metrics, and supports encryption (KMS, AWS S3 encryption, etc.).
Feature 8: Interactive Environments — EMR provides AWS EMR Studio (our main topic), EMR Notebooks, and SSH Access.
Feature 9: Deployment Options — While this guide focuses on EMR on AWS EC2 (the traditional way), it's good to know there are other flavors: EMR on AWS EC2, EMR on EKS (Elastic Kubernetes Service) and EMR Serverless.
Phew! That covers a lot! The key takeaway: EMR is flexible, powerful, and integrates well with other services.
If you want more details, check out our article on AWS EMR Architecture 101.
What is AWS EMR Studio? Quick Overview
AWS EMR Studio is a web-based IDE that runs fully-managed Jupyter notebooks on AWS EMR clusters. It's like having a Jupyter environment in the cloud, but with EMR clusters handling the heavy data processing. AWS EMR Studio lets data scientists and engineers develop, visualize, and debug Spark and Hadoop applications (in Python, Scala, R, SQL, etc.) without touching servers.
AWS EMR Studio Features: Complete List
AWS EMR Studio is more than just a basic notebook interface; it comes with many features built for collaborative, interactive big data work, such as:
- IAM-based authentication (via IAM users/roles or IAM Identity Center), including SAML/OIDC federation, so you control who can access each Studio.
- On-demand clusters — Start or attach EMR clusters from the notebook interface to run jobs. You can use EMR on AWS EC2 or EMR on EKS clusters.
- Built-in data analysis tools — Managed Jupyter notebooks that support Python, PySpark, SparkSQL, R, Scala. You can install custom kernels or Python libraries.
- SQL Explorer — A SQL interface to query your data catalog directly from Studio.
- Collaboration — Share notebooks or work together in real time.
- Version control — Link notebooks to GitHub/Bitbucket repositories for source control and team workflows.
- Job debugging — View Spark UI, YARN timeline, and logs for active or terminated jobs without using SSH into the cluster.
- Scheduled workflows — Run parameterized notebooks via orchestration tools (Apache Airflow or Amazon MWAA) as part of pipelines.
- Multi-language notebooks — Use Python, Scala, SparkSQL, or R in the same notebook (sharing data via temp tables) to use the right tool for each task.
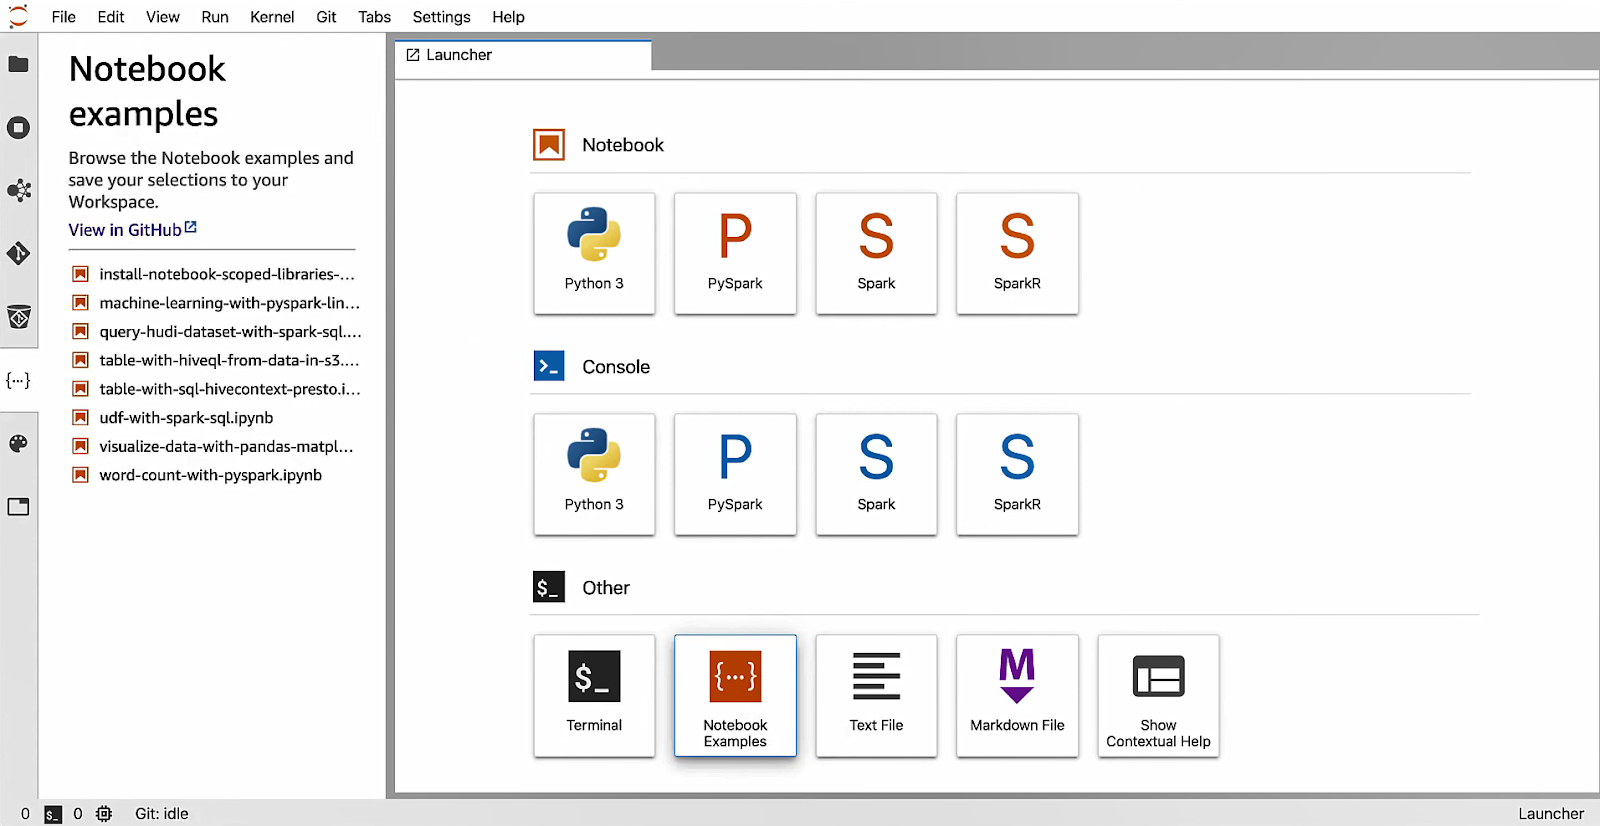
- Example Notebooks — Out-of-the-box sample notebooks to get started quickly.
What Can You Do with AWS EMR Studio? 6 Common Use Cases
With all those features, what can you actually do with EMR Studio? Quite a lot, it turns out.
Use Case 1: Interactive Data Exploration and Visualization — Analysts can run notebooks on S3 data to clean and visualize on the fly.
Use Case 2: Building ETL and ML Pipelines — Prototype Spark jobs in notebooks, then turn them into production workflows via Airflow or Amazon MWAA for scheduling.
Use Case 3: Debugging Big Data Jobs Without SSH — Instead of SSH into EMR, view all your Spark UIs directly in the Studio.
Use Case 4: Team Collaboration on Data Projects — Multiple team members can share code, reproduce analyses, and review each others’ work in a single environment.
Use Case 5: Rapid Pipeline Prototyping — You can rapidly build and test individual components of larger data pipelines.
Use Case 6: Ad-Hoc Analysis on Demand — Quickly spin up clusters (or use existing ones), run queries, then tear them down, all from the notebook.
AWS EMR Studio provides an accessible IDE for big data work. It cuts down the effort of setting up local Spark environments or managing EMR notebook servers. Picture it as your team’s shared Jupyter server on EMR, with all the integration EMR provides.
How to Set Up AWS EMR Studio: 8-Step Implementation Guide
Okay, time to get this done. Setting up AWS EMR Studio involves a few moving parts, especially around networking and permissions. Don't worry, we'll go through each steps.
Prerequisites: What You Need Before Starting EMR Studio Setup
Before you even think about clicking "Create Studio", you need to have a few things in place.
We assume console-based steps (no CLI or CloudFormation).
- AWS account and IAM permissions. You need an active AWS account with permissions to create and manage AWS EMR, AWS EC2, AWS S3, AWS IAM, and related resources. Admins should configure an IAM user or role with these permissions.
- AWS S3 bucket. AWS EMR Studio saves notebooks and workspace data to an AWS S3 bucket you specify. Create a bucket or choose an existing one to use as the workspace backup location.
- Virtual Private Cloud (VPC) and subnets. If you plan to attach EMR clusters (AWS EC2 or AWS EKS) to your Studio or link Git repos, you’ll need a VPC and up to five subnets. At least two subnets (in different Availability Zones) are recommended: one public (with an Internet Gateway) and one or more private subnets (with a NAT gateway). The Studio and clusters will run in this VPC.
If you only use EMR Serverless, no VPC is needed because EMR Serverless does not require VPC networking.
- Networking setup. In your VPC, configure an Internet Gateway (for internet access) and a NAT gateway in a public subnet if you have private subnets (see Step 3).
- Security group configuration. Plan to create at least two security groups: one for engine and one for workspace (see Step 4). These control traffic between the Studio’s notebook server and EMR clusters.
- Existing EMR cluster (optional). If you want to attach a pre-existing EMR on AWS EC2 cluster, have it launched (in the same VPC) before creating the workspace. Otherwise, you can always start a new cluster from the Studio later.
So, you need an AWS account with EMR, EC2, S3, and IAM privileges, a workspace S3 bucket, a VPC with multiple subnets (up to 5 allowed), and security groups ready to go. With those in place, you can start the Studio setup.
Step 1—Choose Authentication Mode - IAM or Identity Center?
When you create the Studio, you must choose how users will log in. AWS EMR Studio supports two modes.
- IAM authentication mode — Uses AWS IAM users and groups (or federated IAM with a custom IdP). If you already manage identities in IAM or want a quick setup, this mode works well. It even supports OpenID Connect or SAML federation if you have an external IdP. IAM mode is available in most AWS Regions and is SOC 2 compliant.
- IAM Identity Center (AWS SSO) mode — Uses AWS IAM Identity Center for user management. This mode makes it easy to assign users/groups (across multiple accounts) through a centralized directory. It works with Microsoft Active Directory or any SAML IdP and simplifies multi-account federation. It’s ideal if you’re already using AWS Identity Center or need to scale user management.
If you and your organization already uses IAM for AWS access or has a custom IdP trust, IAM mode can be faster to set up. If you want single sign-on and plan to manage many accounts or users centrally, Identity Center mode might fit your needs better. You pick the mode during Studio creation, and it applies to all users of that Studio.
Step 2—Configure IAM Roles - Service Role and User Role Setup
AWS IAM roles are how AWS services talk to each other securely. AWS EMR Studio needs two main types of IAM roles to work right: a service role for the Studio itself and permissions for your users.
Service Role (for the Studio). This is the role that AWS EMR Studio itself assumes to interact with AWS services on behalf of workspaces and clusters. The role must trust EMR (elasticmapreduce.amazonaws.com) and include permissions for actions such as creating network interfaces, reading/writing to AWS S3, and accessing Secrets Manager (for Git credentials). AWS provides a managed policy for this like or you can attach similar permissions manually.
Here’s how to create an AWS EMR Studio service role:
➤ Sign in to the AWS Management Console and go to IAM > Roles.
➤ Create the role:
- Click Create role.
- Under the Trusted entity type, choose AWS service.
- For Use case, select EMR (elasticmapreduce.amazonaws.com) and click Next.
➤ Replace the trust policy: On the Trust policy screen, remove any default statements and paste in the AWS EMR Studio trust policy:
{
  "Version": "2012-10-17",
  "Statement": [
    {
      "Effect": "Allow",
      "Principal": { "Service": "elasticmapreduce.amazonaws.com" },
      "Action": "sts:AssumeRole",
      "Condition": {
        "StringEquals": { "aws:SourceAccount": "<your-account-id>" },
        "ArnLike":    { "aws:SourceArn":    "arn:aws:elasticmapreduce:<region>:<your-account-id>:*" }
      }
    }
  ]
}
Click Next.
➤ Define permissions:
- On the permissions page, remove the default “AWS managed” policies.
- Click Create inline policy, switch to the JSON tab, and paste in the sample EMR Studio service role policy (copy from here).
- Update any "Resource": "*" entries to the specific ARNs you need.
- Click Review policy, name it
EMRStudio_Service_Role, and then click Create policy. - Attach this new policy to your role.
➤ Tag resources for tag-based access control
AWS EMR Studio uses tag-based access control. Tag each of the following resources with:
- Key:
for-use-with-amazon-emr-managed-policies - Value:
true- Your EMR Studio VPC
- Each subnet you plan to use
- Any custom security groups
- AWS Secrets Manager secrets for Git credentials
➤ Optional: Grant S3 access
To allow Studio access to your AWS S3 bucket, attach an inline policy (or extend the one you just created) with the appropriate S3 permissions:
{
  "Version": "2012-10-17",
  "Statement": [
    {
      "Sid": "StudioS3Access",
      "Effect": "Allow",
      "Action": [
        "s3:PutObject",
        "s3:GetObject",
        "s3:ListBucket",
        "s3:GetEncryptionConfiguration",
        "s3:DeleteObject"
      ],
      "Resource": [
        "arn:aws:s3:::<your-studio-bucket>",
        "arn:aws:s3:::<your-studio-bucket>/*"
      ]
    }
  ]
}
➤ Optional: EMR Serverless notebooks
If you plan to run interactive EMR Serverless notebooks, use the same trust policy as above but attach a stripped-down permissions policy:
{
  "Version": "2012-10-17",
  "Statement": [
    {
      "Sid": "ObjectActions",
      "Effect": "Allow",
      "Action": [
        "s3:PutObject",
        "s3:GetObject",
        "s3:DeleteObject"
      ],
      "Resource": ["arn:aws:s3:::<bucket-name>/*"]
    },
    {
      "Sid": "BucketActions",
      "Effect": "Allow",
      "Action": [
        "s3:ListBucket",
        "s3:GetEncryptionConfiguration"
      ],
      "Resource": ["arn:aws:s3:::<bucket-name>"]
    },
    {
      "Effect": "Allow",
      "Action": [
        "kms:Decrypt",
        "kms:GenerateDataKey",
        "kms:ReEncryptFrom",
        "kms:ReEncryptTo",
        "kms:DescribeKey"
      ],
      "Resource": "<your-kms-key-arn>"
    }
  ]
}
Finally, verify everything. Confirm that the trust policy and permissions policies are correct. Check if all required resources are tagged properly.
See How to create a service role for EMR Studio on Amazon EC2
User Role (for Identity Center mode). If you use IAM Identity Center authentication, you create an EMR Studio user IAM role. A user's Identity Center session assumes this role when they open the Studio. The trust policy for this role allows EMR (elasticmapreduce.amazonaws.com) to assume it and set context. After creating it, you'll attach session policies to limit what that role can do inside the Studio. A session policy is a special IAM policy that further restricts a federated user’s privileges during a Studio session.
Here’s how to create the AWS EMR Studio user role (Identity Center mode):
➤ In the IAM console, go to Roles => Create role.
- Under Trusted entity type, choose AWS service.
- For Use case, select EMR (elasticmapreduce.amazonaws.com) and click Next.
➤ On the Trust policy screen, remove the default statements and paste in:
{
  "Version": "2008-10-17",
  "Statement": [
    {
      "Effect": "Allow",
      "Principal": {
        "Service": "elasticmapreduce.amazonaws.com"
      },
      "Action": [
        "sts:AssumeRole",
        "sts:SetContext"
      ]
    }
  ]
}
Click Next, skip managed policies for now, give the role a name (for example, EMRStudioUserRole), and finish creation.
➤ Detach all AWS‑managed policies so you start with no permissions.
➤ Create and attach AWS EMR Studio session policies. These control what users can do in Studio:
- Go to Create policy => JSON and define your actions (basic, intermediate, advanced).
- At a minimum, include these statements:
{
  "Sid": "AllowAddingTagsOnSecretsWithEMRStudioPrefix",
  "Effect": "Allow",
  "Action": "secretsmanager:TagResource",
  "Resource": "arn:aws:secretsmanager:*:*:secret:emr-studio-*"
},
{
  "Sid": "AllowPassingServiceRoleForWorkspaceCreation",
  "Effect": "Allow",
  "Action": "iam:PassRole",
  "Resource": "arn:aws:iam::*:role/<your-emr-studio-service-role>"
}
Attach this policy to your IAM identities (users, groups, or roles) or, in Identity Center mode, to EMRStudio_User_Role.
➤ Enable workspace collaboration by adding these actions:
{
  "Sid": "WorkspaceCollaboration",
  "Effect": "Allow",
  "Action": [
    "elasticmapreduce:UpdateEditor",
    "elasticmapreduce:PutWorkspaceAccess",
    "elasticmapreduce:DeleteWorkspaceAccess",
    "elasticmapreduce:ListWorkspaceAccessIdentities"
  ],
  "Resource": "*"
}
To restrict collaboration to a workspace’s creator, use tag‑based control (creatorUserId = ${aws:userid}):
{
  "Sid": "RestrictCollaborationToCreator",
  "Effect": "Allow",
  "Action": [
    "elasticmapreduce:UpdateEditor",
    "elasticmapreduce:PutWorkspaceAccess",
    "elasticmapreduce:DeleteWorkspaceAccess",
    "elasticmapreduce:ListWorkspaceAccessIdentities"
  ],
  "Resource": "*",
  "Condition": {
    "StringEquals": {
      "elasticmapreduce:ResourceTag/creatorUserId": "${aws:userid}"
    }
  }
}
➤ (Optional) Create a user‑level Git secrets policy. To move from service‑level to user‑level secrets access, add:
{
  "Sid": "UserLevelGitSecretsAccess",
  "Effect": "Allow",
  "Action": "secretsmanager:GetSecretValue",
  "Resource": "arn:aws:secretsmanager:*:*:secret:*",
  "Condition": {
    "StringEquals": {
      "secretsmanager:ResourceTag/for-use-with-amazon-emr-managed-user-policies": "${aws:userid}"
    }
  }
}
Then remove any secretsmanager:GetSecretValue statements in the service‑role policy that use the for-use-with-amazon-emr-managed-policies tag, and reattach policies to your identities.
Then, (Re)attach policies to your identities.
➤ Finally, sign in to AWS EMR Studio as a test user and confirm you can:
- Create, open, and stop workspaces
- Attach and detach EC2 (or EKS clusters)
- Use the Collaboration panel (if permitted)
- Link Git repositories and fetch secrets according to your Git secrets policy
You now have fine-grained, least-privilege permissions for EC2- or EKS-backed EMR Studio.
Step 3—Set Up Your VPC and Subnets
AWS EMR Studio and any connected clusters run in your VPC. Follow these best practices:
- AWS lets you associate up to 5 subnets with your Studio. It is recommended to use at least two subnets in different AZs – for example, one public subnet (with an Internet Gateway) and one private subnet (with a NAT). Multiple AZs give redundancy for your notebooks.
- Make sure the chosen subnets can communicate internally (same VPC with appropriate routing).
- If your data scientists will link public Git repositories, put the workspaces in a private subnet that has Internet access via a NAT gateway. Create one or more private subnets whose route table directs outbound 0.0.0.0/0 to a NAT in a public subnet.
- Tag the VPC, subnets, and any custom security groups.
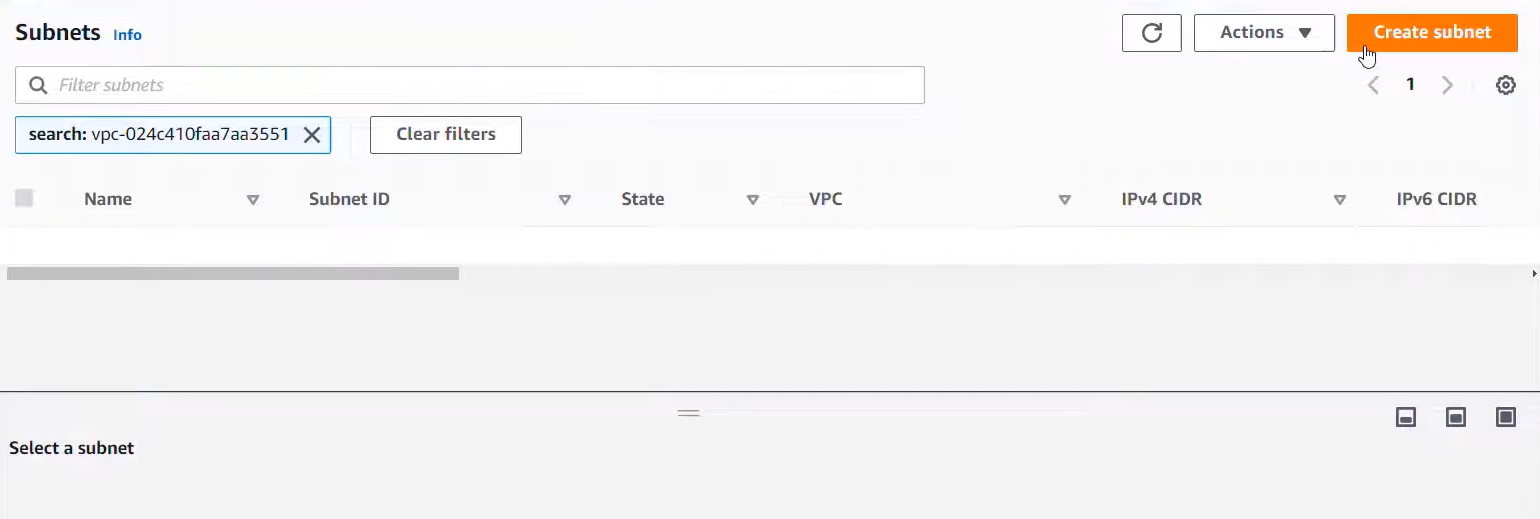
Console Steps
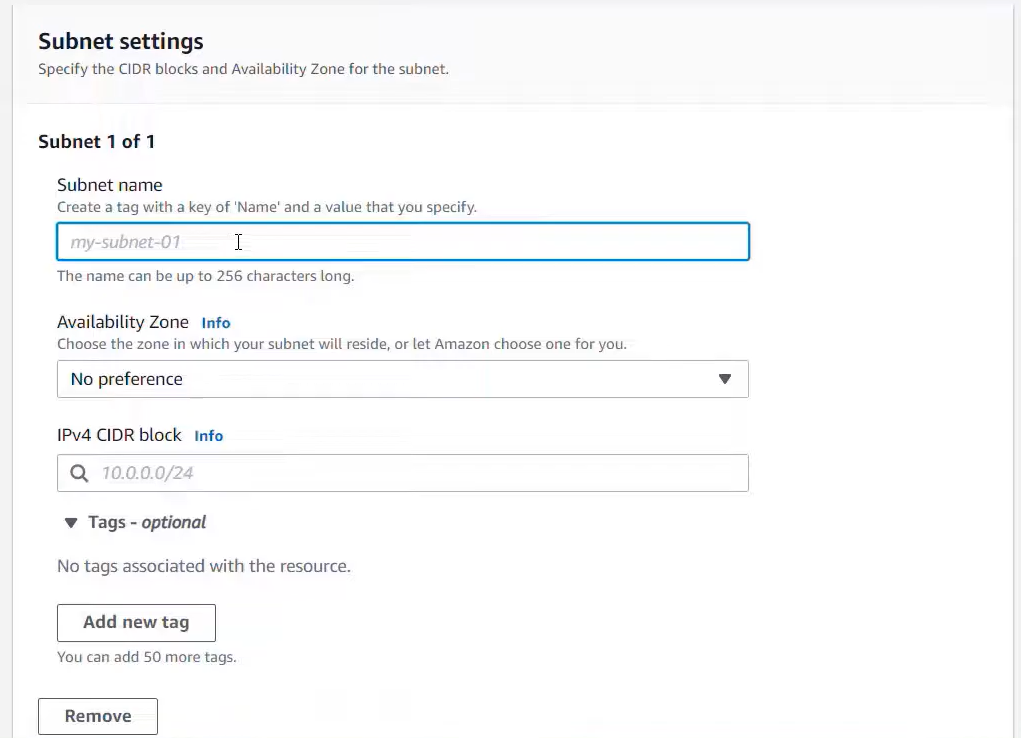
Open the VPC console. Create a new VPC (or use an existing one). Under Subnets, click Create Subnet:
- One public subnet in AZ-1. Attach an Internet Gateway to the VPC and add a route 0.0.0.0/0 => igw-id in the public subnet’s route table.
- One private subnet in AZ-2. Create a NAT Gateway in the public subnet, and add a route 0.0.0.0/0 => nat-id in the private subnet’s route table.
(Optional) Create additional private subnets in other AZs for more availability.
Tag the VPC and each subnet with:
- Key:
for-use-with-amazon-emr-managed-policies - Value:
true
If not using NAT, you could allow the workspace SG to talk to the public internet directly, but NAT is recommended for security.
By the end of this step, you should have a VPC with at least one public subnet (with an Internet Gateway or NAT Gateway) and one or more private subnets. EMR Studio will use these subnets for its networking.
Step 4—Configure Security Groups - Engine and Workspace Security
AWS EMR Studio uses two security groups to manage traffic between workspaces (your notebooks) and clusters:
- Engine Security Group — Associated with the EMR cluster. It allows inbound traffic on port 18888 from the Workspace security group. (Port 18888 is used by Spark for Livy connections, etc.)
- Workspace Security Group — Associated with the Studio Workspaces (notebooks). It allows outbound traffic to the Engine group (TCP 18888) and to the Internet (HTTPS 443).
In practice:
If you let AWS create defaults, the console can automatically generate DefaultEngineSecurityGroup and DefaultWorkspaceSecurityGroupWithGit for you. These come with the necessary rules already in place. In that case, you simply pick "default" when you create the Studio.
If you make them manually, create two security groups in your VPC.
- For the Engine SG, permit inbound TCP port 18888 from the Workspace SG's ID. (No other inbound rules are needed if clusters reside in the same VPC.).
- For the Workspace SG, permit outbound HTTPS (443 to 0.0.0.0/0) so notebooks can reach GitHub, and outbound TCP 18888 to the Engine SG. A word to the wise: don't permit any inbound traffic on the Workspace SG; the EMR service connects out, not in.


- Tag the Security Groups — If these are custom Security Groups, tag them with :
- Key:
for-use-with-amazon-emr-managed-policies - Value:
true
- Key:
Once you set them up, note the IDs of these two Security Groups. You'll pick them when you create the Studio.
Step 5 (Optional)—Enable Encryption - KMS and S3 Security Configuration
If you have compliance needs, you can enable encryption. Examples:
- AWS S3 encryption — Configure your EMR cluster’s EMRFS to use server-side encryption (SSE-S3 or SSE-KMS) for data at rest. Also encrypt log buckets via SSE-KMS if desired.
- EMRFS & EBS — Use a Security Configuration in EMR to encrypt data at rest in AWS S3 and on EBS volumes with KMS keys.
- Studio workspace encryption — By default, Studio stores notebooks in AWS S3 using S3-managed keys (SSE-S3). You can opt to use your own AWS KMS key for notebook encryption. If so, create a KMS CMK and ensure its key policy allows your EMR Studio service role to use it (see sample in AWS docs). Then when creating the Studio, choose the “Encrypt workspace files with KMS” option.
- Encryption in transit — All EMR Studio traffic (browser => service and notebooks => data sources) is encrypted via TLS, and EMR uses SSL between nodes and to S3 by default.
This encryption setup is optional but recommended for sensitive data. The key points are: use AWS KMS for server-side encryption on S3/EMRFS, and enable EMR notebook encryption with your CMK if needed.
Step 6—Create Your EMR Studio - Console Configuration Walkthrough
You've done the heavy lifting! Now it’s time for users to actually get to work.
With the network and IAM pieces ready, you can now create the Studio itself in the console.
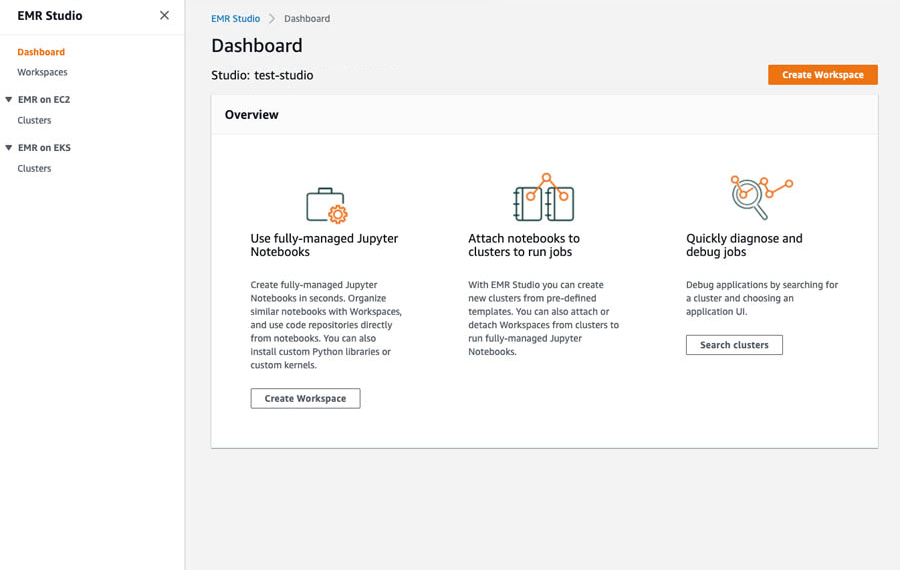
Open the AWS EMR console (https://console.aws.amazon.com/emr).
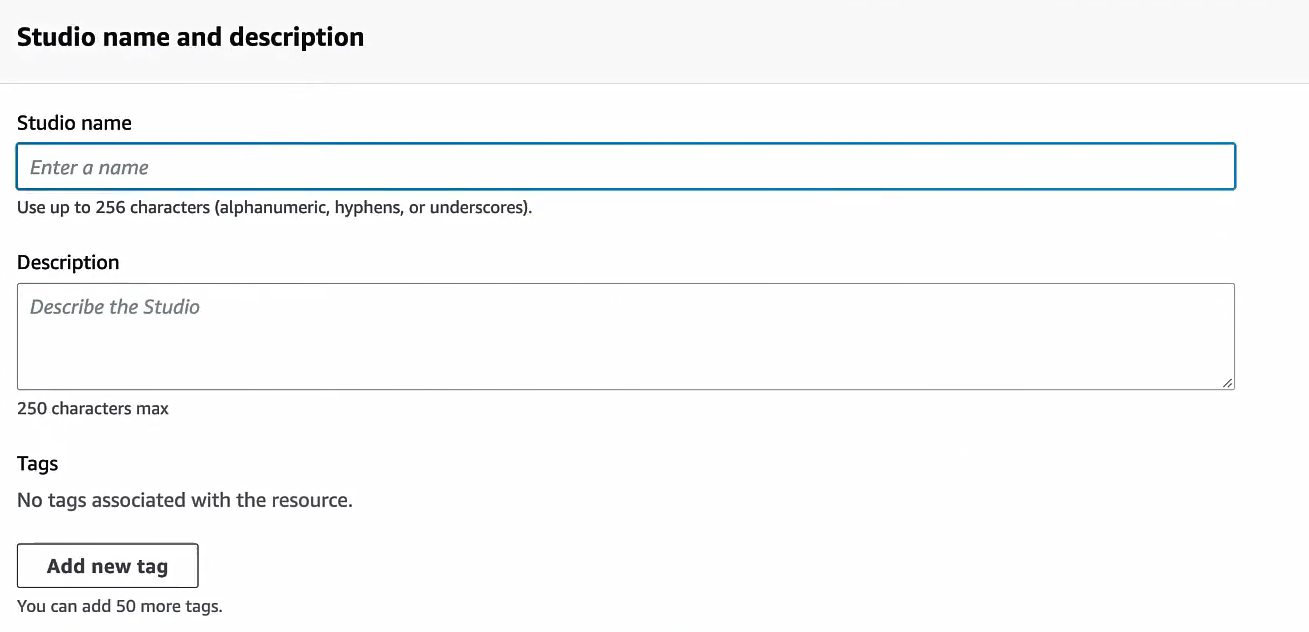
In the left-hand navigation under “EMR Studio”, click Studios, then Create Studio. Enter a Studio name, Description, and Tags details.
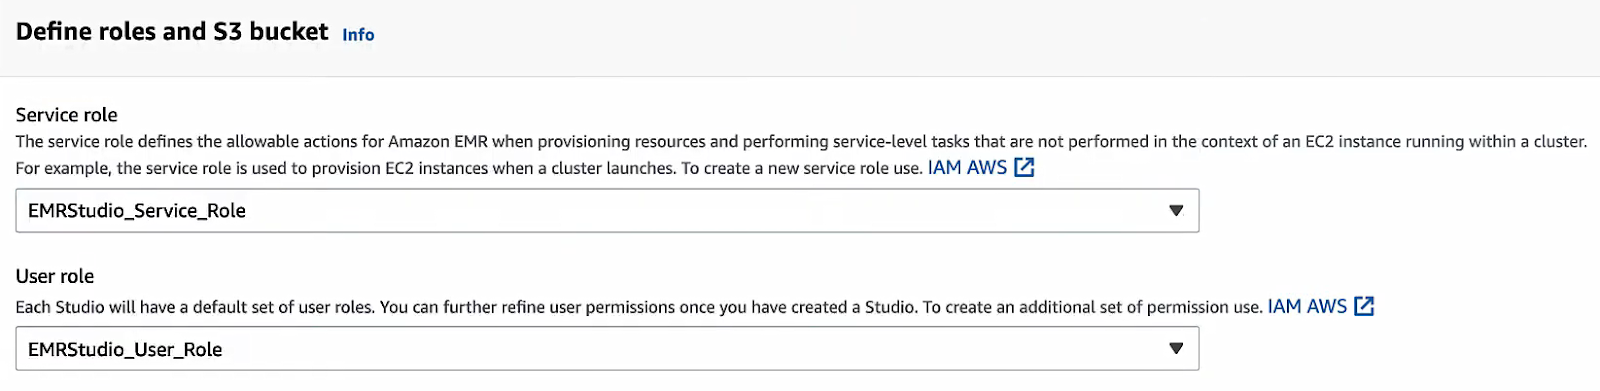
Service role and user role:
Choose the AWS EMR Studio service role you created in Step 2.
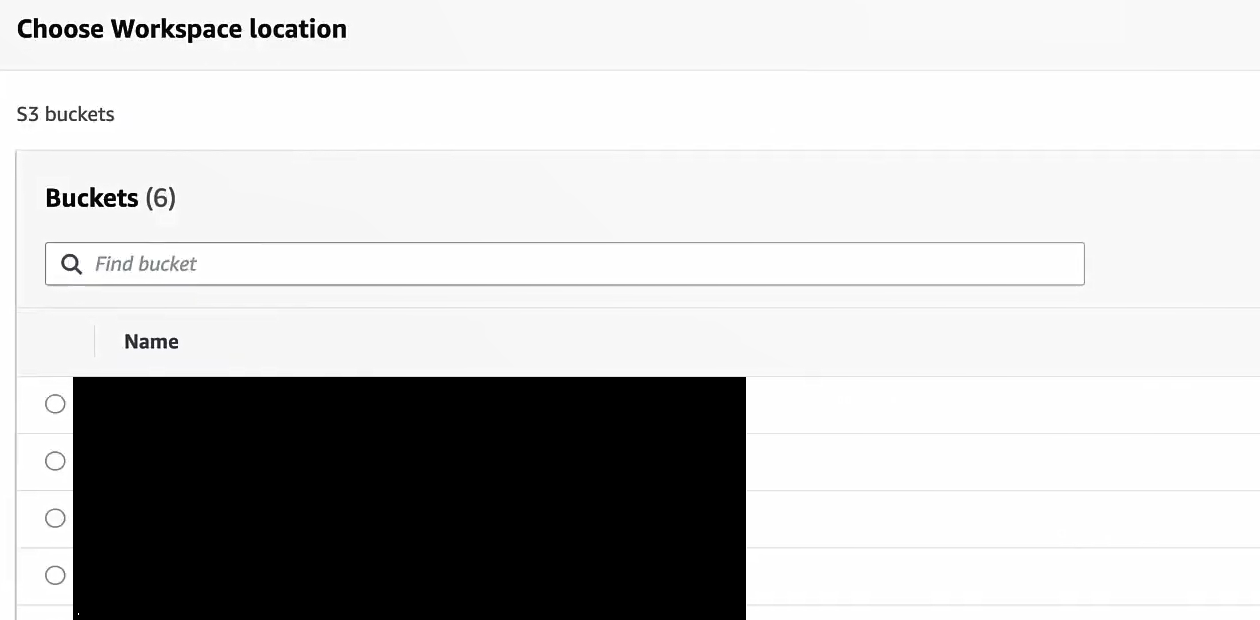
Workspace bucket:
Specify the S3 bucket/location for workspaces.

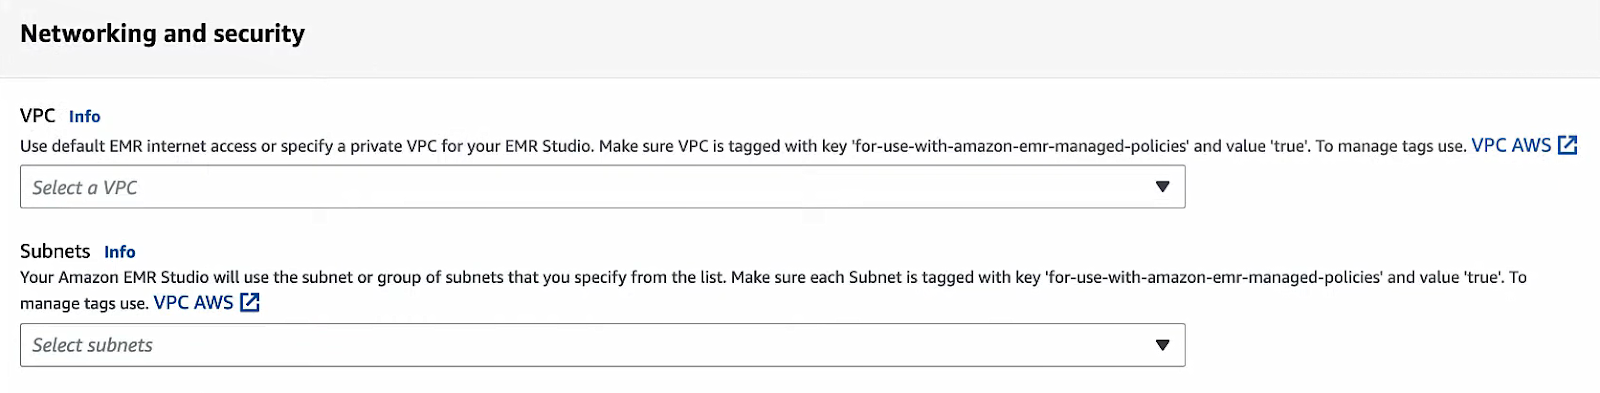
VPC and subnets:
Select the VPC you set up, and then pick up to five subnets to associate (choose your private ones across AZs). You can add more later via CLI, but a Studio must have at least one private subnet.
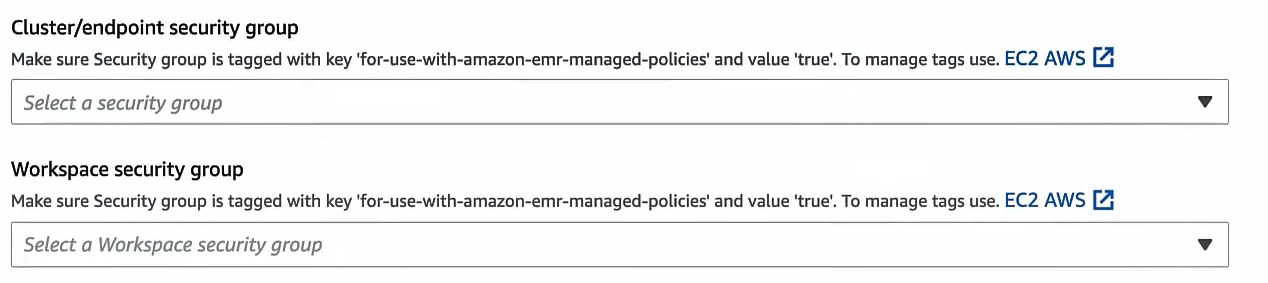
Security groups:
If you want AWS to use defaults, select the default Security Groups (it will use the DefaultEngineSecurityGroup and a default workspace SG).

For custom Security Groups (recommended if you made them), click the radio for Custom. Then under “Cluster/Endpoint security group” select your Engine SG, and under “Workspace security group” select your Workspace SG.

If you want Git integration enabled, toggle on “Enable clusters/endpoints and Git repository” (this includes the HTTPS rule in the workspace SG).
Authentication:
If you choose IAM mode, the console will default to IAM. (You might also configure an IdP here if doing IAM federation).
If you chose IAM Identity Center, select it here and then choose the user role you created in Step 2. (You can also enable “Trusted identity propagation” if your downstream EMR clusters use the same IdC setup.)
Encryption (optional): If you want notebook encryption with KMS, check the box to use your KMS key and choose the key from the dropdown.
Tags (optional): Add any resource tags needed by your org.
Click Create Studio and launch Workspace. The console will create the Studio and immediately open the first workspace.

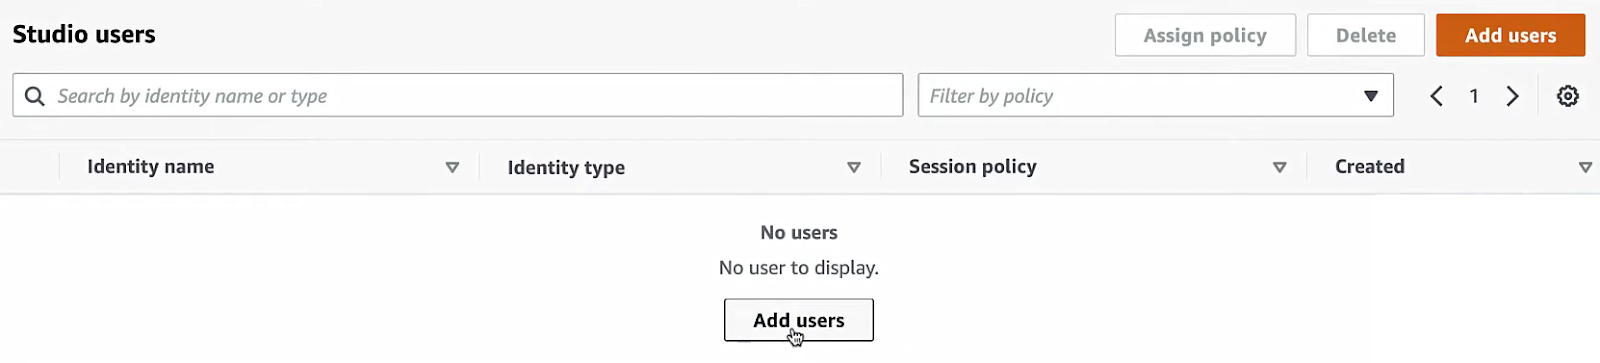
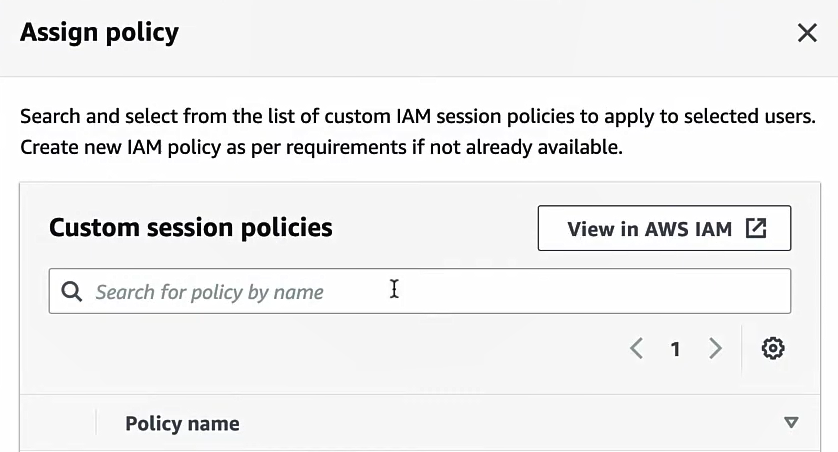
Step 7—Assign Users and Groups - Access Management Setup
After the Studio is created, you need to authorize users or groups to access it. To do so, click on Add users to Studio, which is located in the top right corner of the screen.

The method depends on your auth mode:
IAM mode:
Use IAM permissions. Any IAM user or role with permission to call elasticmapreduce:CreateStudioSessionMapping (or CreatePresignedUrl) can access the Studio. In practice, you attach a policy like AmazonEMRFullAccess or a custom policy to IAM users/groups or roles to grant Studio login.
You can also use IAM tags and ABAC to limit access to specific studios. Once permitted in IAM, users sign in to the AWS console and open the Studio from the EMR console’s Studios list (or via the Studio URL).
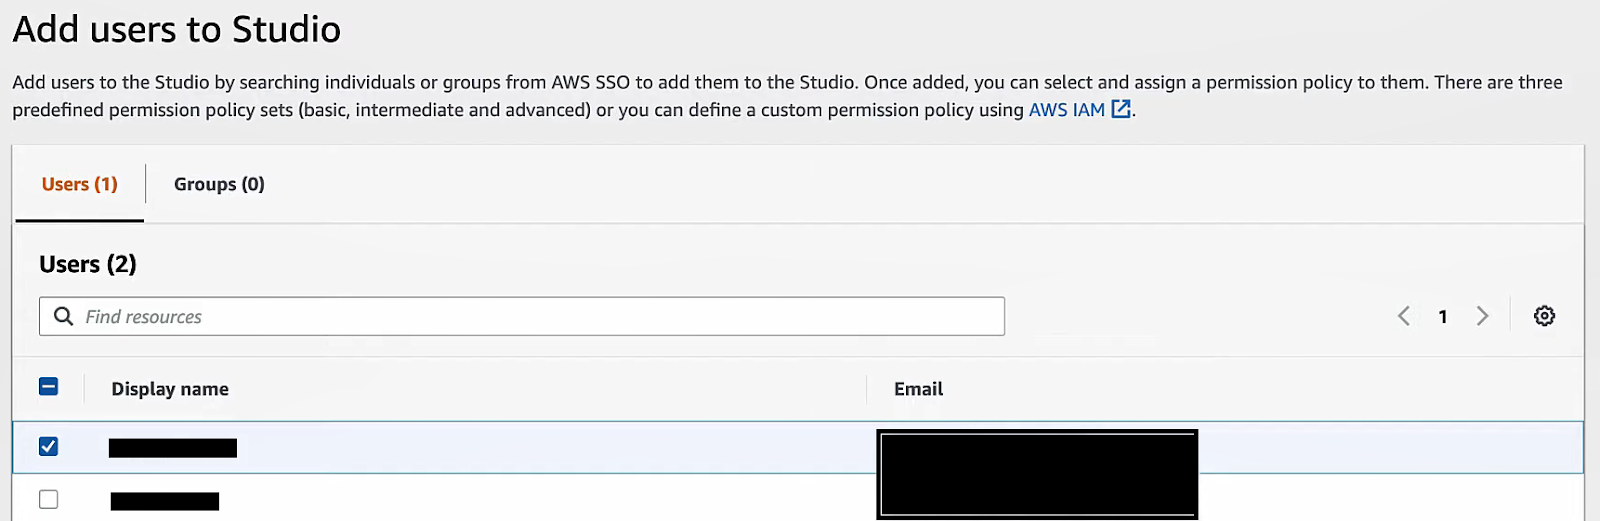
Identity Center mode:
In the AWS IAM Identity Center (IAM SSO) portal (or AWS console under Single Sign-On), assign users or groups to the AWS EMR Studio and attach the EMR Studio user role (from Step 2) to them. When doing so, you also attach a session policy to each user/group mapping to restrict their Studio permissions. Session policies are IAM permissions that apply during their login session. AWS docs explain how to “Assign a user or group to an EMR Studio” using either the AWS CLI (create-studio-session-mapping) or console.
Step 8—Create Your First Workspace - Jupyter Environment Setup
An EMR Studio workspace is essentially a Jupyter environment. Now that the Studio is up, create a workspace and attach compute:
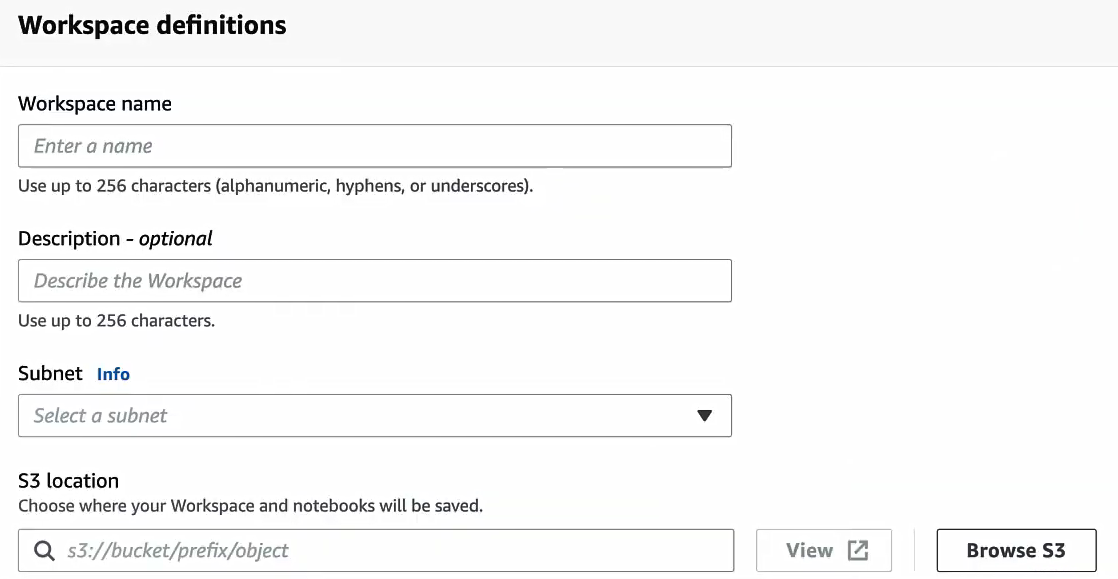
In the EMR Studio UI, click Workspaces => Create Workspace.
Enter a name for the EMR workspace and a description, select the subnet that we configured earlier, and choose the S3 location where your workspace and notebooks will be saved.
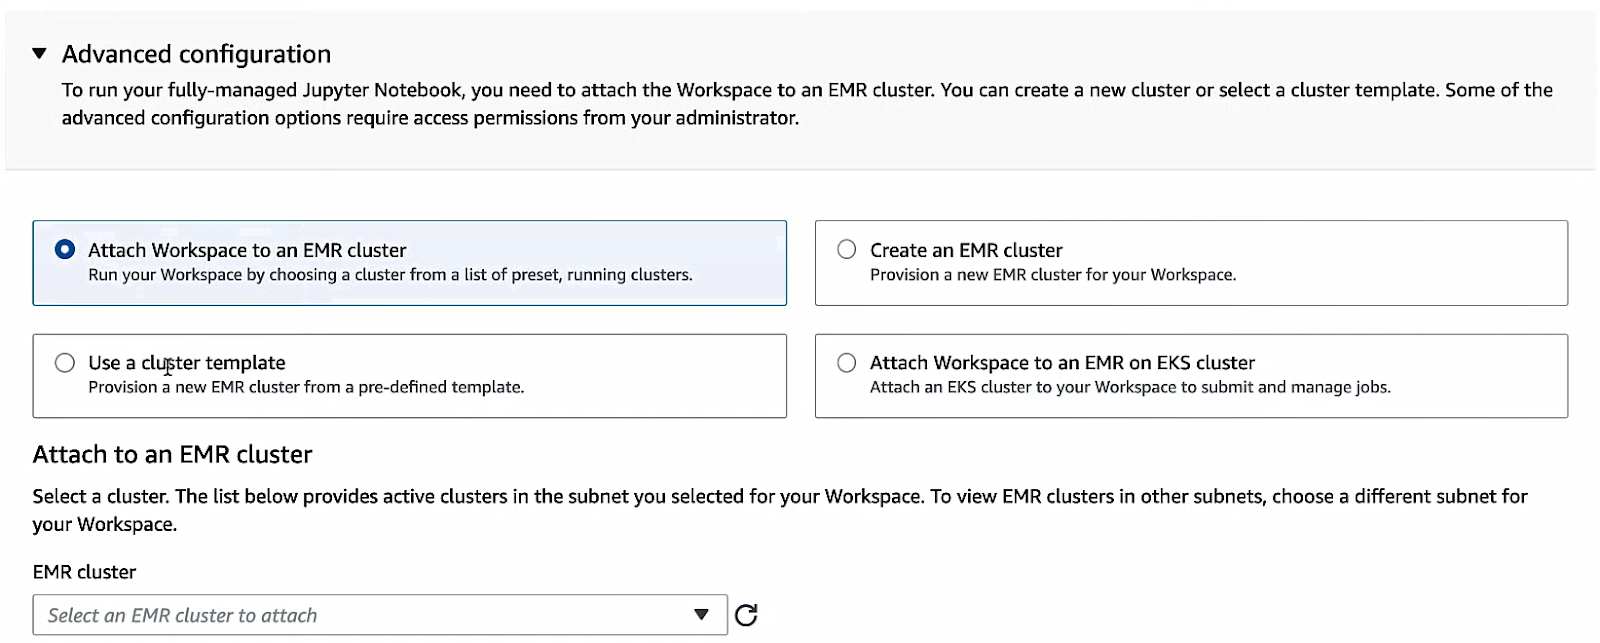
Attach compute:
Choose an existing EMR cluster (EC2) or EMR on EKS managed endpoint for this workspace. If you have an EMR on AWS EC2 cluster running in the same VPC, you’ll see it in the list and can select it. If not, you can launch a new EMR cluster separately (outside of Studio) and then attach it here. (For EMR on EKS, choose a registered virtual cluster/endpoint.) The attached cluster is where your notebook jobs run.
Once configured, click Create Workspace. AWS EMR Studio will provision a JupyterLab instance and open it in a new browser tab.

Your workspace is now ready for interactive analysis. You can create or upload notebooks, run code cells on the attached EMR cluster, and use built-in tools (Spark UI, SQL Editor, etc.). By default the workspace is stopped until you launch it; after use you can Stop it to avoid charges.
Tip: You can only have one user editing a workspace at a time, unless you explicitly enable the real-time collaboration feature. To collaborate, click the “share” icon in the workspace and turn on sharing (then multiple users can join simultaneously).
You now have an AWS EMR Studio with at least one workspace attached to compute. By default, you can create up to three workspaces per Studio, giving you flexibility. Since each workspace is linked to the S3 bucket you specified, all your notebooks and outputs are saved automatically. You and your team can now run analysis interactively on EMR!
AWS EMR Studio Security Best Practices: 7 Critical Guidelines
When running interactive analysis with EMR Studio, follow standard AWS and EMR best practices:
Best Practice 1: Enable Encryption at Rest and in Transit
Encrypt data at rest and in transit. Use EMR security configurations to enable at-rest encryption (S3 SSE-KMS or SSE-S3, and EBS volume encryption via KMS). For EMR Studio itself, use a customer-managed KMS key for notebook storage if needed. Make sure your EMR Studio service role has permissions on the KMS key as shown in AWS docs. Data in transit (between your browser and Studio, and between nodes and S3) is encrypted by default.
Best Practice 2: Implement Least-Privilege IAM Policies
Use least-privilege IAM policies. Manage user identities with IAM or Identity Center as appropriate. For Identity Center, attach session policies to the EMR Studio user role to limit what users can do in the Studio. Tag-based access control (ABAC) can also restrict which users see which studios.
Best Practice 3: Secure Your Network Architecture
Keep the Studio in private subnets. Use a NAT gateway so Workspaces can access the Internet only outbound. Place subnets in multiple AZs for high availability. Use VPC Flow Logs or security monitoring to audit traffic. Check that your security groups only allow necessary flows (workspace SG to internet/engine SG).
Best Practice 4: Enable CloudTrail and CloudWatch Logging
Enable AWS CloudTrail for EMR to log all control-plane operations on your Studio and clusters. EMR also integrates with CloudWatch: use CloudWatch Logs and metrics to monitor cluster health and user activity. You can trace who ran which notebook (via CloudTrail and notebook audit logs if needed).
Best Practice 5: Align with Regulatory Compliance Requirements
AWS EMR Studio is HIPAA-eligible and complies with HITRUST CSF, SOC 2, and FedRAMP standards. Still, make sure your data sources and cluster settings meet any regulatory requirements (e.g: encrypt logs, restrict access, VPC usage).
Best Practice 6: Configure Session Policies and SSO Properly
If using Identity Center with trusted identity propagation, ensure your EMR clusters are also configured with that option (trusted identity propagation must align between Studio and clusters). Test your SAML/IdP login flows to avoid issues.
Best Practice 7: Implement Resource Cleanup Procedures
Delete workspaces and clusters when not in use to avoid unnecessary costs. Back up important notebooks (they auto-save to S3, but you can also link a Git repo for versioned backups).
That's it. If you follow these practices (encryption, proper IAM policies, private networking, etc.), your EMR Studio environment will be secure and well-managed.
AWS EMR Studio Pricing: Cost Breakdown and Optimization Tips
AWS EMR Studio is completely free. But remember, you only pay for the underlying resources:
- Any EC2 instances you launch (or EMR on EKS, or EMR Serverless jobs) cost the same as usual. Use Spot instances to save money if possible.
- EMR pricing is per-second, with a 1-minute minimum.
- You pay for the S3 bucket that holds your notebooks and workspace data. Larger datasets or many notebooks will incur S3 storage costs (and S3 request costs).
- If your cluster uses EBS for storage, those volumes incur charges.
- If you copy data across AZs or out to the Internet, normal AWS data transfer fees apply.
Since Studio itself is free, the key is to shut down idle clusters. An idle workspace (stopped) does not use compute. In summary, EMR Studio adds convenience but no new line-item cost; just watch your clusters and S3 usage, that's all.
Conclusion
And that’s a wrap! AWS EMR Studio turns EMR into a collaborative platform for data analysis with notebooks. You have set up the infrastructure, created the IAM roles, and launched a fully managed EMR Studio using the AWS Console. Now you can log in and run Jupyter notebooks powered by EMR’s big data engine. Your data team can explore large datasets interactively. Just remember to follow the security best practices covered above and manage cluster lifecycles to control costs. EMR Studio gives you a data science IDE with all the features you need, integrated directly within the AWS platform.
In this article, we have covered:
- What is AWS EMR?
- What is an EMR Studio?
- A step-by-step guide to setting up AWS EMR Studio from scratch
- Security, compliance, and best practices
- Pricing breakdown of AWS EMR Studio
… and so much more!
Frequently Asked Questions (FAQs)
What is AWS EMR Studio?
AWS EMR Studio is a web-based Integrated Development Environment (IDE) that provides a fully-managed Jupyter notebook experience. It's built for data scientists and engineers to interactively develop, visualize, and debug data applications on AWS EMR clusters, EMR Serverless, or EMR on EKS.
Which authentication modes does AWS EMR Studio support?
AWS EMR Studio supports two main authentication modes: IAM authentication, where users log in with their IAM credentials or through SAML 2.0 federation with IAM; and AWS IAM Identity Center authentication, which integrates with IAM Identity Center for centralized user and group management.
Do I need a custom VPC to use AWS EMR Studio?
Yes, you do. AWS EMR Studio needs to be created within an AWS Virtual Private Cloud (VPC) you control. This helps it connect securely to your EMR clusters and other AWS resources within your private network.
How many subnets do I need for AWS EMR Studio?
You need at least one private subnet. For better availability and fault tolerance, we recommend selecting up to five private subnets spread across different Availability Zones within your VPC. This helps AWS EMR Studio stay operational even if one AZ experiences an issue.
Why is a NAT Gateway recommended?
A NAT Gateway is recommended because AWS EMR Studio and your EMR clusters typically reside in private subnets for security reasons. A NAT Gateway, placed in a public subnet, lets resources in your private subnets initiate outbound connections to the internet (e.g., to download libraries, connect to Git repositories, or reach external APIs) while still blocking unwanted inbound connections from the public internet.
What permissions does the EMR Studio service role need?
The AWS EMR Studio service role needs permissions to perform actions on your behalf. These include creating network interfaces, reading and writing to your designated S3 bucket for notebooks, accessing secrets in AWS Secrets Manager (if you use Git integration), and discovering and interacting with your EMR clusters.
What is a session policy in the context of EMR Studio?
A session policy is an advanced IAM policy. It applies when a user assumes a role through AWS IAM Identity Center. It acts as an additional layer of permission filtering, limiting the permissions granted by the assumed role for that specific session. This allows for very fine-grained access control for users within AWS EMR Studio.
Can I attach an existing EMR cluster to a workspace?
Yes, definitely. When you create or modify a workspace in AWS EMR Studio, you can select an already running AWS EMR on EC2 cluster, an EMR Serverless application, or an EMR on EKS virtual cluster to connect to your notebook session.
Does EMR Studio incur extra charges?
No, the AWS EMR Studio IDE itself is free of charge. You only pay for the underlying AWS resources that your workloads consume. These include the EC2 instances for EMR on EC2 clusters, the compute resources for EMR Serverless or EMR on EKS, and Amazon S3 storage for your notebooks and data.
Can multiple users share a workspace?
Yes, EMR Studio supports real-time collaboration within notebooks, meaning multiple users can work on the same notebook simultaneously. Also, connecting your workspace with Git repositories allows for version control and sharing of notebooks among teams.
Can I integrate AWS EMR Studio with existing CI/CD pipelines?
While AWS EMR Studio is an interactive environment, the notebooks and code you develop there can certainly integrate into CI/CD pipelines. You can store your notebooks in Git, and then use AWS SDKs or orchestration services like Apache Airflow (via Amazon MWAA) to programmatically run those notebooks as part of an automated pipeline.
How do I backup notebooks in AWS EMR Studio?
Your notebooks save automatically to the S3 bucket you configured when you created the AWS EMR Studio. For version control and collaborative backup, it's a good practice to link your workspaces to Git repositories (like AWS CodeCommit, GitHub, or BitBucket) and regularly commit your changes.
How do I delete an EMR Studio?
You can delete an EMR Studio from the AWS EMR console. Go to "EMR Studio," pick the Studio you want to delete, and choose "Delete". Make sure you no longer need any associated workspaces or resources before deleting it.
What AWS regions support EMR Studio?
AWS EMR Studio is generally available in most commercial AWS regions. For the most up-to-date and complete list of supported regions, always check the official AWS EMR documentation.